
How to uninstall Windows 10? If you want to remove it, whether to roll back to an older version or install a fresh operating system, this article will guide you through the detailed steps. Before uninstalling, you’ll need to back up your data using the MiniTool Partition Wizard.
Want to uninstall Windows 10 from your computer? You cannot uninstall Windows 10 like a regular application. If Windows 10 is your current operating system, removing it usually means rolling back to a previous Windows version, resetting the PC, or performing a clean installation of another operating system.
You need to choose an appropriate method based on your goal:
| Situations | Best Method |
| Return to the Windows version you used before an upgrade | Roll Back to a Previous Version |
| Replace Windows 10 with Windows 11 | Clean install Windows 11 |
| Replace Windows 10 with Linux or another OS | Clean install the new OS |
| Reinstall Windows 10 and remove personal files/app | Reset this PC |
Why Uninstall Windows 10?
Why uninstall Windows 10? Here are some common reasons:
- Security update termination: Windows 10 support ended on October 14, 2025. Microsoft no longer provides free software updates, technical assistance, or security fixes through normal support.
- Compatibility issues: Some older software or hardware may not function properly on Windows 10.
- System performance: Because some older computers run slowly on Windows 10, you may need to roll back to a previous Windows version to improve performance.
- System errors or crashes: Windows 10 may experience frequent blue screens, update failures, or system instability.
- New system installation needs: You may want to switch to Windows 11, Linux, or another system.
- Personal habits: Some users are accustomed to the interface and features of older versions of Windows.
Protect Your Files: Back Up Data Before Uninstalling Windows 10
Protect your files before removing Windows 10. Use MiniTool Partition Wizard’s Copy Disk feature to clone your entire disk, ensuring all your data is safely backed up.
This method is faster and more reliable than copying files manually, and it allows you to restore your system quickly if something goes wrong during the uninstallation.
MiniTool Partition Wizard DemoClick to Download100%Clean & Safe
Step 1: Connect the new drive to your computer.
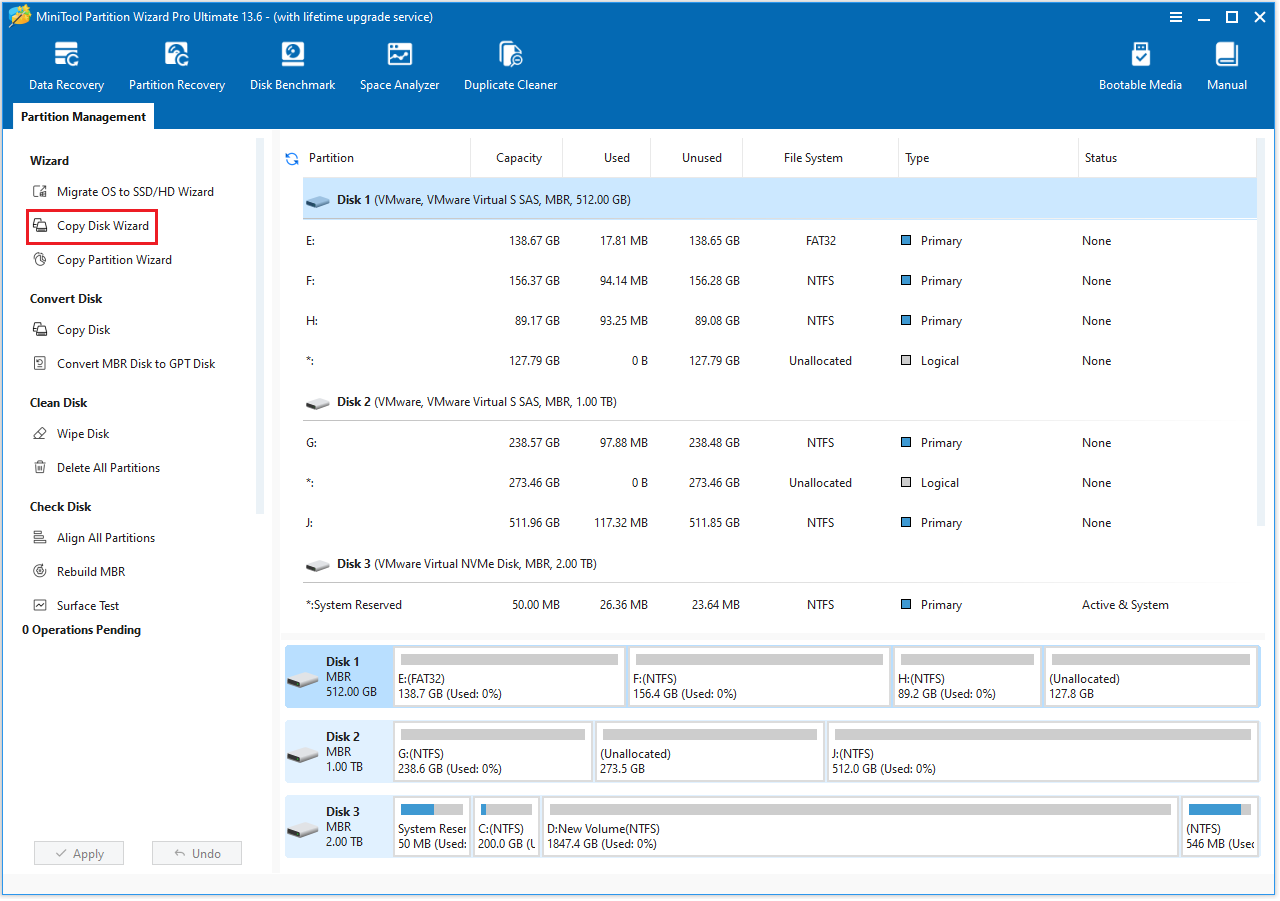
Step 2: Open MiniTool Partition Wizard and choose Copy Disk Wizard.
- Launch MiniTool Partition Wizard.
- Click Copy Disk Wizard in the left-side panel.
- Click Next on the wizard’s screen.
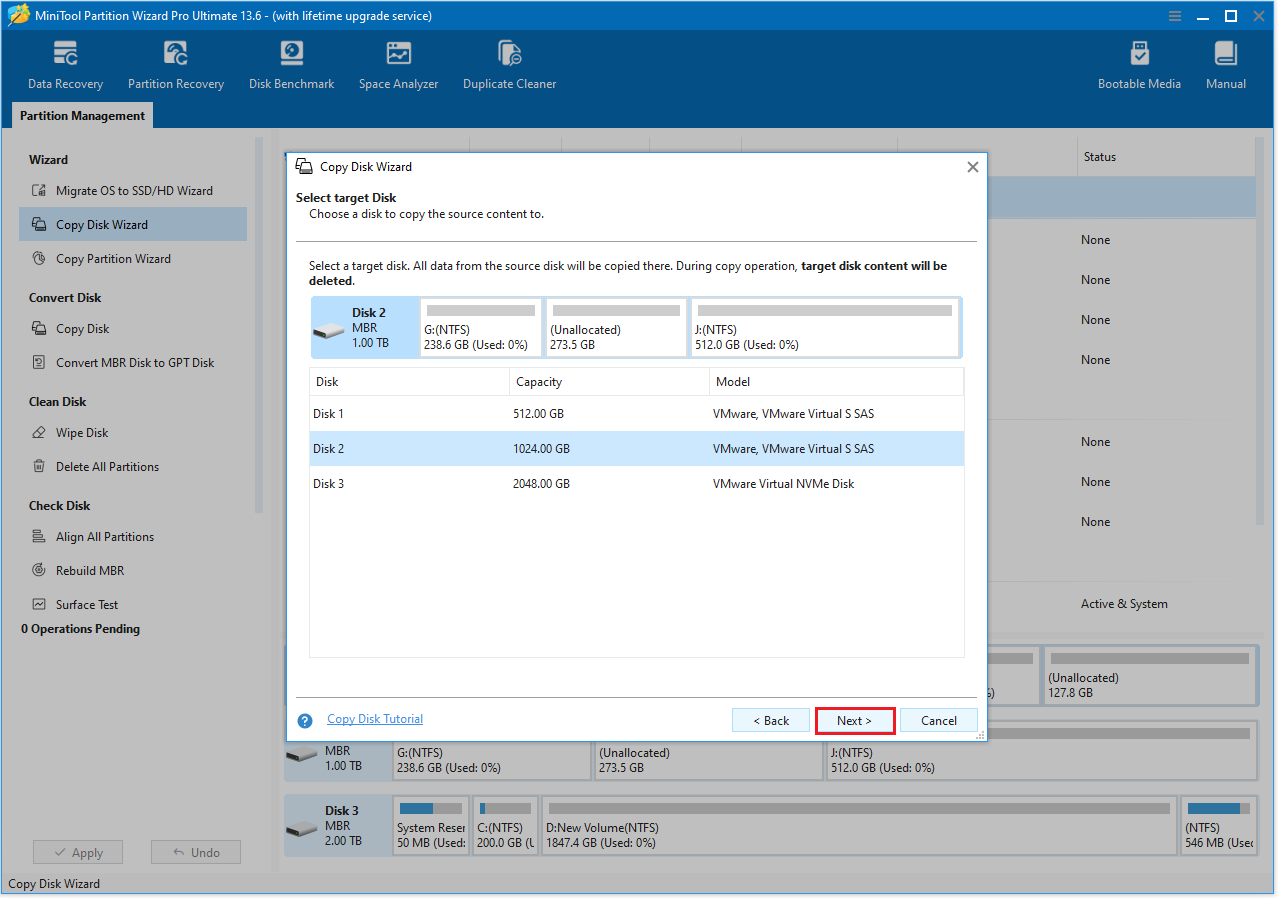
Step 3: Select source and target disks.
- On the Select Disk to copy screen, choose the old disk and click Next.
- Select the disk you connected to before and click Next.
- When prompted that all the data on the target disk will be destroyed, click Yes to continue.
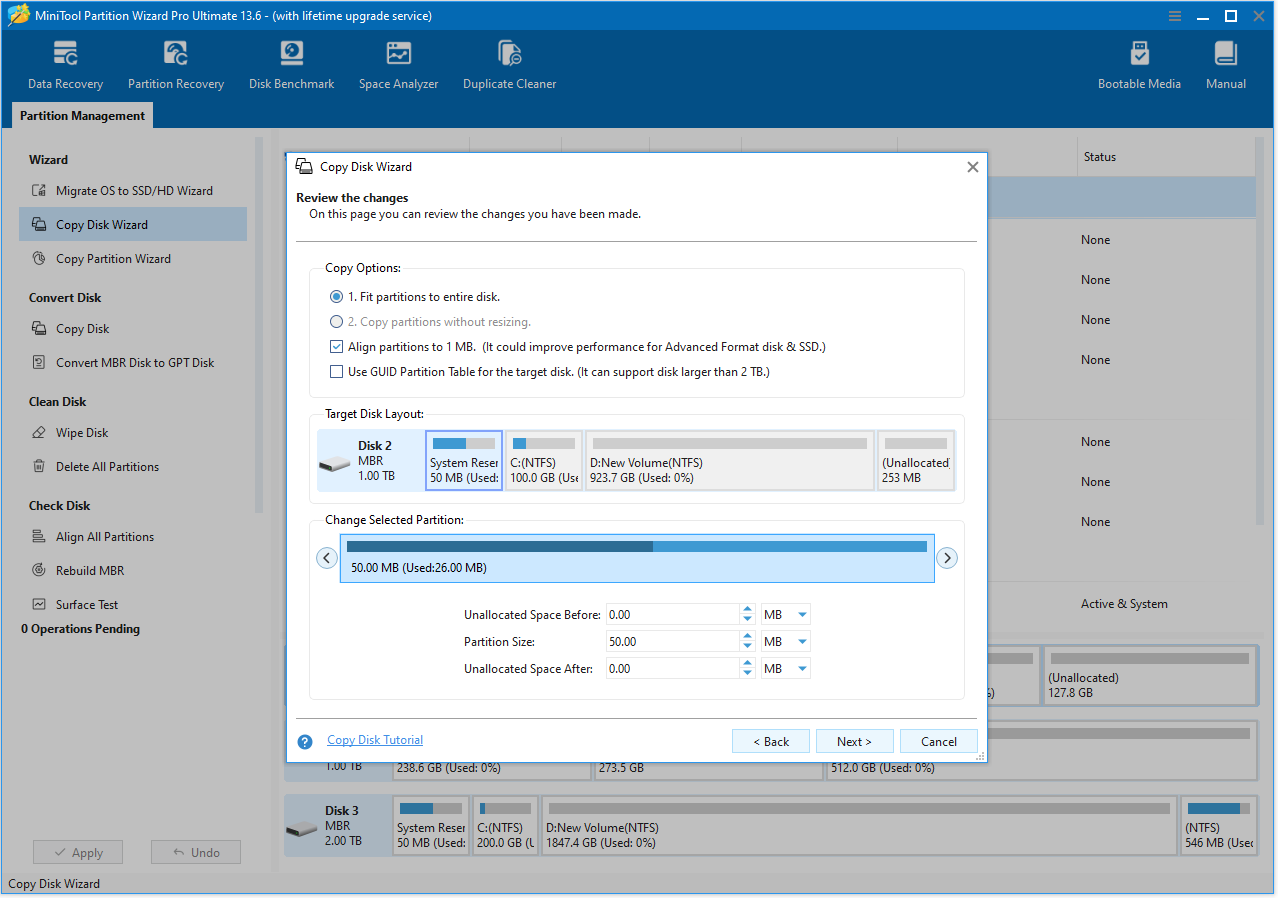
Step 4: Review the changes and click Next. Keeping the default option is recommended.
- Fit partitions to entire disk: Resizes the partitions to fill the entire target disk proportionally.
- Copy partitions without resizing: Copies the partitions with their original sizes, leaving any remaining space as unallocated on the target disk.
Step 5: Apply the cloning process.
- Read the NOTE information and click Finish.
- Click Apply to execute the pending operation and click Yes to confirm.
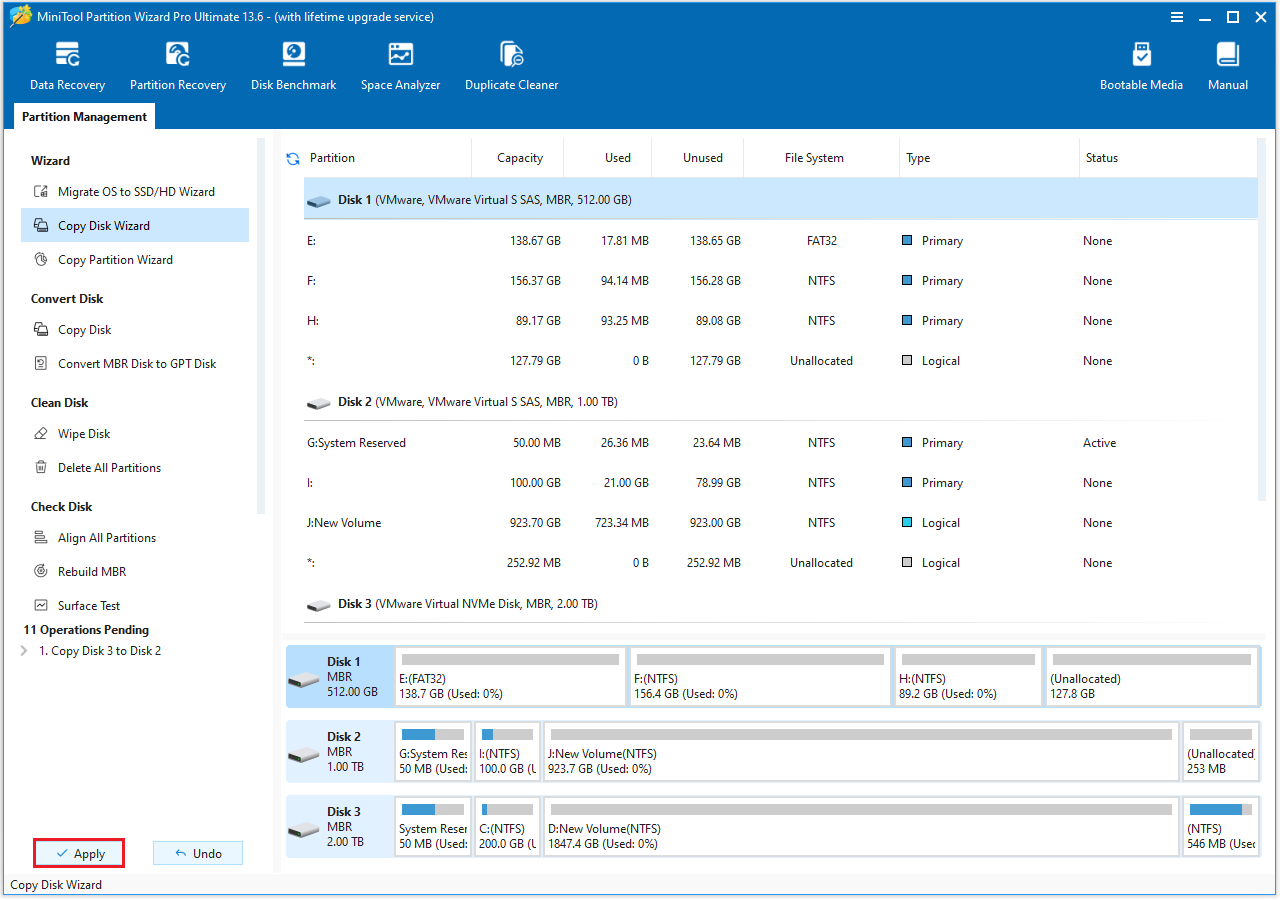
After the operation is complete, please unplug the hard drive. Your backup data will be saved on that disk.
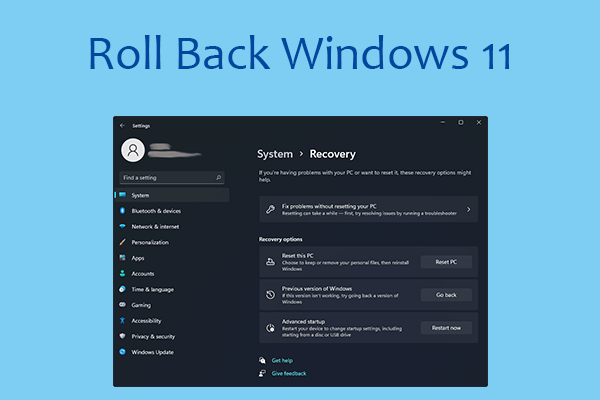
How to Uninstall Windows 10
There are several ways to uninstall Windows 10, such as rolling back to a previous version, resetting your PC, or performing a clean install.
Below are detailed steps for these three methods; you can choose the one that best suits your needs.
| Method | Roll Back to a Previous Version | Reset This PC | Clean Install via USB Drive |
| Difficulty | Easy | Medium | Difficult |
| Data Loss | No | Optional | Yes |
| Best For | Recent upgrade users | Fixing some issues | Full system replacement |
Method 1: Roll Back to a Previous Version
If you upgraded to Windows 10 from another Windows version and want to return to the previous installation, the built-in Go back feature is the first method to try.
Microsoft states that the rollback option is available only for a limited time after an upgrade. In most cases, you have 10 days to go back, provided the required previous-version files are still available.
Here are the full steps to delete Windows 10:
- Click Start > Settings > Update & security > Recovery.
- You can see the Go back Go back to Windows 7 (Windows 8, or Windows 8.1) to section, then tap on the Get started button.
- Microsoft will then ask for your feedback on why you switched back to the older version of Windows. Enter your feedback and click Next. Then, follow the on-screen instructions.
Note: It’s important to note that rolling back requires your password for your previous version of Windows. Without the password, you will not be able to access the system.
Also read: 3 Fixes for Go Back to an Earlier Build Not Available Windows 10.
Method 2: Reset This PC
The Reset this PC feature allows you to delete all personal files, apps, and settings, and reinstall a clean Windows 10 system. This process will restore your computer to a clean installation state.
Here are the steps:
Step 1: Open Settings and go to Update & Security > Recovery. Under Reset this PC, click Get started.
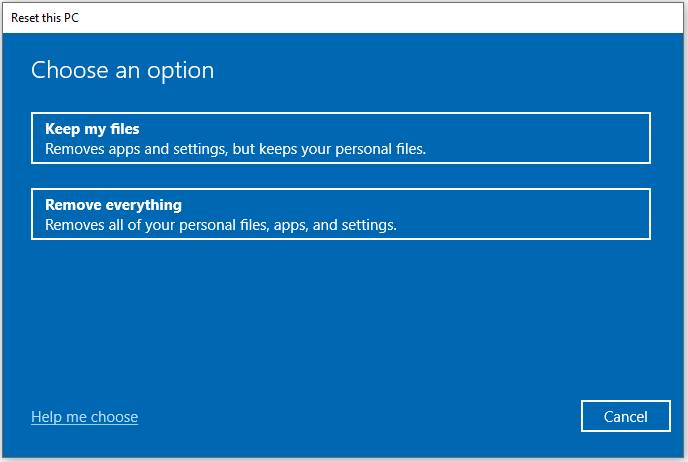
Step 2: Choose Keep my files or Remove everything.
- Keep my files: When reinstalling Windows, it will remove apps and settings, but keep your personal files.
- Remove everything: It will delete all things on the computer and then reinstall Windows. This option is similar to a clean install.
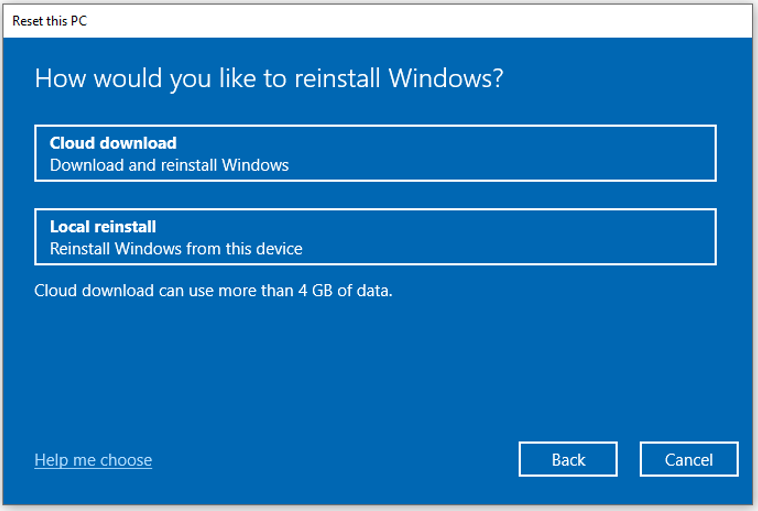
Step 3: Select a reinstallation method.
- Cloud download: Downloads a fresh Windows from Microsoft.
- Local reinstall: It will reinstall Windows using a local recovery image (winre.wim) stored in the Windows recovery partition.
Step 4: Follow the prompts, click Reset. Wait until the reset process is complete.
Also read: Best Fixes for Reset This PC Not Working in Windows 10/11.
Method 3: Clean Install via USB Drive
Well, how to uninstall Windows 10 completely?
If you want to uninstall Windows 10, you can do so by performing a clean install of your previous system or by installing the latest Windows 11. However, this is the most complicated method.
As you know, a clean install means that everything (including settings, apps, and data) will be erased.
The following will use the installation of Windows 11 as an example to introduce the specific steps.
Step 1: Create a Windows 11 installation USB drive.
- Go to Microsoft’s Download Windows 11 webpage.
- Under Create Windows 11 Installation Media, click Download Now.
- Connect a USB drive to the computer and run MediaCreationTool.
- Accept the license terms, select the language and version, and finally select the drive letter for the USB drive to begin creating the Windows 11 installation USB drive.
Step 2: Use the USB drive to boot the PC.
- Close the computer.
- Connect the Windows 11 installation USB drive to it.
- Power on the computer and press the boot menu key (F12, F2, Esc, or other key).
- Go to the Boot Menu, select the USB drive as the boot drive, and then press Enter.
Step 3: Follow the on-screen instructions step by step to install Windows 11.
- After the computer starts, the Windows 11 setup screen will appear.
- Configure the language, time, and currency format, and keyboard or input method.
- Select the Install Windows 11 option and check the box before I agree everything will be deleted including files, apps, and settings.
- Click I don’t have a product key.
- Select a Windows 11 edition to install. Accept the license terms.
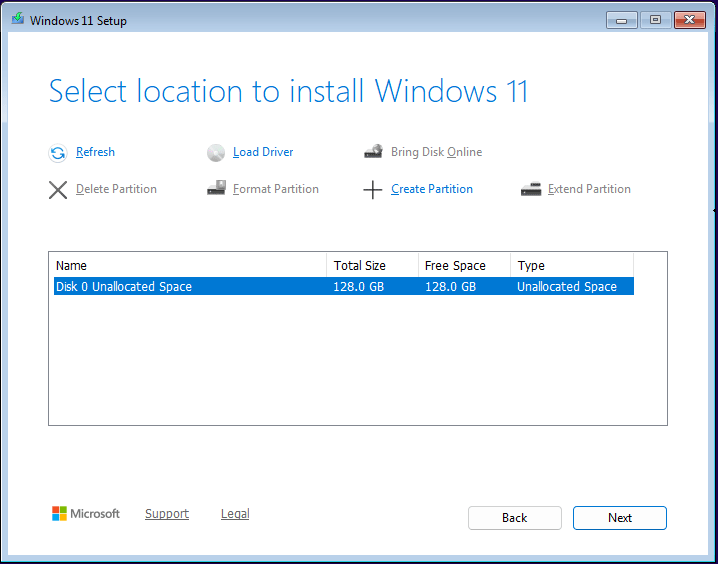
- Select each partition on your main drive and click Delete, then choose the unallocated space to install Windows 11.
- Click Install to start the Windows 11 reinstallation.
How to Uninstall Windows 10 FAQ
Afterward, your computer will be like a brand new device, and you will need to reinstall Windows or another operating system to use it again.
Bottom Line
How to uninstall Windows 10 completely? This article provides you with 3 methods, including rolling back to a previous version, resetting this PC, and a clean Install via USB drive.
If you have any questions or feedback about MiniTool Partition Wizard, feel free to contact our support team at [email protected] for additional help.
User Comments :