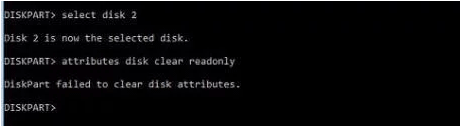
Have you gotten the error "DiskPart failed to clear disk attributes" while running attributes disk clear readonly command? If so, you can read this post, in which MiniTool shows you how to solve this problem through 7 ways.
Error DiskPart Failed to Clear Disk Attributes
Sometimes, your hard drive, USB flash drive or SD card may be intentionally or mistakenly set to be read-only (write-protected), which will prevent you from making any changes on the device, for example, modifying the old files on it or writing new data to it.
To remove the read-only attribute, many people may like to use the DiskPart command line: attributes disk clear readonly. However, the results vary for different users. some people remove the read-only attribute successfully while some people fail and get the following error message: DiskPart failed to clear disk attributes.
Then, how to solve this problem? Don’t worry! If you also encounter DiskPart clear readonly not working error, you can read the content below to get solutions.
Fix 1. Turn off the Physical Write Protection Switch
Some external drives (including USB flash drives, SD card, etc.) have a physical write-protection switch on them. If this switch is turned on, it will disable all the writable options on the storage device and therefore DiskPart won’t be able to change the disk attribute to writable.
Hence, when DiskPart failed to clear disk attributes readonly on external drives, you should check whether there is a physical write-protection switch on them. If there is a switch, you should turn off it. Then, you can run the attributes disk clear readonly command again to see whether the problem is solved.
Fix 2. Check the Drive Space Usage and Files’ Attributes
Sometimes, the write protection is caused by not enough space or the read-only attribute of files. I’m not sure whether they will also cause the DiskPart clear readonly not working, but you should ensure that there is enough space and remove the read-only attribute of files before you use the attributes disk clear readonly command.
The method for checking the drive space usage is very simple, so I will not make an unnecessary move to show you how to do that in this post. But please note that if you find there is not enough space on the drive, you should follow this post to increase the space: Do You Want to Increase Disk Partition Easily? Here’s How.
As for how to remove files’ read-only attribute, please follow the steps below:
- Right-click the file or folder in File Explorer and select Properties.
- Uncheck the Read-only
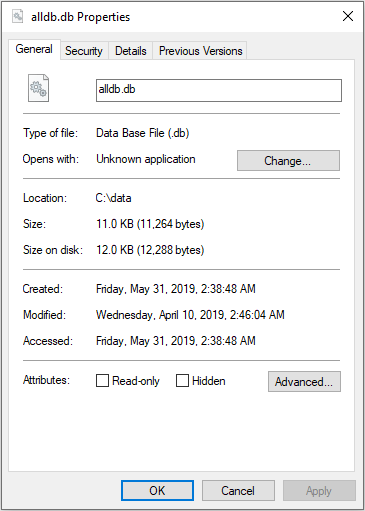
After checking the drive space usage and removing files’ read-only attribute, you can run the DiskPart command again to see whether the problem is solved.
Fix 3. Check and Repair Bad Sectors
If the disk has bad sectors or is set to be hidden, it is also possible that the DiskPart attributes disk clear readonly doesn’t work. If so, you should make the drive display again and repair bad sectors and file system by running Error checking or CHKDSK command.
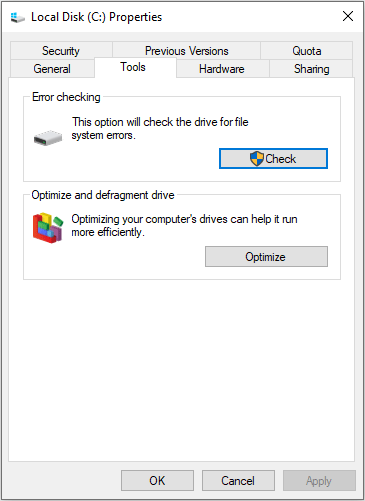
Here is the tutorial on how to run the Error Checking tool:
Step 1: Open File Explorer and highlight This PC. Then, right-click the write-protected drive and choose the Properties button.
Step 2: Skip to the Tools tab and click the Check button. Then, scan the drive to check and repair bad sectors.
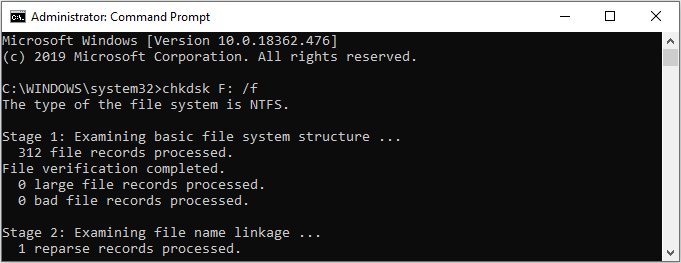
As for how to run the CHKDSK command, it is very simple. You just need to type “cmd” in search box and right-click the Command Prompt window to run it as administrator. Then, type the following command: chkdsk F: /f, and hit Enter key to run it. Please note that the “F” in the command is a drive letter and you should replace it accordingly.
Then, you can run the DiskPart command again to see whether the problem is solved. If this method fails to fix problem, you can then run MiniTool Partition Wizard to see how many bad sectors are there. Please refer to the following steps:
MiniTool Partition Wizard FreeClick to Download100%Clean & Safe
Step 1: Download MiniTool Partition Wizard and launch it to go to its main interface. Right-click the write-protected drive and choose Surface Test.
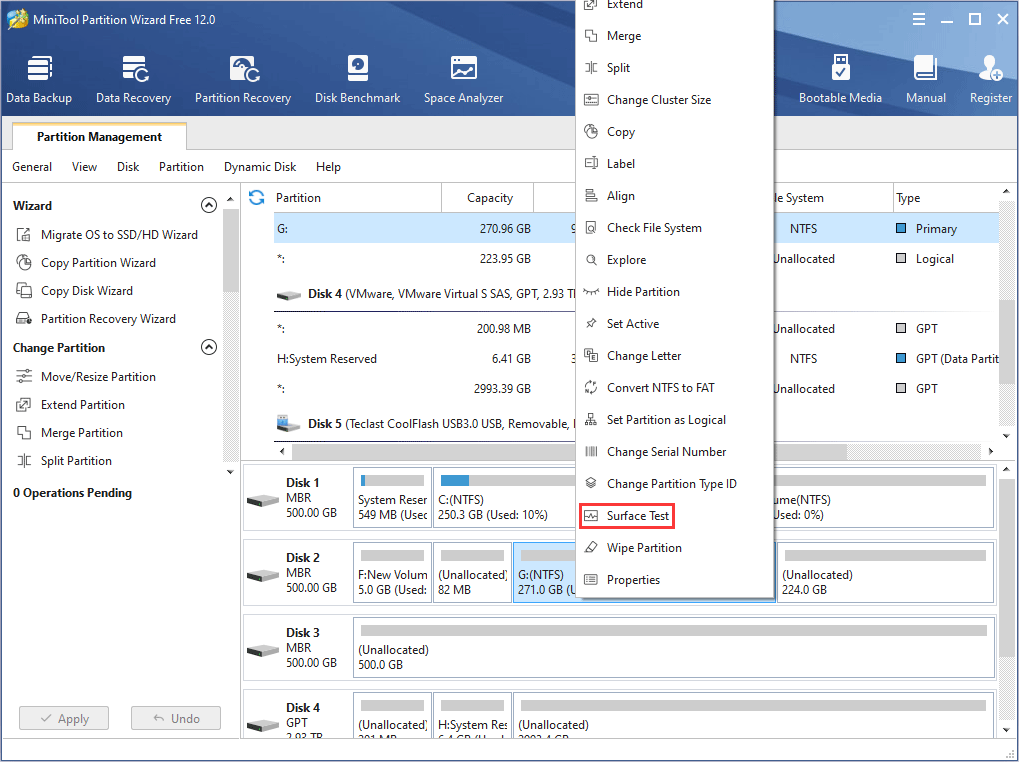
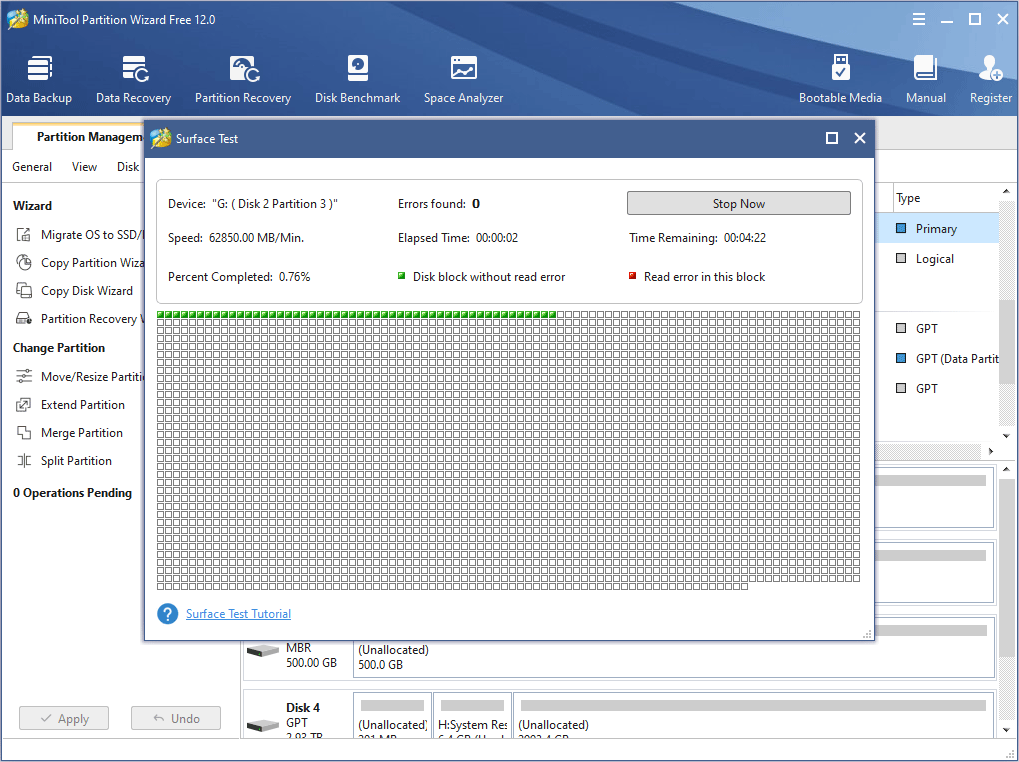
Step 2: Click Start Now to run Surface Test and then wait for it to finish. After the process is finished, you can see there are how many bad sectors marked by red blocks. If there are too many red blocks, you should consider replace the disk.
Fix 4. Run Antivirus Software
If of the above methods don’t work, then you can consider running antivirus on your computer. As for antivirus software, you can use a reliable third-party program or Windows Defender, a Windows built-in tool.
Here is the tutorial on how to run Windows Defender to kill virus:
Step 1: Press “Windows + I” keys simultaneously to open Settings.
Step 2: Navigate to Update & Security > Windows Security. Then, click Open Windows Security.
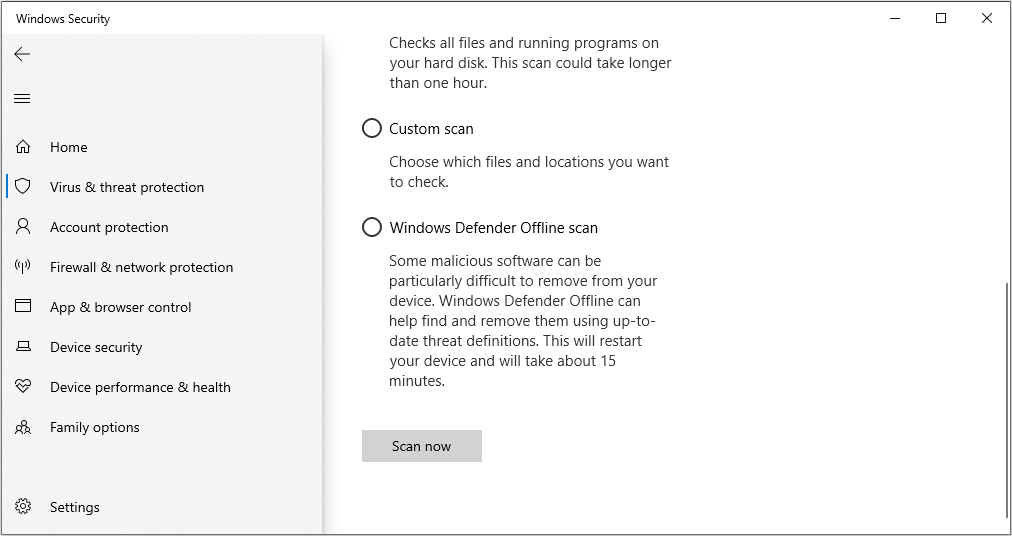
Step 3: Click Virus & threat protection on the left navigation bar. Then, click Scan options to choose a scanning mode. After that, click Scan now.
Then, you can run the DiskPart command again to see whether the problem is solved.

Fix 5. Alternative: Remove Write Protection via Registry Editor
If the above methods can’t solve error DiskPart failed to clear disk attributes Windows 10, you should consider using another method to remove the disk write protection, for example, Registry Editor.
The Registry is a core database in the Windows operating system and plays a central role in the entire system. It stores various parameters, which directly control the startup of Windows, the loading of hardware drivers, and the running of some Windows applications. With Registry Editor, you can modify these parameters.
As for how to edit Registry to remove the disk write protection, please refer to the following steps:
Step 1: Press “Windows + R” keys simultaneously to call out the Run dialogue. Then, type “regedit” in the dialogue box and press Enter.
Step 2: Navigate to HKEY_LOCAL_MACHINE > SYSTEM > CurrentControlSet > Control.
Step 3: Under Control, find StorageDevicePolicies. If you can’t find it, you need to create one by yourself. Right-click on Control and move your cursor onto New and then choose Key. Then, name the new key as StorageDevicePolicies.
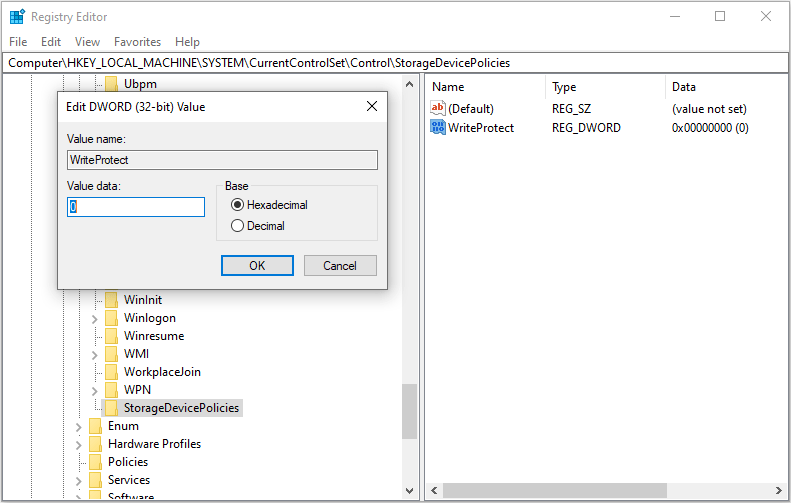
Step 4: Highlight StorageDevicePolicies and then right-click on the blank in the right window. Create a new DWORD (32-bit) Value and name it as WriteProtect.
Step 5: Double-click the WriteProtect entry and change its value to “0“. Then, click the OK button to save changes.
Step 6: Exit and restart your computer. Then, try transferring data to your storage device again to see whether the read-only attribute is removed.
Fix 6. Format the Drive to FAT32, NTFS, or exFAT
When certain files in an external drive are corrupt, the RAW format gets created. If you run the attributes disk clear readonly command on the external drive with RAW format, you are likely to get the error DiskPart failed to clear disk attributes. In this situation, you ought to format the File System to FAT32, NTFS, or exFAT.
Sometimes, you may fail to format the drive because it is write-protected. In order to avoid this situation, you should reboot Windows with Safe Mode before formatting the drive. If you still can’t format the drive after entering Safe Mode, you can try low level format tools or mass production tools.
After the drive is repaired by low level format tools or mass production tools, you can then format the drive in Windows.
Here is the tutorial on how to format the drive:
Step 1: Press “Windows + R” keys to open Run dialogue. Then, type “diskpart” into the dialogue box and hit Enter to open the DiskPart tool.
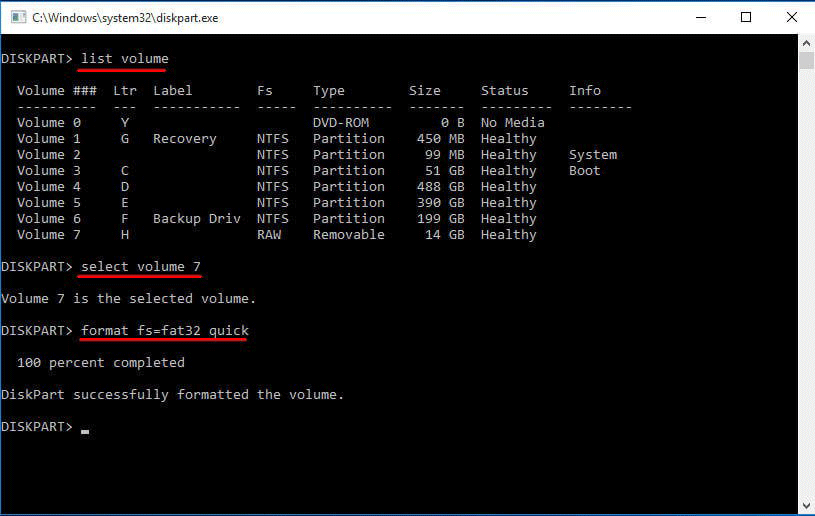
Step 2: Type following commands in turn to format the RAW drive to FAT32, NTFS, or exFAT. Please note that these command lines will delete all data on your drive.
- list volume
- select volume n
- format fs=fat32 quick
- exit

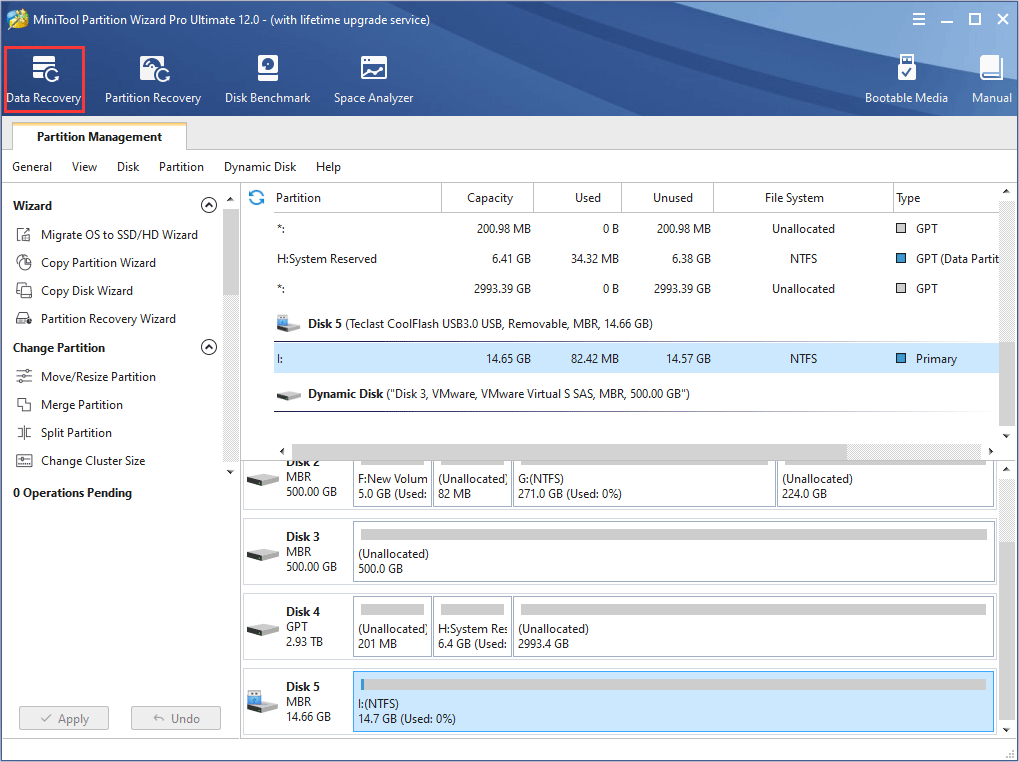
After the formatting process is completed, the write protection and data will be deleted together. If you haven’t used level format tools or mass production tools, you can recover your data through a reliable data recovery program like MiniTool Partition Wizard.
Click the above button the buy MiniTool Partition Wizard and launch it on your computer. Then, go to its main interface and click Data Recovery. Next, follow the wizard to recover your files and save them into a safe place. Click here to get the detailed guide.
Fix 7. Check Hardware Problem
If none of the above methods work, it is possible that the DiskPart failed to clear disk attributes issue has something to do with a hardware problem on the storage device. For example, this problem is very likely to occur on flash drives when their life is about to run out.
If so, you should check whether the drive is within warranty period, and then you can take the following measures accordingly:
- Within warranty period: Contact manufacturers or after-sales staff to get the drive repaired or replace it.
- Outside the warranty period: You can go to the nearby store and pay for them to inspect the storage device. Or, you should buy another drive to replace it.
DiskPart Failed to Clear Disk Attributes FAQ
- Turn off the physical write protection switch.
- Check the drive space usage and files’ attributes.
- Check and repair bad sectors.
- Run antivirus software.
- Remove write protection via Registry Editor.
- Format the drive to FAT32, NTFS, or exFAT.
- Repair hardware problem.
Bottom Line
Have the above ways helped you solve the problem? Do you have problem in performing the above methods, recovering your data, or replacing your drive? Please give us your feedback by leaving a comment below or emailing us at [email protected]. We will appreciate it and get back to you as soon as possible.
About The Author

Position: Columnist
Linda has been an editor at MiniTool for seven years. She continuously learns about computers and puts her knowledge into practice. Moreover, she is particularly knowledgeable in disk management, data recovery, system installation, and PDF editing. Her articles typically reference multiple examples or are based on her own experience, providing users with the most suitable solutions.
User Comments :