When your run CHKDSK, you may encounter the CHKDSK write protected error. It gives you the error message “Windows cannot run disk checking on this volume because it is write protected.” How to fix it? This article will show you 6 solutions.
CHKDSK is a command-line utility for Windows users to check and fix hard drive errors. However, when you run CHKDSK, it might prompt you with the error message “Windows cannot run disk checking on this volume because it is write protected.”
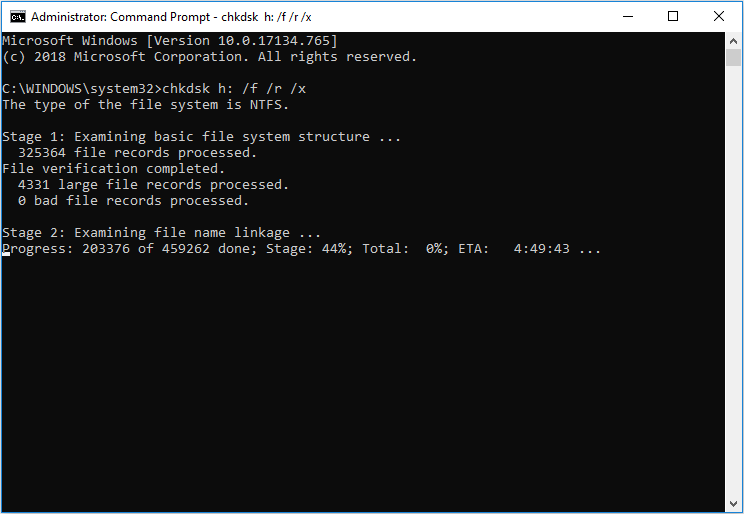
As you can see from the following screenshot, you are unable to run CHKDSK in CMD with the error message.
What does this error mean? What causes the Windows cannot run CHKDSK write protected error? How to fix the CHKDSK write protected error?
Don’t worry that too much. You will find all the information you need in this article.
Before I show you the methods to fix Windows cannot run disk checking on this volume Windows 10 issue, it is necessary to learn the reasons for the CHKDSK write protected error.
What Causes CHKDSK Write Protected?
Here are two main reasons for the CHKDSK write protected error.
1. The drive is write-protected.
If your drive is attributed to Read-only, the CHKDSK write protected error will occur due to restrictions on permissions.
2. The drive is damaged or corrupted.
Sometimes a partition’s file system can be corrupted due to many reasons like virus attack or other unknown reasons. In this case, you are unable to access the drive and run CHKDSK.
When it happens, you can try the following 5 solutions to get rid of the CHKDSK write protected error.
Watch this video for a more intuitive guide.
Solution 1. Run CHKDSK
Step 1. Open an elevated Command Prompt.
- Input cmd in the Windows 10 Cortana search box.
- Right-click the best match and choose Run as administrator.
Step 2. Run CHKDSK commands
- Type chkdsk *: /f /r /x (* represents the partition you want to check)
- Then hit Enter key.
The different parameters have different meaning:
- /f – Find any drive errors and try to fix them.
- /r – Locate bad sectors on the drive and try to recover any and all readable information from them.
- /x – Force the volume you’re about to check to be dismounted.
After running the command, you can check if you can access your drive and run CHKDSK as normal. If this method doesn’t work, you can try the next method.
Solution 2. Modify the Attribute via Registry
You can remove the write protection by modifying the attribute via Registry.
Step 1. Open Windows Registry Editor.
- Press Windows key + R key to open the Run box. Then input regedit and hit Enter.
- Input regedit in the Windows Cortana search box and click the best match.
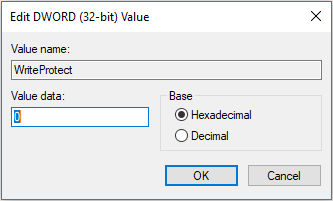
Step 2. Modify the WriteProtected key.
- Locate to HKEY_LOCAL_MACHINESYSTEMCurrentControlSetControlStorageDevicePolicies.
- Double-click the ‘WriteProtect’ key and change the value from 1 to 0.
Then you can run CHKDSK in cmd again to see if the error disappears.
Solution 3. Remove Write Protection in Diskpart
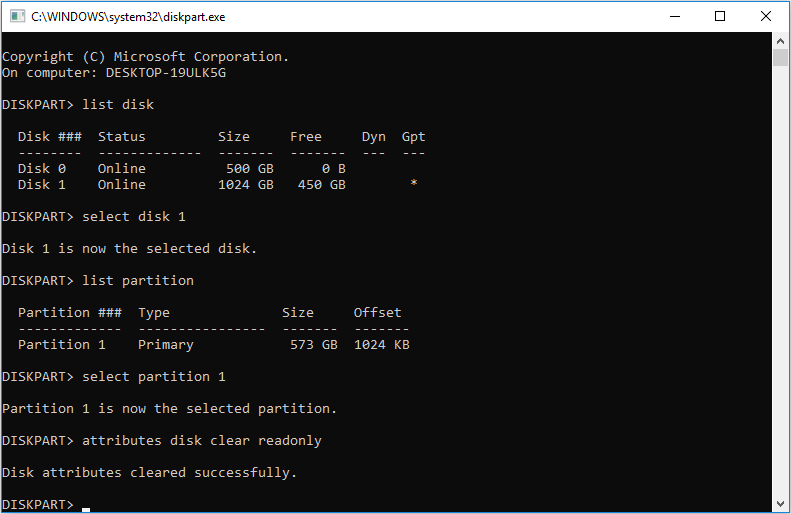
If the CHKDSK write protected error is caused by the drive attributed to Read-only, you can use this method to remove write protection in Diskpart. This method will clear readonly attributes. Here are detailed steps and screenshot.
Step 1. Type diskpart in CMD and hit Enter. Click on Yes in the pop up confirming dialogue.
Step 2. In Diskpart, type the following commands one by one and hit Enter after each.
- list disk
- select disk * (* represents the disk which has the write-protected partition)
- list partition
- select partition* (* represents the write-protected partition)
- attributes disk clear readonly
- exit
Then you can back to CMD to check if the CHKDSK can run smoothly.
Solution 4. Format Partition
One effective way to remove write protection CHKDSK is to format the partition. If none of the above fixes has resolved your issue, you can format the partition to get rid of the Windows cannot run disk checking on this volume Windows 10 error.
You can format the partition with Windows Disk Management or download MiniTool Partition Wizard Free Edition to format partition. Here I will show you both methods.
Format Partition with Disk Management
Disk Management is a Windows built-in disk partitioning utility. It has some basic features for users to manage their disks and partitions, such as create partition, delete partition, format partition, change drive letter, convert disk to dynamic and so on.
To format partition with Disk Management, you can follow the steps as below.
Step 1. Open Disk Management.
You can follow the two ways to open Disk Management in Windows 10.
- Right-click the Windows Start menu and choose Disk Management.
- Press Win + R key to open Run box and then input diskmgmt.msc and hit Enter.
Step 2. Format the drive.
1. Choose the target partition.
2. Right-click it to select Format….
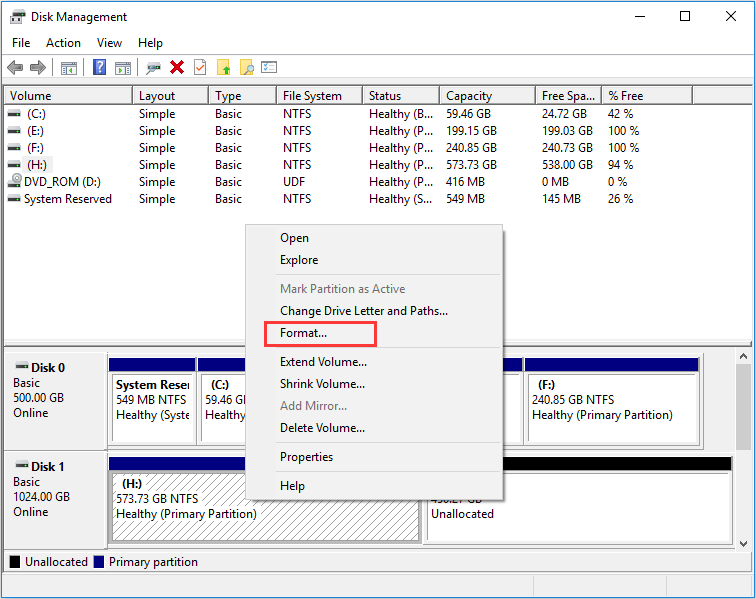
3. Set volume label, file system and allocation unit size and then click OK.
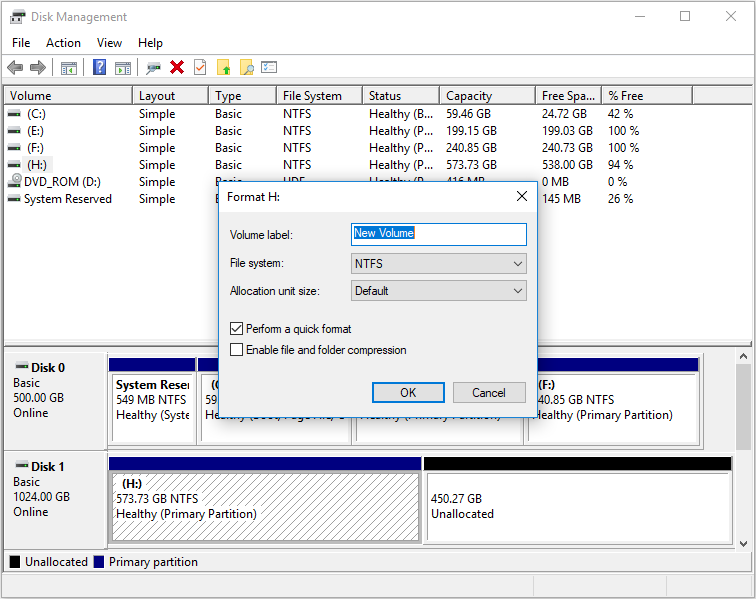
Tip: Make sure the option Perform a quick format is checked on the pop-up window, or the lost data may be unrecoverable.
4. Read the warning and click OK to continue.
This is how to format partition with Disk Management. Next, I will show you how to format partition with a third-party partition manager.
Format Partition with Third-party Partition Manager
You can format partition with a professional partition manager as it provides users with many advanced features to manage hard drives. In this case, MiniTool Partition Wizard Free Edition is a good choice.
MiniTool Partition Wizard Free Edition is a free and prominent partition manager, which enable users to perform many advanced operations like resize partition, extend partition, split partition, check file system, convert MBR to GPT without data loss, convert FAT32 to NTFS, etc.
The free partition manager is trusted by tens of millions of people. So you can utilize this software to format partition at ease. Download one by clicking the following button and start formatting your drive now.
MiniTool Partition Wizard FreeClick to Download100%Clean & Safe
Step 1. Launch MiniTool Partition Wizard Free Edition.
- Install the partition manager on your computer.
- Launch it to get the main interface.
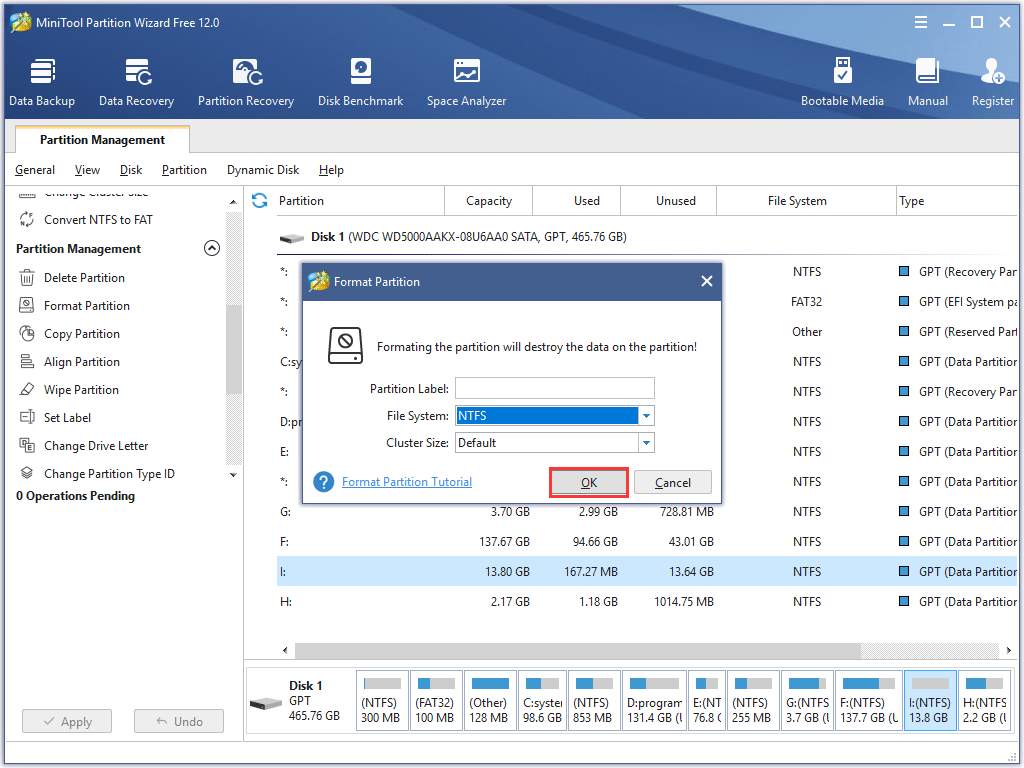
Step 2. Format the Partition.
1. Choose the target partition on the main interface.
2. Select Format Partition from the left action panel.

3. Set partition label, file system and cluster size and click OK.
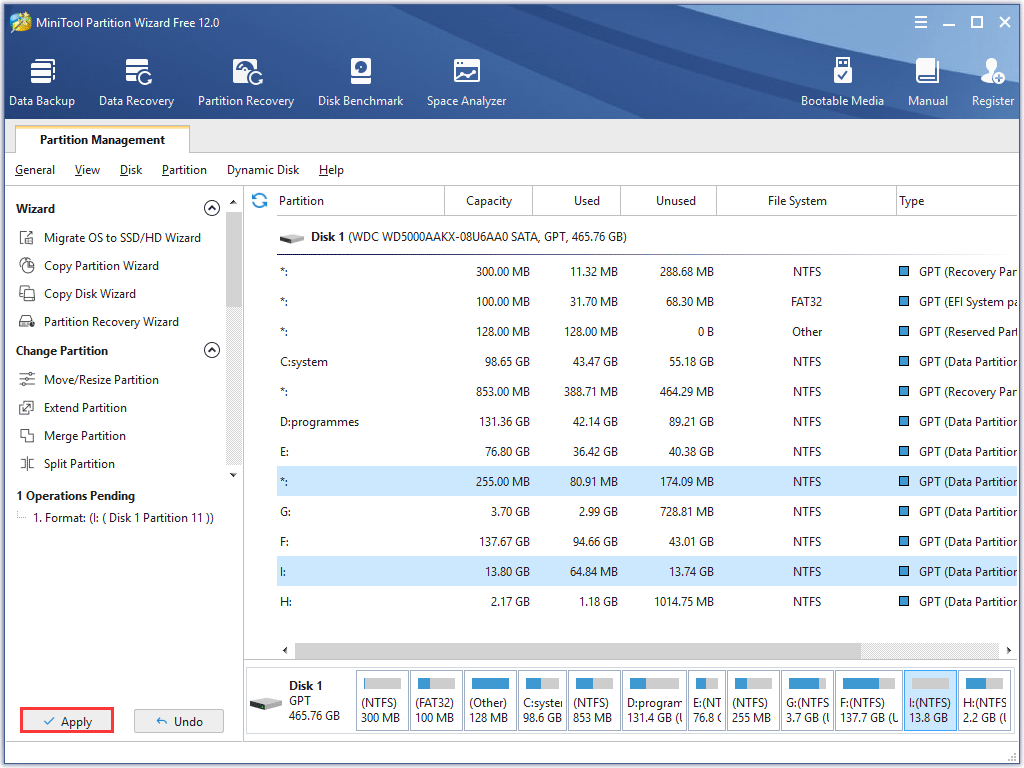
Step 3. Apply the change.
1. Click the Apply button on the upper left corner to apply the change.
Kindly Reminder:
Formatting will delete all the files on the partition. To recover data from formatted partition, you can try using MiniTool Partition Wizard Pro Ultimate, which enables you to recover data from formatted partition, deleted partition, raw partition, etc.

You can get the data recovery software by clicking the following button. And install it on your computer.
If the data is less than 1GB, you can choose use the MiniTool Partition Wizard Free Edition, which allows users to recover 1 GB data for free.
MiniTool Partition Wizard FreeClick to Download100%Clean & Safe
Just right click the partition and choose Data recovery to recover data from your formatted partition now.
Solution 5. Check and Fix Hard Drive Error with CHKDSK Alternative
If you cannot run CHKDSK in CMD with the error “Windows cannot run disk checking on this volume because it is write protected.”, you can try using the CHKDSK alternatives. Next, I will introduce you two CHKDSK alternatives for Windows users and show you how to utilize them one by one.
Check File System with MiniTool Partition Wizard
Check file system is another way to fix the Windows cannot run chkdsk write protected issue with MiniTool Partition Wizard Free Edition. It is a CHKDSK alternative, which can help you check and fix hard drive file system errors.
If you encounter the CHKDSK write protected error in CMD, you can also try using the Check File System feature in MiniTool Partition Wizard Free Edition.
If you have downloaded MiniTool Partition Wizard Free Edition to format partition in the above part, you can launch it directly. If not, you can click the following button to download one for free.
MiniTool Partition Wizard FreeClick to Download100%Clean & Safe
Step 1. Launch MiniTool Partition Wizard Free Edition.
- Install the partition manager on your computer.
- Launch it to get the main interface.
Step 2. Check and fix file system error.
1. Select the target partition on the main interface.
2. Choose Check File System from the left action panel.
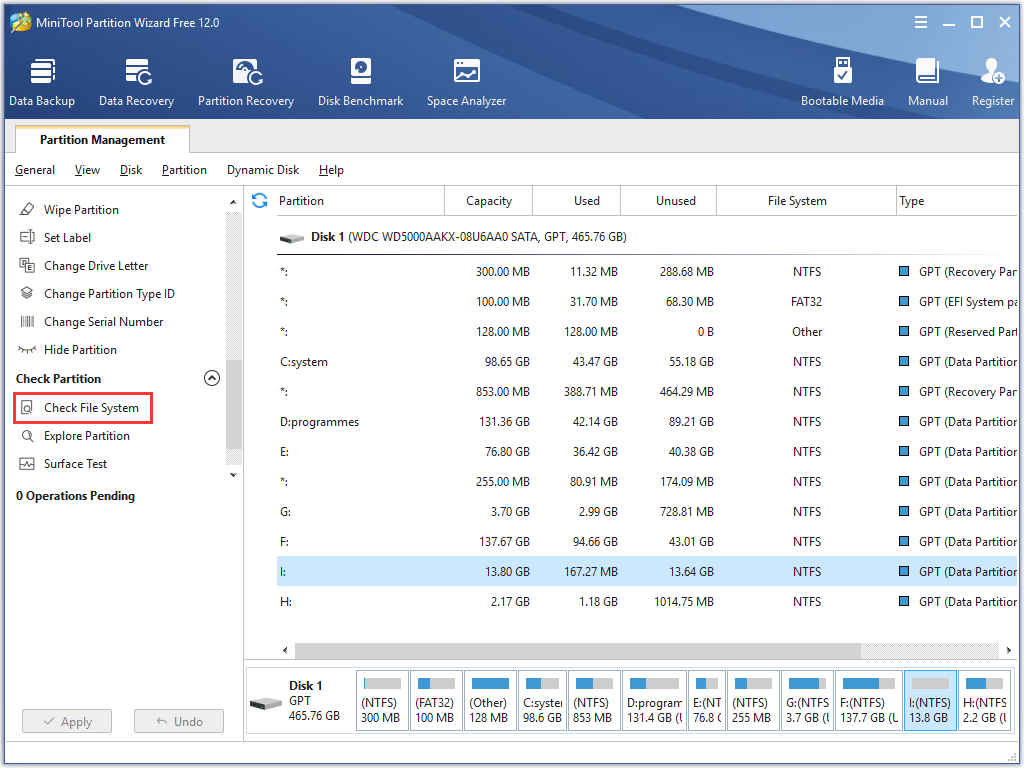
3. Select check & fix file system error and click Start.
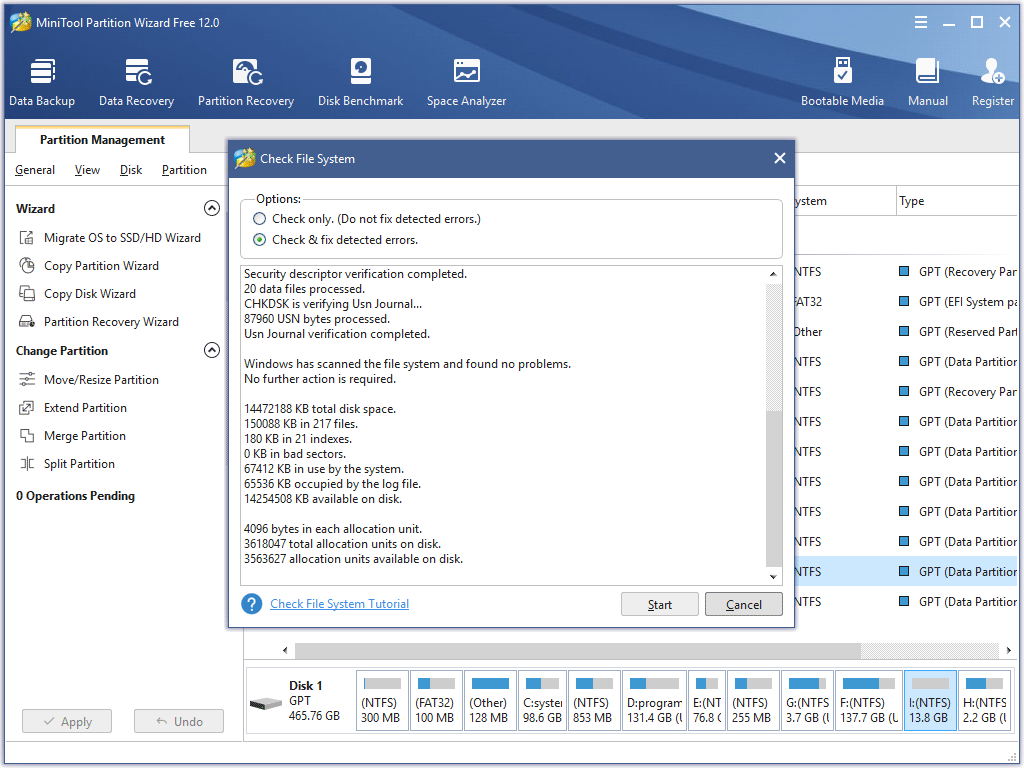
Then the CHKDSK Alternative will check and fix hard drive errors automatically. When it is finished, you can close the program.
Disk Error Checking
Disk error checking is another CHKDSK alternative, which can help you check the drive for file system error. You can try it when the CHKDSK write protected error appears in CMD.
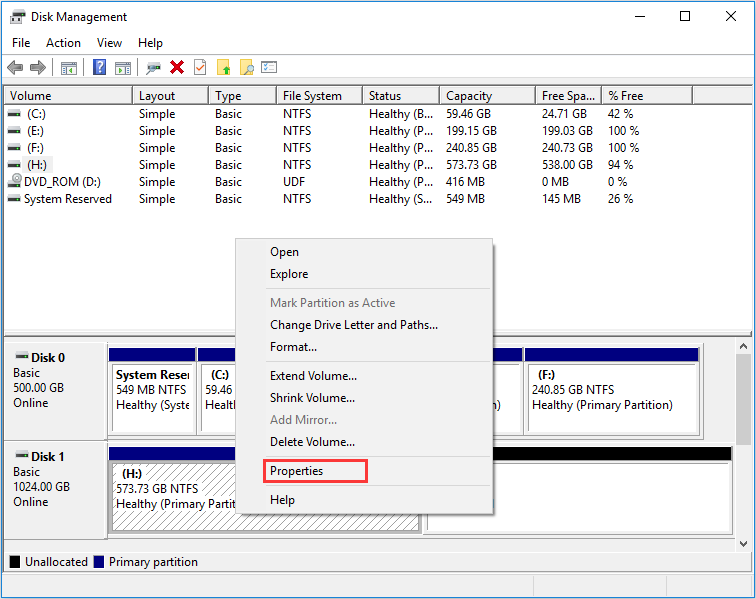
Step 1. Access the drive Properties.
- Right-click Windows Start menu and choose Disk Management.
- Right-click the partition that you encounter CHKDSK write protected error.
- Then choose Properties from the pop-up window.
Step 2. Check the drive.
1. Select the Tools tab.
2. Click the Check option.
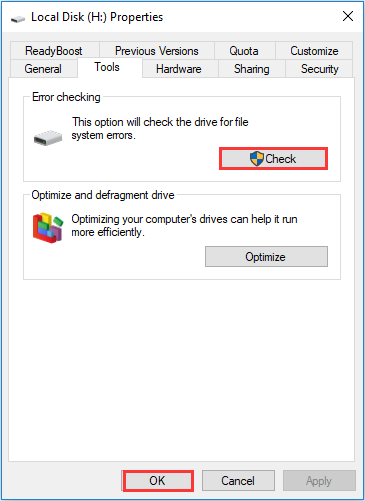
3. If no errors are found, you can still choose to check the drive if you want to. Click on Scan drive.
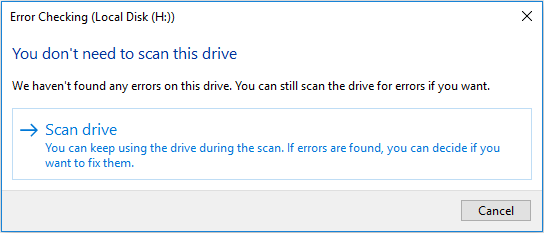
If there are file system errors found on the drive, Windows will ask for a restart to fix the errors automatically.
If you come across the error message “Windows cannot run disk checking on this volume because it is write protected.”, you can try the above methods to fix it immediately.
Bottom Line
After trying the above solutions, have you fixed the CHKDSK Windows 10 cannot run write protected issue? If you cannot run CHKDSK write protected, the above fixes are worth trying. Hope this post can help you.
If you have any question about how to remove the error that Windows cannot run chkdsk write protected or you have better solutions, please share it with us. You can leave a message in the following comment zone and we will reply as soon as possible. If you need any help when using MiniTool software, you can contact us via [email protected].
User Comments :