As an extension of the Microsoft Management Console, Disk Management allows us to manage the disk-based hardware recognized by Windows OS.
Deleting partition or volume via this utility is a common and easy operation to modify the numbers of the partitions on the hard drive.
However, sometimes this simple operation also makes you clumsy, as Delete Volume is greyed out in Disk Management.
Why does this issue occur? Here are 4 cases, and their corresponding solutions will be introduced in detail. So, let’s see what the culprit is behind Disk Volume greyed out and how to remove it to make this feature available again.
Case 1: The Volume Contains Operating System
The first situation for “Disk Management Delete Volume greyed out” is that the volume contains system as the following image shows.
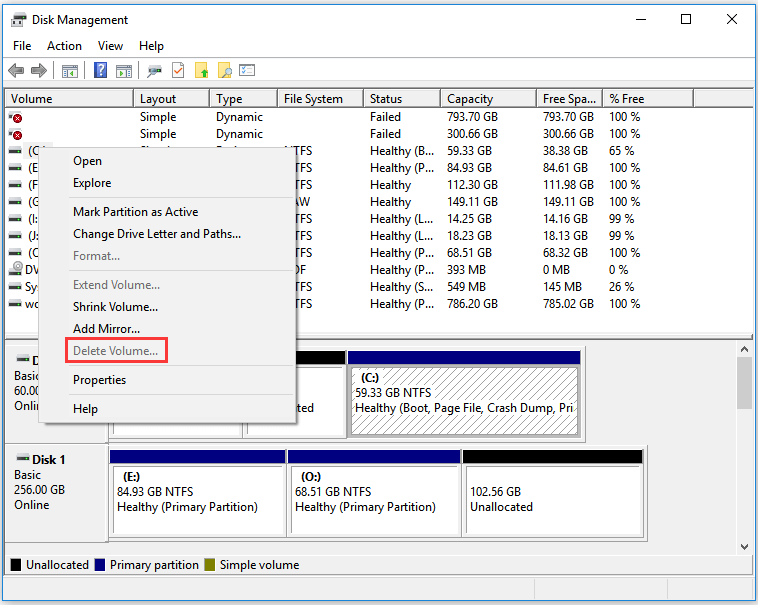
In these 2 cases, you might want to delete system partition.
- There are two operating systems in computer, and you just want to delete one of them.
- You want to reinstall a new operating system to the original location but prefer to clean the previous operating system at first.
Although Disk Management doesn’t allow you to delete such volumes, it doesn’t mean that you can’t do anything to this volume.
In this situation, it is highly recommended to use the professional edition of MiniTool Partition Wizard or advanced editions, since the following steps will use Bootable Media feature of this software which cannot be supported by the free edition.
The detailed steps are offered in the following content to help you to delete the volume containing system successfully.
Step 1: Prepare CD/DVD disc at first and insert it your computer.
Note: If you want to make a bootable USB flash drive, you should back up the important files in this device because the following steps will destroy such files.
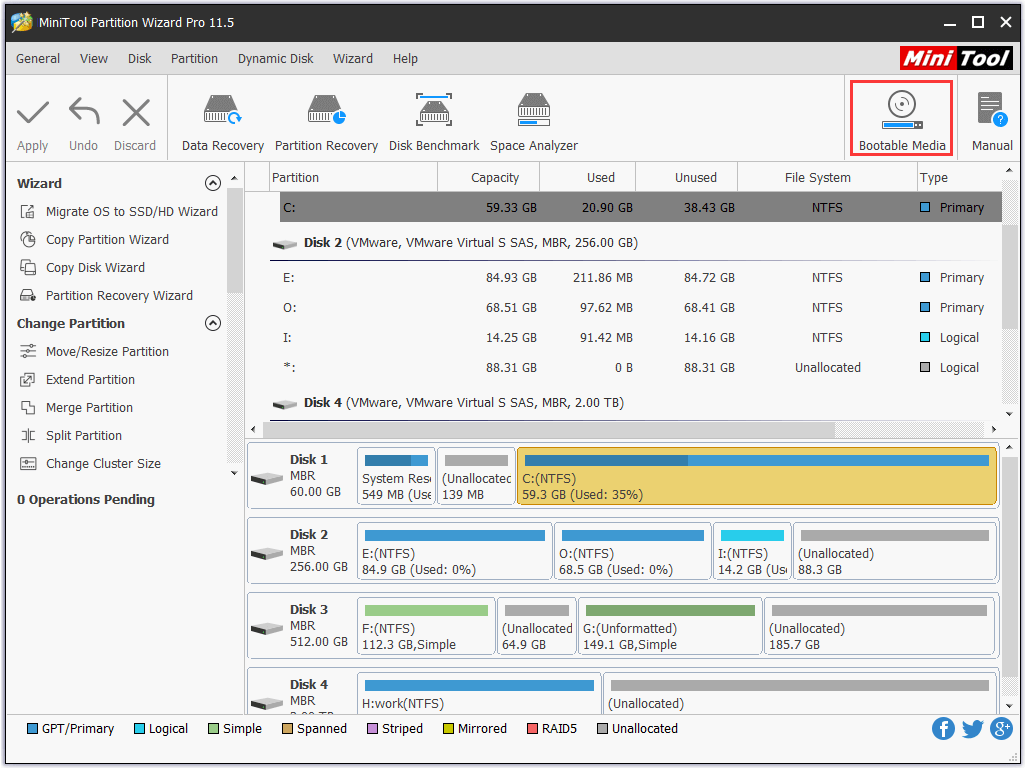
Step 2: Buy MiniTool Partition Wizard Pro and launch it to get its main interface.
Step 3: Click Bootable Media in the main interface to create a bootable DVD/CD disc.
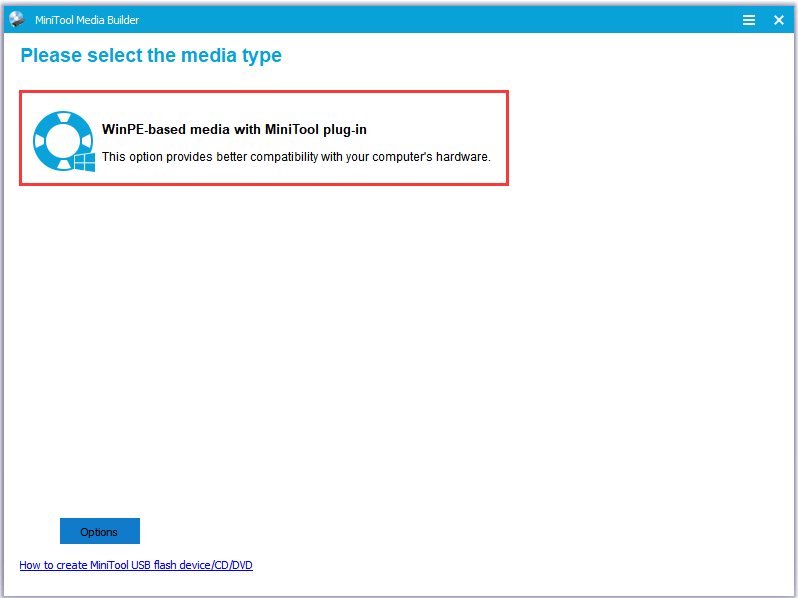
Step 4: Select WinPE-based media with MiniTool plug-in in the pop-up window.
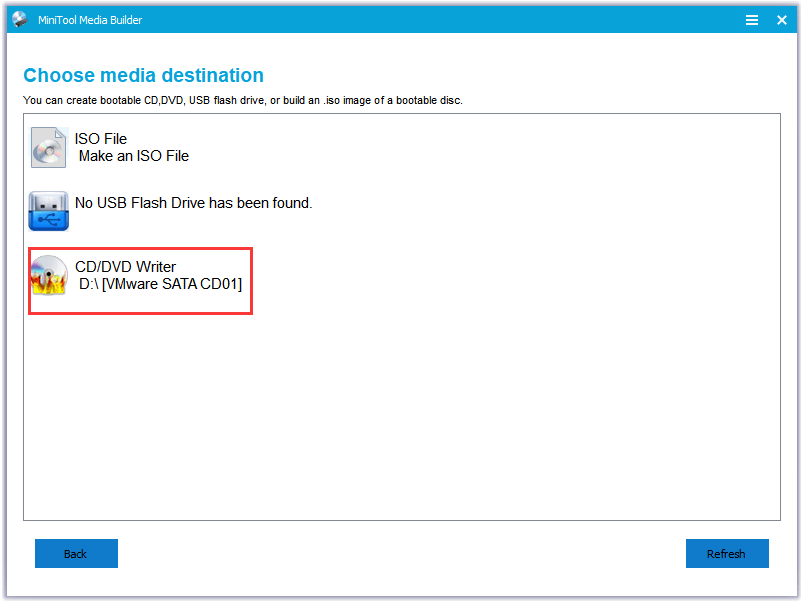
Step 5: Click CD/DVD Writer as media destination to boot computer and then click Yes in the new pop-up window.
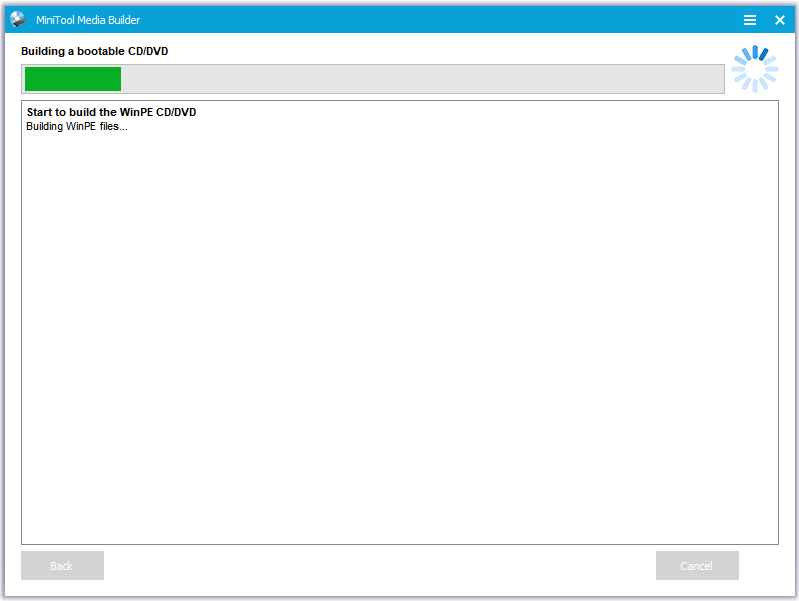
Step 6: Wait for some minutes when Bootable Media Builder is creating boot files on the CD/DVD disc. Finally, click Finish after successfully burning.
Step 7: Access MiniTool Partition Wizard Bootable by booting from burned MiniTool Partition Wizard Boot CD/DVD discs.
Step 8: After accessing the main interface of MiniTool Partition Wizard Bootable, please click the active system partition and click Delete Partition from the left panel. Or right-click this partition and choose Delete Partition.
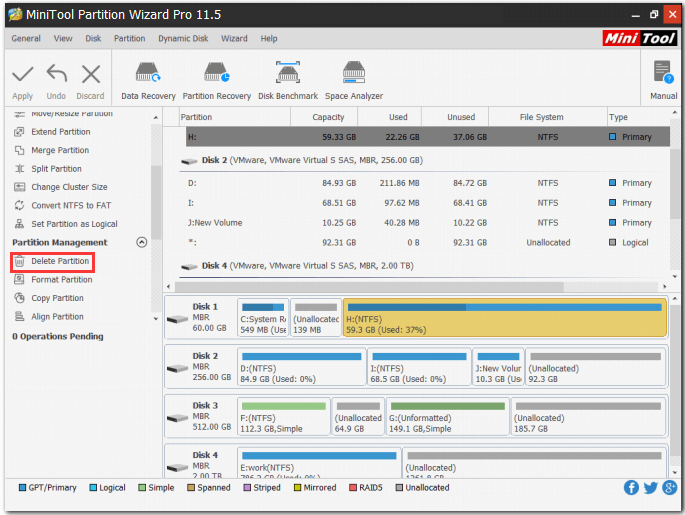
Note: In the MiniTool Partition Wizard Bootable, the driver letter for partition has been changed, you can use the Explore Partition feature of this program to figure out the partition you want to delete.
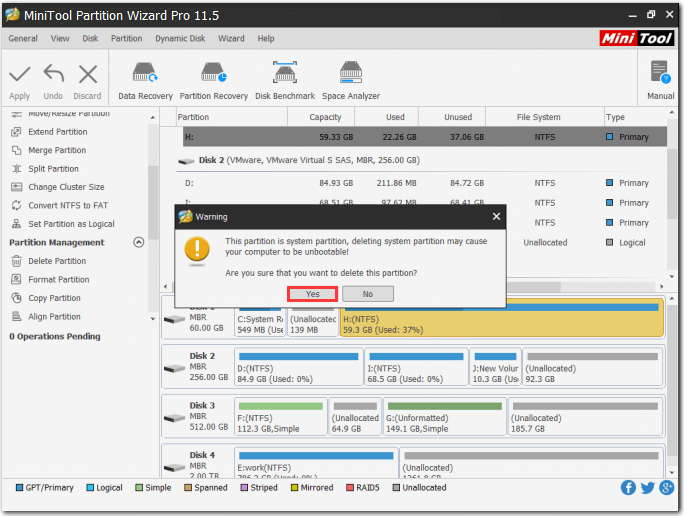
Step 9: Click Yes after getting a warning “deleting system partition may cause your computer to be unbootable” and then click the Apply button in the main interface.
To reinstall another Windows operating system like Windows 10, you can click Detailed Steps and Instructions to Reinstall Windows 10.
Case 2: The Volume Contains Page Files
The second reason that prevents you from deleting a one volume via Disk Management is that this volume contains page files.
Page files refer to a hidden system file with the extension name of .sys which is related to the virtual memory.
Why do such page files exist in volumes? When your computers RAM (random-access memory) are getting full, the operating system will automatically move some of the data from RAM to the pagefile.sys file on the hard drive. That’s why these files may appear in your volumes.
And when you want to delete such volumes, you will find that the “Disk Management Delete Volume” is greyed out.
In this situation, you need to disable file pages saved in the volume that you want to remove. To do that, please follow the steps below.
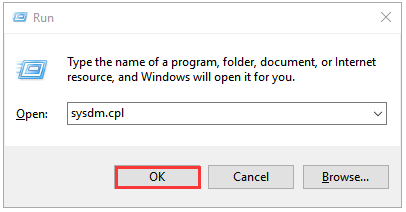
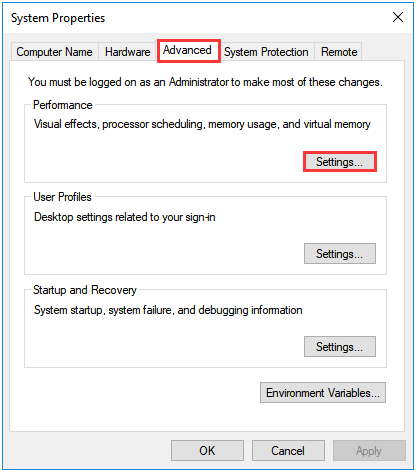
Step 1: Press the Windows icon and the R key on the keyboard simultaneously and input sysdm.cpl in the pop-up window. Click the OK button to run System Properties.
Step 2: In the System Properties window, move to the Advanced tab and then click the Settings button belonging to Performance.
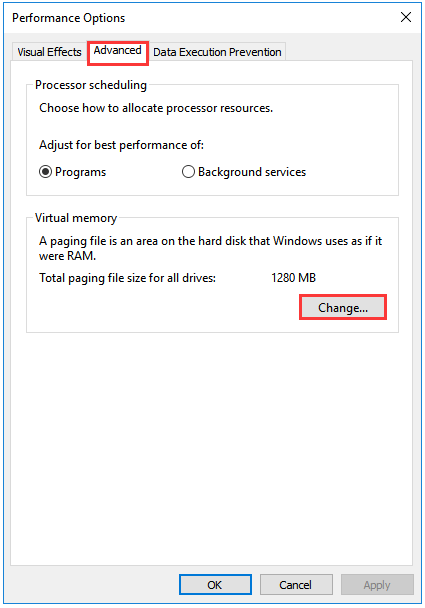
Step 3: Navigate to the Advanced tab in the window as the following image shows and the click the Change button.
Step 4: Select the volume you want to remove from the rectangle circled by the red line in the following picture at first, check No page file, click the Set button and the OK button in order.
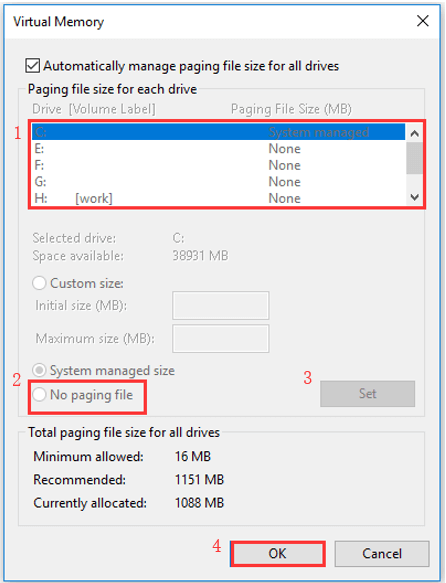
Note: Many choices are unavailable in the above image since each volume on my hard drive doesn’t have any page file. If you also get such picture by following the steps above, it means page files are not the barriers for deleting volume. Therefore, you should move to Case 2 directly.
Step 5: After disabling the pagefile, please run Disk Management again.
Step 6: Select the volume you want to delete again. The Delete Volume should be active, and you should click Delete Volume to delete the selected volume.
If this solution fails to fix “Delete Volume greyed out”, you need to keep reading and find other reasons that lead to this issue.
Case 3: Free Space Cannot Be Deleted in Extended Partition
If you want to delete the free space in the extended partition, the Delete Volume will be greyed out in Disk Management like the following picture shows:/strong>
Therefore, please look at the interface of Disk Management and check whether you are facing the similar situation as the image above shows.
The reason for this case is that when there are any logical drives left in the extended partition, you will have to delete them first, making all the disk space included becoming overall free space. At this time, you are able to remove the free space in Disk Management.
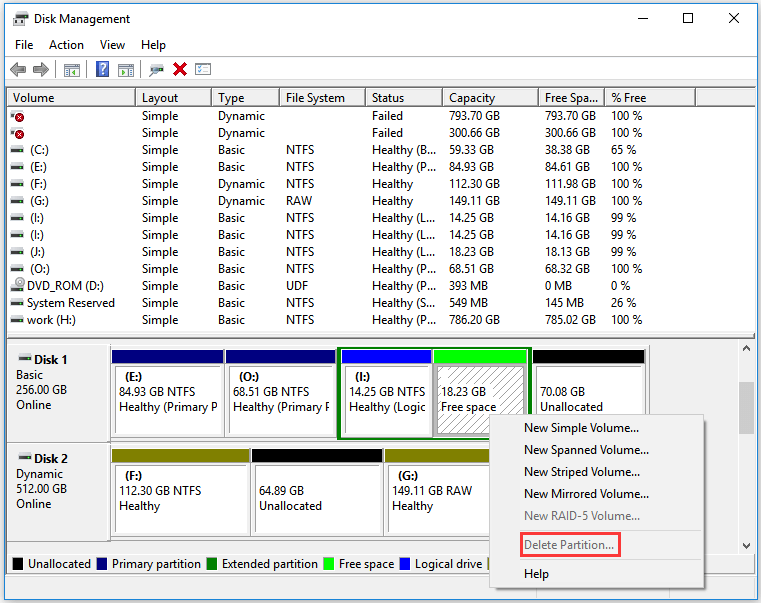
Step 1 Run Disk Management again if you have closed it. And then delete the logical partitions in the extended partition by right-clicking it and then choosing the Delete Volume option.

Repeat Step 1 if you have got more logical drives to delete. After deleting all the logical partitions on the extended partition, you should get a free space as the following image shows.
Step 2: To remove this free space, you should right-click Free Space and choose Delete Partition among the options.
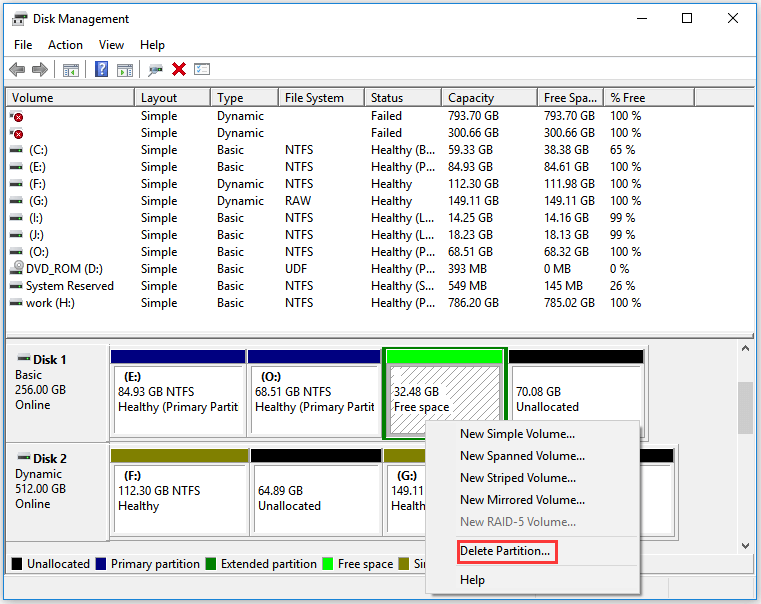
After carrying out Step 2, you can get the result as the following image shows.
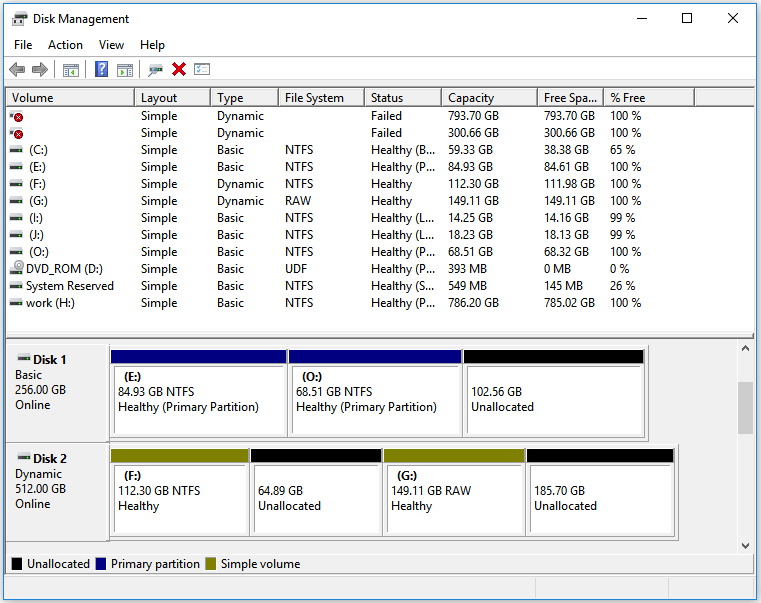
Now you are able to create new partitions on the unallocated space, or you can use it to extend volume.
Tip:
- If you regret deleting these logical partitions, you can restore these partitions with MiniTool Partition Wizard.
- If your intention is to turn the extended partition into another primary partition, you can rely on the Set Partition Primary feature of MiniTool Partition Wizard.
Related article: Fixed – No Free MBR Slots While Creating/Splitting Partition Using Partition Wizard
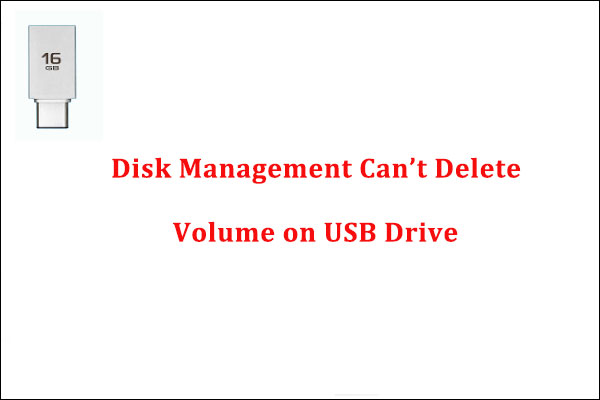
Case 4: Can’t Delete Partition on USB Drive
The fourth situation is that the second partition on the USB flash drive cannot be deleted, you can read the following recommended article to learn about this situation.
The top 4 cases for cannot delete partition in Disk Management and their responding solutions have been introduced in detail in the above content.
Bottom Line
This article comes to an end. Please figure out the reason that causes you cannot remove volume on your hard drive via Disk Management. And then try the mentioned solutions to fix “Delete Volume greyed out”.
Hope this article can help you solve the problem successfully and you can do what you want to do after removing the volume.
If you have any difficulties in solving “Delete Volume greyed out” or any other suggestions on this topic, please leave a message below or contact with us via [email protected]. Thanks in advance.
User Comments :