You may need to extend volume to non contiguous space but failed in Disk Management of Windows. So, how to extend partition to non contiguous space easily and safely? Don’t worry. This article from Partition Magic shows you ways to extend partition to non contiguous space without data loss.
Why Extend Partition to Non Contiguous Space Fails in Disk Management
After you have used your computer for a long time, the partitions will store more and more data, which will occupy a lot of disk space. When Windows prompts that the disk space is insufficient or the partition displays a red bar, you may consider extending the partition to a non-contiguous space without losing data.
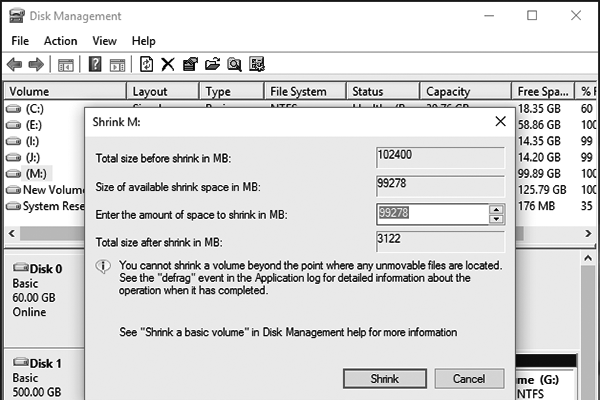
However, you will see that the Extend Volume is grayed out in Disk Management. Why? That’s because the Extend Volume feature of Disk Management only extends volumes to the allocated/free space which is next to the right of the target partition. Besides, this feature is only available for NTFS and RAW partitions.
As mentioned above, there are some restrictive conditions while using the Disk Management tool, so how can you use it successfully?
If your volume’s file system is able to be extended, and you still want to extend volume to non contiguous space in Disk Management, you can try the following two methods:
- Convert the data partition to a dynamic partition and then select the Extend Volume option. However, some Windows operating systems do not support dynamic disks.
- When the target partition and the unallocated space are separated by a partition, you should delete the partition behind the target partition and then use its Extend Volume feature to extend the target partition. Please note that this operation will cause data loss and require continuous space to be on the right side of the partition to be deleted.
As you can see, it is very troublesome to use Disk Management to do this, and its limitations are difficult to break through. Well, how to extend the volume to non-contiguous space without losing any data? In this post, we provide you with a free extend partition program to do that easily and safely. Please keep reading.
![[Full Guide] How to Extend Partition Windows 10](https://images.minitool.com/partitionwizard.com/images/uploads/2024/07/extend-windows-10-partition-thumbnail.png)
How to Extend Partition to Non Contiguous Space
If you want to extend volume to non contiguous space without data loss, MiniTool Partition Wizard is a great choice. Its Extend Partition feature can help you extend FAT32 partitions and NTFS partitions, whether there is unallocated space on the hard disk.
As a professional third-party partition manager, it provides extensive functions related to partitions and disks. For example, it not only can create/format/split/merge partitions, but also can perform most complex operations such as migrate OS, recover data from hard drive, and convert MBR to GPT.
Now, you can click the download button below to download it to your computer and complete the operation of extending the volume to non-contiguous space.
MiniTool Partition Wizard FreeClick to Download100%Clean & Safe
Well, how to extend partition into non adjacent space into the Extend Partition feature. Let’s take a look at how to do it step by step.
As shown in the figure, if you want to expand the F partition with the unallocated space, there is a G partition in the middle. But it doesn’t matter, the Extend Partition feature can still be operated.
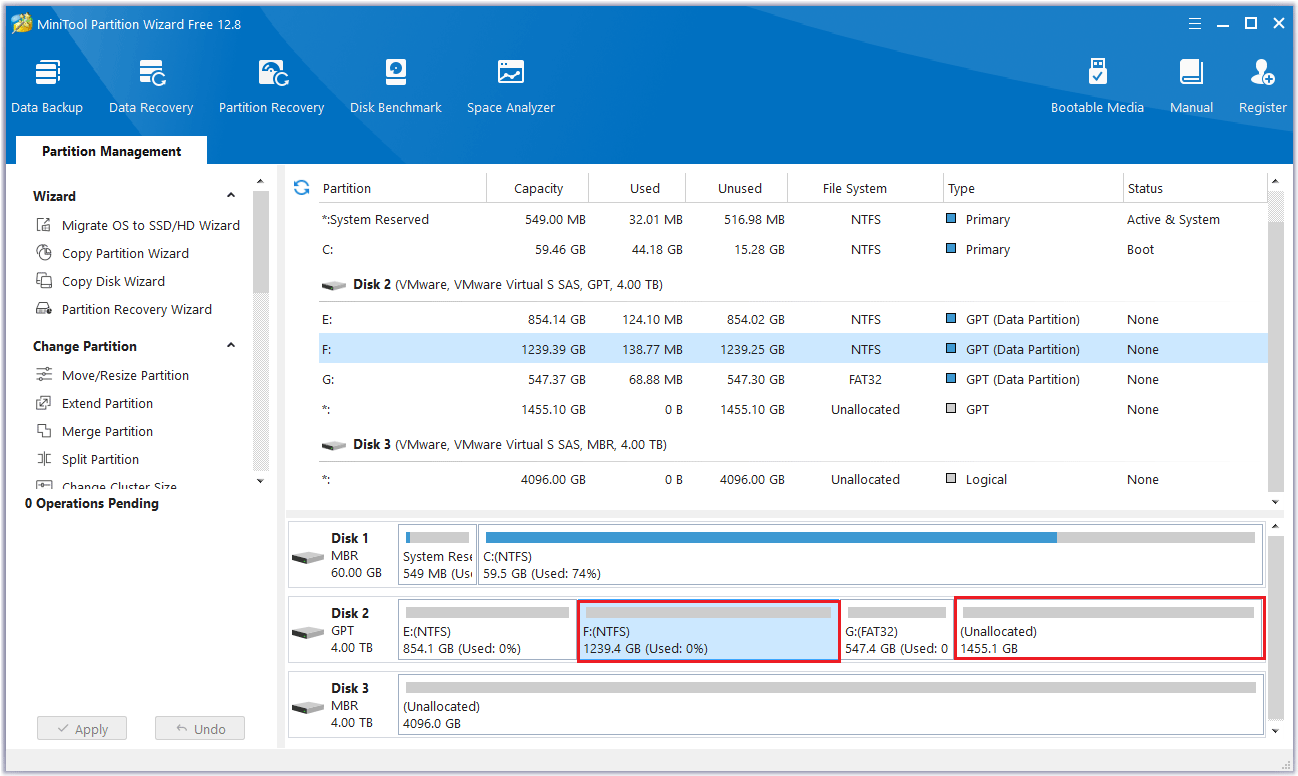
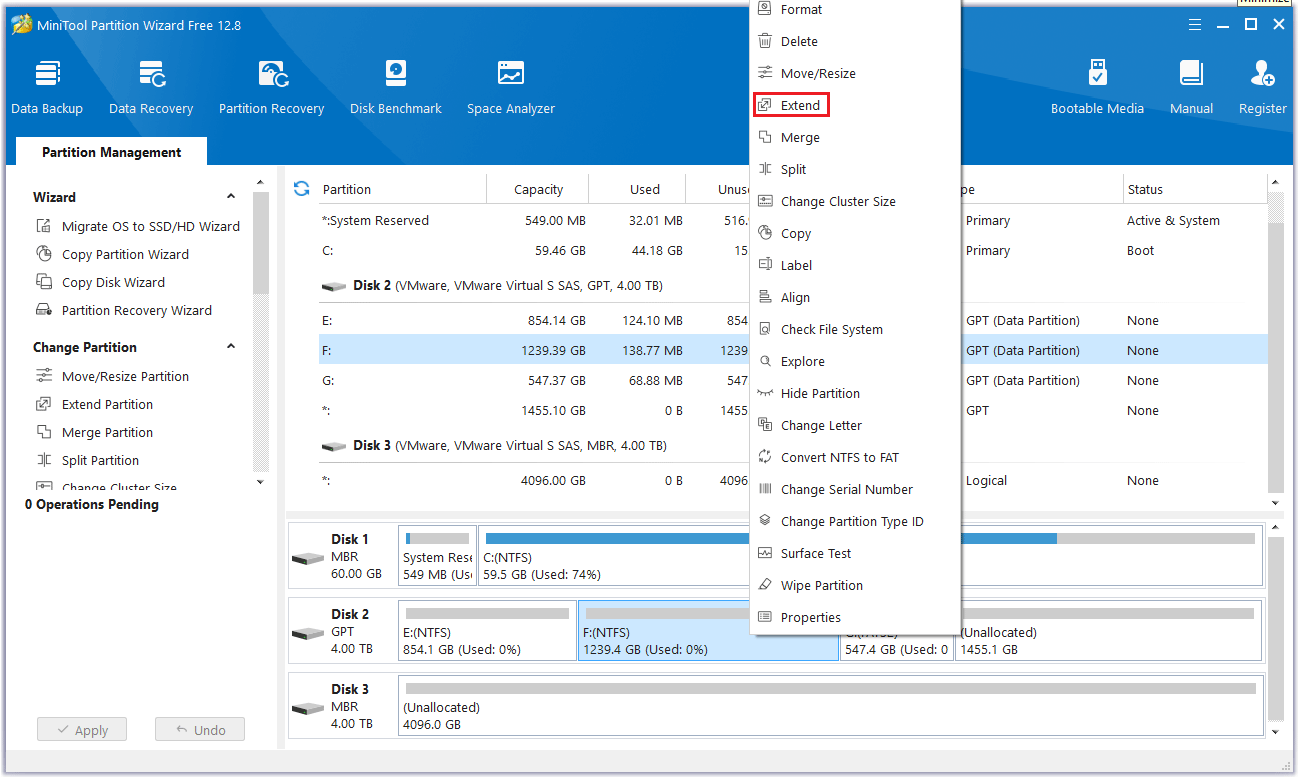
Step 1: Launch MiniTool Partition Wizard to its main interface. Then right-click the F partition to be extended and select Extend.
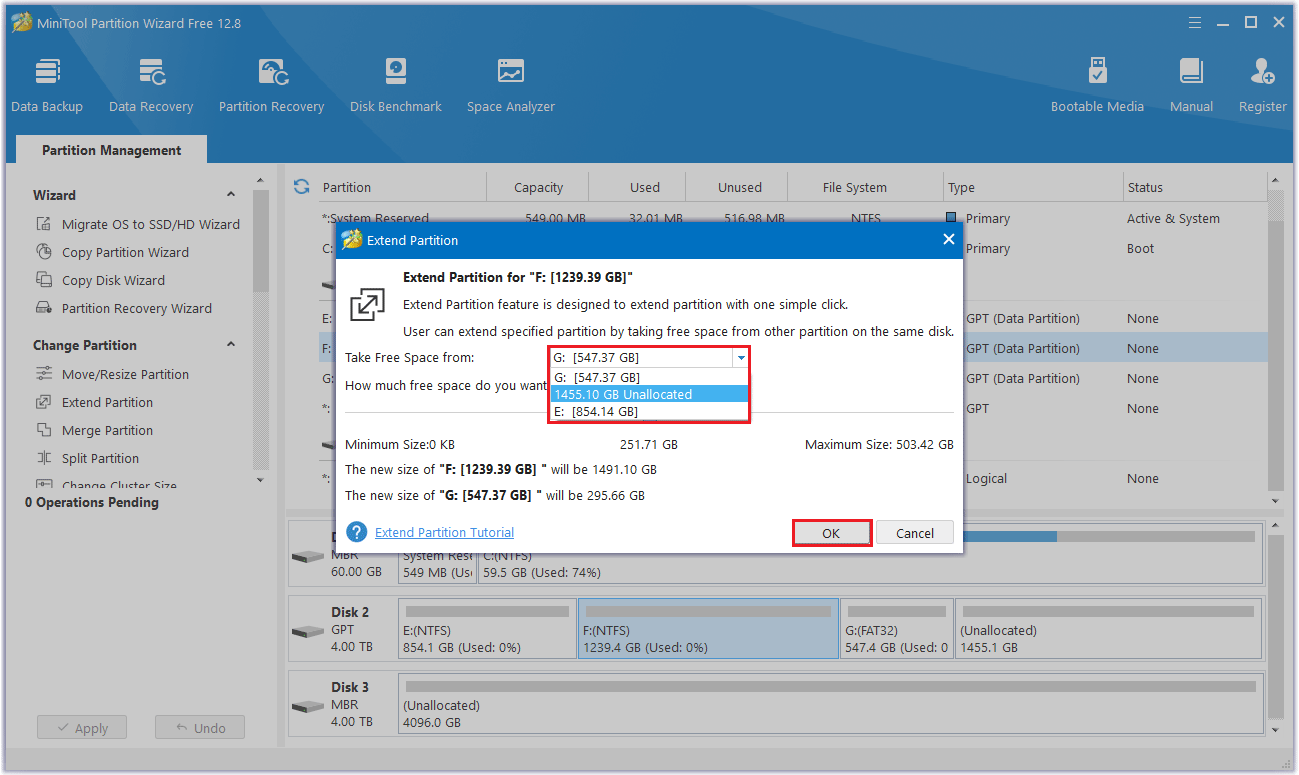
Step 2: Click the down arrow from “Take Free Space From” and select the unallocated partition to get expansion space. You can drag the sliding handle to decide how much of the available space it takes up. Then click OK to return to the main interface.
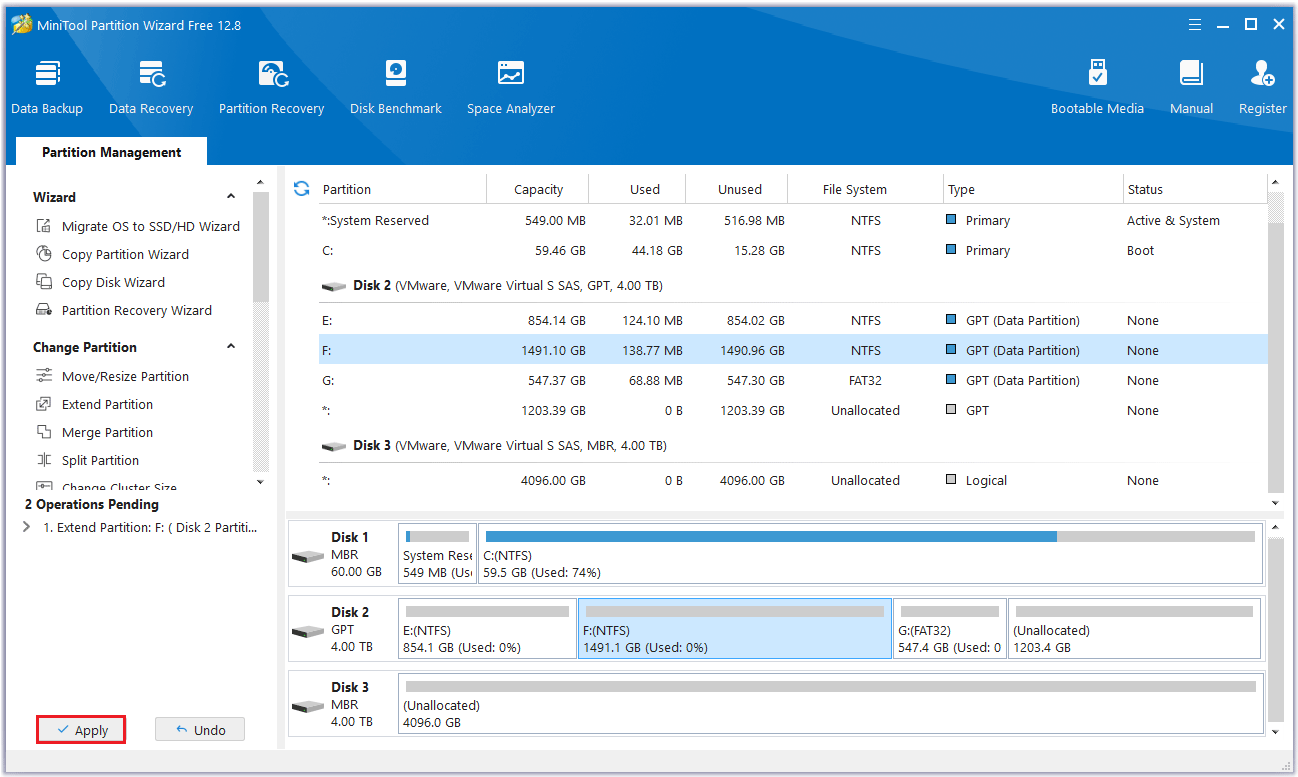
Step 3: You can see that the F partition has been expanded to a non-contiguous space. But it has not been applied to the computer yet, so you need to click the Apply button to perform all changes.
That’s all the steps on how to extend partition into non adjacent space with MiniTool Partition Wizard. It can be seen that using MiniTool Partition Wizard is easier and faster than using Disk Management to extend a partition. When you extend a volume to non-contiguous space, all your data will be safe.
After finishing all the operations, you can return to Windows Explorer to check the new condition of the disk.
Bottom Line
In this article, we show you how to extend partition to non contiguous space. When Windows built-in tool Disk Management cannot extend partition to non contiguous space, you can choose MiniTool Partition Wizard to do that without data loss. It is very powerful, reliable, and safe. You can have a try.
If you encounter certain issues while using MiniTool Partition Wizard, you can send us an email via [email protected] to get a quick reply.
About The Author

Position: Columnist
Cecilia has been an editor at MiniTool for two years. She primarily focuses on disk and partition-related content, with particular expertise in disk cloning, partition recovery, and PDF document conversion. She is dedicated to providing users with clear and accurate solutions to help them efficiently resolve common computer problems.
User Comments :