It’s annoying if USB tethering causes blue screen. Fortunately, you can solve the BSOD caused by USB tethering by using the methods offered by MiniTool Partition Wizard in this post. Pick one to fix the issue now!
Blue screen errors can be caused by various reasons in different cases. Sometimes, you may see that USB tethering causes blue screen. Why this situation occurs and how to deal with it? From this post, you can explore the answers.
Some blue screen scenarios:
Windows 11 blue screen when idle
Blue screen after installing drivers
Some SSDs are causing blue screen
Blue screen after installing new CPU or GPU
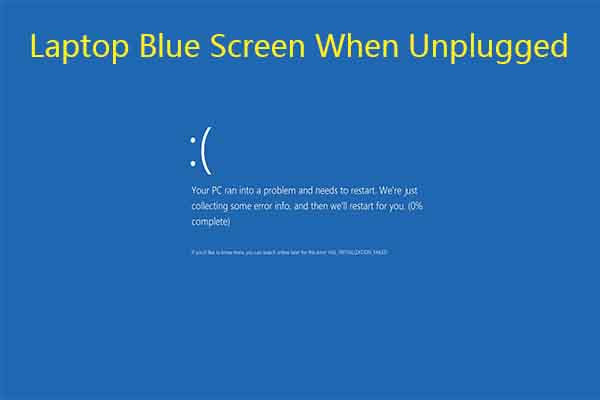
Laptop blue screen when unplugged
Enter Safe Mode Before Fixing the Issue
As you are stuck on the blue screen, power off and power on your computer repeatedly to enter the Windows Recovery Environment. Then click Troubleshoot > Advanced Options > Startup Settings > F4 > Restart to enter the Safe Mode. After that, perform the operations below to fix the BSOD caused by USB tethering.
Further reading:
To prevent data loss caused by BSOD or other unexpected errors, clone the hard drive via MiniTool Partition Wizard in advance. This HDD/SSD cloning software enables you to clone hard drives/partitions/files easily. Besides, it also allows you to convert MBR to GPT, partition hard drives, perform Iomega hard drive recovery, recover data from hard drives with bad sectors, stop checking file system on C, etc.
MiniTool Partition Wizard DemoClick to Download100%Clean & Safe
Method 1: Check the USB Cable and Port
A simple way to get rid of the BSOD caused by USB tethering is to check the USB cable and port. First, check if there are any damages on the USB cable or port. If not, connect the USB cable to other devices to see if it works fine.
As for USB ports, simply connect the USB drive to other available USB ports on the computer to verify them. If you find that USB 3.0 ports are not working, please refer to this guide to fix them.
Method 2: Run the Network Adapter Troubleshooter
Step 1: Press the Windows and I keys to open the Settings app.
Step 2: If you run Windows 11, click System > Troubleshoot > Other troubleshooters.
Step 3: Tap on the Run button that is close to Network adapters.
Step 4: Follow the on-screen instructions to finish the troubleshooting process.
Method 3: Perform a SFC Scan
Try performing a SFC scan when USB tethering causes blue screen on Windows 11/10.
Step 1: Run Command Prompt as administrator. To do that, open the Run dialog window, and then type cmd and press Ctrl + Shift + Enter keys at the same time.
Step 2: In the pop-up Command Prompt window, type sfc /scannow and hit Enter.
Step 3: Wait for the finish of the process.
Step 4: After the process ends, restart the computer to check if the BSOD caused by USB tethering is solved.
Method 4: Reinstall the USB Tethering Device Driver
Before starting the process, type andexecute the command “sc.exe config netsetupsvc start=disabled” in the Command Prompt to stop the netsetupsvc service.
Step 1: Right-click on the Windows icon and then click Device Manager.
Step 2: In the Device Manager window, find and expand Network adapters.
Step 3: Right-click on the USB tethering driver and choose Uninstall device.
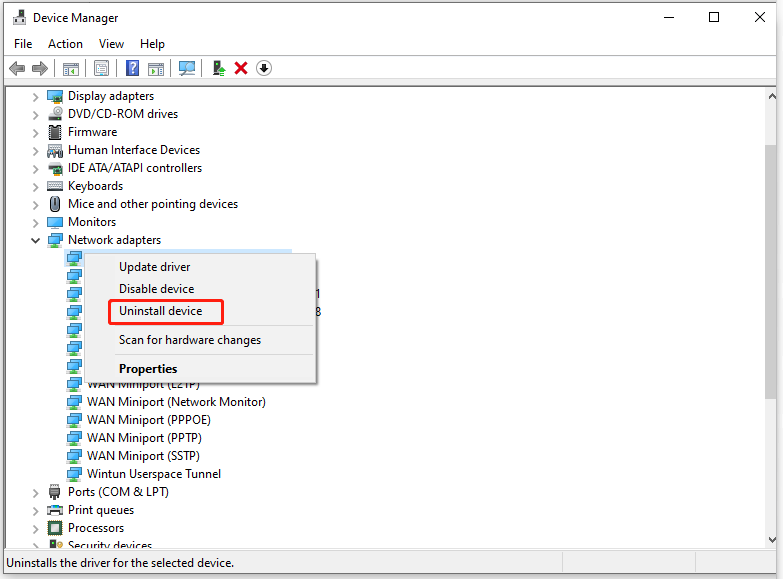
Step 4: In the pop-up window, click Uninstall to confirm the operation.
Step 5: After the uninstallation process ends, disconnect and reconnect the device. Then the driver should be installed by automatic.
You need to make changes to the Registry after reinstalling the driver. Here’s the full tutorial.
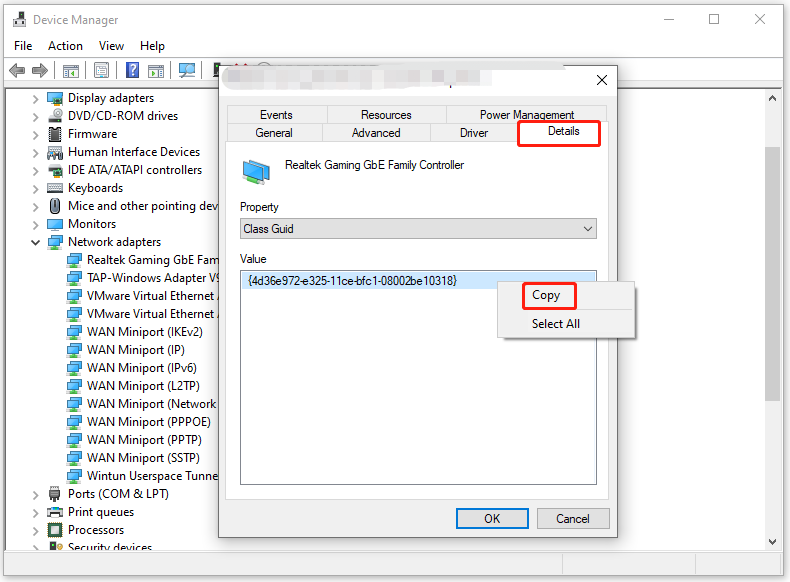
- Open Device Manager and expand Network adapters.
- Right-click the USB tethering driver and choose Properties.
- Navigate to the Details tab and select Class GUID from the Property drop-down menu.
- Then right-click the string and click Copy.
5. Open Registry Editor and follow the path below to access the destination. The <Class-GUID> is the value you copied.
HKEY_LOCAL_MACHINE\SYSTEM\CurrentControlSet\Control\Class\<Class-GUID>
6. Right-click the blank space in the left panel and choose New > DWORD (32-bit) Value. Repeat this operation to create values below.
DWORD values: value data
- IfType: 6
- MediaType: 0
- PhysicalMediaType: 0xe
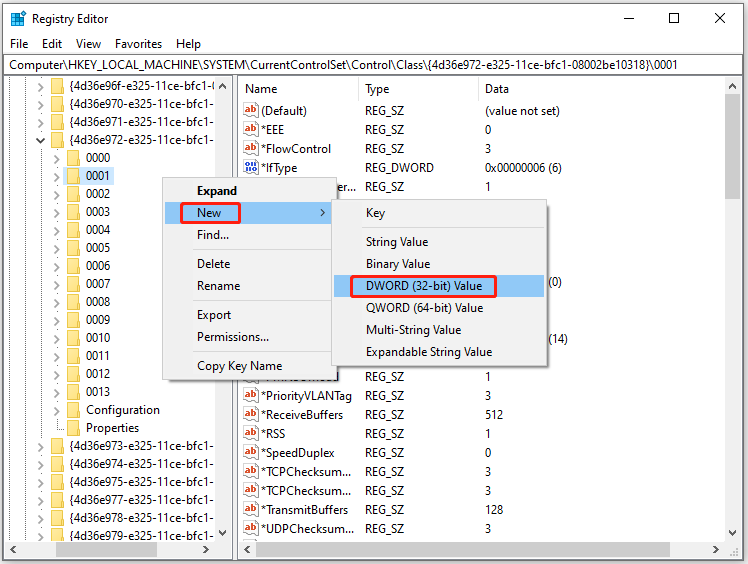
7. Now, run the command “sc.exe config netsetupsvc start=demand” to enable the closed service.
Also read: Fix USB Tethering Not Working Issue with 7 Different Methods
User Comments :