You may encounter USB 3.0 not working issue after reinstalling or upgrading Windows. This issue is not rare. If you look through computer-related forums, you can often see the problems like “my USB 3.0 ports are not working”. So, how to fix it? Look here, 3 fixes will be talked about.
Fix 1: Ensure That Internal Cables Are Connected
Once you encounter the USB 3.0 ports not working Windows 10 issue, you should check if internal cables are connected to your USB 3.0 ports correctly. Only if you are attempting to utilize the front USB ports of your PC, these cables matter you a lot.
However, if you encounter issues with USB 3.0 ports on the back of your computer or on a laptop, you can ignore this advice.
To check if the internal cables are connected, you need to turn off your computer and open the PC case to access the motherboard. Generally speaking, you can see the “USB 3” text at the bottom of the motherboard. If the cables are not connected correctly, you can connect them manually.
You may have interest in this: 6 Methods for Troubleshooting PCI Express Root Port Error
Fix 2: Install the Newest Drivers
When the 3.0 USB ports not working issue occurs, you can consider installing the newest drivers. Before doing that, you need to know what drivers your computer demands. You can get the information in device manager by following the steps below.
Step 1: Right click the Windows key, and then choose Device Manager from the pop-up menu.
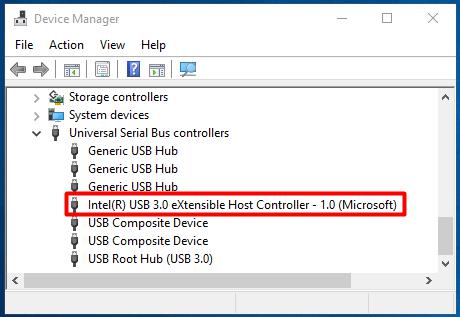
Step 2: Find and double click Universal Serial Bus controllers to expand it.
Step 3: Now, you can see your USB 3.0 or 3.1 driver name.
Step 4: After getting the driver name, you can search it in Google. It will guide you to an Intel website with the download address for your Windows.
However, if there’s no available link for your operating system, it is likely that the manufacturer doesn’t provide driver downloads. If so, you can update the driver from device manager.
Step 1: Repeat the Step 1 and Step 2 in above to expand the Universal Serial BUS controllers.
Step 2: Then, right click the USB 3.0 driver and click on Properties to go on.
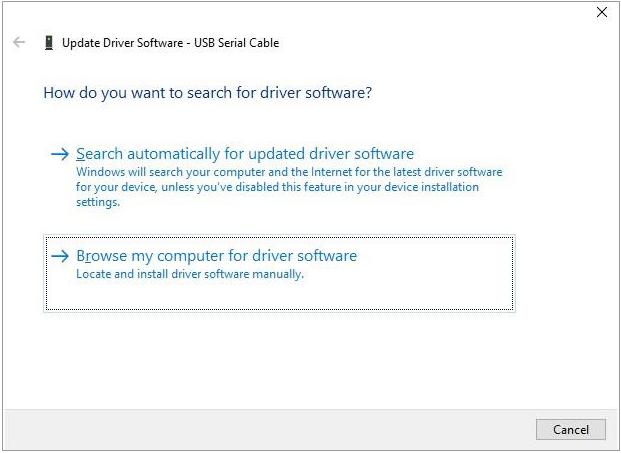
Step 3: Navigate to the Driver tab, and then click on Update Driver.
Step 4: In the pop-up window, click on Search automatically for updated driver software. After that, follow the on-screen instruction to complete the operation.
![The Guide to Test and Improve USB 3.0 Speed [With Pictures]](https://images.minitool.com/partitionwizard.com/images/uploads/2020/01/usb-3-0-speed-thumbnail.jpg)
Fix 3: Install the Latest BIOS
Software issues related to USB 3.0 ports or any other ports on the motherboard result from motherboard in many cases. If so, install or update your BIOS to the latest version can fix the problem.
Before that, you need to know your motherboard name at first. Then, you can find the newest BIOS on the Internet. Download and install it according to the on-screen instruction.
To get the detailed steps for checking and updating BIOS, you can refer to this guide.
User Comments :