
On Windows 10/11, you may need to clone hard drive to SSD to improve performance or expand storage. This article introduces methods: using the built-in Backup and Restore (Windows 7) feature, and using the MiniTool Partition Wizard for quick cloning.
Why You Clone Hard Drive to SSD
Why clone HDD to SSD in Windows? Here are some common reasons:
- Speed up Windows: SSDs generally provide much faster read/write performance than traditional HDDs, which can reduce boot and application loading times.
- Avoid reinstalling Windows and keep installed programs and settings: Cloning transfers your existing Windows installation, applications, and personal files to the SSD, so you can keep your current system and usage environment.
- Upgrade to a larger SSD: Cloning can help migrate your existing system to a higher-capacity SSD without setting up everything from scratch.
- Created a backup: Cloning a hard drive is equivalent to creating a backup, helping to prevent data loss in case of hard drive failure.

Can You Clone a Hard Drive to an SSD?
Yes. You can clone a hard drive (HDD) to an SSD and transfer Windows, installed programs, files, partitions, and other data without reinstalling Windows.
The specific requirements and steps depend on the program you use to clone the disk. In this article, I will introduce two tools to you—MiniTool Partition Wizard as well as Backup and Restore (Windows 7).
| Features | MiniTool Partition Wizard | Backup and Restore (Windows 7) |
| Pros | 1. Can clone the entire disk or Windows system only. 2. Can clone to a smaller SSD as long as the SSD is larger than the used space in the HDD. 3. Can resize partitions, align partitions, and convert MBR to GPT during the cloning. 4. Support cloning data disks for free. | As a built-in Windows tool, it is free to use and requires no download. |
| Cons | 1. Cloning the system drive or migrating the system is a paid service. 2. As third-party software, it requires downloading. | 1. Can only copy the C drive and the boot partition (EFI or system reserved partition). Other partitions won’t be cloned. 2. Can only clone a disk to a larger one. 3. Requires a large external hard drive. |
| Requirements | 1. Prepare a suitable SSD. 2. Prepare a SATA-to-USB or NVMe-to-USB adapter if you are using a laptop that has only one drive slot. | 1. Prepare an SSD larger than the source disk. 2. Prepare an external hard drive larger than the source disk. |
| Cloning Steps | 1. Connect the SSD to the computer. For a laptop, using the adapter to connect the SSD. 2. Clone the disk. 3. Install the SSD. | 1. Connect the external drive to the computer and create a recovery drive. 2. Create a separate partition on the external drive and back up the system. 3. Install the SSD and restore the system to it. |
How to Clone a Hard Drive to SSD with MiniTool Partition Wizard
Do you want to clone HDD to SSD Windows 10/11 easily? Do you want to clone larger HDD to smaller SSD? If so, you try MiniTool Partition Wizard, a professional disk and partition management tool.
This software not only can help you clone the hard drive but also help you partition hard drives, format FAT32 on USB drives or SD cards, convert MBR to GPT without data loss, recover hard drive data, etc.
How to clone a hard drive to SSD using MiniTool Partition Wizard? Here is the guide.
Step 1: Connect both the HDD and the SSD to your computer.
Step 2: Install MiniTool Partition Wizard and launch it on the computer. Right-click the HDD and then select Copy from the menu.
MiniTool Partition Wizard DemoClick to Download100%Clean & Safe

Step 3: On the pop-up window, select the SSD as the target disk and then click Next. Click OK when it asks you whether you are sure to continue. Note that all data on the target disk will be destroyed.

Step 4: Change the disk layout here and click Next. In general, the Fit partitions to entire disk option and the Align partitions to 1 MB option are selected by default. The former option will extend or shrink the partitions on the HDD by an equal proportion to fill the SSD. The latter option will apply 4K alignment on the SSD.

Step 5: Read the NOTE information and then click Finish. Then, click the Apply button to execute the pending operation.

Step 6: If you clone laptop HDD to SSD, you need to install the SSD into the computer in this step. If you are using a desktop PC, you may need to change the boot device to the SSD in this step. Then, the computer should boot from the SSD.
Here is a video guide:
How to Clone a Hard Drive to SSD with Backup and Restore (Windows 7)
Do you want to copy hard drive to SSD with Windows built-in tools? If so, you can try this method. To use this method, you should prepare the following items:
- Prepare an SSD. It must be larger than the HDD.
- Prepare an external hard drive. It also must be larger than the HDD.
If you have prepared all the things, you can follow the guide to let Windows clone drive to SSD. You can even follow this guide to clone laptop HDD to SSD.
Step 1: Connect the external hard drive to your computer via the USB port.
Step 2: Press the Windows logo key + S to open the Windows Search bar. Type “recovery drive” and click the corresponding app from the result list to open it. Uncheck the Back up system files to the recovery drive option and click Next.

Step 3: The external drive will be detected. Select it and click Next. You are warned that everything on the external drive will be deleted. If it’s OK, click the Create button to start creating the recovery drive. Once the recovery drive is ready, click Finish.

Step 4: Press the Windows logo key + X and then select Disk Management from the menu. Right-click on the unallocated space on the external hard drive and select New Simple Volume. Then, follow the wizard to create an NTFS partition.

Step 5: Open the Control Panel. In the System and Security field, select Backup and Restore (Windows 7). On the left panel, select Create a system image.

Step 6: On the pop-up window, in the On a hard disk field, select the partition on the external drive that you created just now to save the system image. Then, click Next. This image will back up your system, programs, and personal files.

Step 7: The system lists the drives that will be backed up and the required disk space. Please select Start backup to start to create a system image. If it asks you whether to create a system repair disc, select No. After the system image creation is completed, select Close.

Step 8: Remove the old HDD from the computer and install the SSD into the computer. Boot the PC from the external hard drive (shut down your computer, power on it again, and press the boot menu key immediately to change the boot device to the external hard drive).
Step 9: After the computer boots up, you will enter the Windows Recovery Environment. Select your language and keyboard layout. Then, go to Troubleshoot > Advanced options and select System Image Recovery.

Step 10: Choose a target operating system. Then, the system will automatically search for the latest available system image. If you want to choose it manually, click Select a system image. Make sure the selected image is the one saved on the external hard drive.

Step 11: Choose additional restore options. In this step, you need to format and repartition the existing disk (the SSD). Then, click Next. Then, check the restored system image information again. If it’s OK, click Finish.

Step 12: The system will remind you that all data on the drives to be restored will be replaced with the data in the system image, select Yes to start the restore process. Once your system has been successfully restored, you can restart to boot into Windows.
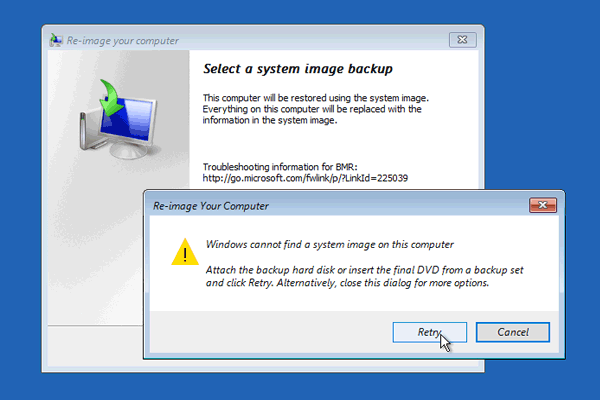
What to Do If the Hard Drive Cloning Fails?
The hard drive cloning will take a long time. The bigger the HDD, the longer the cloning time. Therefore, it will be very annoying if the hard drive cloning fails.
In general, if the Backup and Restore method fails, I recommend you try third-party cloning software like MiniTool Partition Wizard. But if the MiniTool Partition Wizard fails, the reason must be the bad sectors.
In this case, you can open the Command Prompt window with administrator privilege, and then use the chkdsk drive_letter:/f /r command to shield bad sectors on the HDD. Then, use MiniTool Partition Wizard to clone hard drive to SSD again.
Clone Hard Drive to SSD FAQ
2. Extra storage: Used to store large files, videos, etc.
3. Data transfer: Use it as a temporary hard drive to transfer data between devices.
4. Reusing it in other devices: Install it in another computer as an expansion drive.
Bottom Line
This post tells you how to clone HDD to SSD in 2 ways. The first one is the best. If you encounter problems when cloning a hard drive to an SSD via MiniTool Partition Wizard, contact us via [email protected]. We will get back to you as soon as possible.
About The Author

Position: Columnist
Linda has been an editor at MiniTool for seven years. She continuously learns about computers and puts her knowledge into practice. Moreover, she is particularly knowledgeable in disk management, data recovery, system installation, and PDF editing. Her articles typically reference multiple examples or are based on her own experience, providing users with the most suitable solutions.
User Comments :