If you are planning to upgrade the hard drive for your computer, you can choose between an HDD (hard disk drive) or an SSD (solid state drive). Although SSDs were once more expensive than HDDs, the price of SSDs has dropped significantly in the past few years.
More importantly, the read and write speed of SSDs is much higher than that of HDDs. SSDs may only take 10 seconds to boot up Windows.
If you are planning to upgrade your computer to an SSD, you must make sure that the SSD type is suitable for your device. How much do you know about the SSD form factors on the market? If you know nothing about the different types of SSDs, don’t worry. You can continue reading this article to get some useful information.
Also read: SSD VS HDD: What’s Difference? Which One Should You Use in PC?
The Introduction of SSD
SSD is an alternative to HDD, also known as a semiconductor storage device, solid-state device, or solid-state disk. SSD uses integrated circuit components (usually flash memory) to store data persistently. Compared with HDD, SSD lacks physical rotating disks and movable read and write heads, so it is more resistant to physical shock and operates silently.
When choosing a solid-state drive (SSD) for your computer, you may pay great attention to aspects such as capacity, performance, lifespan, and price. In fact, you also need to consider whether the SSD sizes are compatible with your device.
If you want to know more about different types of SSDs, please continue reading.
Common SSD Form Factors
In the computer industry, the term “form factor” is often used to describe the physical specifications (especially the shape and size) of computer components such as drives, motherboards, power supplies, etc.
When it comes to hard drive size, the first thing that comes to your mind may be the physical size of the SSD. But in fact, the specifications of the SSD are also determined by the connector interface. SSDs with different connectors may have the same size, and SSDs of different sizes may also have the same connector interface.
Of course, there are now SSDs that are directly soldered to the motherboard, and their form factors are only defined by physical size because they do not have any interface.
To help you choose the right SSD size, I will introduce some SSD types classified by size. Let’s take a look at them one by one.
5 Common SSD Form Factors
- 2.5-inch SATA
- M.2 SSD
- mSATA SSD
- U.2 SSD
- Add-in card (AIC)
2.5-inch SATA
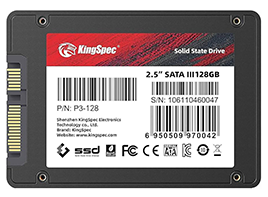
A 2.5-inch SSD is a solid-state drive that uses a SATA interface. It is called “2.5-inch” because it is approximately 100mm x 70mm in size and is generally 7mm or 9.5mm thick.
It is the most common type of SSD and is suitable for most laptops or desktop computers. It is similar in shape to a traditional hard disk drive (HDD) and connects via a SATA cable. It is designed to work in the drive bays of most PCs and provides an easy way to upgrade older systems and increase storage performance.
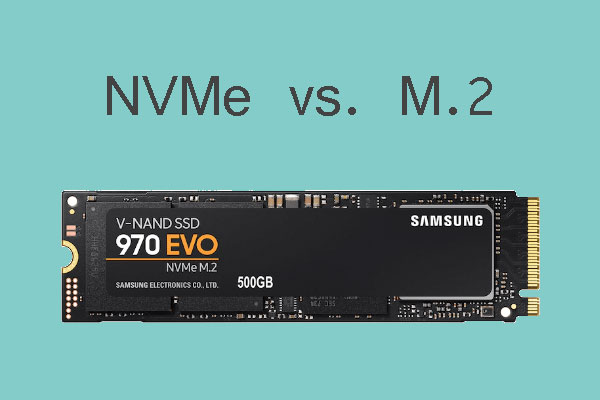
M.2 SSD
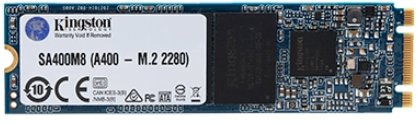
M.2 SSD is a new type of solid-state drive, which refers to an SSD with an M.2 interface. It is much smaller than ordinary SSDs, about the size of a stick of gum. It can be installed directly on the motherboard through the M.2 slot, without cables and drive bays.
Most M.2 SSDs are 22 mm wide and 80 mm long, marked as M.2 Type 2280.
Common lengths include:
- 30 mm (2230)
- 42 mm (2242)
- 60 mm (2260)
- 80 mm (2280)
- 110 mm (22110)
The M.2 interface is divided into two types: B-key and M-key. B-Key is gradually being replaced by B+M Key. B+M Key SSD can be inserted into B-Key and M-Key slots, while M-Key SSD can only be inserted into M-Key slots.
mSATA SSD
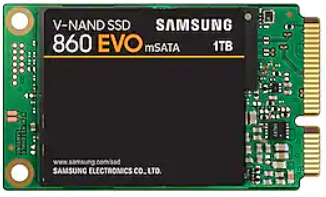
mSATA stands for mini-SATA and uses the mSATA interface, which is a scaled-down version of the SATA protocol. This type of SSD is compact in design and is only one-eighth the size of a 2.5-inch SSD.
M.2 drives support SATA and PCIe interface options, while mSATA only supports SATA. This form factor is designed for small systems with limited space.
mSATA SSDs are often used in ultra-thin and mini devices with limited space, or as a secondary storage drive for desktop computers to improve computer performance.
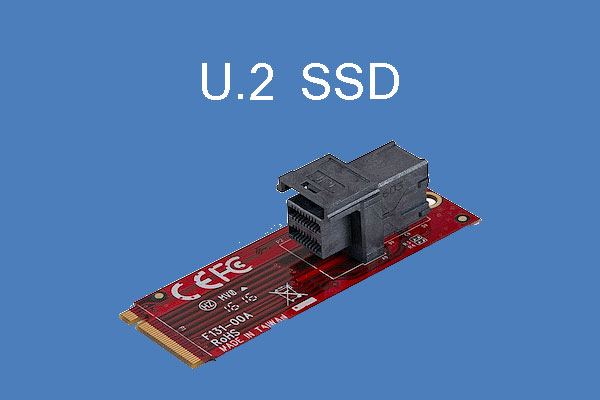
U.2 SSD
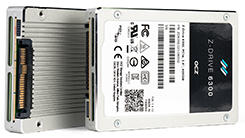
U.2 is another form factor standard to specify the shape, dimensions, and layouts of a physical device. U.2 SSDs are commonly associated with 2.5-inch SSDs, as they look like 2.5-inch SATA SSDs. But actually, U.2 SSDs are thicker than 2.5-inch SSDs.
By contrast, SSDs with the U.2 form factor are commonly more expensive and have higher capacity than M.2 drives.
Add-in card (AIC)

An Add-In Card (AIC) is an expansion device installed through a PCIe slot on a motherboard. It is shaped like a graphics card or sound card and is used to increase the functionality or performance of a computer.
It is a dedicated storage device designed to be installed in a computer’s PCIe slot. Add-In Card SSDs offer superior performance and are suitable for demanding applications such as gaming, data analysis, and content creation. They are usually found on desktop computers.
Clone Data Before Replacing Your Disk with a New SSD
After you have selected an SSD with sufficient capacity, you may want to use it to replace your original hard drive. Before doing so, it is recommended that you migrate your data to the new SSD so that you can boot from the new hard drive without reinstalling the operating system.
To do this, you can use MiniTool Partition Wizard, a powerful disk manager that allows you to easily recover data from hard drive, format USB to FAT32, and convert MBR to GPT.
MiniTool Partition Wizard DemoClick to Download100%Clean & Safe
To migrate data to a new SSD using this utility, you can follow these steps:
Step 1: Attach the new SSD to your laptop or install it internally before starting the system migration.
Step 2: Open MiniTool Partition Wizard.
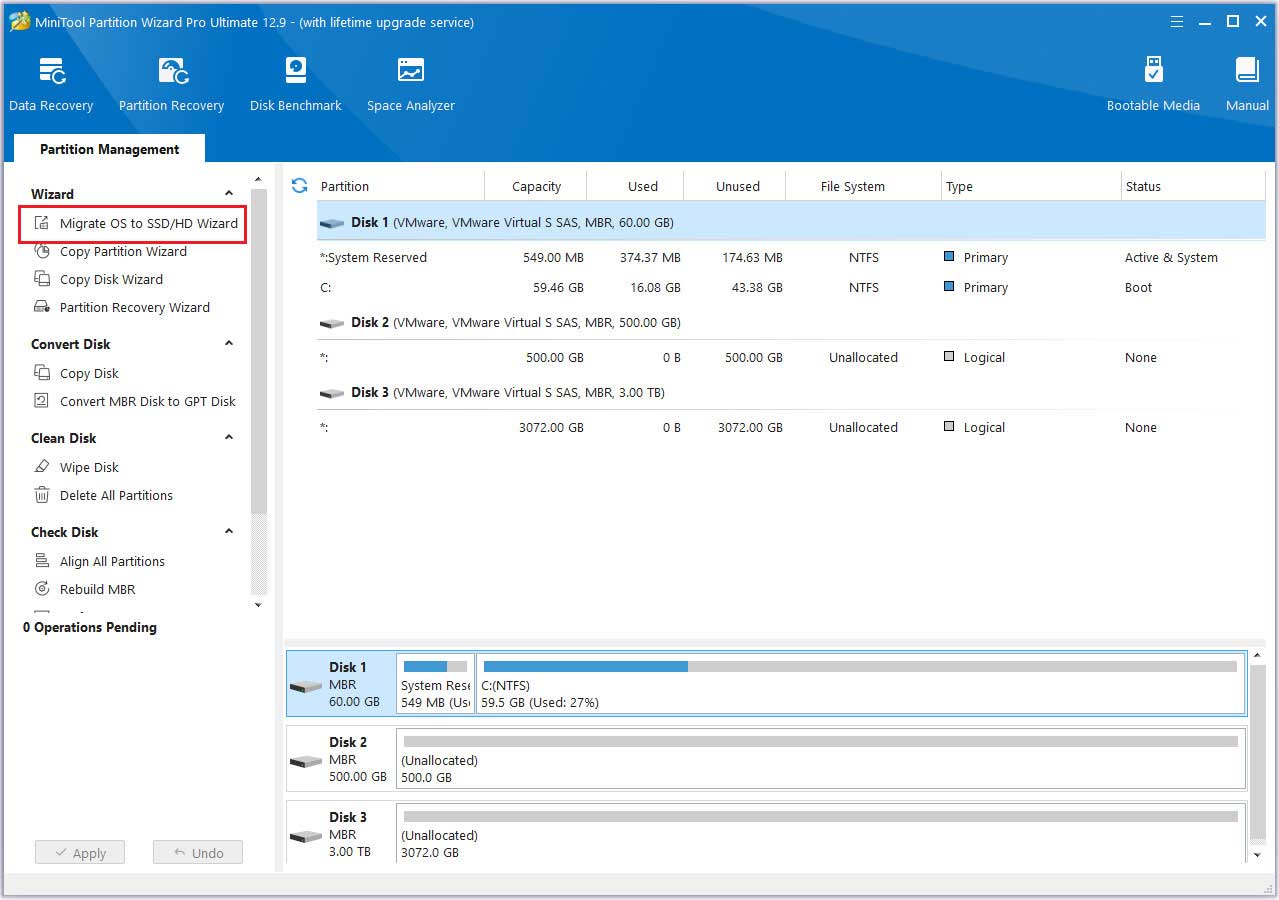
Step 3: Select the Migrate OS to SSD/HD Wizard option from the left panel of the software interface.
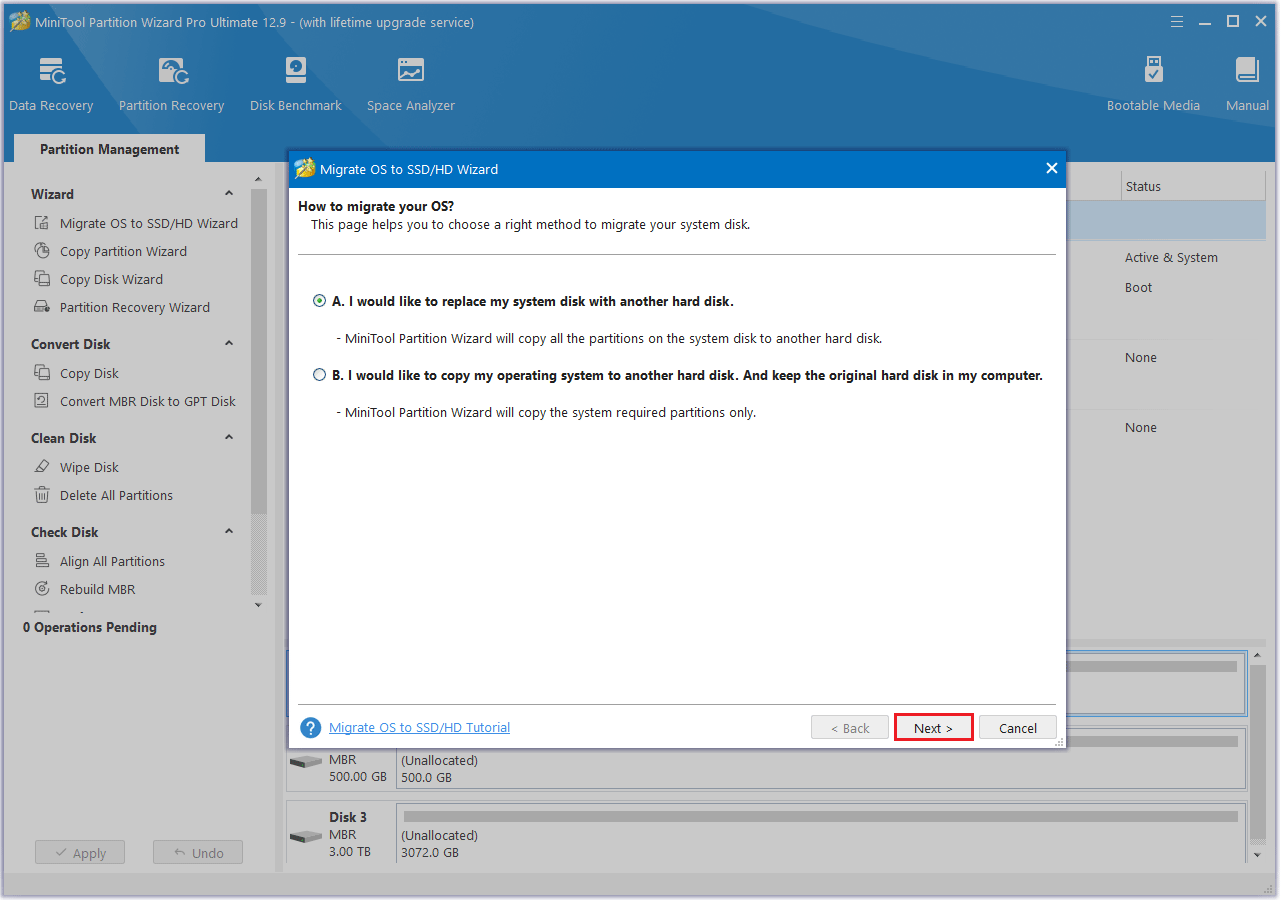
Step 4: Choose the method to migrate your OS to the SSD.
Step 5: Choose the SSD as the target disk and then click the Next button.
Step 6: Choose a copy option and then click the Next button.
- Fit partitions to entire disk: The partitions on the source disk will be extended by an equal proportion to fill the entire new SSD.
- Copy partitions without resizing: All the partitions on the source disk are copied into the new SSD without changes in size or location.
- Align partitions to 1 MB: The Align partitions to 1 MB option will apply 4K alignment on the SSD.
- Use GUID partition table for the target disk: The Use GUID partition table for the target disk option will apply GPT on the SSD, but it only appears when the source disk is an MBR disk.
- Change Selected Partition: You can resize or move the partition according to your needs.
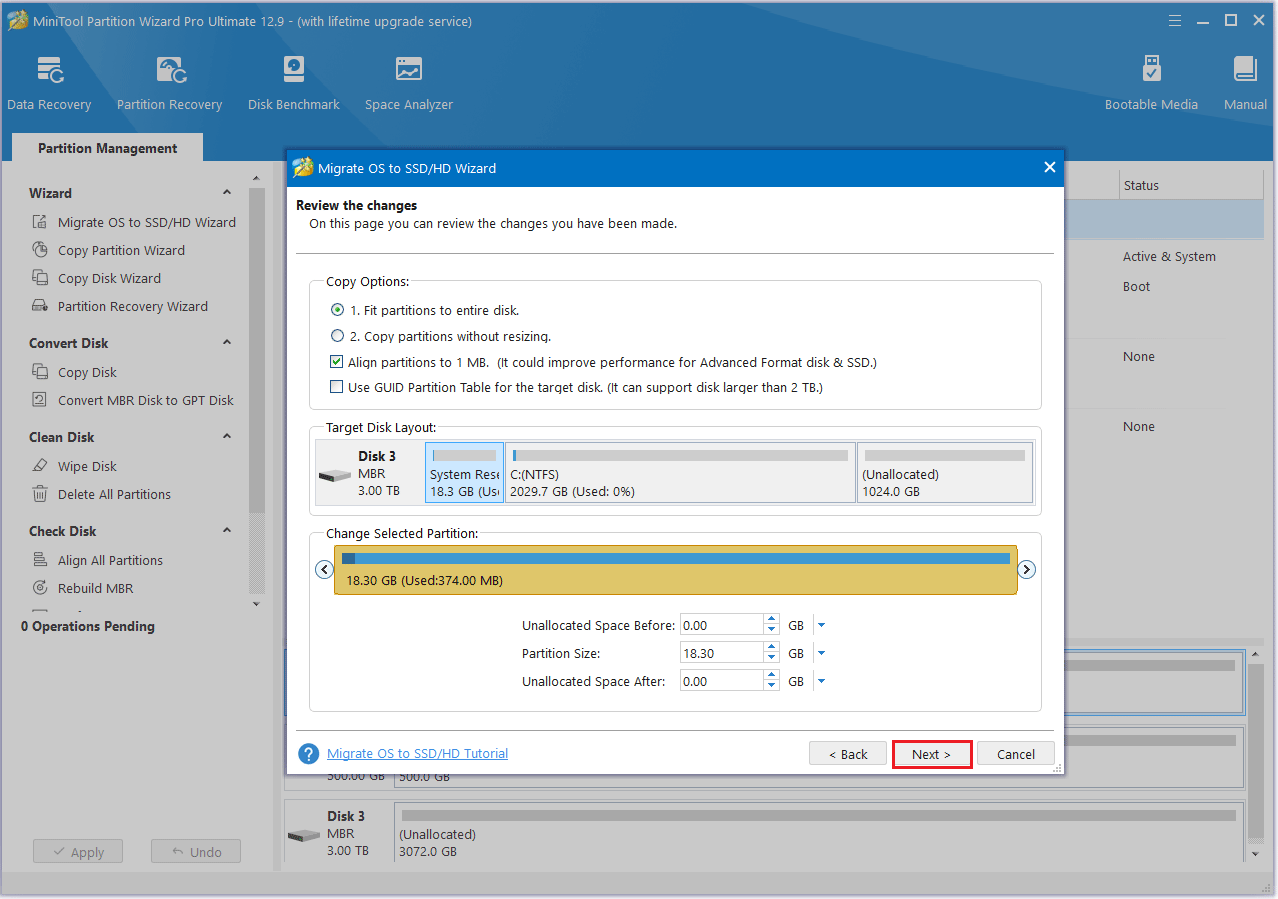
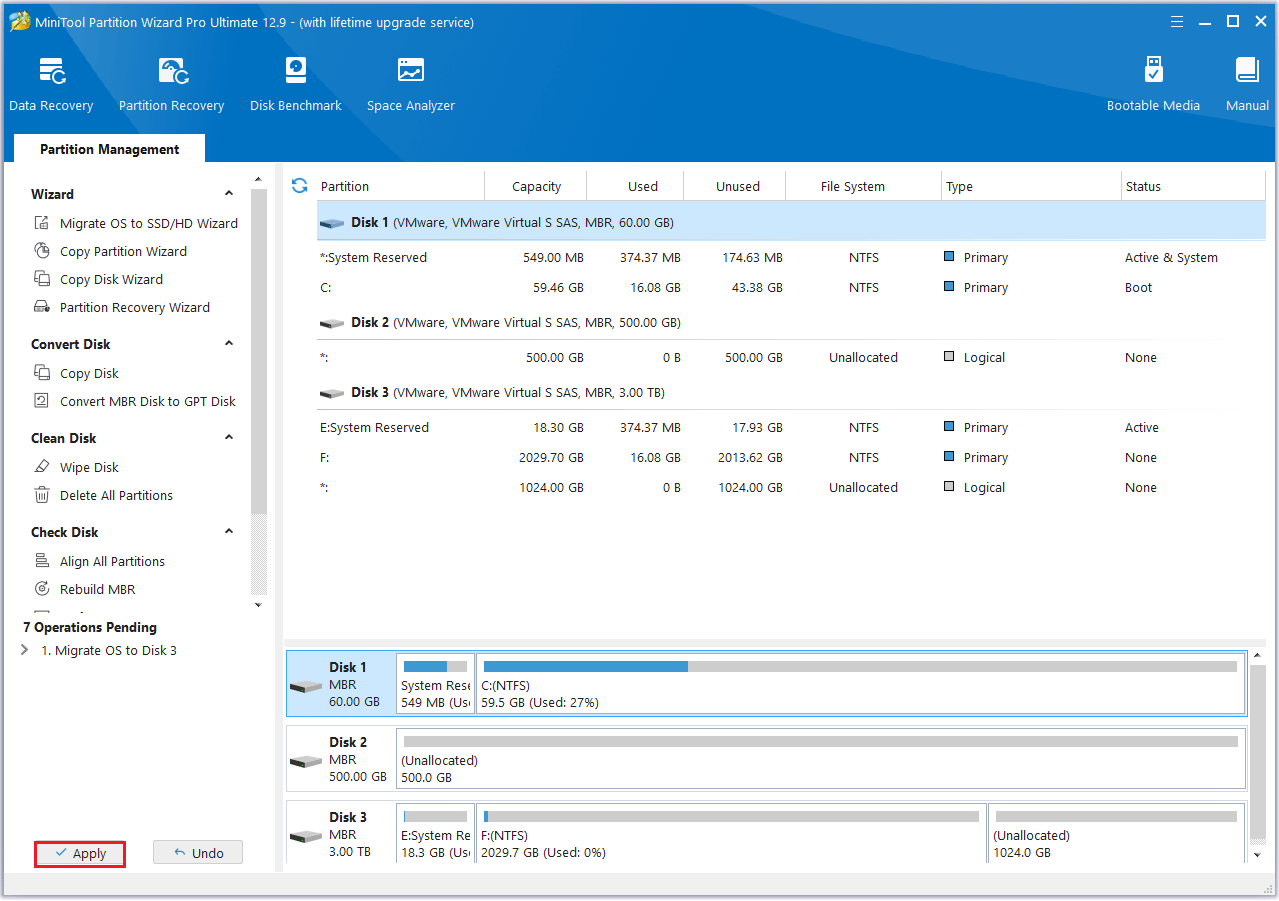
Step 7: Review the pop-up message, then click the Finish button.
Step 8: Preview the change and click the Apply button on the interface to execute the pending task.
How to Manage Your SSD for Laptop
How to easily manage the new SSD you bought for your computer? In addition to migrating old data to the new disk, you can also extend/delete the partitions on the new SSD and wipe the data on the old SSD.
Below, I will show you how to extend partitions, delete partitions, format the new SSD, and wipe the old SSD.
MiniTool Partition Wizard FreeClick to Download100%Clean & Safe
The first step after getting a new SSD is to initialize it so it’s ready for use. Refer to this article if you need help initializing a new disk: How to Initialize SSD in Windows 10/8/7? Here is the Full Guide.
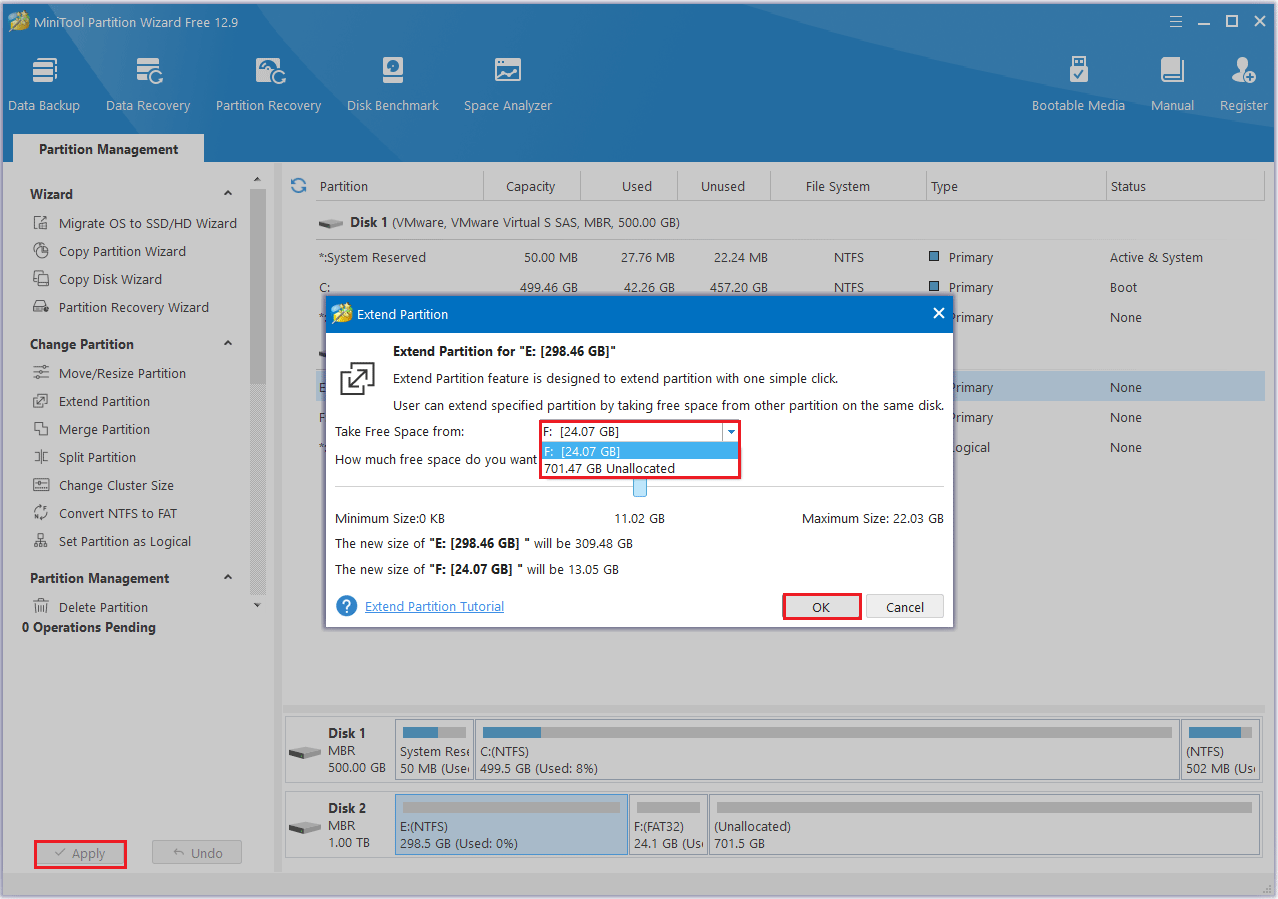
#1. Extend Partition
Step 1: Launch MiniTool Partition Wizard to its main interface. Then right-click the partition to be extended and select Extend.
Step 2: Click the down arrow from “Take Free Space From” and select the partition to get expansion space. Then move the arrow to select the space you want to expand. Finally, click OK to return to the main interface.
Step 3: Click the Apply button to perform all changes.
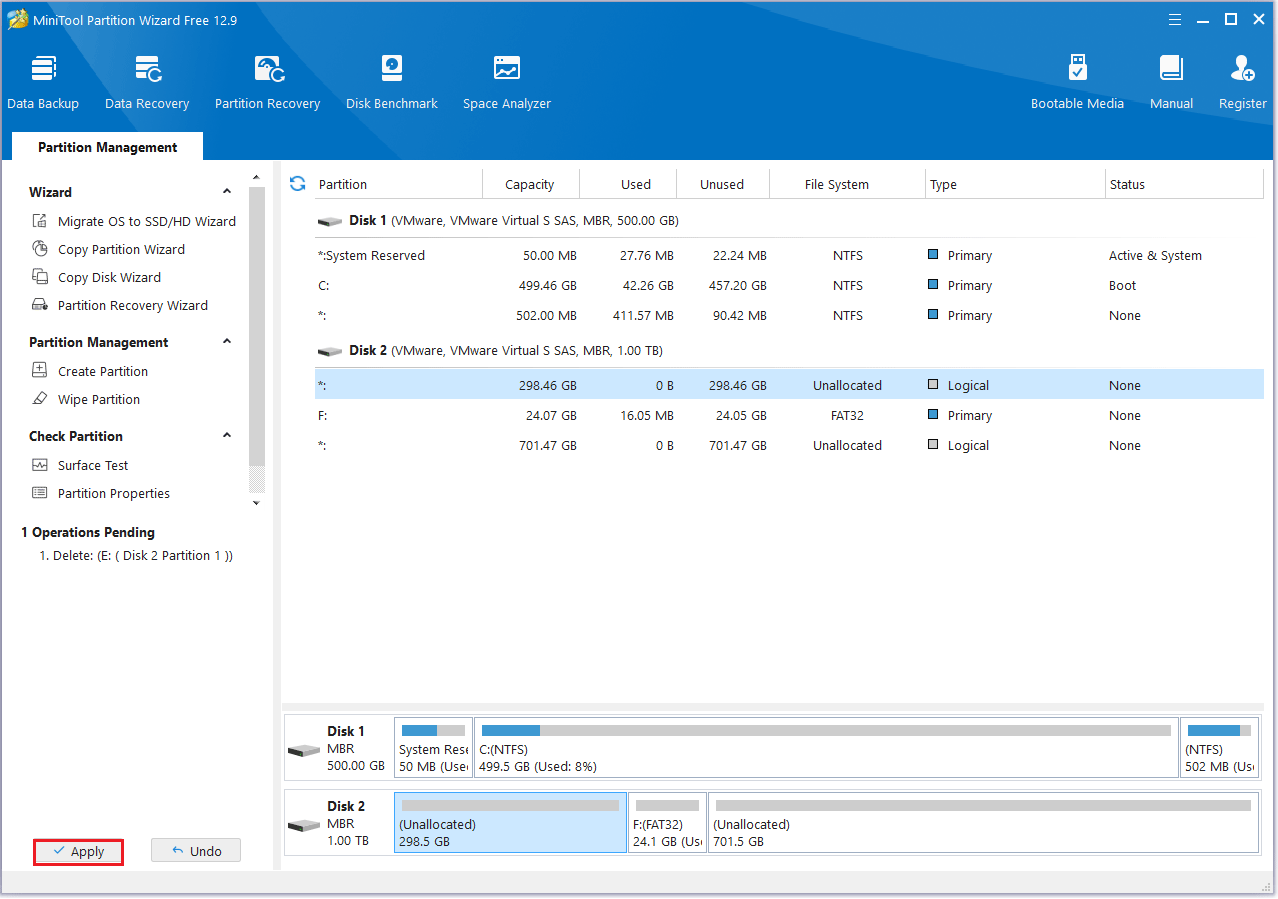
#2. Delete Partition
Step 1: Launch MiniTool Partition Wizard first. Right-click the unwanted partition to select Delete.
Step 2: You will see that the original partition becomes unallocated space.
Step 3: Click the Apply button to perform all changes.
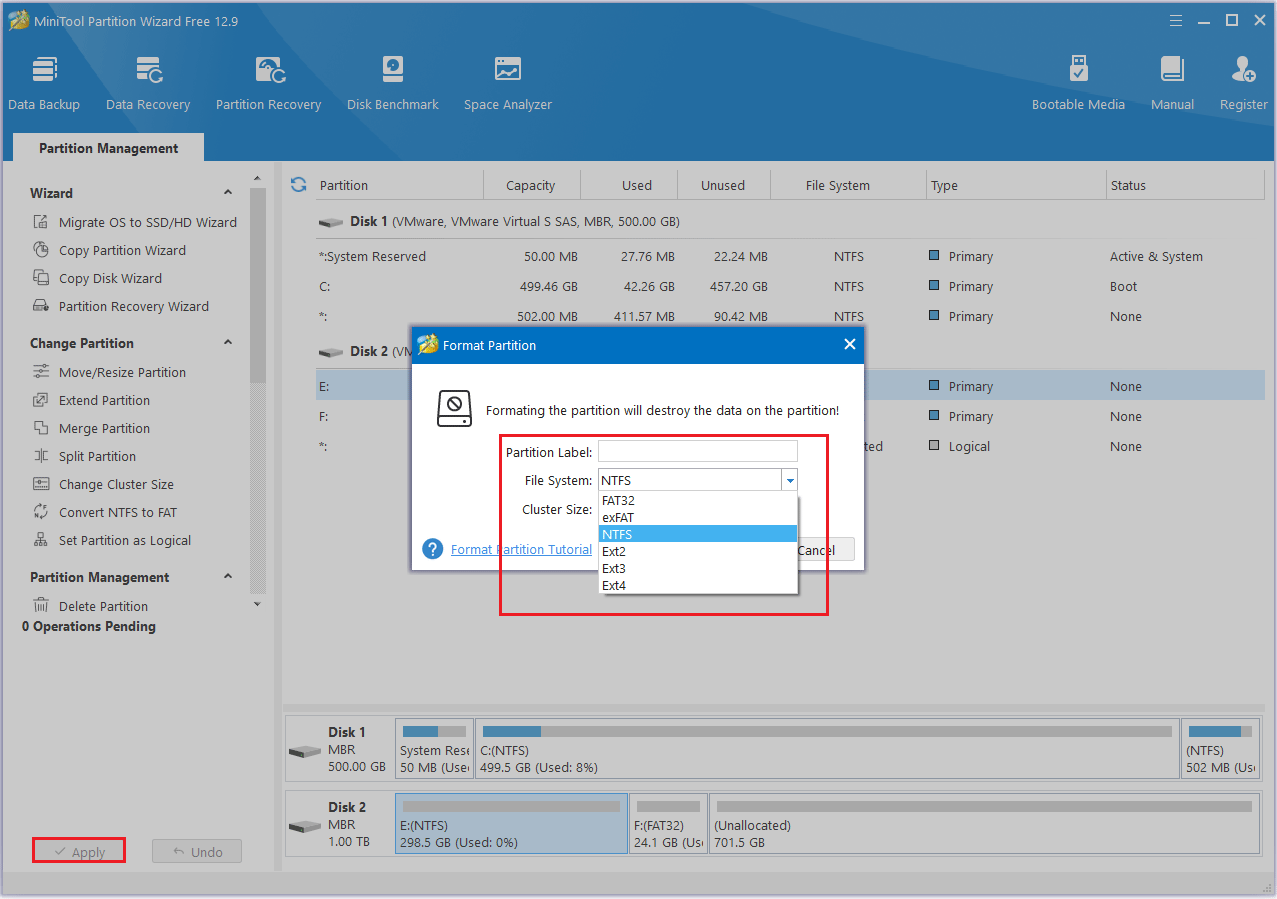
#3. Format Partition
Step 1: Launch MiniTool Partition Wizard first. Right-click the partition to select Format.
Step 2: Choose the File System that you need and click OK.
Step 3: Click the Apply > Yes to perform all changes.
#4. Wipe Disk
The old SSD you replaced still contains your previous data, which could pose an issue if you plan to sell or give it away. So, what’s the solution? You can use MiniTool Partition Wizard to securely erase the data. Follow these detailed steps:
Step 1: Right-click on the disk you wish to wipe and choose Wipe Disk, or select the target disk and click Wipe Disk from the left action panel.
Step 2: A pop-up window will appear as shown below. Select a method to wipe, then click the OK button to move on to the next step.
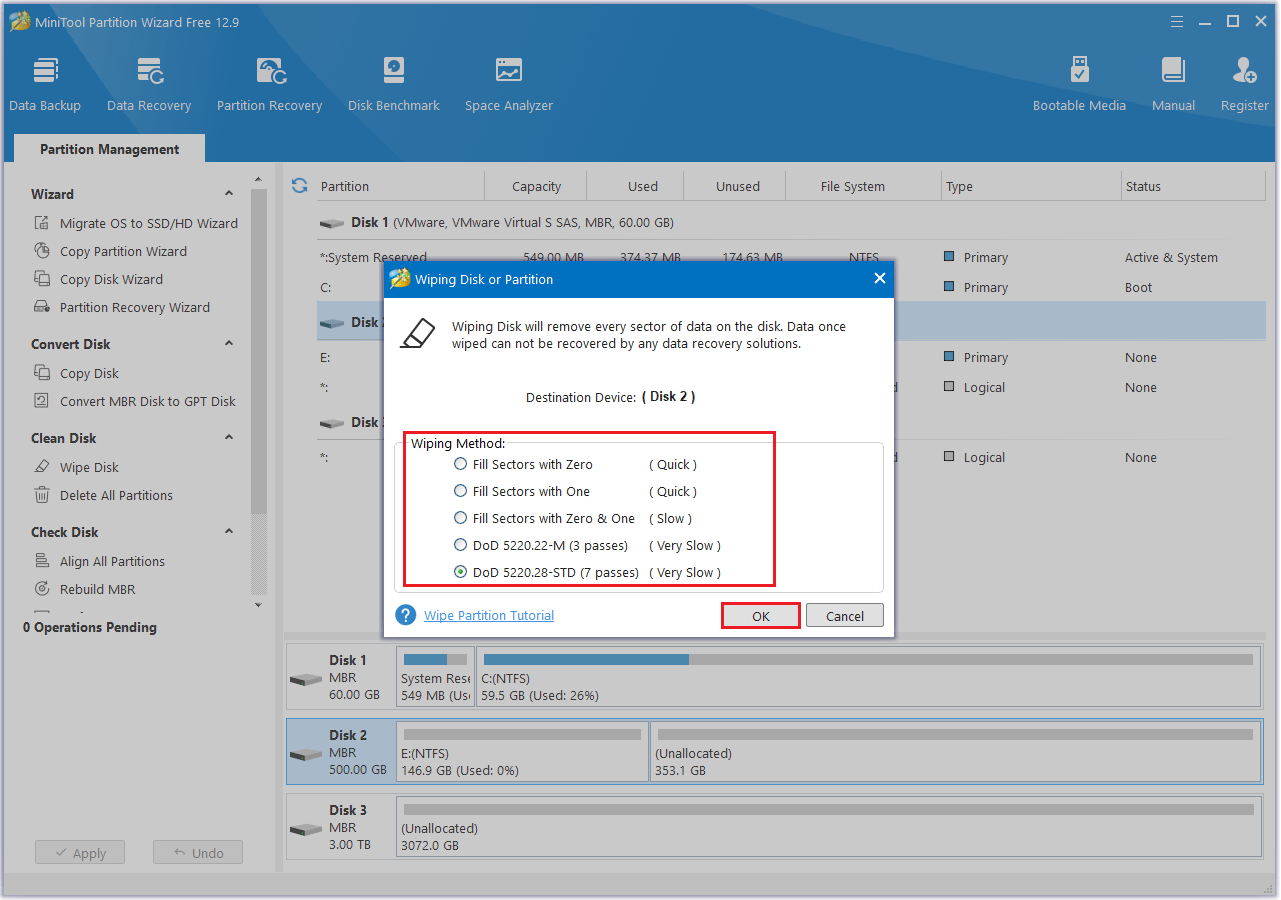
Step 3: After the process is complete, you will be returned to the main interface. The target disk is labeled as “Unallocated”. To apply the changes, you must click the Apply button.
Bottom Line
This article ends here. I hope you can learn about different types of SSDs after reading this article. In addition, you will also know how to use MiniTool Partition Wizard to manage your SSD. If you have any questions or suggestions while using MiniTool Partition Wizard, you can contact us via [email protected] to get a quick reply.
About The Author

Position: Columnist
Cecilia has been an editor at MiniTool for two years. She primarily focuses on disk and partition-related content, with particular expertise in disk cloning, partition recovery, and PDF document conversion. She is dedicated to providing users with clear and accurate solutions to help them efficiently resolve common computer problems.
User Comments :