A lot of users complain that they can’t install Windows 11 on SSD. This issue is indeed confusing if you are eager to experience Windows 11 on an SSD. Fortunately, you can solve this Windows 11 installation issue with the methods offered by MiniTool Partition Wizard in this post.
Whether upgrading from Windows 10 to Windows 11 or upgrading from an HDD to an SSD, installing Windows 11 onto an SSD via USB is a good option.
However, some users can’t install Windows 11 on an SSD, even if their computer meets the Windows 11 installation requirements. There are five main situations.
Case 1. Windows 11 Installer Is Unable to Detect the SSD
Symptom: When you need to select the Windows 11 installation location, the SSD does not appear.
Possible Causes:
- The computer has multiple hard drives, causing disk recognition confusion.
- Intel Rapid Storage Technology driver issue.
- The SSD is not recognized by the BIOS (causes and solutions will be explained carefully in Case 2).
Solutions:
- Disconnect the other hard drives, leaving only the SSD where you will install Windows 11.
- Install the Intel Rapid Storage Technology driver.
To install the Intel Rapid Storage Technology driver, follow the guide below.
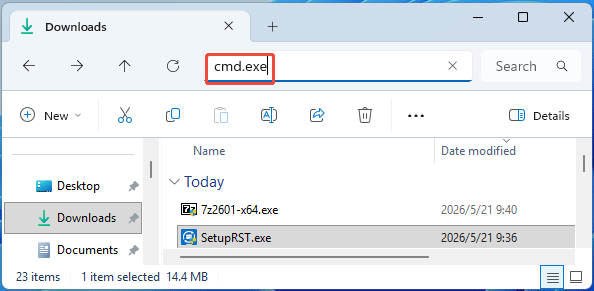
Step 1: Download Intel Rapid Storage Technology driver (SetupRST.exe) from Microsoft (or, you can go to your motherboard or laptop manufacturer’s support page to download the Intel RST or F6 VMD driver).
Step 2: In File Explorer, go to the location of the SetupRST.exe. Now, in the address bar, type “cmd.exe” and press Enter.
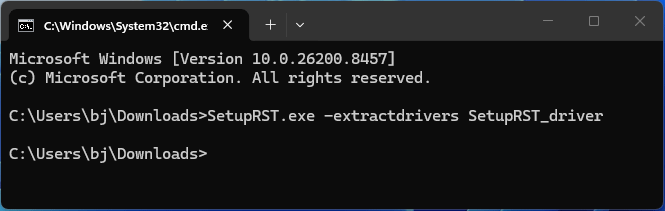
Step 3: Once Command Prompt opens, type “SetupRST.exe -extractdrivers SetupRST_driver” and press Enter. The SetupRST_driver folder will appear in the same folder as the SetupRST.exe.
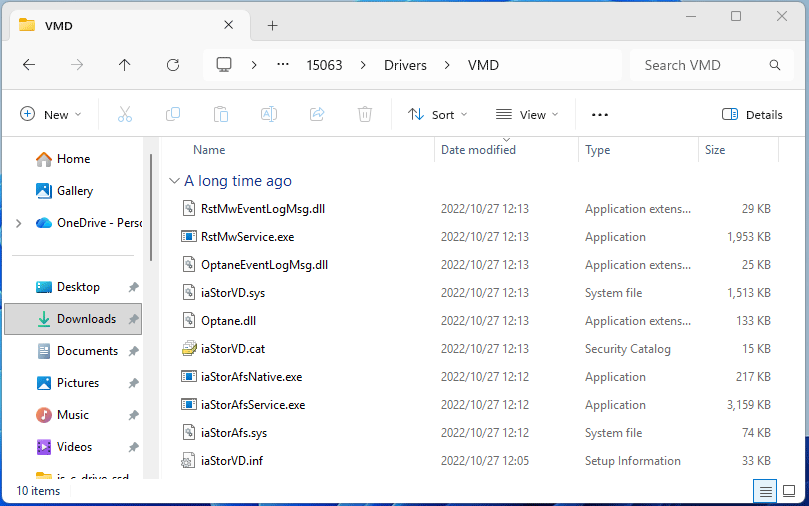
Step 4: Open the SetupRST_driver folder and find the VMD subfolder. Copy this subfolder to the root directory of the Windows 11 installation USB drive.
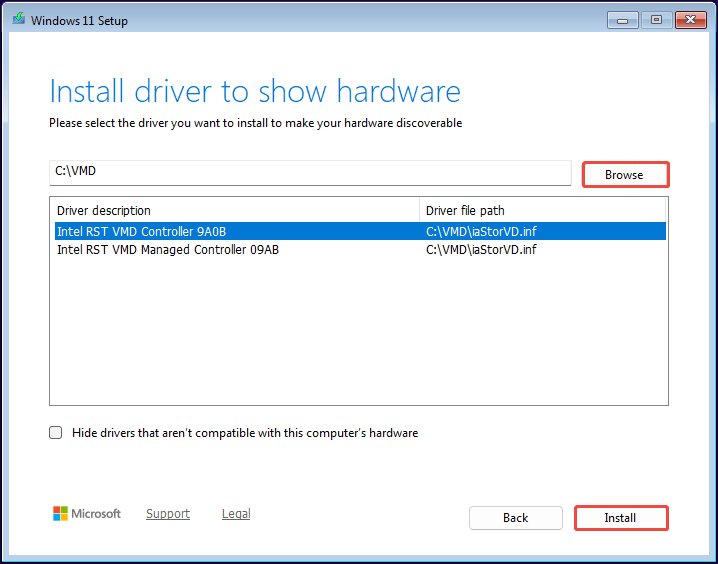
Step 5: Use the Windows 11 installation USB drive to install Windows 11. When it asks you to select a location to install Windows 11, click Load Driver.
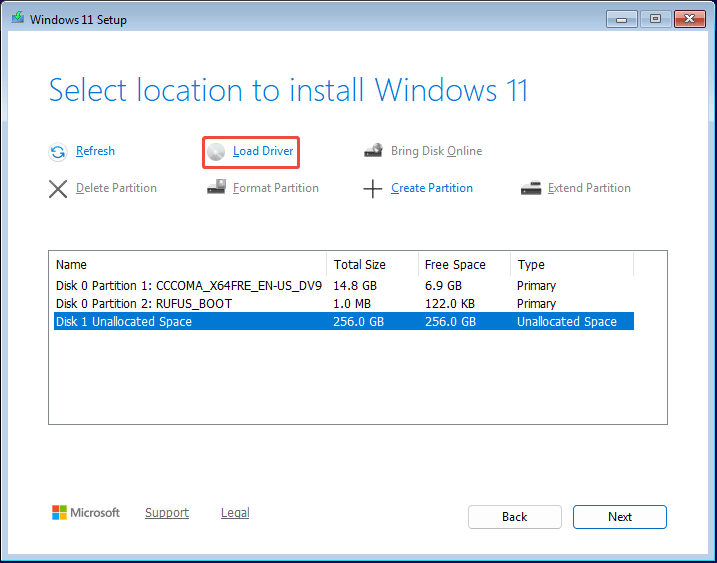
Step 6: Click Browse to select the VMD folder. The RST VMD driver will appear. Select any of the drivers and click Install. After the installation, you can select the SSD to install Windows 11.
Case 2. The SSD Is Not Recognized By BIOS
Possible Causes:
- The SSD is physically damaged or incorrectly connected.
- The SSD port is not turned on.
- Your PC’s boot mode is UEFI only but the SSD is an MBR disk.
- The PCIE support is not enabled.
Solutions:
- Check the SSD and its cables for damage.
- Enable the SSD port in BIOS.
- Turn on the CSM option in BIOS.
- Enable PCIE support in BIOS.
Here is how to modify the BIOS settings mentioned above.
Step 1: Power on your computer and press the BIOS key (usually F2, F10, ESC, Del, etc.) to access the BIOS window.
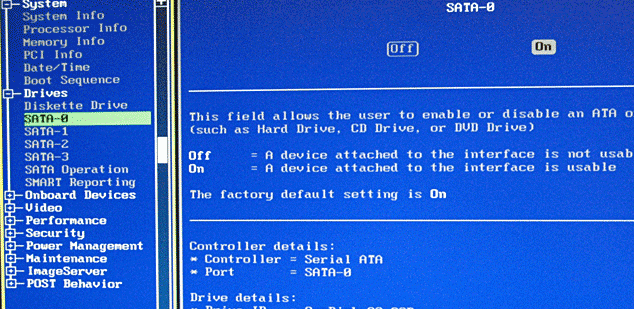
Step 2: Turn on the SSD port. Some motherboards may not have this setting. Taking Dell PCs as an example, go to Drives to make sure all drive ports are turned on.
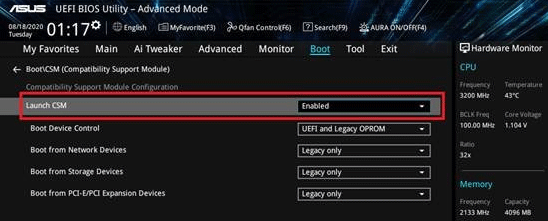
Step 3: Turn on the CSM option. Go to Advanced Mode > Boot tab, and then set Launch CSM to Enabled.
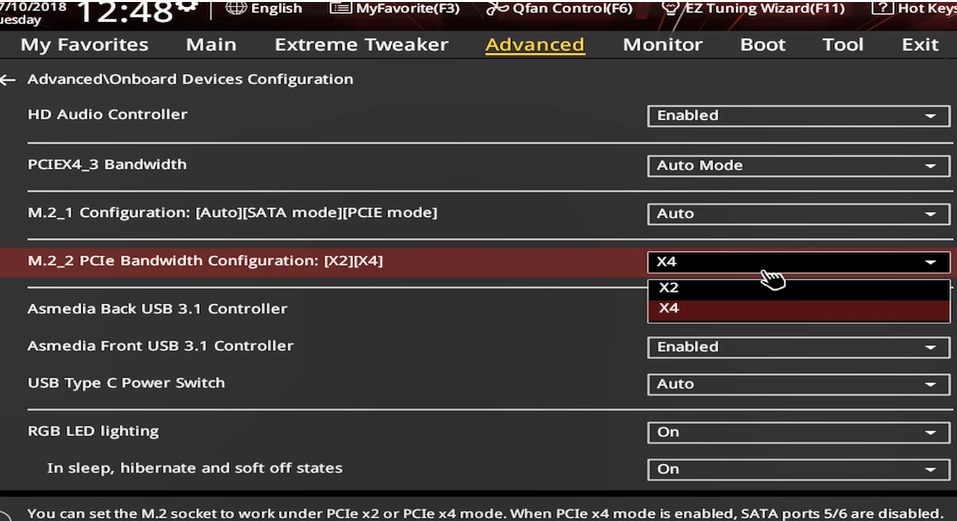
Step 4: Enable PCIE support.
- Go to Advanced Mode and find Onboard Devices Configuration, PCIe Slot Configuration, PCI Subsystem Settings, or similar options.
- Change the PCIE setting from Auto to your target generation (e.g., Gen 3, Gen 4, or Gen 5), or change its lanes to X4.

Case 3. SSD Type and Partition Issues Cause Windows 11 Installation Failure
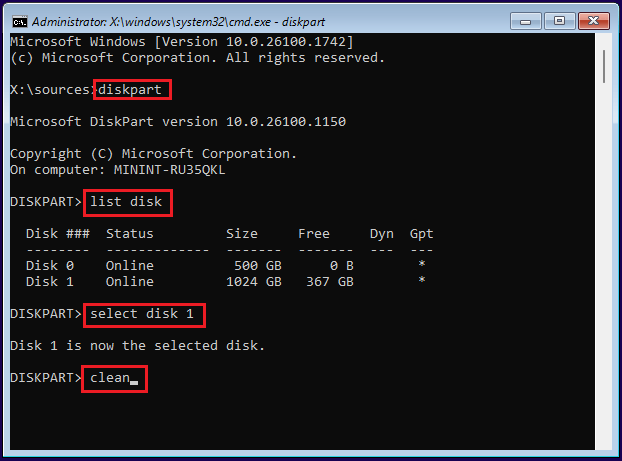
In this case, you can select the SSD to install Windows 11, but you will get various errors. To solve these errors, cleaning the disk is a simple and fast method. Here is the guide:
- During the Windows 11 installation, press Shift + F10 to open Command Prompt.
- Type “diskpart” and press Enter.
- Type “list disk” and press Enter.
- Type “select disk *” and press Enter. * is the disk number of the SSD where Windows is to be installed.
- Type “clean” and press Enter. This command will delete all partitions and the partition table information on the disk.
Here are the detailed errors, their causes, and solutions.
Error 1: Windows cannot be installed to this disk.
Possible Causes:
- The SSD uses the MBR format.
- The SSD is about to fail.
- Other issues with the SSD.
Solutions:
- Clean the disk.
- Check SSD health.
Error 2. Windows cannot be installed to this hard disk space.
Possible Causes: The selected partition has a problem, such as not being in NTFS format, or being an OEM partition, MSR partition, ESP partition, Recovery partition, encrypted partition, or non-system dynamic volume.
Solutions: Cleaning the disk is the easiest method.
Error 3. Windows 11 installation has failed.
Possible Causes:
- You directly choose to install Windows 11 on the original C drive, but the original EFI partition is too small.
- You used Rufus to create the Windows 11 installation USB drive and chose to bypass the Windows 11 requirements.
- The USB drive is damaged.
Solutions:
- Clean the disk.
- Re-create the Windows 11 installation USB drive.
Here is a video guide:
Alternative Method to Get Windows 11 on SSD
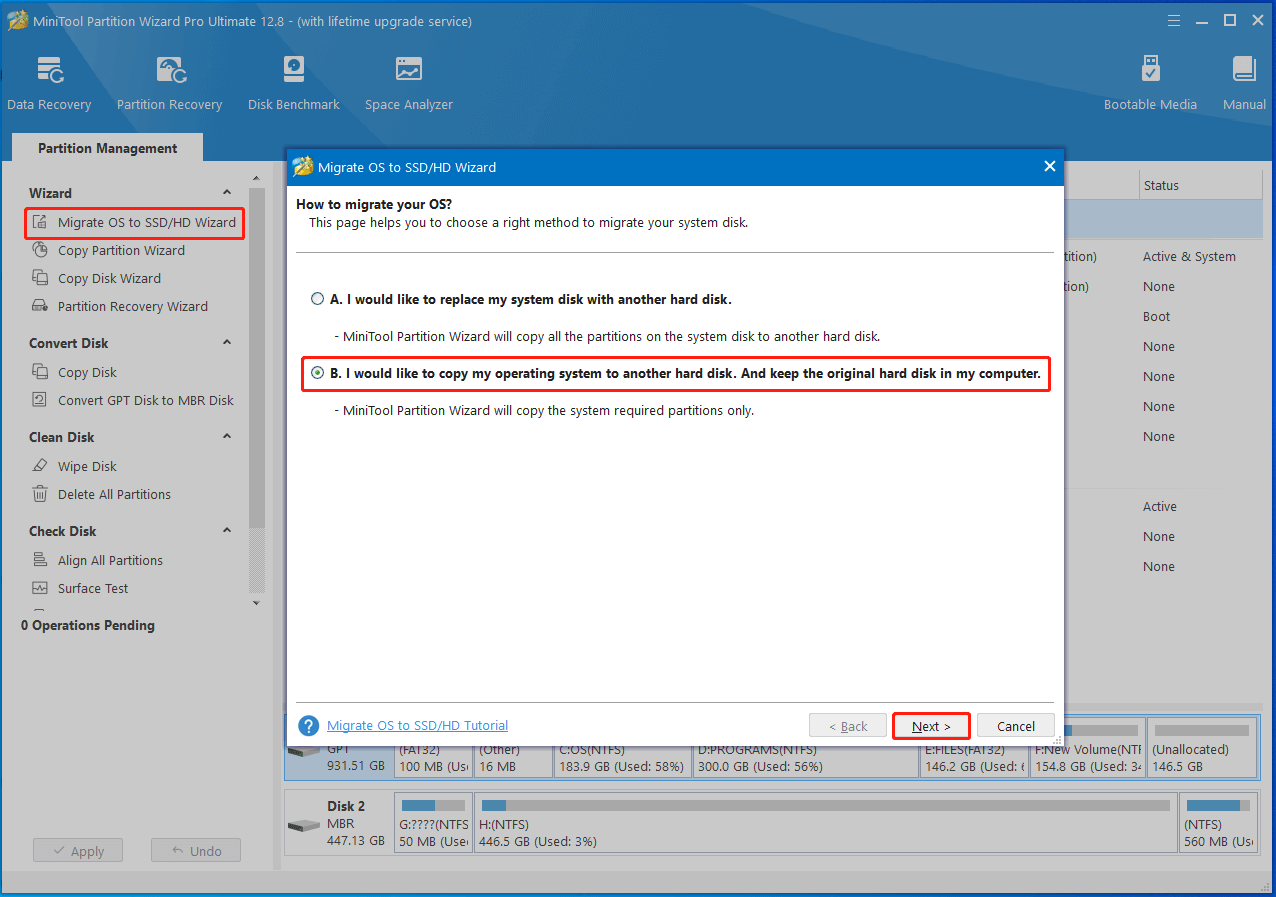
If you can’t install Windows 11 on SSD from scratch, migrating a properly running Windows 11 from another computer is a good choice. Then, MiniTool Partition Wizard can assist you to do that.
MiniTool Partition Wizard DemoClick to Download100%Clean & Safe
Here are the steps.
Step 1: Connect the SSD to your computer.
- If your computer has only one slot, connect the SSD to your PC via a USB-to-SATA/NVMe adapter.
- If your computer has an extra slot, install the SSD into the empty slot.
Step 2: Launch MiniTool Partition Wizard and click Migrate OS to SSD/HD Wizard in the action panel. Then, select a migration method. Option B is recommended.
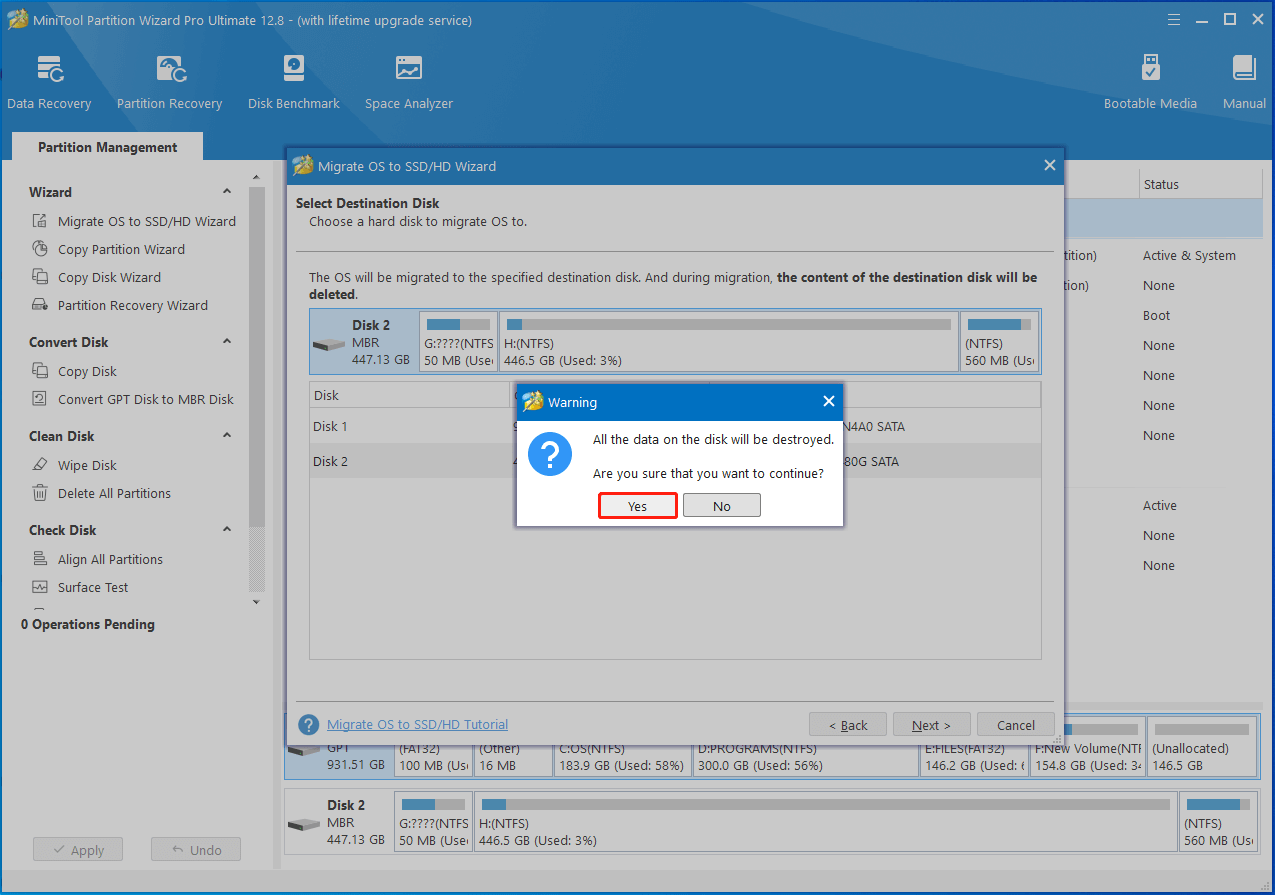
Step 3: Select the connected SSD as the destination disk and click Next. In the elevated warning window, click Yes if you ensure that there’s no important data on the SSD.
Step 4: In the next window, configure copy options based on your demands and click Next.
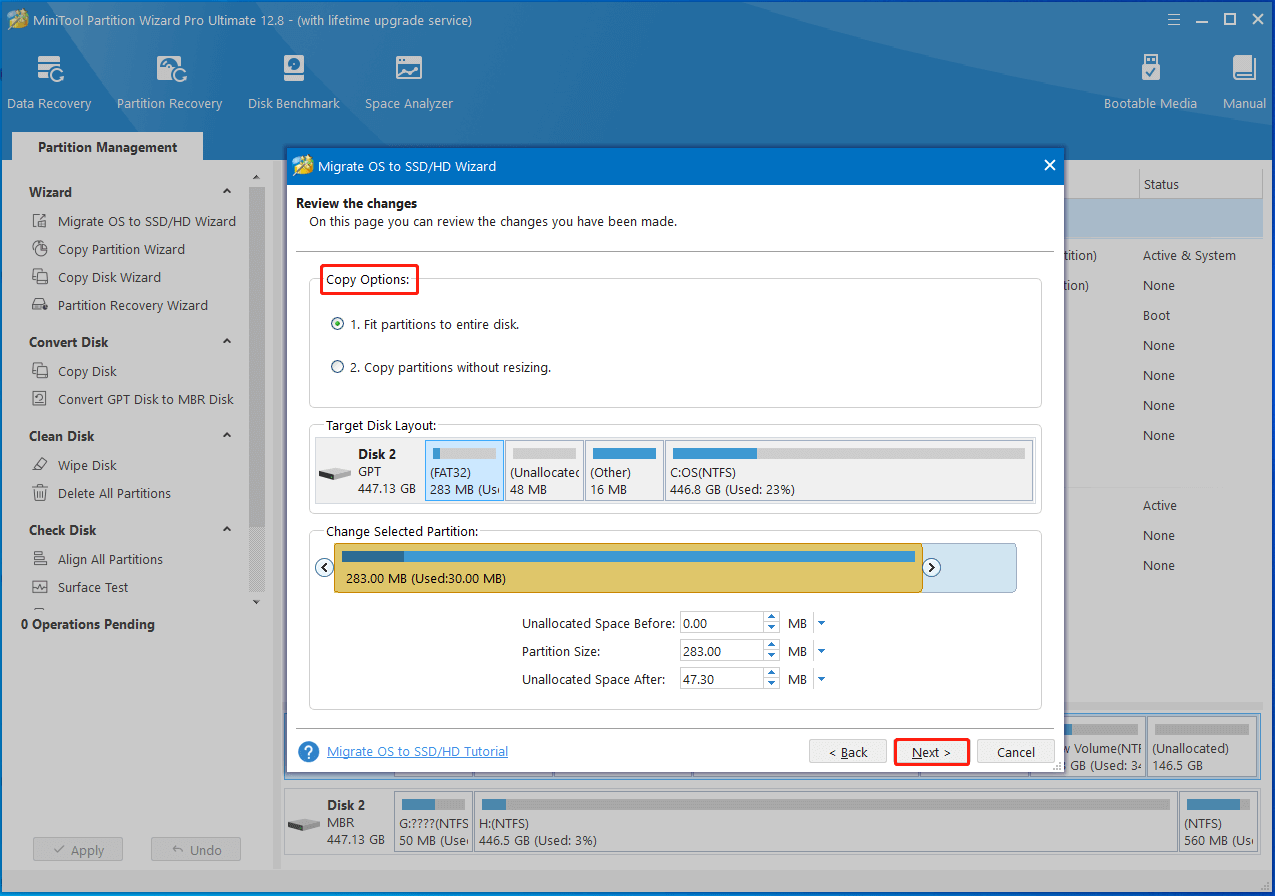
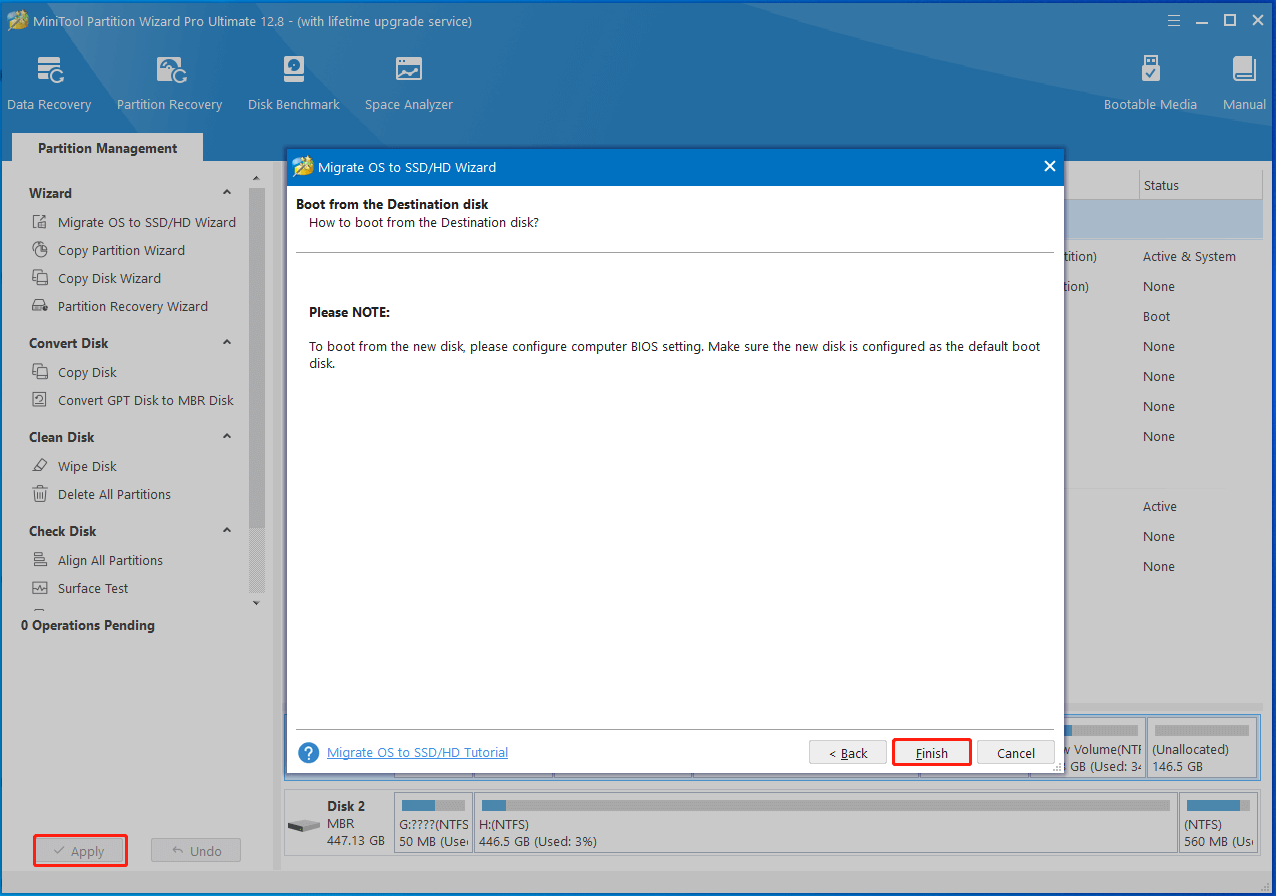
Step 5: Click Finish > Apply to carry out the pending operation.
When can’t install Windows 11 on SSD, try this way to get Windows 11 installed on your SSD. You don’t have to set up the system step by step.
Bottom Line
This post tells what to do if you can’t install Windows 11 on SSD in 3 cases. According to your situation, apply the corresponding method to solve the problem. Certainly, you can also directly migrate Windows 11 from another PC by using MiniTool Partition Wizard.
For any issues related to Windows 11 installation, write them down in the following comment area for sharing and discussion. If you have any doubts about MiniTool Partition Wizard, contact us by sending an email to [email protected]. We will make a reply as soon as possible.
About The Author

Position: Columnist
Linda has been an editor at MiniTool for seven years. She continuously learns about computers and puts her knowledge into practice. Moreover, she is particularly knowledgeable in disk management, data recovery, system installation, and PDF editing. Her articles typically reference multiple examples or are based on her own experience, providing users with the most suitable solutions.
User Comments :