What should you do before setting up RAID? How to setup RAID in Windows 10? If you are still trying to find the answers, this post of MiniTool is what you need. From here, you can get 3 applicable ways to setup RAID 0/1 in Windows 10.
What Is a RAID Setup
RAID, also called Redundant Arrays of Independent Disks, is a type of data storage virtualization technology that combines multiple disks into a logical unit for data redundancy or performance improvement. This disk combination is often used by professionals or enterprises to manage different data in different drives.
There are different standard levels of RAID setups, including RAID 0, RAID 1, RAID 0+1, RAID 3, RAID 4, RAID 5, RAID 6, RAID 7, and RAID 10. Among them, the most frequently asked question is how to setup RAID 0 and RAID 1 in Windows 10. So, here we will start with introducing the definition and prerequisites of RAID 0 and RAID 1.
Overview of RAID 0
RAID 0 is also known as a striped volume that’s composed of two or more hard disks. And the space you take from each disk should be equal. One of the biggest merits of RAID 0 is that it greatly improves the performance and throughput of a hard drive.
However, RAID 0 provides no fault tolerance and parity information redundancy. That means you will lose all the data on the entire array once any disk fails and the whole system will be affected. So, it’s not recommended that you use RAID 0 for any critical system. Well, you need to make sure that each disk you added to the array is not more than the smallest disk size when setting up RAID 0 Windows 10.
Overview of RAID 1
When it comes to RAID 1, we often think of the mirrored volume that is a technique of writing the same data to more than one drive. Each drive on the RAID 1 array contains an identical copy of the data. This configuration owns high data security because it provides fault tolerance and redundancy. That is to say, if an individual drive fails, the second one can continue to work.
When creating a RAID 1 array, you need to make sure the array is as big as the smallest disk. Since the data is mirrored on all disks of the array, this array can still work normally as long as one disk is operational. Of course, you should replace the failed hard disk timely in case the whole operating system crash.
Further reading: Do you want to know more differences between RAID 0 vs RAID 1? This post tells you the answer and helps you make a wise choice.
What You Need to Prepare Before Setting up RAID
Here comes a new question, what do you need to do before setting up RAID 0/1 Windows 10. Both RAID 0 and RAID 1 configurations require at least 2 hard disks, while you’d better use the disks with the same sizes, types, and manufacturers on the RAID 1 setup.
Another important thing you need to do is to make sure you back up all of your data on the hard drives. This is because all the data on the hard disks will be erased during the RAID setup. How to back up hard drives easily and quickly? MiniTool Partition Wizard can achieve that with a few clicks. It’s a powerful partition manager that can migrate OS and even copy the whole disk. Here’s how to use it.
MiniTool Partition Wizard DemoClick to Download100%Clean & Safe
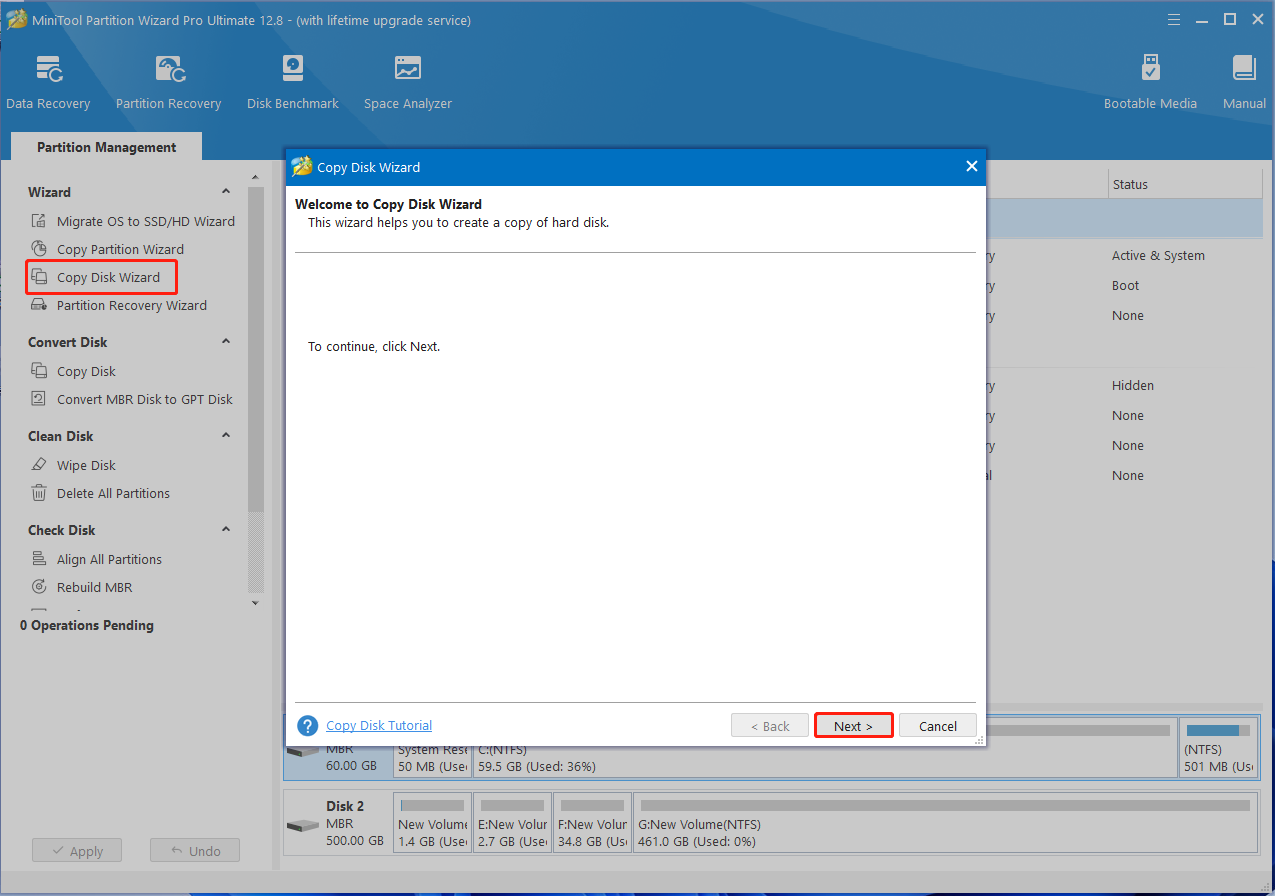
Step 1. In the main interface, click on the Copy Disk Wizard feature at the left pane and click on Next in the pop-up window.
Step 2. Select the hard disk that you want to back up and click on Next.
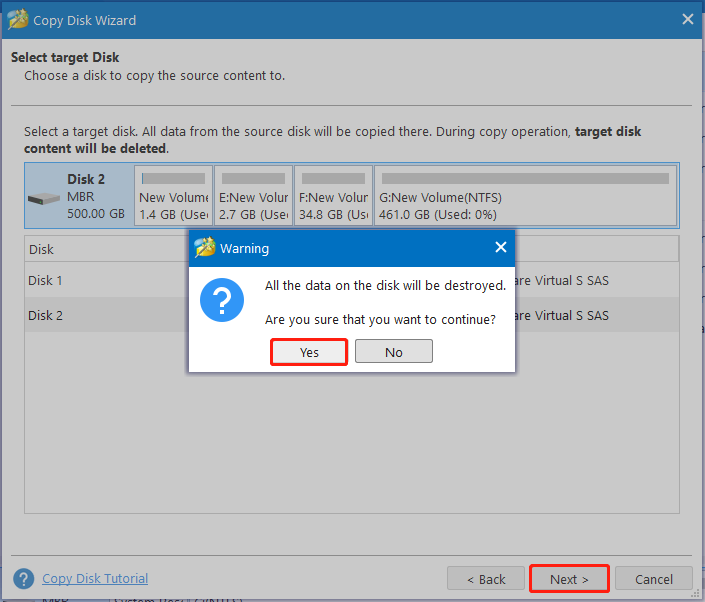
Step 3. Select the target disk that you want to copy disk to and click on Next. If you are prompted to confirm this operation, click on Yes to continue.
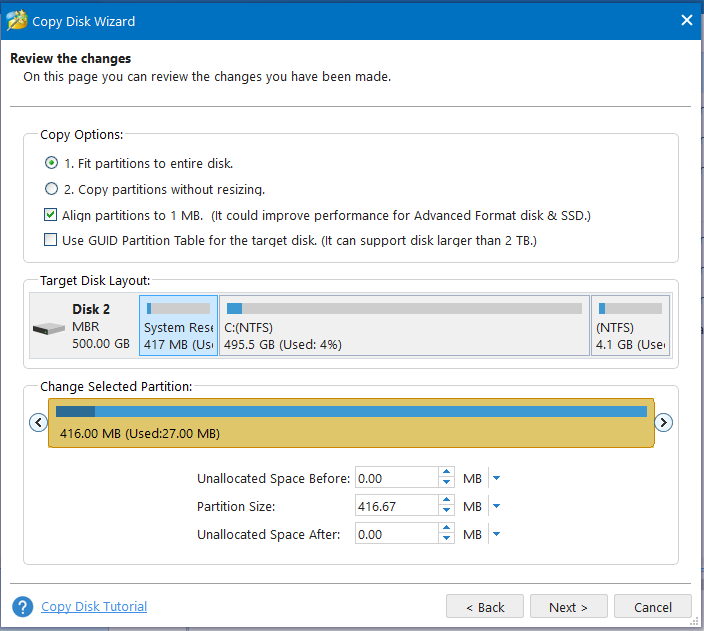
Step 4. Then you can review the changes you have been made. Here you can select the default copy options if you haven’t special demands.
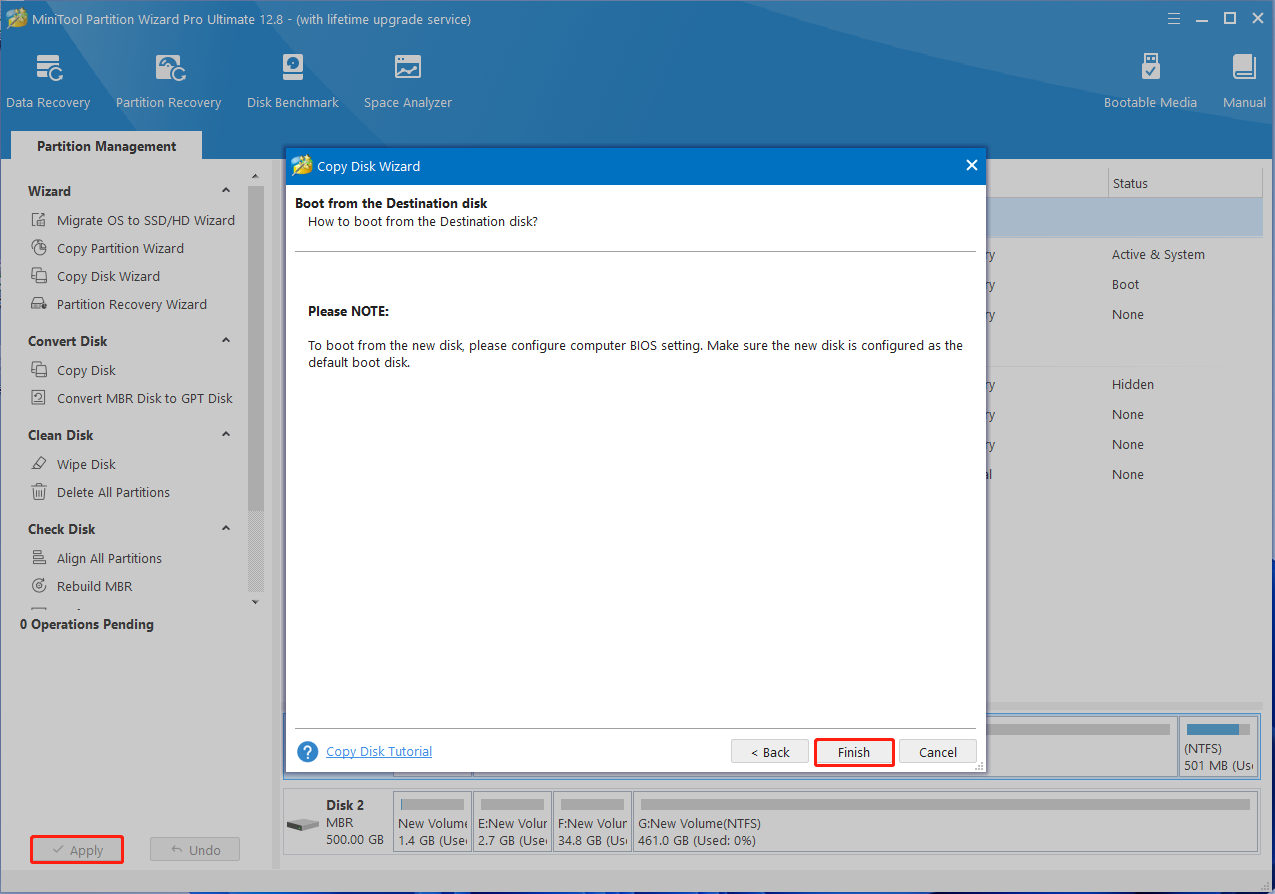
Step 5. Read the information and click the Finish button in the next window. Finally, click on Apply to execute the pending operations.
Once you backed up these important data, you need to install all hard disks that you want to use for setting up RAID 0 Windows 10. If you don’t how to do that, you can refer to this post “How to Install a Second Hard Drive in Your Laptop and Desktop PC”.
How to Setup RAID in Windows 10
Now, I believe that you have prepared everything for the RAID setup. How to setup a RAID 0 and RAID 1 in Windows 10? You can choose one from the 3 applicable ways.
Note: The following operation will be performed on a disk array with 3 unformatted hard drives that have the same size and speed.
Way 1. Setup RAID Using the “Storage Spaces” Utility
As you might know, Windows 10 provides the “Storage Spaces” utility to configure the RAID drives. This tool can help you combine 3 or more drives into a storage pool. It is a software-configured RAID setup in OS. Here we will show you how to setup RAID 1 Windows 10 using the Storage Spaces feature.
Step 1. Type control in the Windows Search box, and then select Control Panel from the top result.
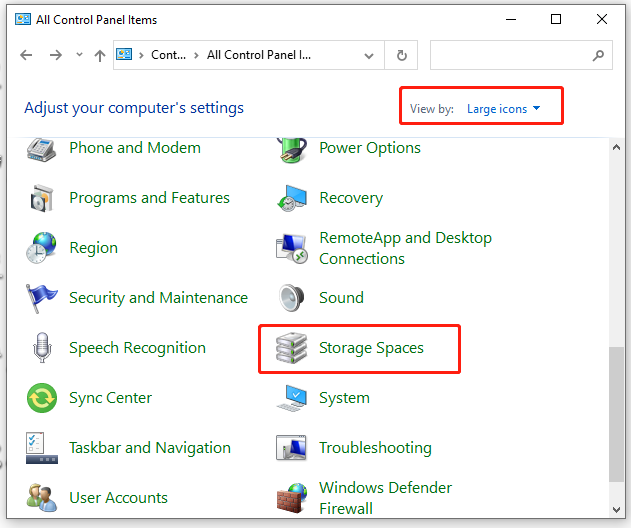
Step 2. Change the View by type to Large icons and select Storage Spaces from the listed icons. Click on Yes in the UAC window when you’re prompted to access this app.
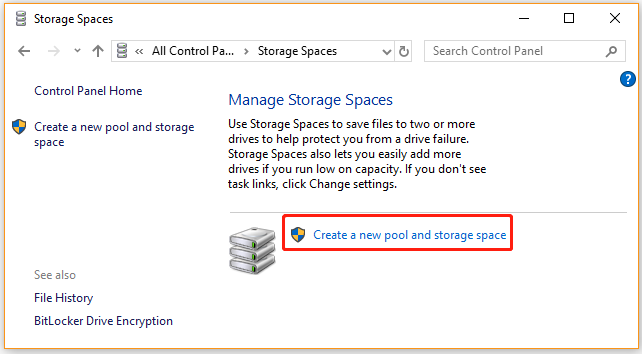
Step 3. In the pop-up window, click on the Create a new pool and storage space link.
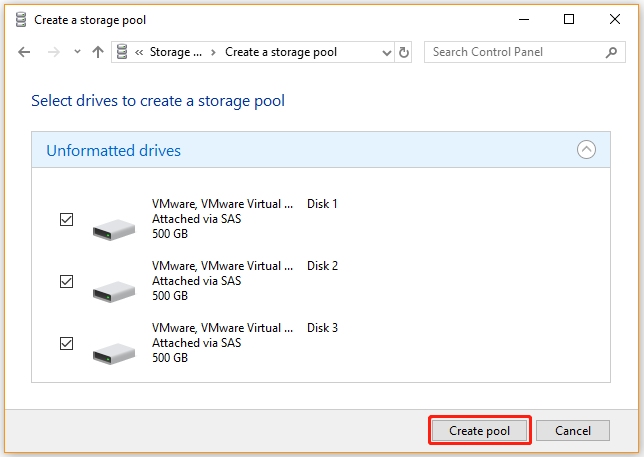
Step 4. Then Windows 10 will check all hard drives installed on your computer and select the disks that you want to use for setting up RAID 1 Windows 10 and click on Create pool.
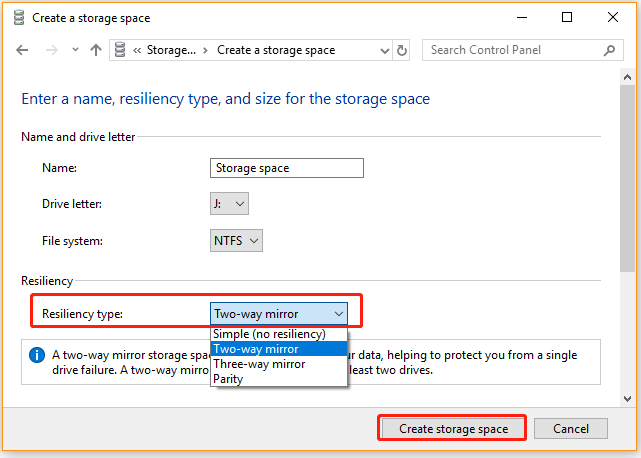
Step 5. Now, you can name the Storage pool, and select a Drive letter and File System from the drop-down menu. Then go to the Resiliency type section, select the RAID type under it. The Simple (no resiliency) option pools the disks, the Two-way mirror and three-way mirror options are similar to RAID 1, and Parity is similar to RAID 5. Once confirmed, click on Create storage space.
Step 6. Now, wait for the process to finish and you should see a single disk in Windows File Explorer.
As shown above, you can set up RAID 1 and RAID 5 with the Storage Space tool, but it can’t configure RAID 0. So, we recommend you use the following 2 methods.
Way 2. Setup RAID in BIOS
In addition, you can set up RAID in BIOS. Here we will show you how to setup a RAID 0 Windows 10 based on the Intel motherboard
Step 1. Restart your computer, and then press the Delete key to enter BIOS.
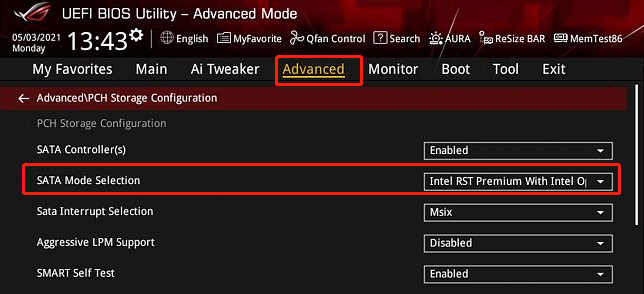
Step 2. In the BIOS Utility window, press F7 to go to Advanced Mode and select PCH Storage Configuration from the listed options.
Step 3. In the Advanced tab, go to the SATA Mode Selection option and set it to Intel RST Premium With Intel Optane System Acceleration (RAID), and set SATA Controllers to Enabled.
Step 4. Go to the Boot tab and set the Launch CSM option to Disabled.
Step 5. Press F10 and click OK to restart your system. And press Delete after the system reboots and enter BIOS again.
Step 6. Press the F7 key to enter Advanced Mode, and then go to the Advanced tab and select Intel(R) Rapid Storage Technology from the listed options.
Step 7. Tap on Create RAID Volume. Then you can set the RAID name, RAID level (like RAID 0 stripe), and select the disks you want to use and set it to X.
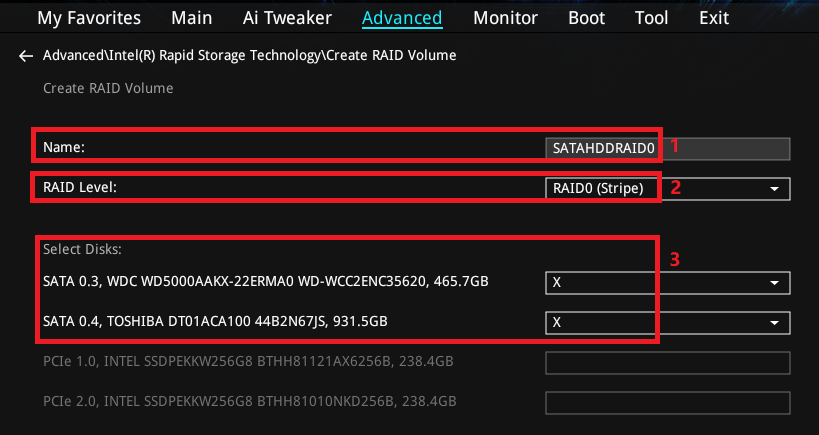
–images from asus.com
Step 8. Set the RAID capacity and click on Create Volume to save the changes.
According to the above information, you may find some limitations on using the Storage Space and BIOS utilities. Therefore, we highly recommend you use a professional RAID partition manager like MiniTool Partition Wizard.
Way 3. Setup RAID Using MiniTool Partition Wizard
With MiniTool Partition Wizard, you can not only create a striped volume (RAID 0) but a mirrored volume (RAID 1) easily. In addition, this program can help you move/resize, or extend volume if you need. Here’s how to setup RAID 0/1 using the MiniTool software.
MiniTool Partition Wizard DemoClick to Download100%Clean & Safe
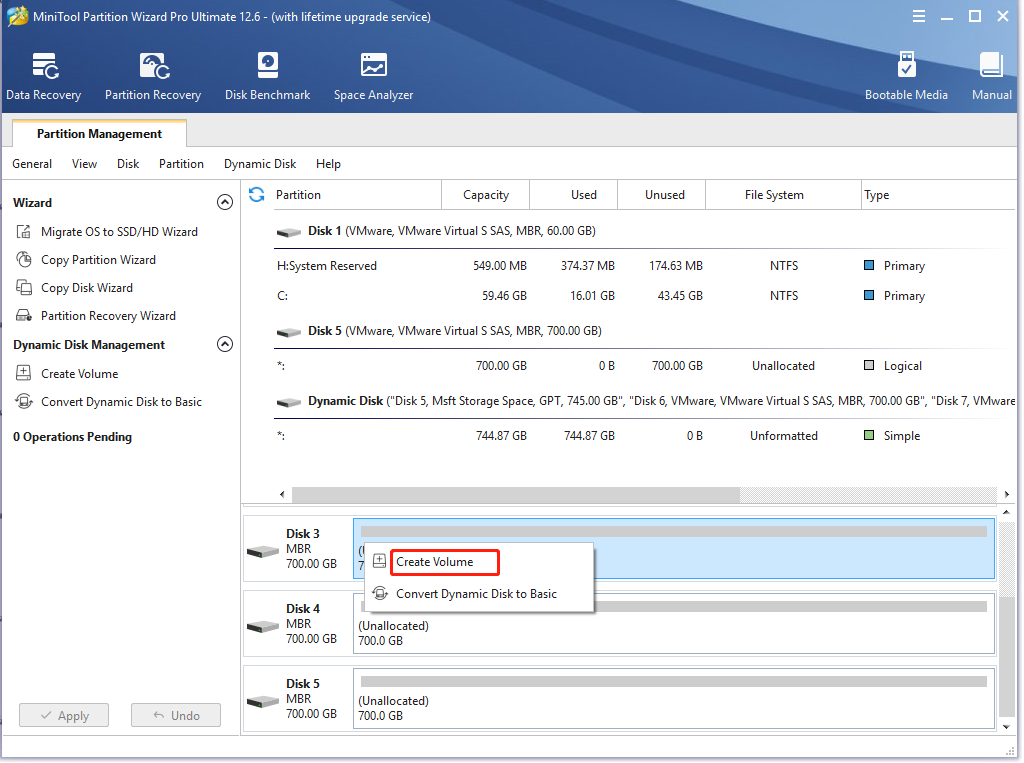
Step 1. Launch the MiniTool software to enter its main interface, right-click the dynamic disk that you want to create the striped volume or mirrored volume, and select Create Volume.
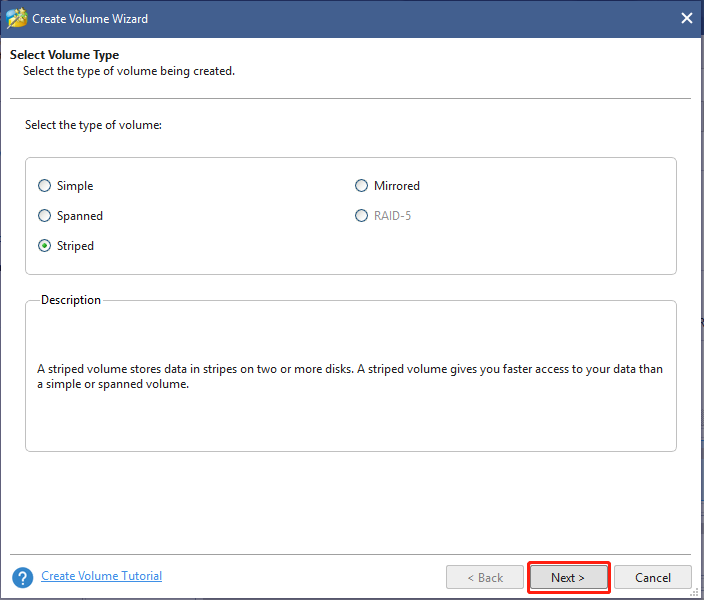
Step 2. In the pop-up window, you will see all supported volume types according to your present situation. Select Striped or Mirrored and click on Next to go on.
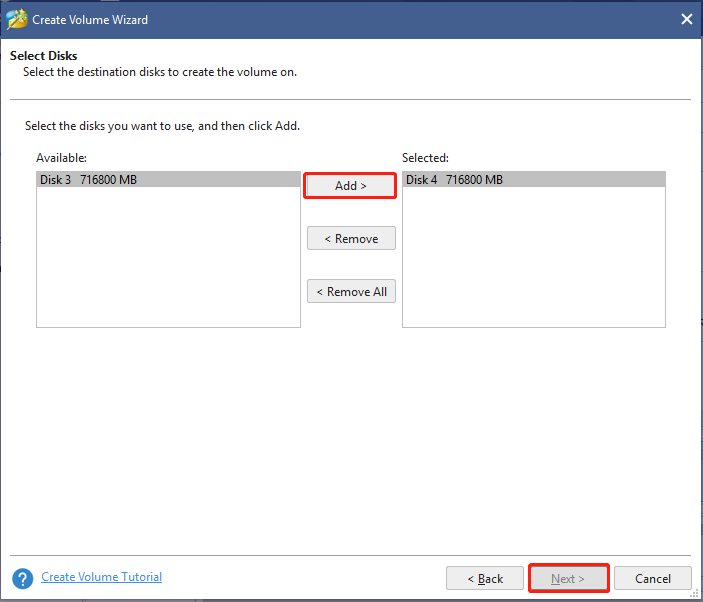
Step 3. Select the target disk where volume is to be created and click on Add to add the disk to the right box. Then click on Next.
Step 4. Now, you can set relevant parameters, including Volume Label, File System, Drive Letter, Cluster Size, and Volume Size/Location. Then click on Finish to confirm that.
Step 5. Click on Apply to execute the pending operation.

Bottom Line
Now, the top 3 methods on how to setup RAID in Windows 10 have been illustrated. If you have any ideas on this topic, write them down in the following comment zone. Also, you can send us an email to [email protected] when you have difficulty in using MiniTool Partition Wizard.
User Comments :