In Windows systems, the recovery partition refers to a dedicated hidden area on the hard drive. Well, how to move the recovery partition? You can refer to the methods provided by MiniTool Partition Wizard.
The Windows recovery partition is a separate partition automatically created on the system disk when you install the Windows operating system.
It stores system recovery files, enabling Windows to self-recover in case of startup problems or system failures.
Typically, this partition only occupies a few hundred MB of disk space, at least 500 MB.
Can I move the recovery partition in Windows 10?
The answer is yes. Below, this post will explain how to move the recovery partition, depending on the situation.
Understanding Recovery Partitions in Windows 10
Below is an introduction to the features, uses, and situations where you need to move a recovery partition.
Purpose and Benefits of Recovery Partitions
- Purpose: It allows users to fix boot problems, access system restore points, or perform a factory reset without external media.
- Visibility: Recovery partitions are usually not visible in File Explorer, but are visible in Disk Management.
- Benefits: It can prevent accidental data loss and efficiently reset or troubleshoot Windows malfunctions.
Common Scenarios for Moving Recovery Partitions
- Freeing up system drive space: When your C drive is almost full, moving the recovery partition to another location can free up more space on your system drive.
- Hard drive upgrade or replacement: When upgrading to a larger hard drive or SSD, you need to migrate the recovery partition.
- Consolidating partitions: When you want to add new partitions or rearrange your disk layout.
Before explaining how to move healthy recovery partition, it’s best to back up your system and important files, and close all running programs to prevent conflicts during the operation.

Here is a video guide:
Windows 10 Move Recovery Partition After Unallocated Space
Sometimes, you may not be able to extend your system partition because the recovery partition takes up space.
In this case, you need to move partition windows 10 to a location with unallocated space.
Due to the limitations of Windows’ built-in disk management, it is recommended that you use MiniTool Partition Wizard.
It is a professional third-party tool that can easily and safely move, resize, clone, and manage partitions.
Below are the detailed steps:
Step 1: Download and install MiniTool Partition Wizard on your PC. Then launch it to get into the main interface.
MiniTool Partition Wizard FreeClick to Download100%Clean & Safe
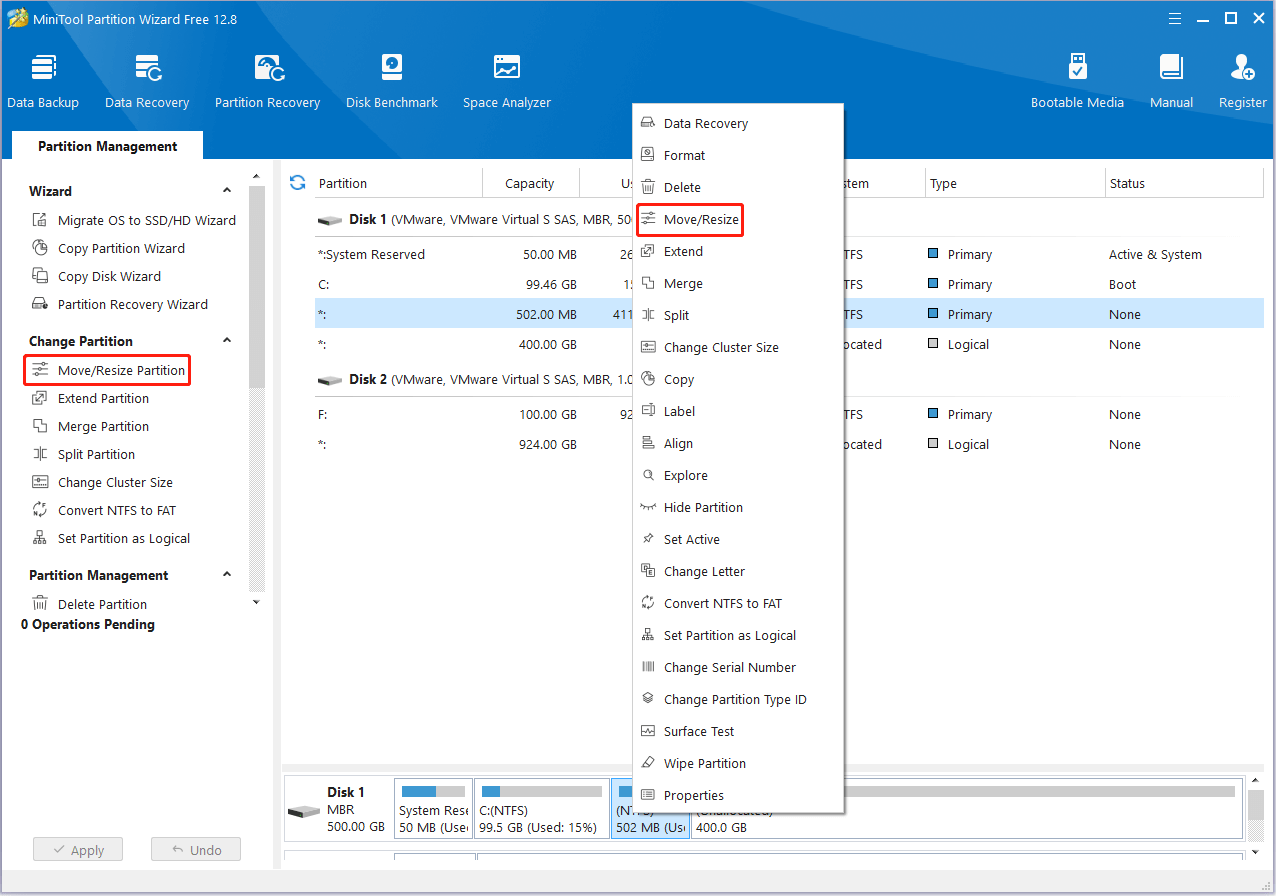
Step 2: Right-click the recovery partition and then select Move/Resize from the context menu. Also, you can highlight the target partition and select Move/Resize Partition from the left action panel.
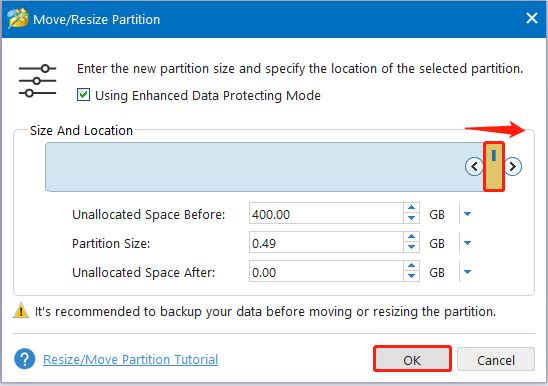
Step 3: In the pop-up window, drag the whole partition slider to the rightmost and click OK.
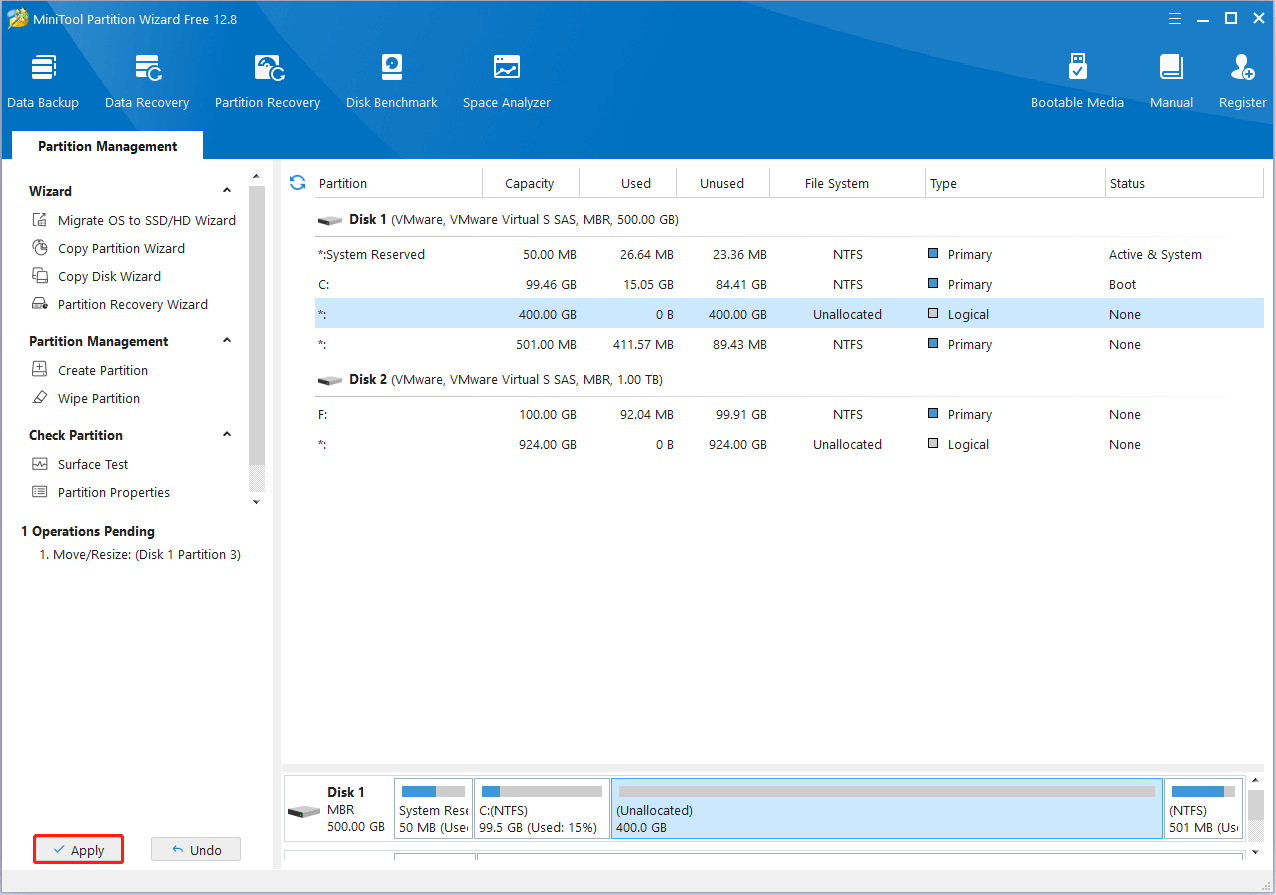
Step 4: Finally, click Apply at the bottom-left corner to save the pending change. When prompted, click Yes for confirmation.
For more information on the “extend system drive but Recovery Partition is in the way” issue, you can pay attention to this post: Windows 10 Can’t Extend Volume Recovery Partition in the Way.
Windows 10 Move Recovery Partition After Windows Partition
Some users find the Windows recovery partition is placed before the system partition, which can block updates that require a larger recovery image.
If you encounter this issue, moving the recovery partition after the Windows partition allows Windows to modify or recreate it during updates.
Follow the steps below to do Windows 10 move recovery partition operation.
Part 1: Shrink Windows Partition to Release Unallocated Space
First of all, you should shrink the Windows partition to get some unallocated space for the Windows recovery partition. You can complete the operation in either of the following ways.
Way 1: Use Disk Management
Step 1: Press the Windows and X keys at the same time to open the Start menu.
Step 2: Choose Disk Management from the context menu.
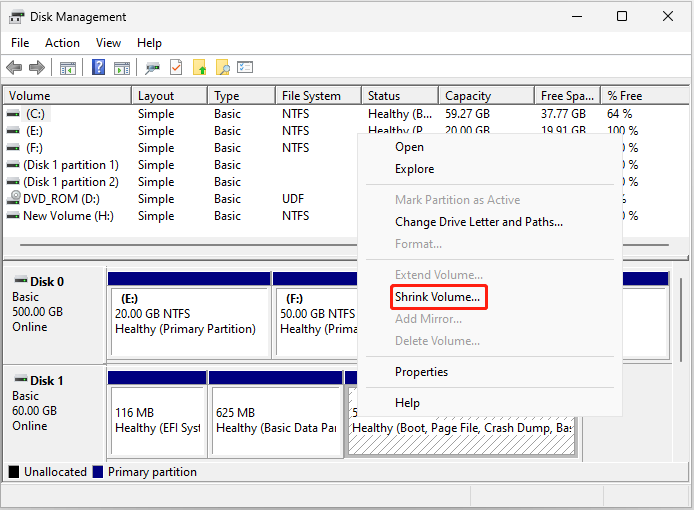
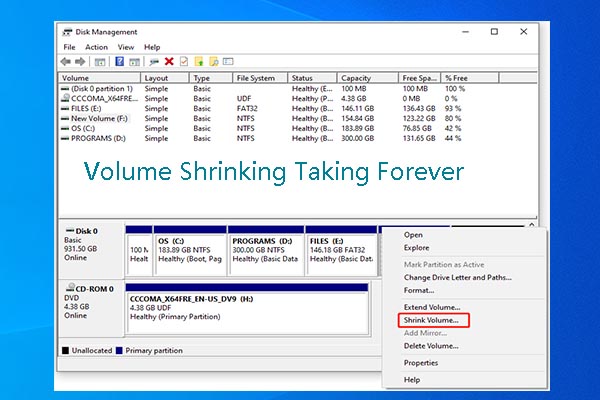
Step 3: Right-click the Windows partition and select Shrink Volume.
Step 4: After this tool queries the selected partition for available shrink space, you will enter the Shrink screen. Enter the amount of disk space to shrink in MB and click Shrink.
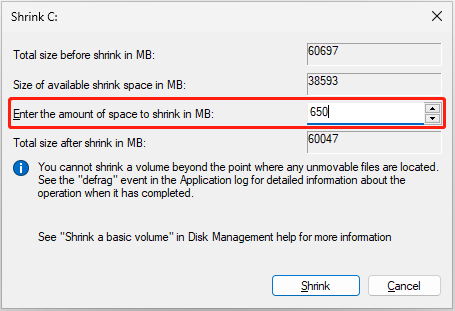
Step 5: After that, click the Shrink button to execute the operation.
Way 2: Use Diskpart
Step 1: Press Windows + R to open the Run dialog.
Step 2: Type cmd in the text box and then press Ctrl + Shift + Enter to open Command Prompt as an administrator.
Step 3: In the elevated Command Prompt, type diskpart and press Enter to access the Diskpart window.
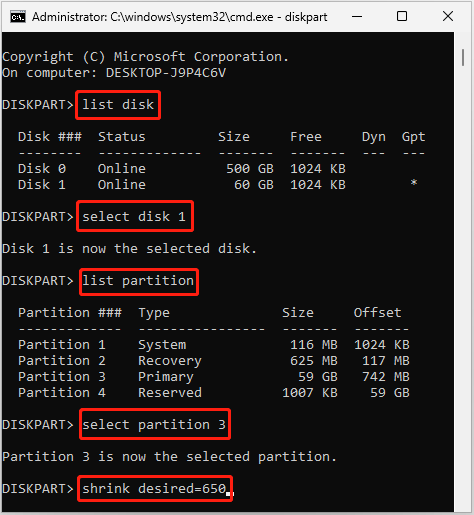
Step 4: After that, type the following commands and then press Enter after each.
- diskpart
- list disk
- select disk 1 (Replace 1 with the number of your system disk)
- list partition
- select partition 3 (3 represents the number of your Windows partition)
- shrink desired=650 (You can replace 650 with the size in MB you want to shrink)
Step 5: Once done, type exit and press Enter to close Diskpart.
Part 2: Copy Recovery Partition to the Unallocated Space
After releasing enough unallocated space after the Windows partition, you can now help Windows move recovery partition to the unallocated space. To move Windows 10 recovery partition, MiniTool Partition Wizard comes here to help you again.
You can use MiniTool Partition Wizard to copy the Windows recovery partition to the unallocated space with a few clicks. Here’s how to do this.
Step 1: Download, install, and launch MiniTool Partition Wizard on your computer.
MiniTool Partition Wizard FreeClick to Download100%Clean & Safe
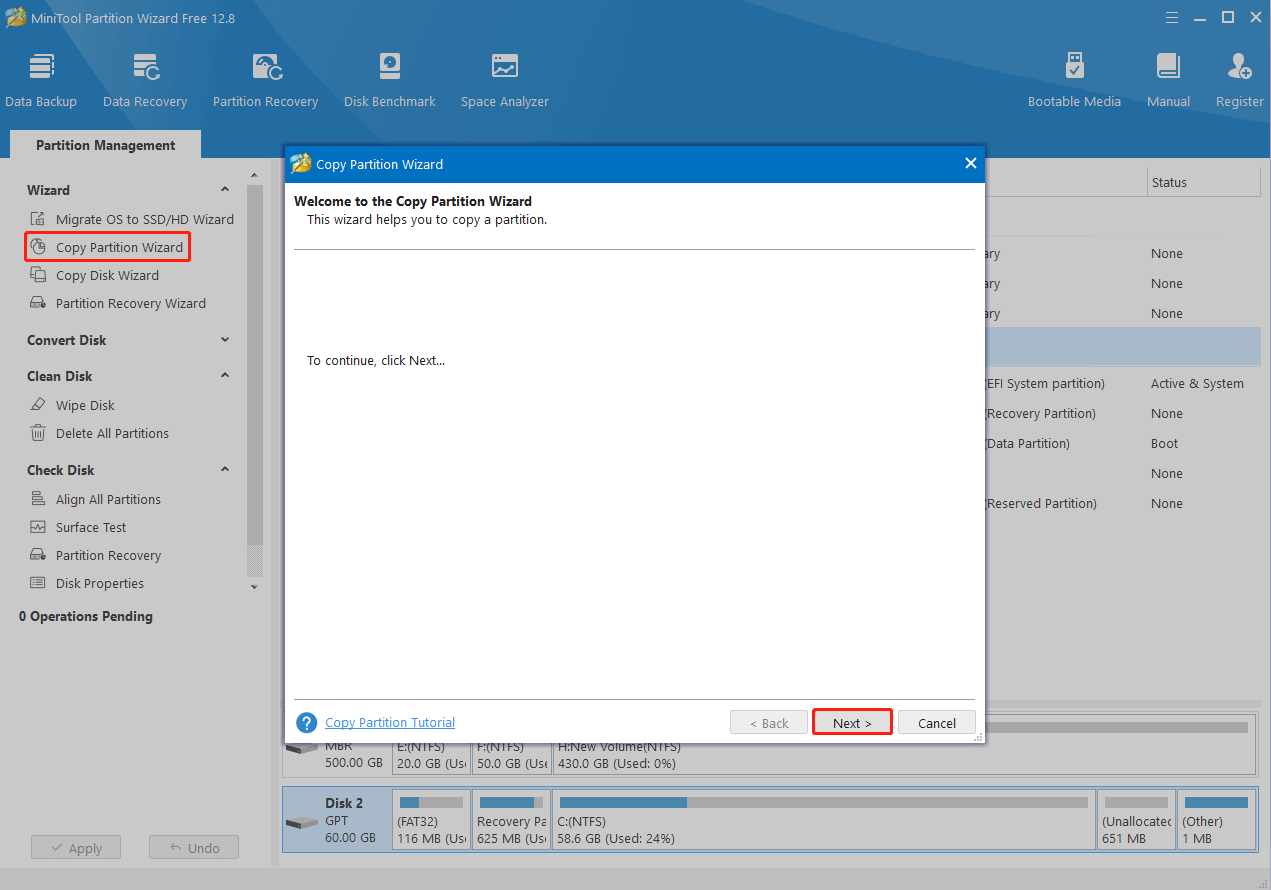
Step 2: In the main interface of this program, choose Copy Partition Wizard from the left action panel.
Step 3: In the Copy Partition Wizard window, click Next to continue.
Step 4: In the next window, select the recovery partition and click Next.
Step 5: Select the unallocated space you get through shrinking, and then click Next.
Step 6: After that, you can enter the new partition size and determine the location of the copied partition. Then choose Primary in the Create As section.
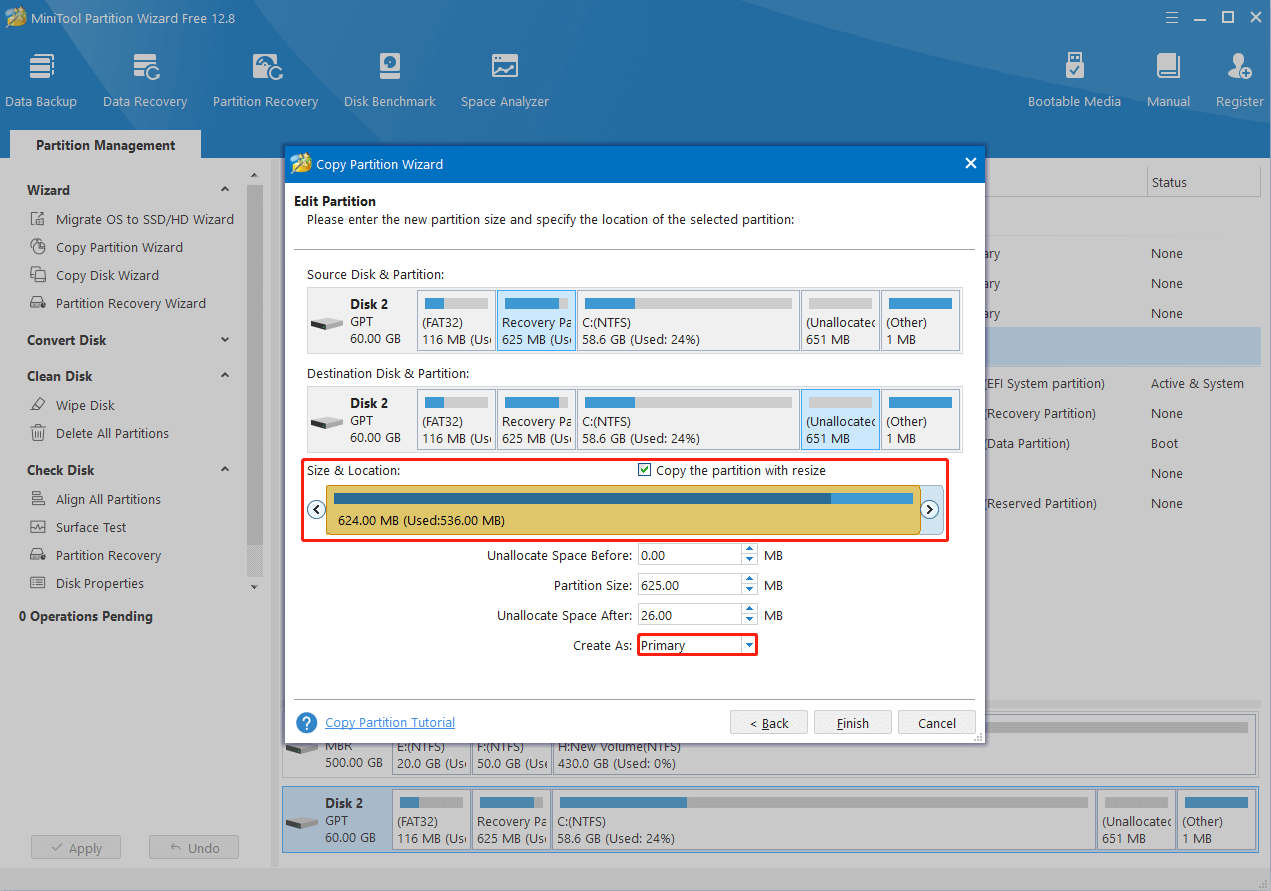
Step 7: Once you finish setting everything according to your needs, click Finish.
Step 8: When back to the main interface, right-click the original recovery partition and select Delete.
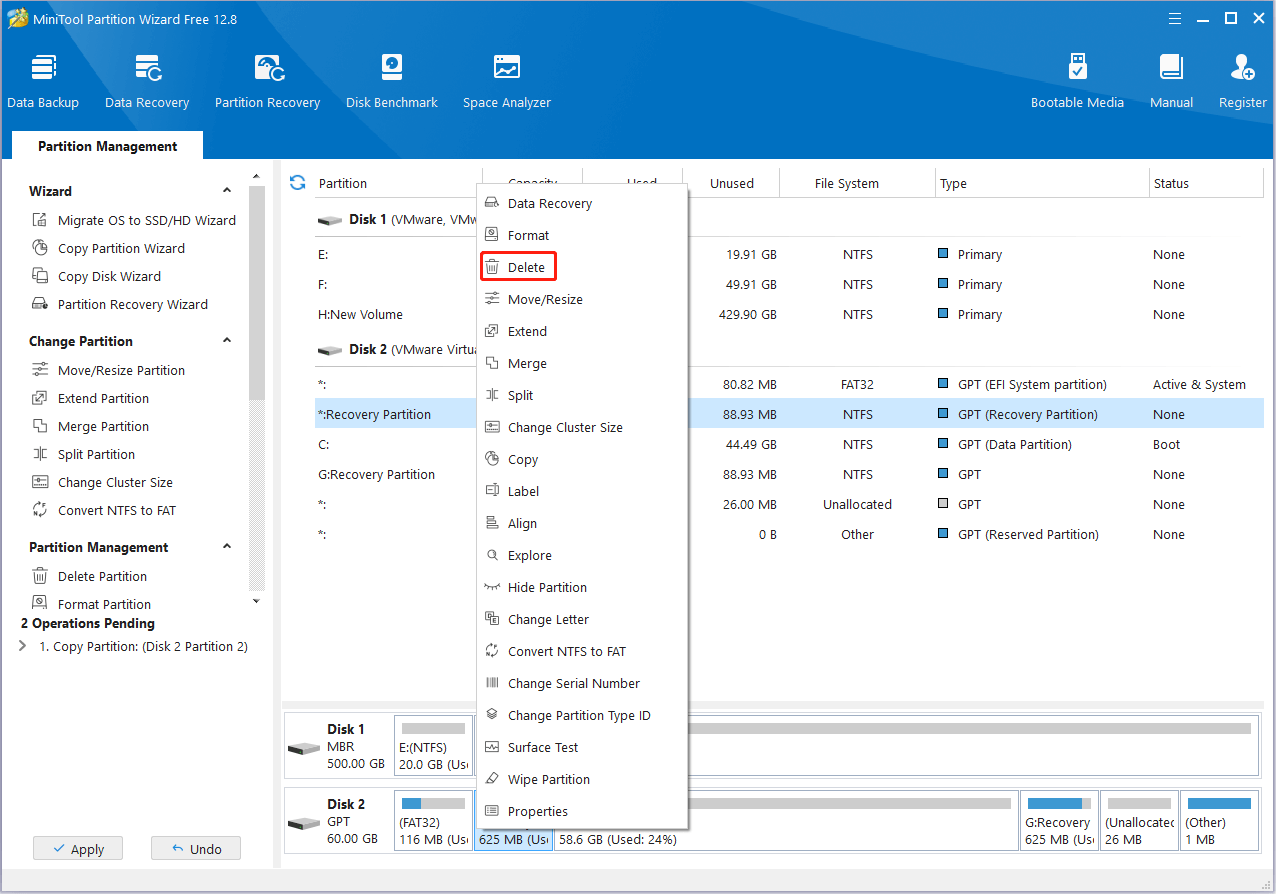
Step 9: At last, don’t forget to click Apply to execute these operations.
Recommended article: Can I Delete Recovery Partition in Windows 7/8/10 for Further Use
Part 3: Make the Cloned Partition Recovery Partition
You need to make some changes to the cloned recovery partition so that it can show the same and work well as the original one. Removing its drive letter to hide it from File Explorer and setting the correct Type ID to it are two of the most important things to do. You can finish them with the given guide.
Step 1: Access the main interface of MiniTool Partition Wizard.
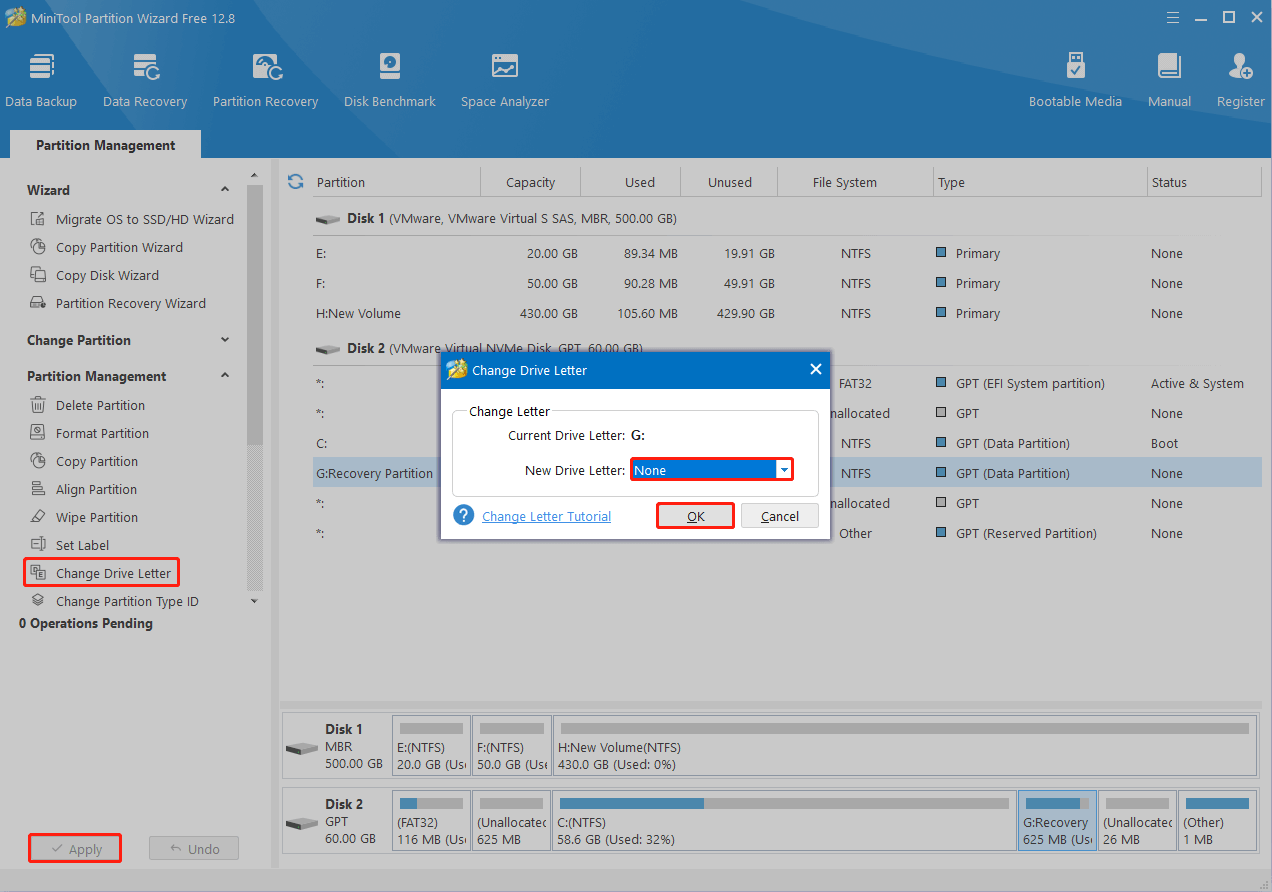
Step 2: Highlight the new recovery partition and then select Change Drive Letter from the left side.
Step 3: Choose None from the New Drive Letter drop-down menu and click OK.
Step 4: Click Apply > Yes to remove the current drive letter of the selected partition.
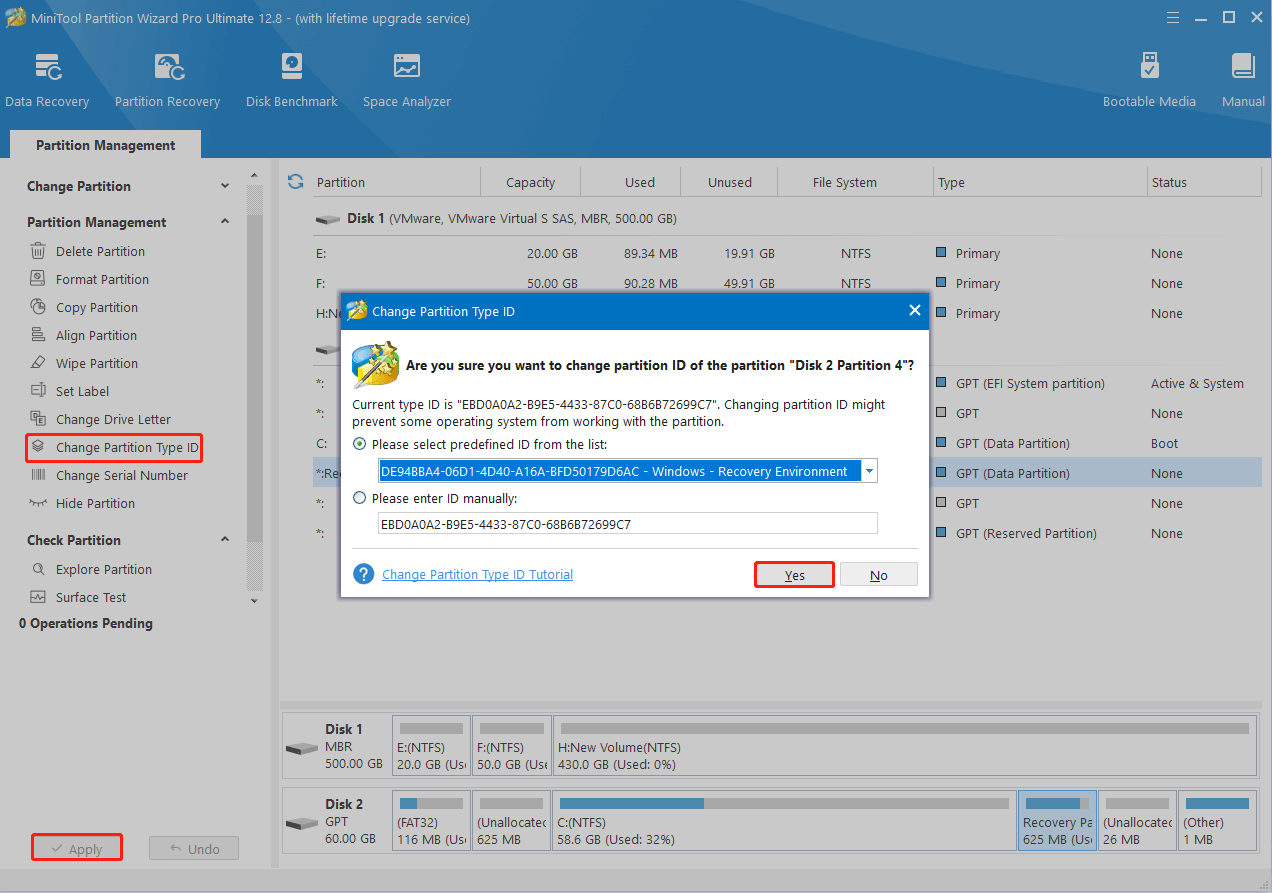
Step 5: After that, highlight the recovery partition again and select Change Partition Type ID.
MiniTool Partition Wizard DemoClick to Download100%Clean & Safe
Step 6: In the prompted window, you can choose the specified ID for the recovery partition from the list. Alternatively, you can enter the ID manually.
Step 7: Once you set the right ID, click Yes to move on.
Step 8: Click Apply > Yes to carry out the operation.
Further reading:
If you want to move or back up your Windows 10 recovery partition to a new hard drive to free up space or ensure data security, you can do so by simply cloning your existing recovery partition to another disk.
If you have no idea, you can refer to this guide: How to Clone Recovery Partition with Free Drive Cloning Software.
Bonus Tip: What If the Cloned Recovery Partition Isn’t Labeled as Normal
After cloning a Windows recovery partition on a GPT disk, you may notice it’s not labeled as “Recovery Partition” or “Healthy” in Disk Management, or it might not appear at all.
Here’s how to restore the recovery partition to normal.
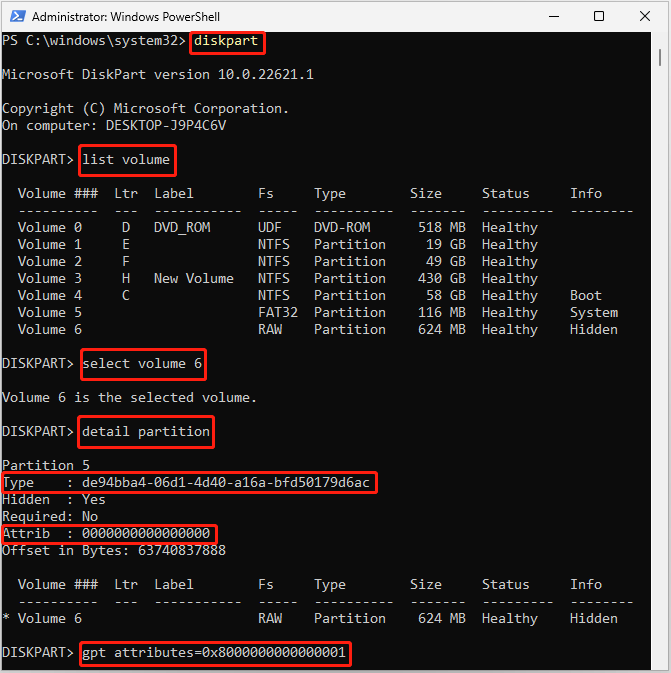
Step 1: Right-click the Start icon and select Windows PowerShell (Admin).
Step 2: In the PowerShell window, type diskpart and press Enter.
Step 3: Type list volume within Diskpart and press Enter.
Step 4: Type select volume 6 and press Enter. Replace 6 with the number of your recovery partition.
Step 5: Type detail partition and press Enter to check if the partition Type ID and attribute are set correctly. If not, run the set id=de94bba4-06d1-4d40-a16a-bfd50179d6ac and gpt attributes=0x8000000000000001 commands one by one.
Bottom Line
Hope you move Windows recovery partition successfully with the help of this guide. If you have any questions about the Windows 10 move recovery partition topic, you can leave a message in our comment part below.
For any issues related to MiniTool Partition Wizard, please feel free to contact us for assistance via [email protected]. We’ll reply to you as soon as possible.
About The Author

Position: Columnist
Cecilia has been an editor at MiniTool for two years. She primarily focuses on disk and partition-related content, with particular expertise in disk cloning, partition recovery, and PDF document conversion. She is dedicated to providing users with clear and accurate solutions to help them efficiently resolve common computer problems.
User Comments :