If a removable storage device shows “No Media” in Disk Management, it means that the computer can’t recognize storage space on it. Fortunately, Partition Magic offers removable disk no media fixes like enabling USB in BIOS, scanning for viruses, changing drive letter, etc.
Removable Disk No Media
The removable disk no media error indicates a communication problem between the computer and USB drive. The drive will appear as an empty disk and its data is inaccessible.
View the Error in Different Places
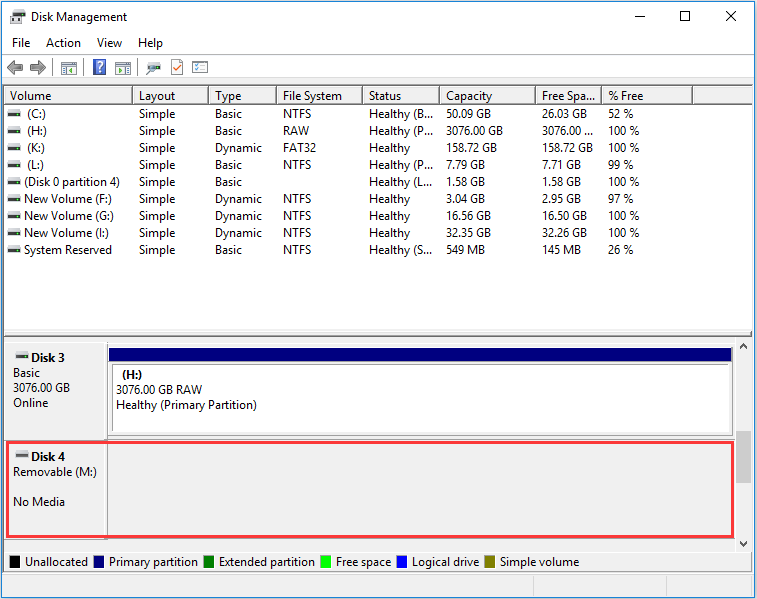
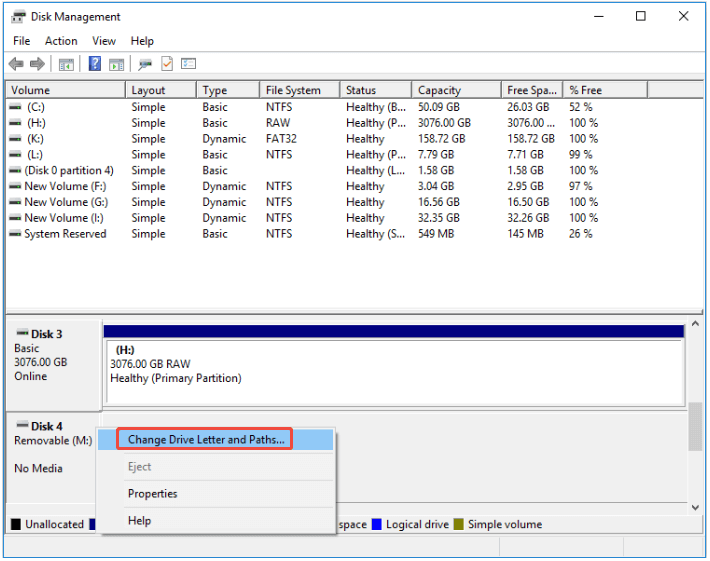
The error is displayed differently in different places. In Disk Management, it is shown as the picture below. The whole disk is shown as blank: with no partitions, capacity, and status label.
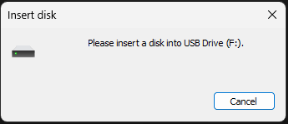
In File Explorer, the error is shown as follows: “Please insert a disk into USB drive (F)”.
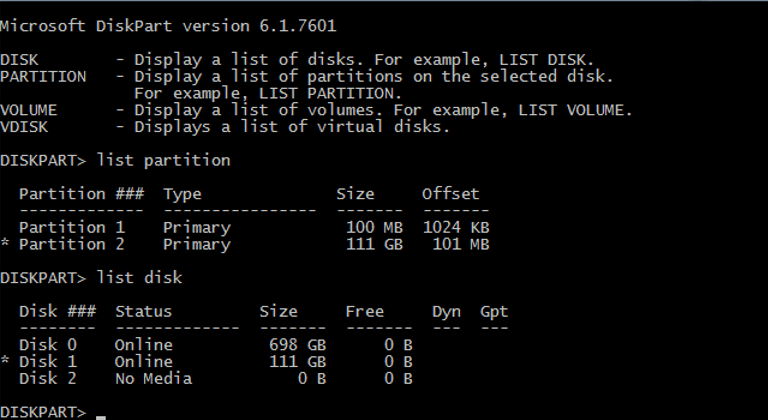
In DiskPart, No Media displays under the Status column.
Which Storage Device Can Prompt the Error
Removable disk no media error can occur to removable storage devices like USB flash drives, SD cards, and even internal SATA drives that are marked as removable mistakenly.
It’s worth noting that USB flash drives are the most common devices that prompt the error. SD cards, especially those used in cameras or phones, will experience the error. In rare cases, the error happens to internal SATA drives.
Causes of Removable Disk No Media
What causes removable disk no media error? You may wonder that if it takes place on your computer. Here, I summarize its possible causes, helping you troubleshoot the error successfully.
- Bad or loose connection: Improper or loose USB connection may result in the error, especially for external hard drives and USB drives. You should check if the USB port and USB cable works normally.
- Insufficient power supply from the USB port: Overloading USB ports like inserting multiple USB drives may result in the USB showing 0 bytes and no media.
- USB driver issues: Corrupted or outdated USB drivers can lead to USB drive no media error.
- Virus infection: Once your USB drive is attacked by viruses or malware, it will display abnormally.
- USB errors:If your USB contains errors or has physical damage, you can experience removable disk no media problem.
Recover the Data of the USB Drive
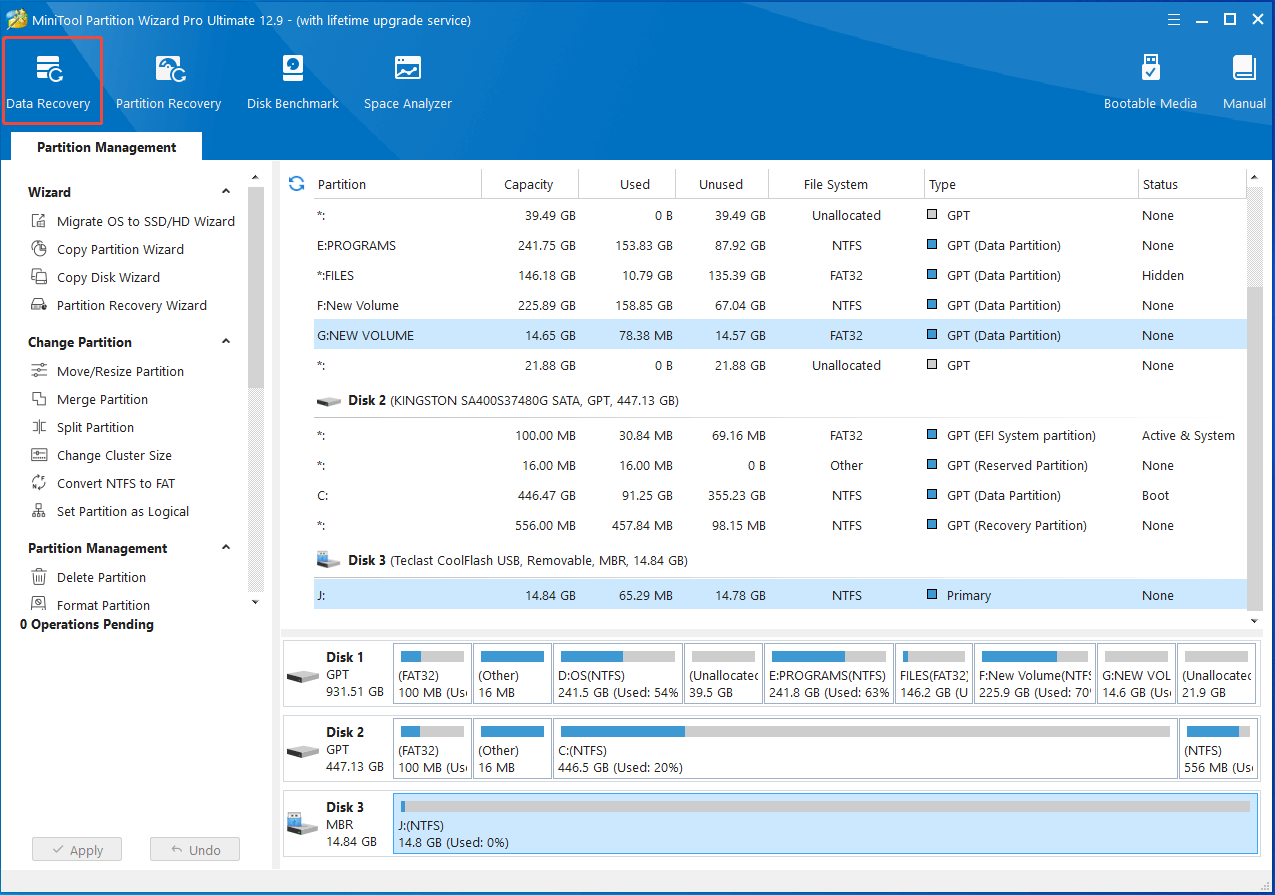
Before carrying out any fix, you should recover the data on your drive by using professional data recovery. MiniTool Partition Wizard is what you need. Its Data Recovery feature helps you recover the lost data on storage devices like SSDs, HDDs, USB drives, SD cards, etc.
Now, click the button below to download this software and install it by following the on-screen instructions. After that, follow these steps to recover the data with the software.
MiniTool Partition Wizard DemoClick to Download100%Clean & Safe
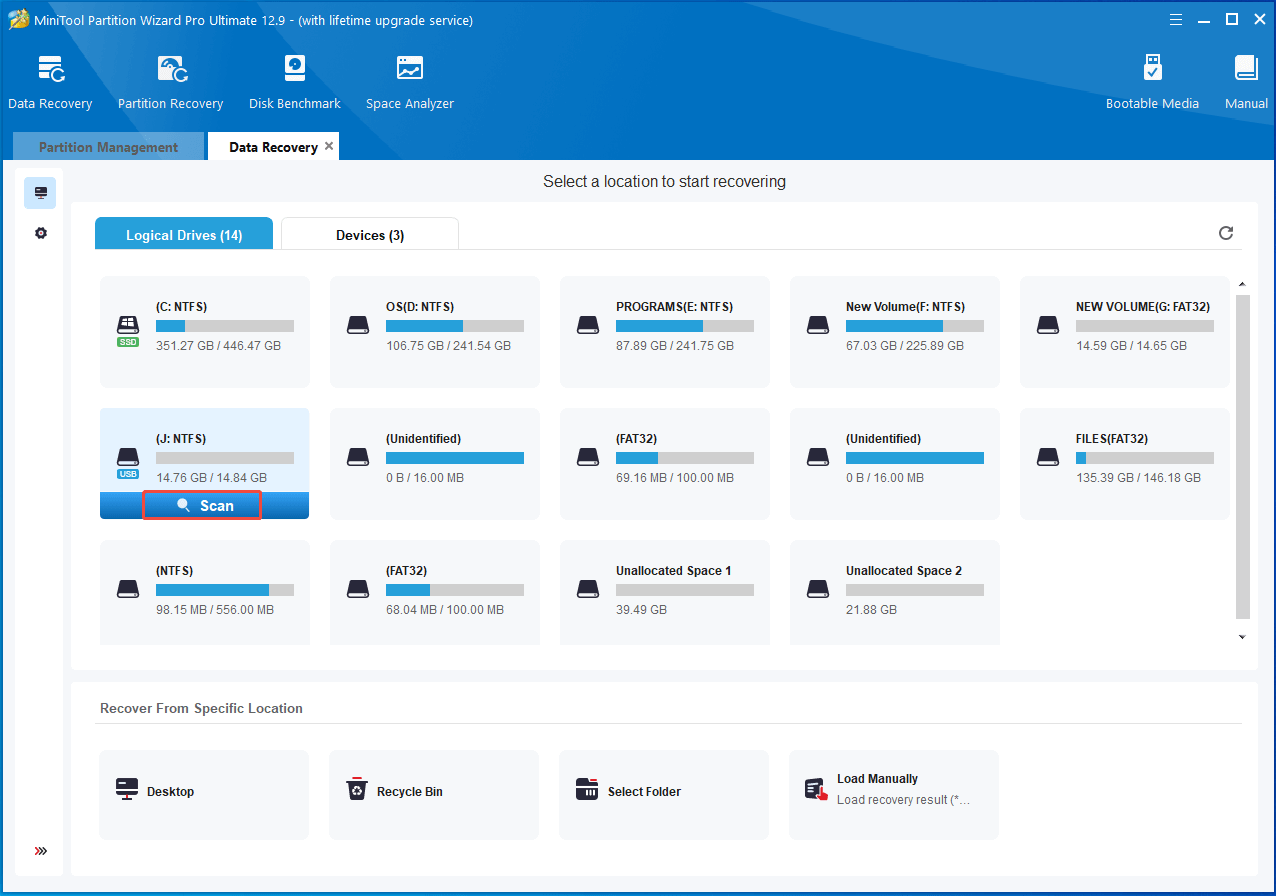
Step 1: Launch the software and click Data Recovery in the tool bar.
Step 2: Hover over the faulty drive and click the Scan button.
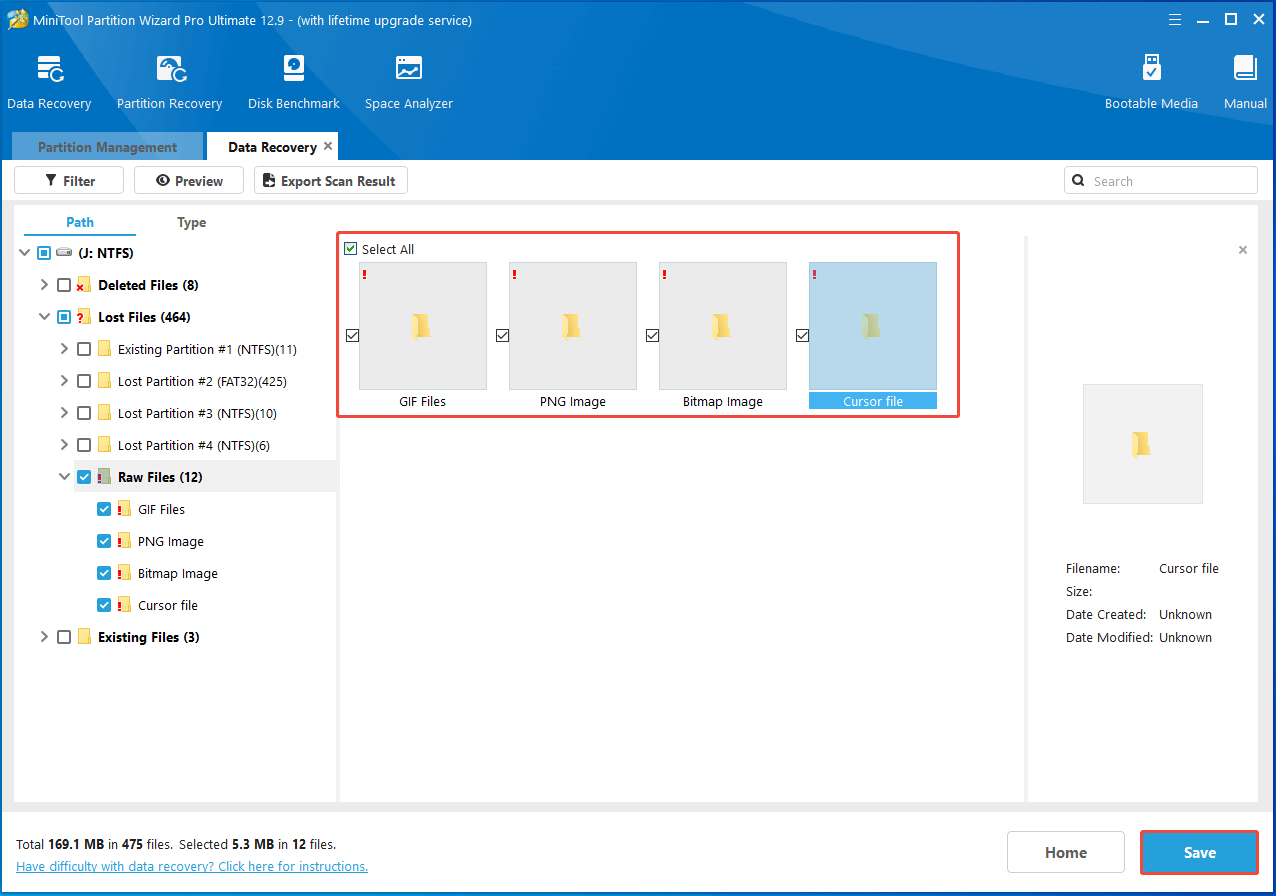
Step 3: Find and select the needed data from the listed result, and then click the Save button.
Step 4: In the pop-up window, select a directory for the recovered data and click OK to save changes.
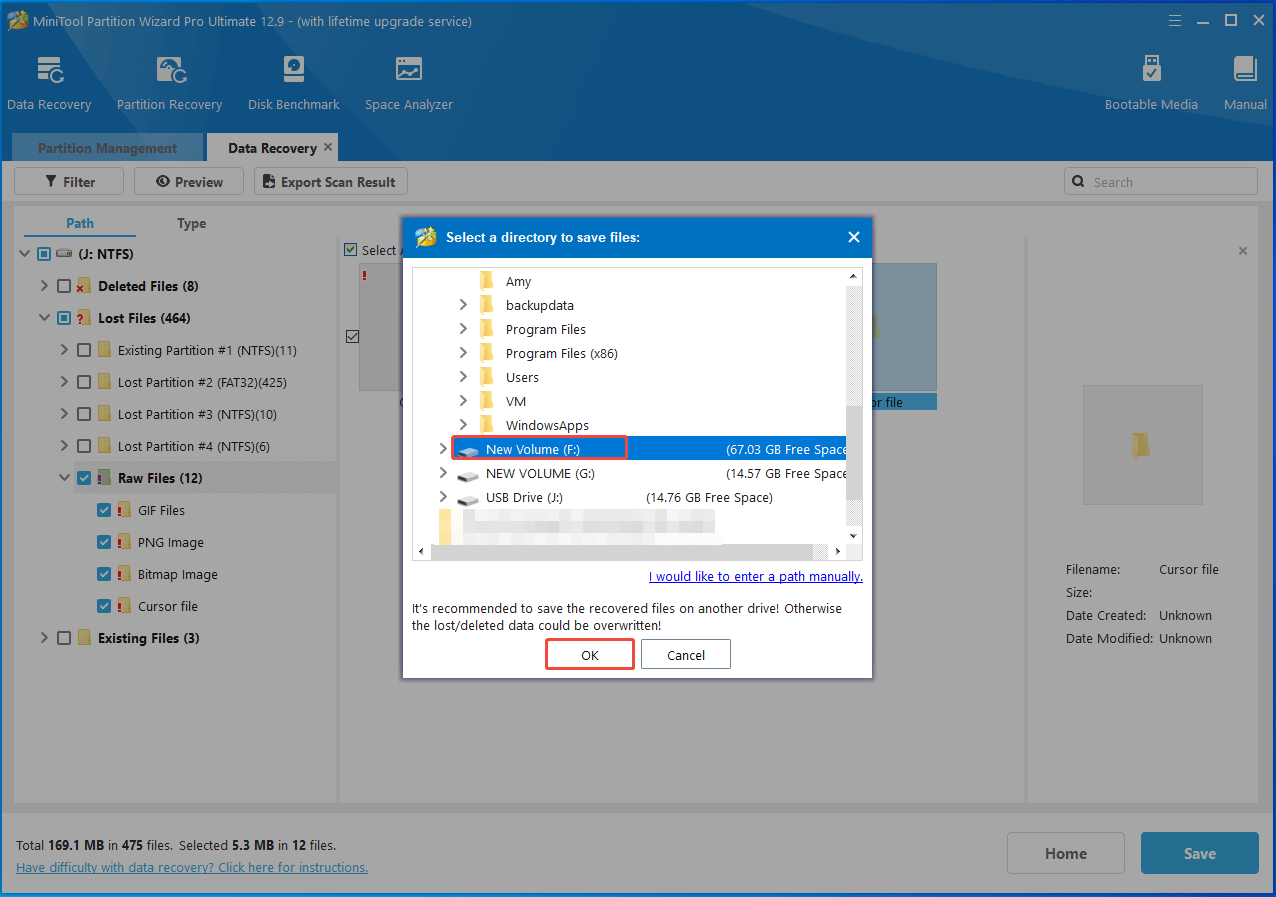
Step 5: Wait for the complete of the operation.
In addition to data recovery, MiniTool Partition Wizard also allows you to recover lost partitions, test read & write speeds of the supported storage devices, clone hard drives, etc. In a word, it’s a multifunctional tool.
Fixes for Removable Disk No Media
After bringing the data back, you can fix removable disk no media error with the methods below. Here, I take the USB drive for an example.
#1: Restart the Computer
A PC restart removes temporary glitches on the device and fixes many common errors. Here, you can also try restarting the computer to troubleshoot removable disk no media issue.
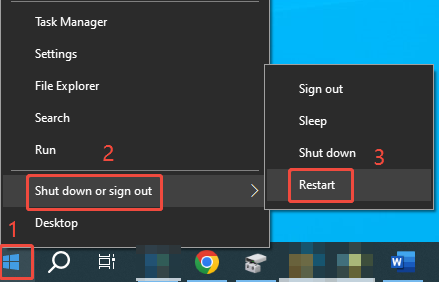
Step 1: Right-click the Start icon to open the Quick Link menu.
Step 2: Hover over Shut down or sign out.
Step 3: Hit the Restart option on the sub-menu.
After the computer restarts, open Disk Management and check if the USB drive still displays no media. If so, try the rest methods to resolve it.
#2: Check if the USB Port or USB Drive Is Faulty
You should also double-check if the USB port that the drive is inserted into works properly. To do that, plug another working USB drive into it and check if the computer displays it normally. Alternatively, you can verify that by connecting the USB drive to other available USB ports on the computer.
You can observe there’s physical damage on the USB drive. Once it’s damaged, you should buy a new one.
#3: Check the Power Source
If the power source is not sufficient, you can encounter USB drive no media issue. Therefore, when the error happens, check if you are overloading the USB ports with power-consuming devices.
#4: Enable USB in BIOS
The disabled USB device is also responsible for the removable disk no media error. To resolve the issue, you can enable it in the BIOS with the steps below.
Step 1: Restart the computer and keep pressing the BIOS key while the PC loads up.
Step 2: Locate the USB device and enable it.
- Find the USB Keyboard Support option.
- Change its status from Disabled to Enabled.
Step 3: Press the F10 > Enter keys to save changes and exit BIOS.
Step 4: After the computer restarts with enabled USB device, check if USB drive no media issue disappears.
#5: Scan the System for Viruses
Scanning the system for viruses is also an available removable disk no media fix. It has been proven useful by a lot of users. You should also run a full system scan when you receive the error.
You can scan the computer by using the built-in feature (Windows Security) or reliable third-party antivirus software. In this scenario, I show you how to scan the system with Windows Security.
Exclusive 70% OFF McAfee
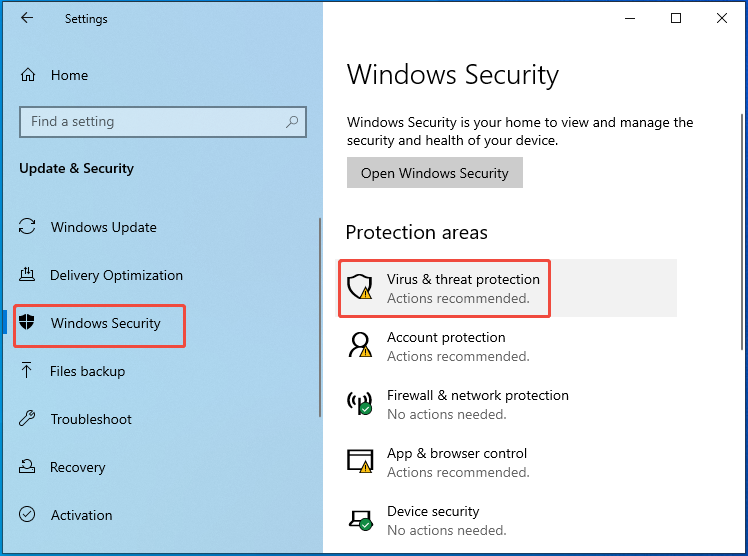
Step 1: Press the Windows and I keys to open Settings.
Step 2: Head to Update & Security > Windows Security > Virus & threat protection.
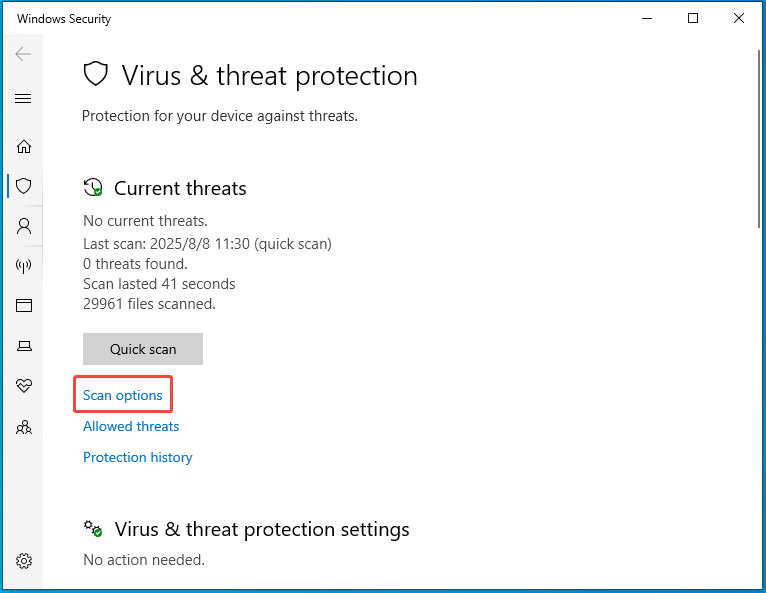
Step 3: In the next window, hit Scan options to continue.
Step 4: From the listed options, select Full scan. Then click the Scan now button at the bottom of the window to begin the scanning process.
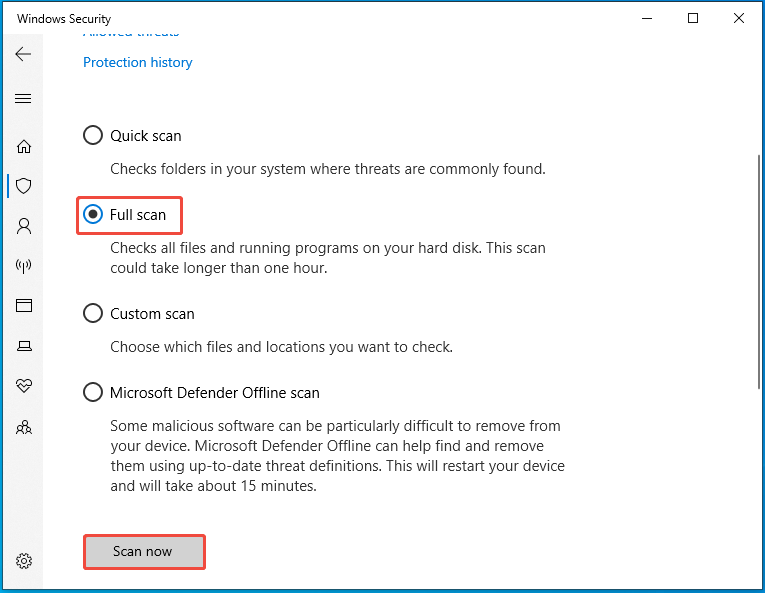
Step 5: Wait patiently until the process ends.
#6: Change the Drive Letter
Changing the drive letter fixes most drive issues, including USB drive no media error. So, try changing your drive letter with the following steps.
Step 1: Open Disk Management on your computer.
Step 2: Right-click the drive that prompts the error and hit “Change Drive Letter and Paths…”.
Step 3: In the pop-up window, click Add.
Step 4: From the drop-down menu, select a desired letter. Then click OK to save changes.
Step 5: Follow the on-screen instructions to finish the operation.
#7: Check the USB for Errors
It’s also necessary to check the USB for errors. How to do that? You can run CHKDSK or the Error Checking option to locate and fix USB errors by referring to the steps below.
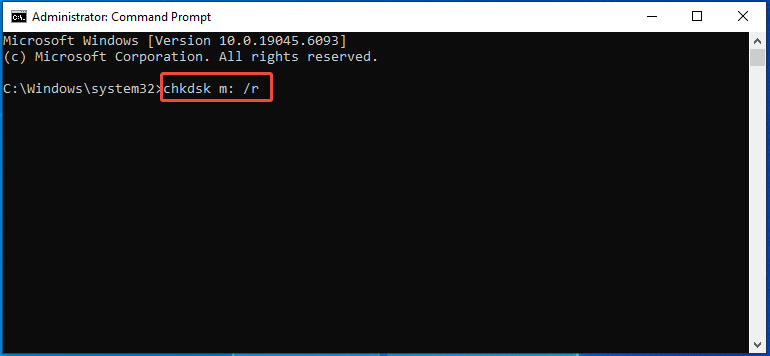
Run CHKDSK
Step 1: Type cmd in the search box.
Step 2: Click Run as administrator under Command Prompt.
Step 3: In the UAC window, click Yes to move forward.
Step 4: Type chkdsk m: /r and press Enter to execute the command. (Replace M with the actual drive letter of the USB.)
After the scanning process ends, check if the USB displays as a normal storage device in Disk Management.
Use the Error Checking Option
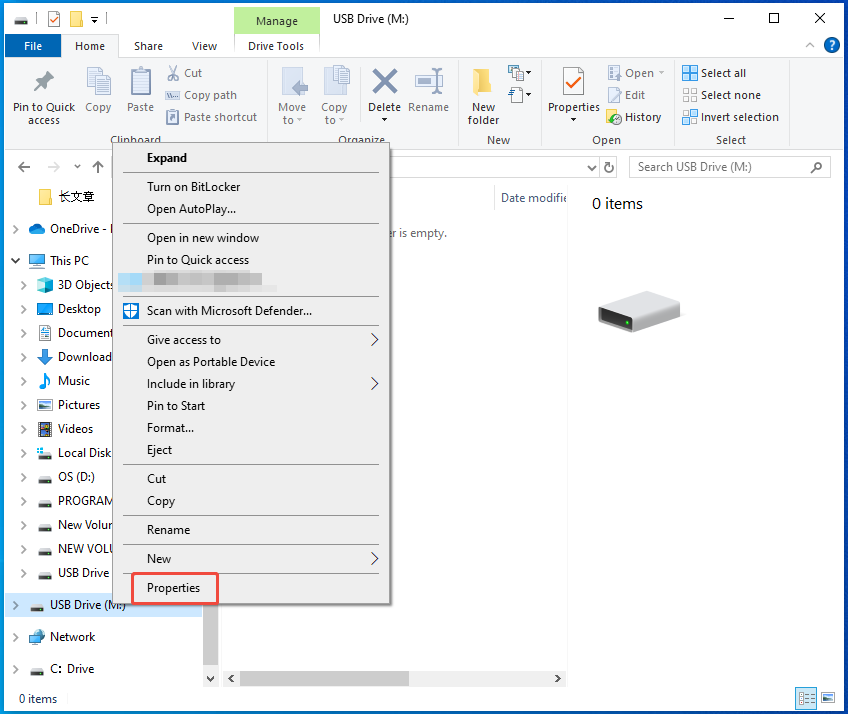
Step 1: Open File Explorer by holding the Windows and E keys.
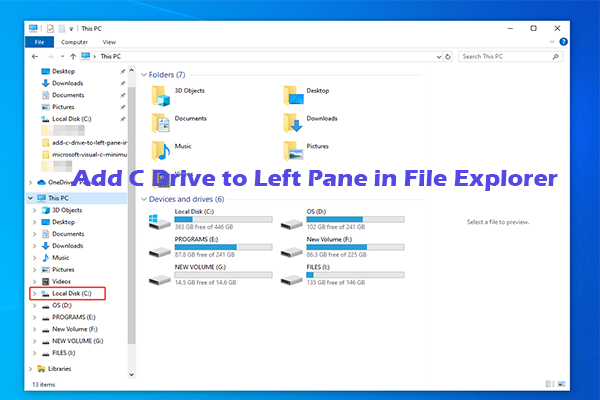
Step 2: If the USB drive is displayed in the left pane, directly right-click on it and choose Properties. If not, you should tap This PC in the left pane and then locate the USB drive on the right side of the window.
Step 3: Switch to the Tools tab and click the Check button in the Error checking section.
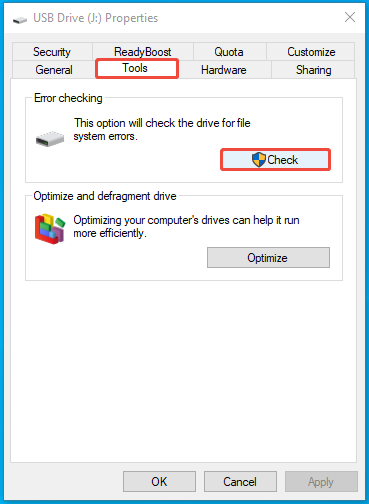
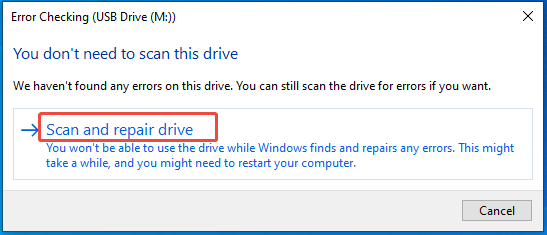
Step 4: In the next window, click Scan and repair drive.
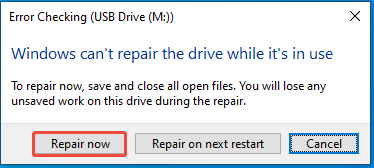
Step 5: According to your situation, choose Repair now or Repair on next restart. If you are ready, click Repair now and start the scanning process.
#8: Fix MBR of the USB
If the Master Boot Record (MBR) of the USB is damaged, it will work improperly and prompt no media error. In this case, you should rebuild MBR with MiniTool Partition Wizard. Here’s a step-by-step tutorial for you.
MiniTool Partition Wizard FreeClick to Download100%Clean & Safe
Step 1: Run into the main interface of the software.
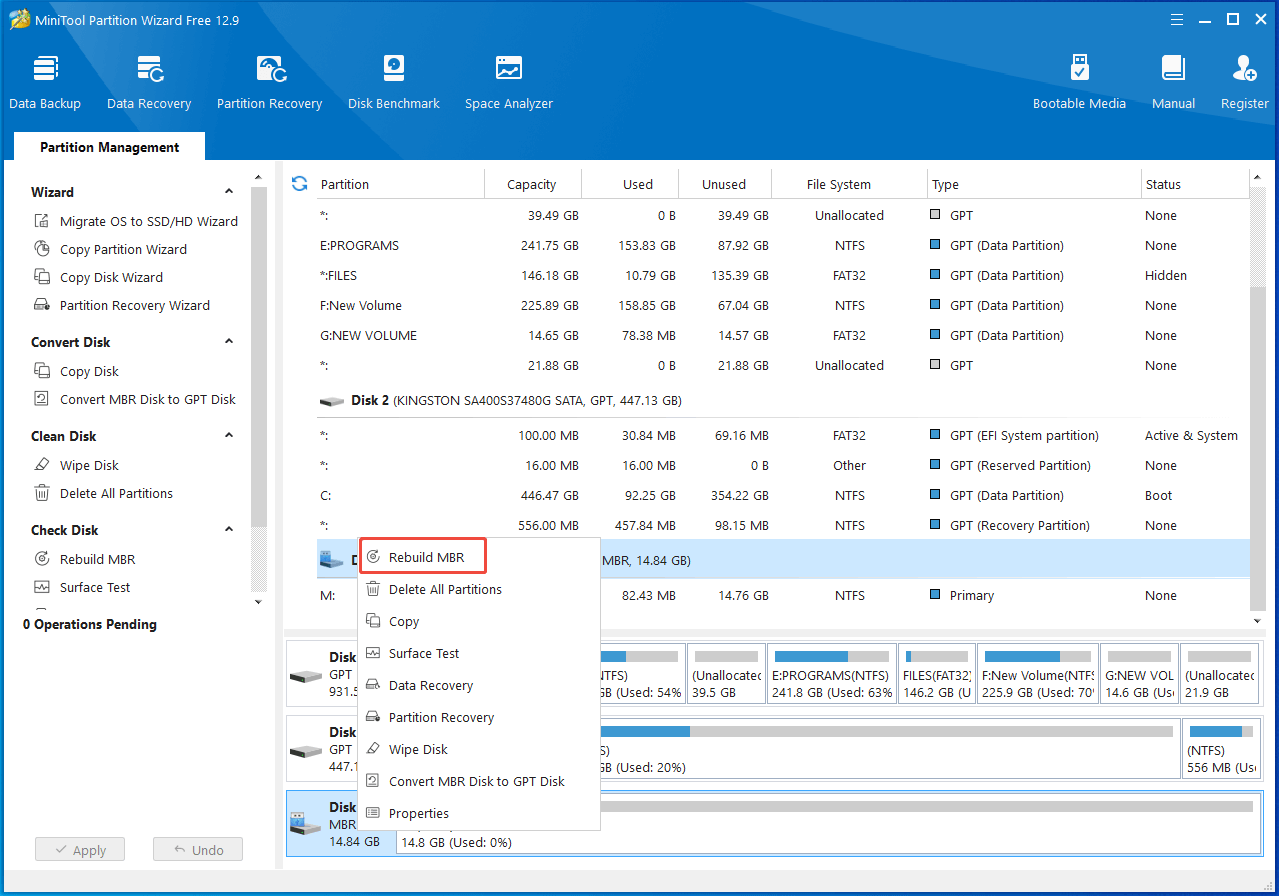
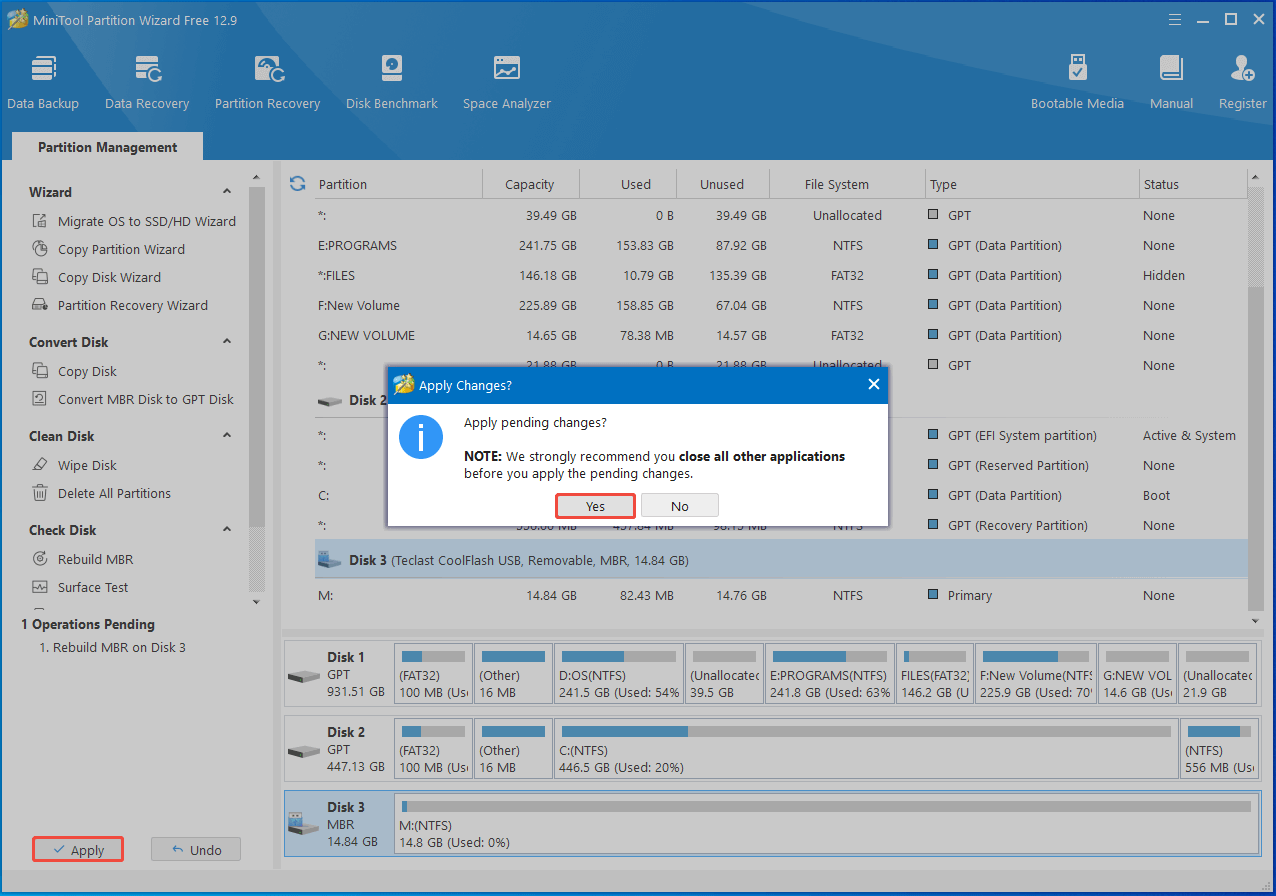
Step 2: Right-click the USB drive and select Rebuild MBR.
Step 3: Tap on Apply > Yes to execute the operation.
#9: Update or Reinstall USB Drivers
Corrupted or outdated USB drivers can also result in removable disk no media error. So, an available solution is to update or reinstall USB drivers. You can do that in Device Manager with the following steps.
Step 1: Right-click the Start icon and click Device Manager on the elevated menu.
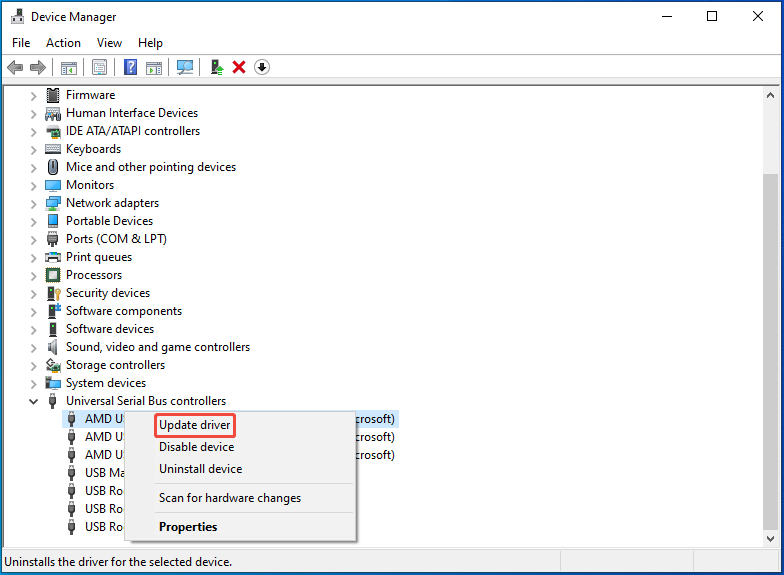
Step 2: In Device Manager, expand Universal Serial Bus controllers by double-clicking it.
Step 3: Right-click your USB driver and pick Update driver.
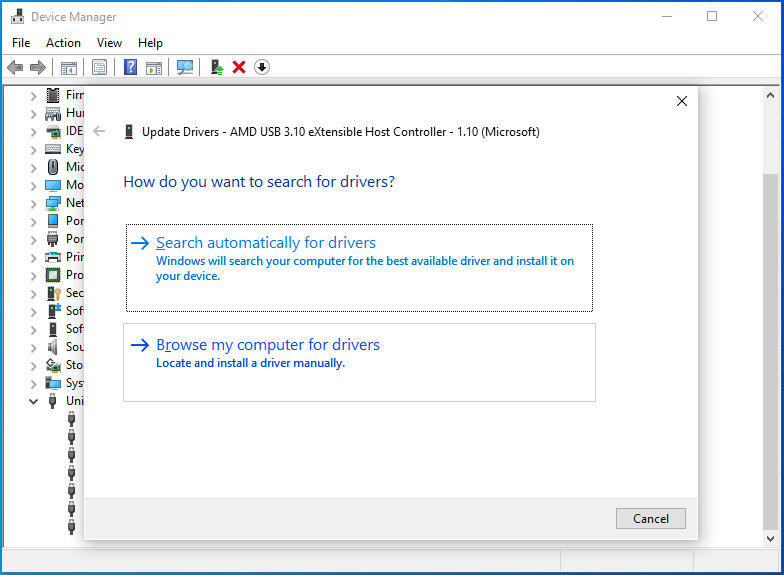
Step 4: Choose a way to update the USB driver.
- Search automatically for drivers: Windows will automatically search your computer for the best available driver and install it on your device.
- Browse my computer for drivers: You need to locate and install a driver manually.
Step 5: Follow the pop-up instructions to complete the operation.
If you want to reinstall USB driver, navigate to the target driver, right-click it, and choose Uninstall device. Then click Uninstall in the warning window to confirm the operation.
After the uninstallation process ends, click on the Action tab and select Scan for hardware changes. After a while, the USB driver will be reinstalled.
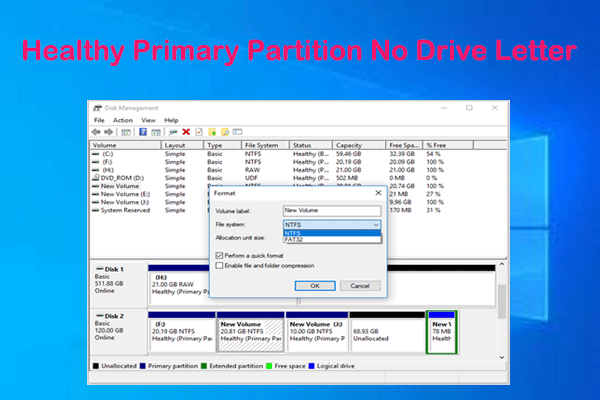
#10: Format the Faulty USB
If none of the above method work, consider formatting the USB drive. It’s an effective removable disk no media fix. To format the USB, you need to use a USB formatter like File Explorer, Disk Management, DiskPart, etc.
Here, I show you how to format the USB drive using File Explorer.
Step 1: Open File Explorer on your computer.
Step 2: Right-click the USB drive and select Format on the context menu.
Step 3: In the prompted window, configure settings like file system, allocation unit size, and volume label based on your needs. Once done, click the Start button.
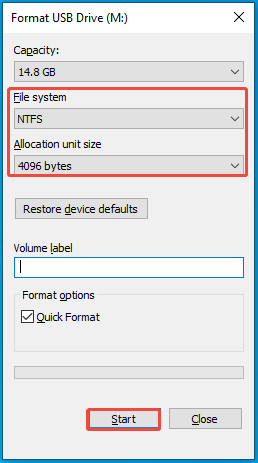
Step 4: Tap OK to confirm the operation.
Bottom Line
This post focuses on removable disk no media error, including its basic information, causes, and fixes. After reading the post, you will have an overall understanding of the error.
If you have any difficulty in using MiniTool Partition Wizard, contact us by sending an email via [email protected]. We will reply to you as soon as possible.
User Comments :