This article explains quick format vs. full format, including data recovery possibilities after formatting. It also guides you on choosing between the two options and shows how to recover data from a quick-formatted disk using MiniTool Partition Wizard.
Quick formatting takes a short time, typically just a few seconds to a few minutes. It’s suitable for reinstalling the operating system or reusing the hard drive, but it doesn’t completely erase the data.
Full formatting takes longer (typically 1–3 hours for HDDs, and even longer for other large-capacity disks). It scans for bad sectors and cleans up data more thoroughly, making it more suitable for selling the device or deep cleaning.

Quick Format vs Full Format: Differences and How to Choose
This section will compare quick format and full format, explaining their main characteristics to help you understand the differences between the two more clearly.
| Quick Format | Full Format | |
| What Does It Do | Delete files from a partition, rebuild the file system, volume label, and cluster size. | Delete files from a partition, rebuild the file system, volume label, cluster size, and scan the partition for logical bad sectors, and overwrite data |
| Time Required | A few seconds to minutes | 2 hours or 1 day |
| Data Recover | The data remains on the hard drive and can be easily recovered | All data will be completely erased and cannot be recovered using data recovery software |
| Pros | Save time, and can recover files | High security, detects bad sectors, and thoroughly wipes data. |
| Cons | It does not check for bad sectors and is not a secure erasure method | Time-consuming and not recommended for SSD |
The following table summarizes the best use cases for quick format and full format in different situations:
| Situation | Recommended Option |
| Selling a hard drive/computer | Full Format |
| Reinstalling Windows | Quick Format |
| Suspected bad sectors | Full Format |
| External drive cleanup | Quick Format |
| Infected with a virus or malware concerns | Full Format |
| Formatting an SSD | Quick Format |
Further reading: Quick Format vs Full Format for SSD
For SSDs, quick formatting is generally the recommended option.
Unlike HDDs, SSDs do not require frequent bad sector scans, and modern SSDs employ TRIM technology to effectively manage deleted data.
Full formatting also generates additional write operations, which can potentially cause unnecessary wear and tear on the SSD.
Also read: How to TRIM Your SSD Manually – A Full Guide.
Quick Format VS Full Format: How Do I Perform Formatting on Windows
How do you perform a quick or full format in Windows? Below are three methods: using File Explorer, using Disk Management, and using DiskPart.
Note: These methods cannot format drives larger than 32GB to FAT32. To overcome this limitation, an excellent FAT32 formatter, MiniTool Partition Wizard, is recommended.
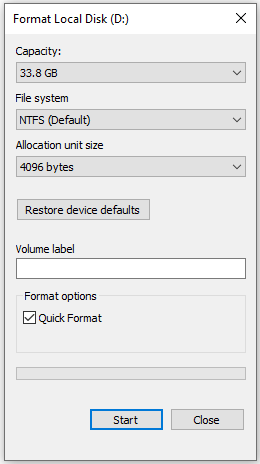
Method 1: Format Disk Via File Explorer
In Windows systems, File Explorer provides a quick and easy way to format hard drives, SD cards, USB flash drives, or external hard drives, making it commonly used for routine formatting of non-system drives.
In actual testing, performing a quick format on an SSD typically takes only a few seconds.
- Press Win + E to open File Explorer.
- Click This PC to view all drives of the PC. Right-click the drive you want to format, and select Format.
- In the Format window, change the file system, allocation unit size, etc.
- Click Start to begin the format.
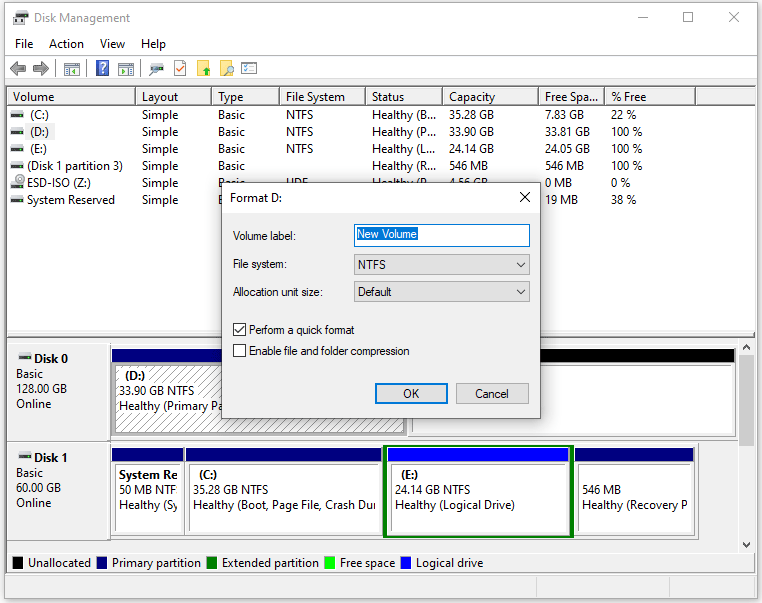
Method 2: Format Disk Via Disk Management
Disk Management is a built-in Windows tool used to format and manage disk partitions. It’s typically used when drives are inaccessible through File Explorer or when operations on partitions are needed.
In fact, formatting a drive here is very simple. A quick format usually takes only a few seconds.
- Right-click the Start icon and select Disk Management.
- Locate the drive you want to format, right-click it, and select Format.
- Configure the settings like File system, etc., and the Perform a quick format option is selected by default. Then click OK to confirm.
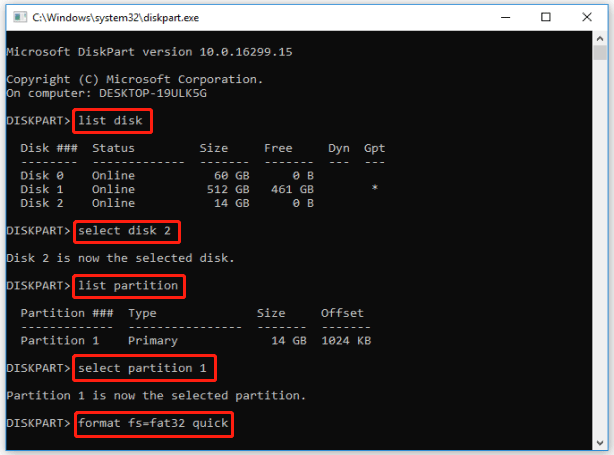
Method 3: Format Disk Via DiskPart
DiskPart is a built-in command-line tool in Windows that allows you to manage and format disks. By entering specific commands, you can quickly format drives or perform other disk-related tasks.
Step 1: Press the Win + R key, type diskpart, and press Enter.
Step 2: Type the following commands in order and press Enter after each one.
- list disk (This command will list all disks detected by your computer)
- select disk * (* represents the disk number)
- list partition (This command will list all partitions on the selected disk)
- select partition * (* represents the partition number of the selected drive)
- format fs=fat32 quick (Swap in NTFS or exFAT as needed. Leaving out Quick will perform a full format.)
How to Recover Data from Quick Formatted Disk
A quick format does not completely erase the data on the drive. In most cases, the original files can still be recovered.
If you accidentally quick format your hard drive, stop using the device immediately to avoid overwriting recoverable files.
Afterward, you can use the data recovery function in MiniTool Partition Wizard to scan the formatted drive and recover deleted files.
In my experience, this software can usually scan a large number of files from a formatted SSD within minutes.
However, when the disk capacity is large, the scanning process may take tens of minutes or even longer.
MiniTool Partition Wizard DemoClick to Download100%Clean & Safe
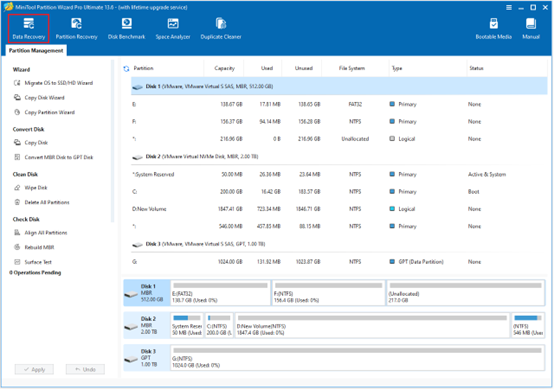
Step 1: Open MiniTool Partition Wizard.
Step 2: Click the Data Recovery feature at the top toolbar of the interface.
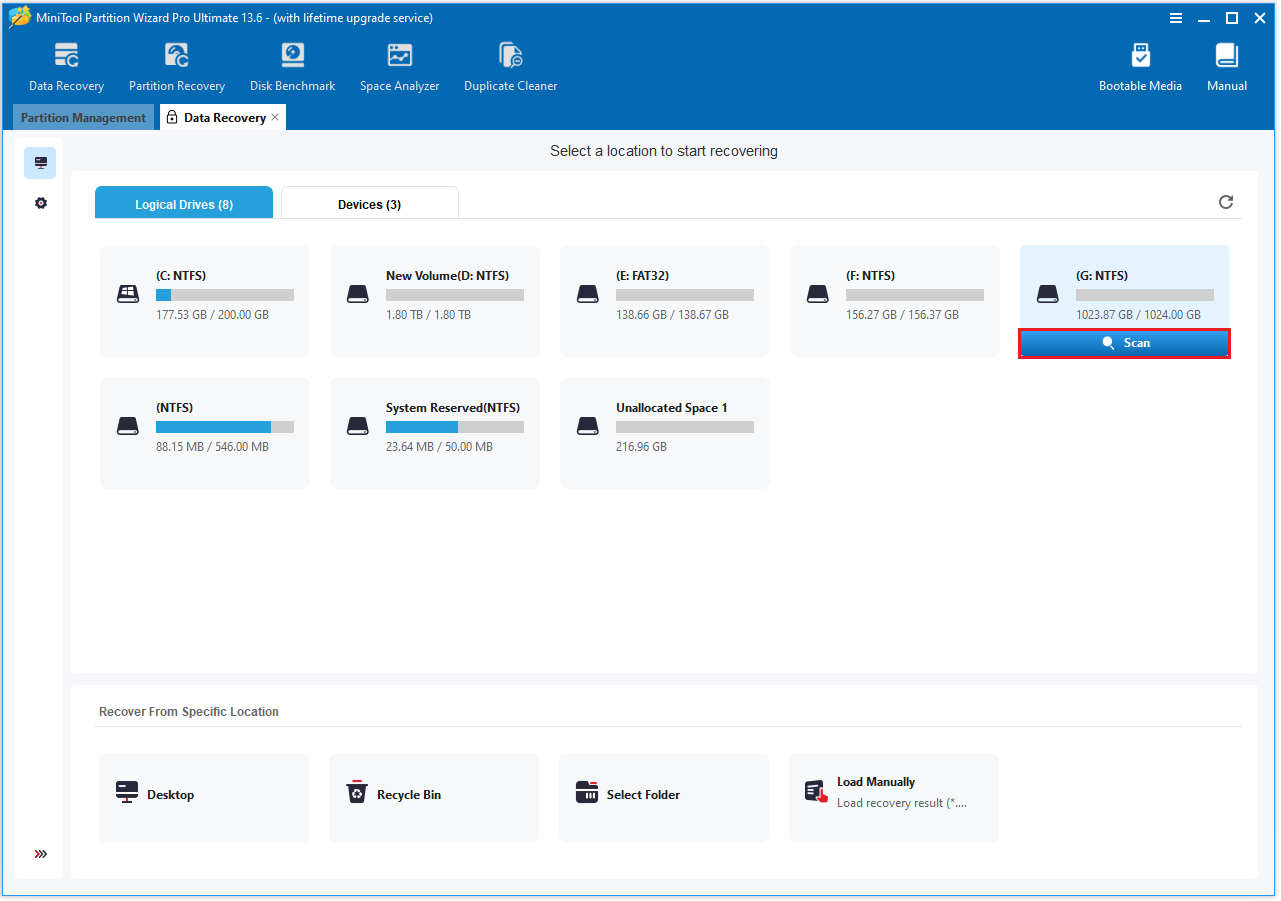
Step 3: Under the Logical Devices section, choose the formatted drive and click the Scan button.
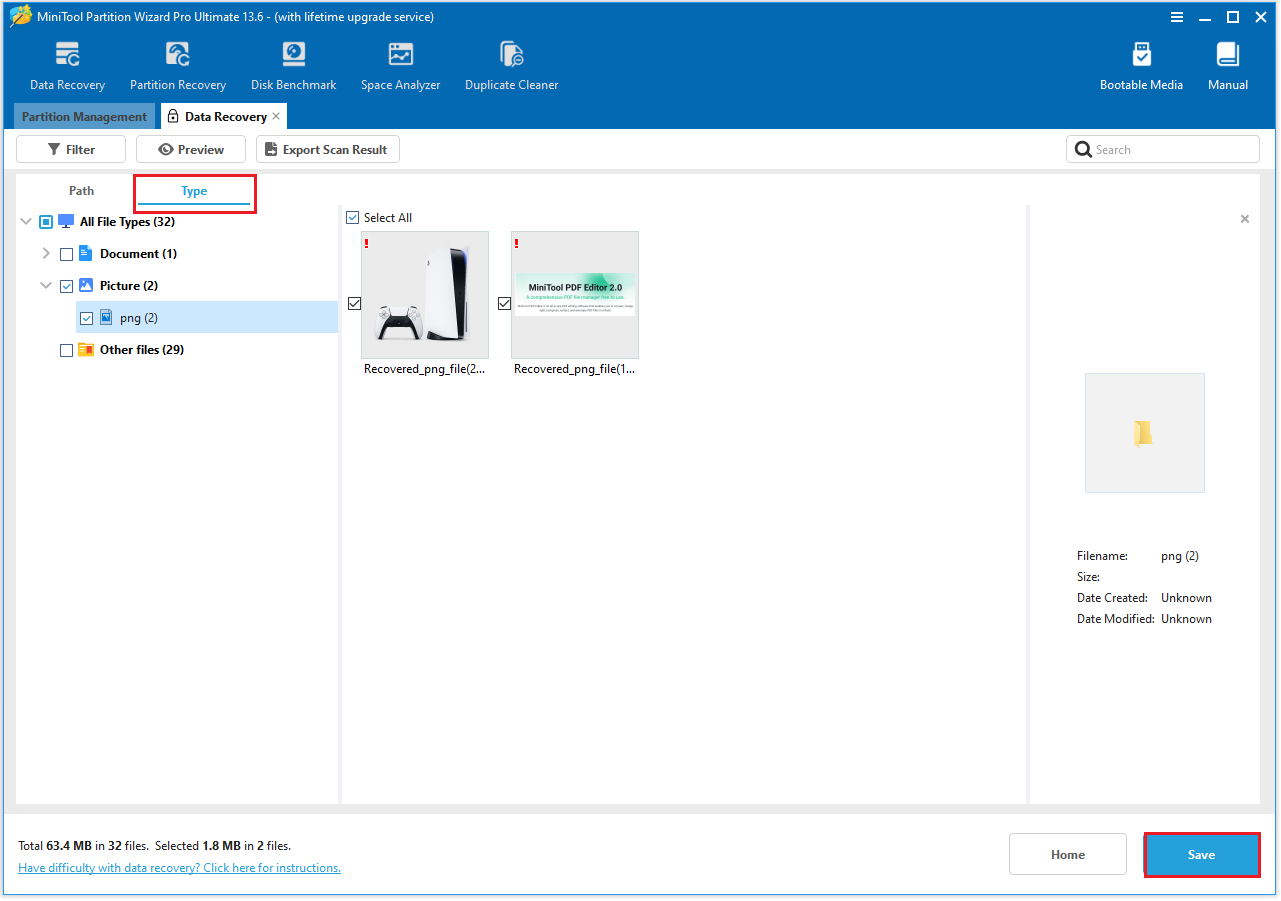
Step 4: After the scan finishes, you can explore the folders to view files listed under the Path tab (the default option). When you see the files you intend to recover, tick the box in front of each file and click Save. To make locating files easier, consider using these features.
- Type: In this section, all files are categorized by their type and format.
- Filter: This feature lets you narrow down results by excluding unwanted files based on factors such as file type, last modified date, size, and category.
- Search: It allows you to perform a targeted search. Simply type a full or partial file name into the search bar.
- Preview: Select a file and click Preview to verify whether it’s the one you need.
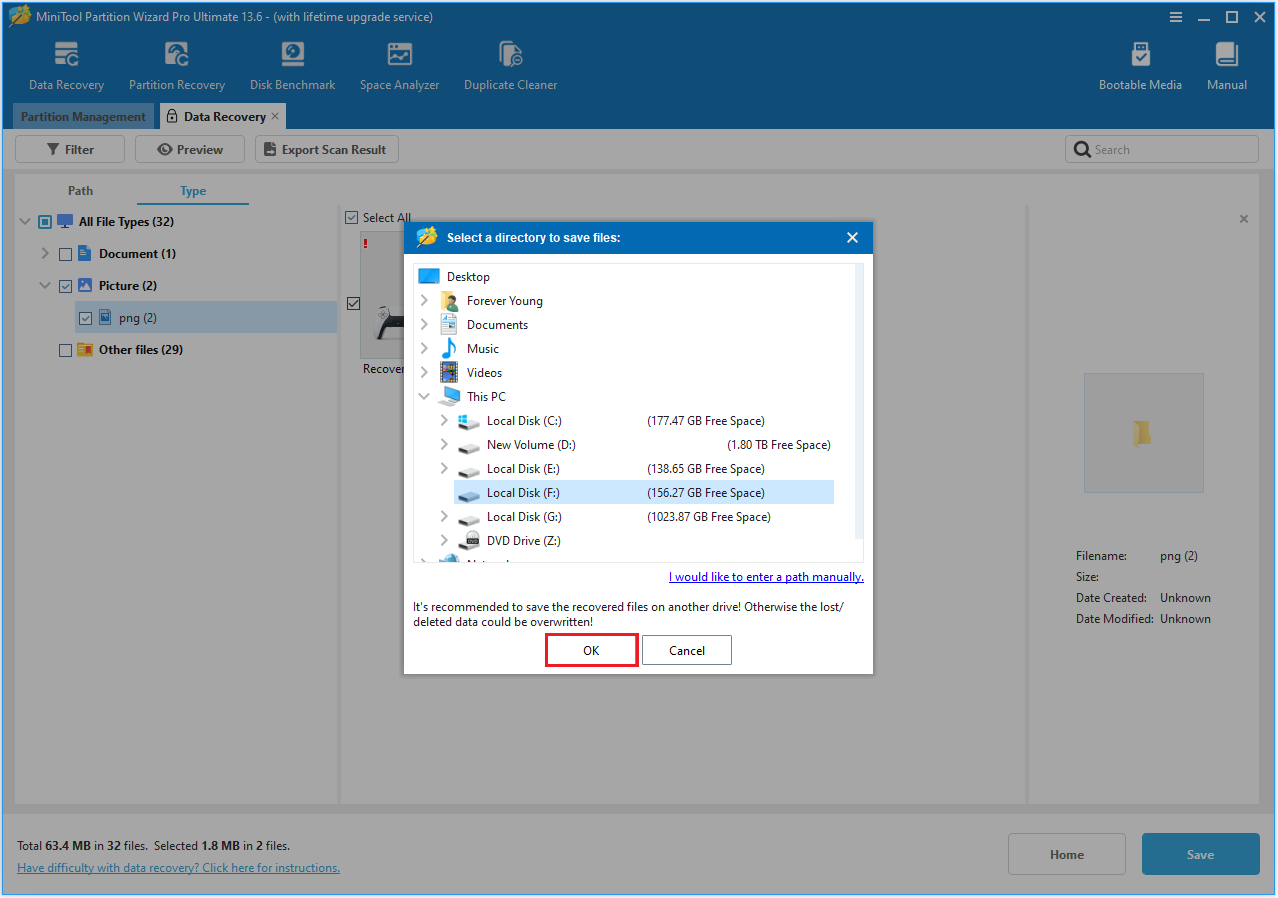
Step 5: Choose a drive to store the recovered files. Then click OK.
Quick Format vs. Full Format FAQ
This process requires reading and writing every part of the storage device, which is very time-consuming.
Bottom Line
This article explains quick format vs. full format in detail. It also tells you how to recover data from quick formatted disk. If you have any questions or suggestions while using MiniTool Partition Wizard, contact us via [email protected] for further assistance.
About The Author

Position: Columnist
Cecilia has been an editor at MiniTool for two years. She primarily focuses on disk and partition-related content, with particular expertise in disk cloning, partition recovery, and PDF document conversion. She is dedicated to providing users with clear and accurate solutions to help them efficiently resolve common computer problems.
User Comments :