Many users encounter the “Rufus won’t recognize USB” problem on Windows 10/11. Are you also troubled by the error? This post from MiniTool Partition Wizard is worth reading. It analyzes the possible causes of the error and provides several corresponding fixes.
Rufus is a free and open-source application for creating a bootable USB drive using an ISO file. It is a popular tool that is widely used by Windows users, but it may not always detect USB drives. If you find that Rufus does not detect USB drive, there are steps you can take to resolve the issue.
Why Rufus Won’t Recognize USB
What causes the “Rufus won’t recognize USB” error on Windows 10/11? There are several reasons why Rufus cannot detect a USB drive.
- Outdated Rufus version: If you are using an outdated version of Rufus, there may be compatibility issues with newer USB drives or operating systems. It is imperative to keep Rufus up to date to ensure compatibility with the latest technologies.
- Compatibility issues with the USB drive: If the USB drive is not compatible with the software, Rufus does not detect USB drive. Make sure the USB drive is compatible with Rufus before attempting to use the software.
- Corrupted USB drive: If there are bad blocks on the USB drive, USB is not detected by Rufus. You should check the USB drive for any physical damage to Rufus before trying to use it.
- Incorrect Rufus settings: Rufus has many options and settings that affect the software’s ability to detect USB drives. You should check the settings to make sure the software is set up correctly for its specific use case.
- Interference with firewall or antivirus software: Firewall or antivirus software may interfere with Rufus’ ability to detect USB drives. You should temporarily disable your antivirus or firewall to see if that is the cause of the problem.
How to Fix Rufus Won’t Recognize USB
If Rufus won’t recognize USB drive, you can try the 9 solutions below in order until the problem gets solved.
Solution 1. Verify the USB Drive Connection
The first step in troubleshooting Rufus not detecting USB drives is to verify the USB drive connection. Sometimes, a USB drive may not be connected properly, causing problems.
You can try disconnecting the USB drive from your computer. Wait a few seconds, then reconnect the USB drive. After that, check if your computer recognizes the USB drive. If yes, it indicates the problem is on Rufus.
If you find this doesn’t work, you can try the next solution to solve the Rufus won’t recognize USB error.
Solution 2. Use a Different USB Drive
Sometimes, the problem can be caused by a faulty or incompatible USB drive. Some USB drives may not be recognized by Rufus due to brand, storage capacity, or file system. Always make sure the USB drive is compatible with Rufus before attempting to use the software. In this case, you can try a different USB drive.
You just need to disconnect the current USB drive from your computer and connect another USB drive to your computer. If your computer recognizes the USB drive, run Rufus and check that it detects the new USB drive.
Solution 3. Check the USB Drive for Errors
As mentioned above, the “Rufus not detecting USB” problem may be caused by the bad sectors on the USB drive. In this case, it’s important to check if the hard drive gets faulty. There are 2 methods to check the hard disk for errors. For that:
Method 1: Use CHKDSK
CHKDSK is a disk error checking and repair utility built into Windows. It scans hard drive partitions for internal errors and repairs them at the same time. To use CHKDSK to repair a corrupted hard drive partition, follow these steps:
Step 1: Type cmd in the Search box. Then right-click on Command Prompt and select the Run as administrator option to open Command Prompt as administrator. Then click Yes to get Admin access.
Step 2: In the Command Prompt window, type the chkdsk G: /f/r command and press Enter. “G” represents the hard drive partition letter.

Method 2: Use MiniTool Partition Wizard
Although CHKDSK can be used to check the hard drive for errors, this tool often runs into various issues like CHKDSK being write-protected, CHKDSK getting stuck, etc. So, it’s highly recommended you use a powerful disk manager – MiniTool Partition Wizard. It can help you check bad sectors but also repair file system errors easily and quickly.
It is an all-in-one partition manager that allows you to perform various operations related to hard disks and partitions like create/format/resize/move/extend/delete/copy/recover partitions. And it is capable of converting MBR to GPT without data loss, converting FAT to NTFS, migrating OS to SSD/HD, etc.
MiniTool Partition Wizard FreeClick to Download100%Clean & Safe
Step 1:Download and install MiniTool Partition Wizard on your PC. Then launch it to get its main interface, and then select the target USB drive and click on Surface Test from the left pane.
Step 2:Click on the Start Now button in the pop-up window. After that, this tool will scan the whole drive immediately and show you the test result.
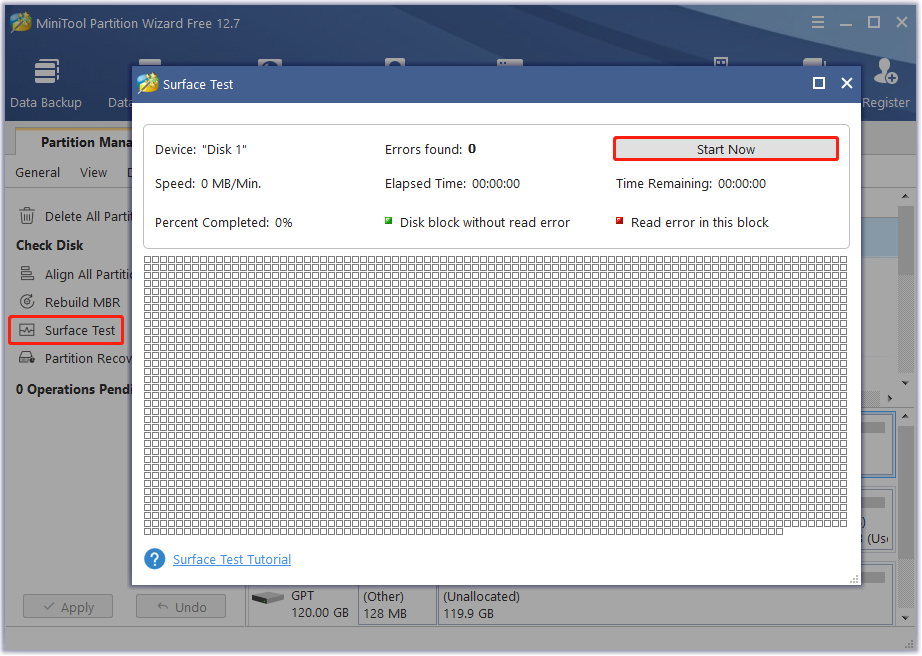
Step 3: When the hard drive error test process is completed, the bad sectors on the hard drive will be marked with red color. In this case, you can either use this bad sector repair guide or consider replacing it with a new one.
Step 4: In the main interface, select the USB drive again and click on Check File System from the left action panel.
Step 5: Select Check & fix detected errors and click on the Start button. This tool will check and repair file system errors immediately.
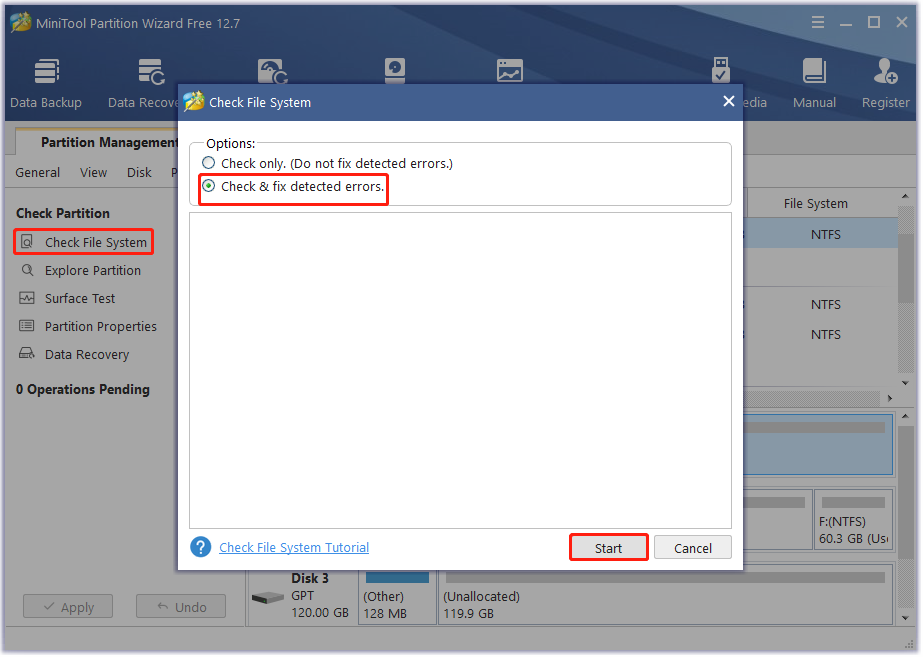
Once repaired, you can check if the USB is detected by Rufus.
Solution 4. Update Rufus
If the above methods do not work for the issue of USB is not detected by Rufus, the next solution is to update Rufus to the latest version. An outdated version of Rufus may not be compatible with the USB drive, which can cause the issue of Rufus not detecting USB drives. Here’s how to update Rufus.
Step 1: Open Rufus and click on Show application settings.
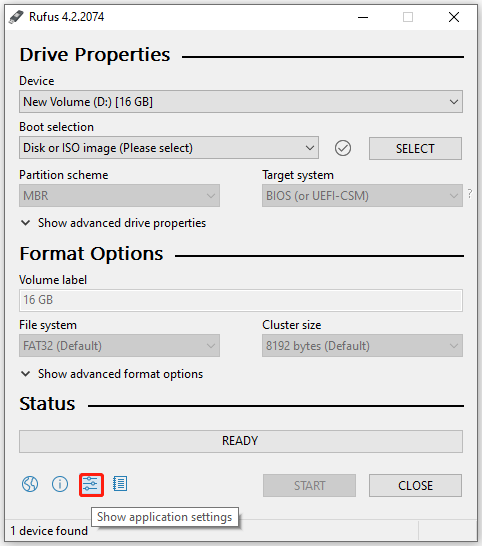
Step 2: Click on the Check Now button. If an update is available, click Download to download and install the update. Here you can select Daily, Weekly, or Monthly to check for updates.
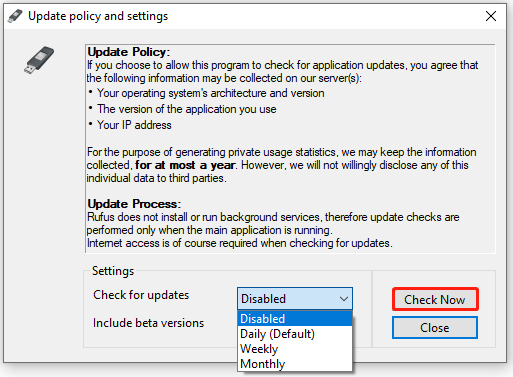
Step 3: Once the update is installed, restart Rufus and check if it detects the USB drive.
Solution 5. Change the Rufus Settings
Sometimes, the issue may be caused by incorrect Rufus settings, which can prevent it from detecting the USB drive. To change the Rufus settings, you can follow the steps below:
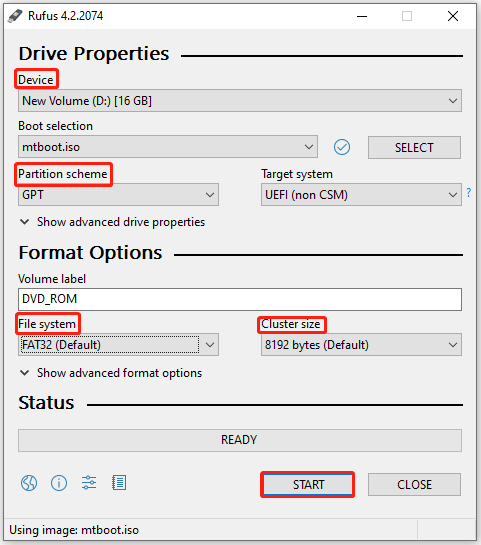
Step 1: Launch Rufus.
Step 2: Click on the Device drop-down menu, and select the USB drive that you want to use.
Step 3: Click on the Partition scheme drop-down menu, and select the appropriate scheme for your USB drive.
Step 4: Click on the File system drop-down menu, and select the appropriate file system for your USB drive.
Step 5: Click on the Cluster size drop-down menu, and select the appropriate cluster size for your USB drive.
Step 6: Click on the START button to begin the process of creating a bootable USB drive.
Solution 6. Temporarily Disable Antivirus Software
Antivirus or firewall software may interfere with Rufus’ ability to detect USB drives. This could be due to software flagging Rufus as a potential security threat or preventing Rufus from accessing the USB drive. You should try temporarily disabling your antivirus or firewall.
To disable Windows Defender Antivirus temporarily, you can follow the steps below:
Step 1: Search for Windows Security from the Start bar and choose the top result to continue.
Step 2: Choose Virus & threat protection. Then, click Manage settings under Virus & threat protection settings.
Step 3: Turn the switch from On to Off under the Real-time protection section.
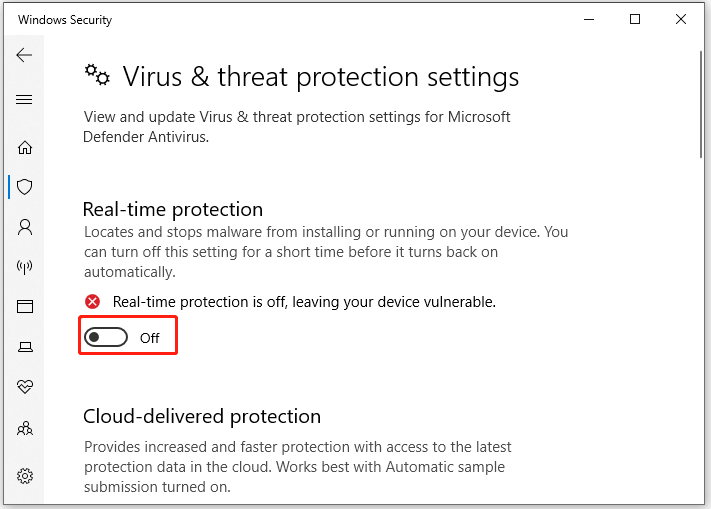
Once disabling the Real-time protection, you should check if the USB drive can be detected by Rufus. If not working, re-enabling the protection.
If you are using any third-party antivirus software, you can try disabling the real-time security option when running Rufus. If the issue still persists, you should uninstall the antivirus software from Windows.
Solution 7. Update the USB Driver
Outdated or missing USB drivers can cause problems with USB drive detection. Therefore, you can check for updates to USB drivers and install them.
Step 1: Right-click on the Windows icon and click Device Manager.
Step 2: Double-click Universal Serial Bus controllers to expand it.
Step 3: Right-click on your USB driver and click Update driver.
Step 4: In the next window, choose Search automatically for drivers to update the USB driver.
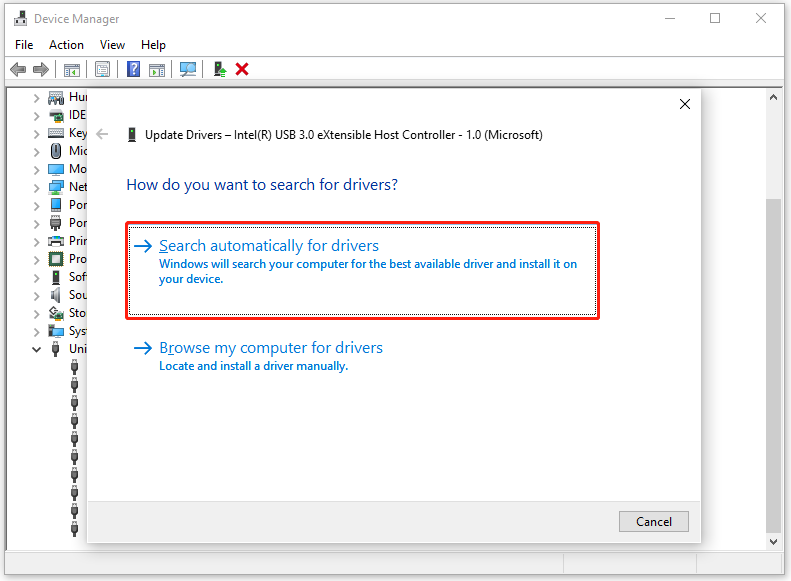
Step 5: Follow the on-screen instructions to complete the operation.
Solution 8. Check the USB Drive File System
Rufus may fail to detect a USB drive if it has an unsupported file system. Check the file system of the USB drive and format it to a supported file system such as FAT32 or NTFS.
Step 1: Insert the USB drive into the computer.
Step 2: Press the Win + E key to open File Explorer.
Step 3: Find the USB drive in the list of drives and right-click on it.
Step 4: Select Properties from the drop-down menu.
Step 5: In the Properties window, check the File system field to see the current file system of the USB drive.
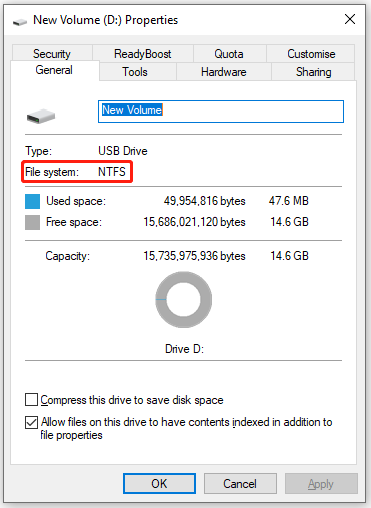
Step 6: If the file system is not FAT32 or NTFS, you will need to format the drive to a supported file system. To do this, right-click the USB drive in File Explorer and select Format.
Step 7: In the formatting window, select the desired file system from the drop-down menu and click Start to start the formatting process.
After formatting is complete, try using Rufus again to see if it detects the USB drive.
If you want to format your USB drive larger than 32GB to FAT32, you cannot use the Windows built-in tools to finish the operation. In this case, you should use MiniTool Partition Wizard to format the USB drive.
MiniTool Partition Wizard FreeClick to Download100%Clean & Safe
Step 1: Launch MiniTool Partition Wizard to get its main interface.
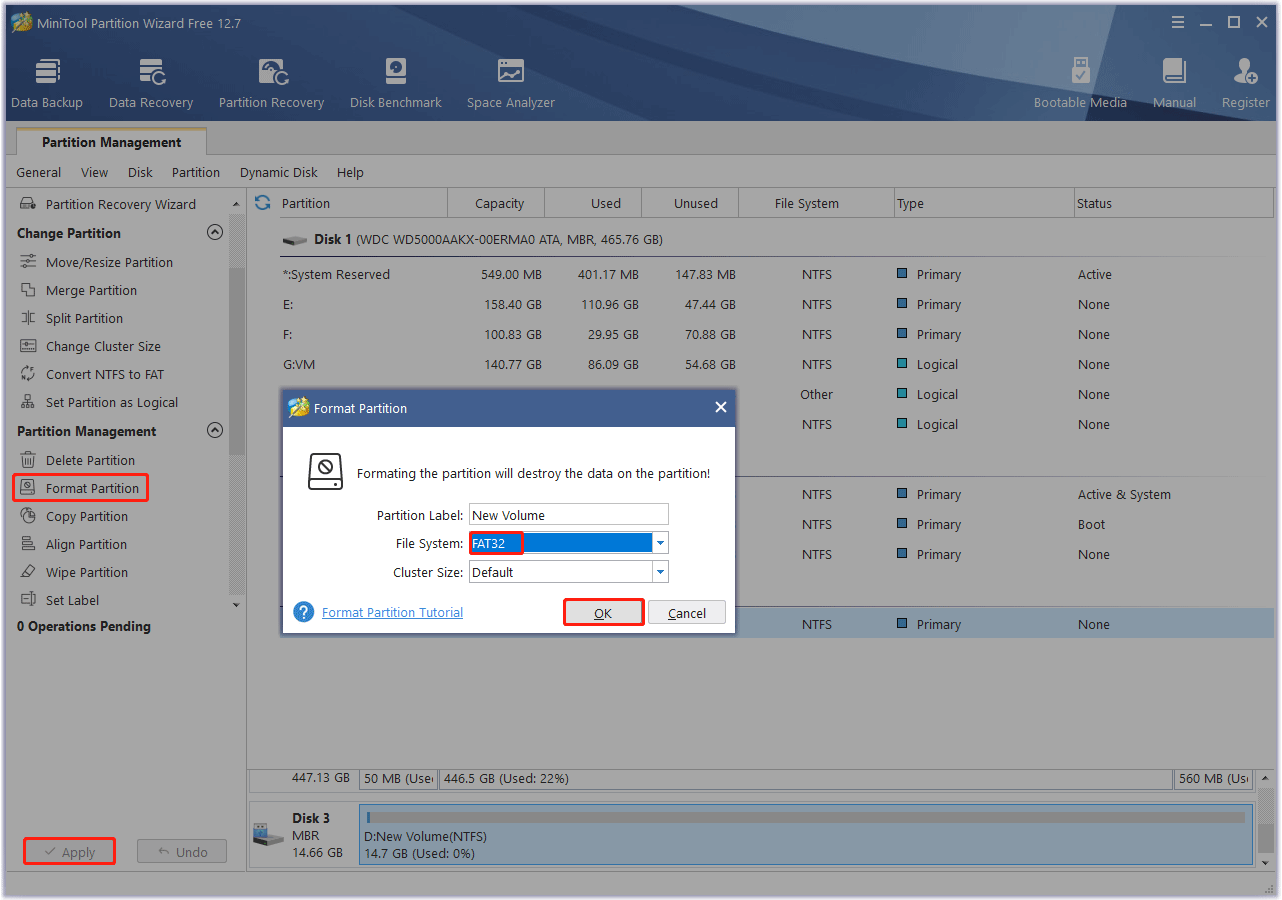
Step 2: Right-click on the USB drive and then click on the Format option in the context menu. Alternatively, click on the USB drive and tap Format Partition in the left panel.
Step 3: In the pop-up window, select FAT32 from the File System drop-down menu and click on OK to confirm it. Here you also can set the Partition Label and Cluster Size according to your needs.
Step 4: Finally, click on Apply to execute the pending operation.
Solution 9. Use an Alternative to Rufus
If the above methods don’t work for the issue of Rufus won’t recognize USB, you can use an alternative to Rufus. What alternatives are available? Read this article to learn.
Bottom Line
How to solve the Rufus does not detect USB problem? The 9 solutions have been displayed in the above content. If you run into some problems during the fixing process, you can leave them in the following comment zone.
Certainly, if you have any questions or suggestions for MiniTool Partition Wizard, please do not hesitate to contact us via [email protected].
About The Author

Position: Columnist
Vega enjoys helping people with computer problems, including disk management, data recovery, data backup, and more. She is constantly expanding her knowledge in related fields. And she will continue to bring more easy-to-understand professional articles to help people solve various problems on the PC.
User Comments :