The error message “Please insert the last disk of the Multi-Volume set” indicates that a software program or process is trying to access a file that has been split into multiple parts and cannot find or read the final file.
This message is most commonly encountered when working with compressed files that span multiple volumes (such as .zip or .rar archives) or when working with backup sets stored on multiple disks.
Here’s a true example from learn.microsoft.com.
Every time I open Windows Explorer, I get a pop-up message that reads: Compressed (zipped) Folders. Please insert the last disk of the Multi-Volume set and click OK to continue. I have no idea what it's talking about or why it's doing this, and it's difficult to make the message go away (it keeps coming back). How do I stop it permanently?https://learn.microsoft.com/en-us/answers/questions/4231141/please-insert-the-last-disk-of-the-multi-volume-se?forum=windows-all&referrer=answers
If you are bothered by the same issue, keep an eye on this article. Here, we’ll break down why this error occurs and how to fix it step-by-step.
What Causes Please Insert the Last Disk of the Multi-Volume Set?
Multiple factors can result in this issue. Knowing the possible causes of the issue can help you get to the best solutions. Here are the main causes of the issue:
#1. Corrupted archive file
A file archive, like a .zip or .rar file, can become corrupted for several reasons.
- Failed transfer: A file wasn’t completely copied from one drive to another, such as when a USB drive was mistakenly ejected while moving files.
- Interrupted download: An incomplete or failed download can cause archive file corruption.
- Aging flash drive: Data on older flash drives can become corrupted as the drive’s memory cells wear out.
- OS conflict: If a file was written by a different operating system (such as macOS), it may be corrupted or contain hidden files that Windows can’t read correctly.
#2. Dispersed multi-part archive
Many large archive files are split into multiple smaller parts (for example, archive.zip, archive.zip.001, archive.zip.002).
Windows’ built-in file extractor requires all parts to be in the same folder to work properly. If one or more of the parts are moved or deleted, the extraction will fail with this error.
#3. Corrupted file system on removable media
If the error appears automatically when you insert an external drive, USB stick, or SD card, the drive’s file system itself may be damaged. Windows interprets the file system error as a problem with the multi-part archive.
#4. Corrupted drivers
Outdated or faulty USB controller drivers can prevent Windows from communicating correctly with removable media, resulting in file access errors.
#5. Corrupted system files
In some cases, corrupt Windows system files can also be the culprit.
#6. Incompatible extractor
Native Windows file extractors are not as powerful as dedicated third-party tools like 7-Zip or WinRAR and are prone to errors.
How to Fix Please Insert the Last Disk of the Multi-Volume Set?
After learning the possible reasons for the issue, you can take action to resolve it. Then try them one by one until the issue is solved.
Way 1. Move All Volumes to the Same Folder
Windows only checks the current folder for related volumes. Even if you have all parts, scattering them across drives or directories will trigger the error.
Therefore, make sure all files in the multi-volume set are in the same folder.
Step 1. Create a new, empty folder on your desktop.
Step 2. Copy all parts of the multi-volume archive into this single folder.
Step 3. Attempt to extract the archive again from its new location.
Way 2. Remove Compressed Files from the Drive
To fix the compressed (zipped) folders error, you can locate and delete the .zip folder that is causing the problem. Most of the time, the folder is hidden, so you first need to make hidden files visible in File Explorer by enabling the “Hidden Items” option.
Step 1. Press the Win + E key to open Windows File Explorer.
Step 2. Go to the View tab, then click Options on the top menu bar.
Step 3. In the Folder Options window, switch to the View tab, and then check the option Show hidden files, folders, and drives.
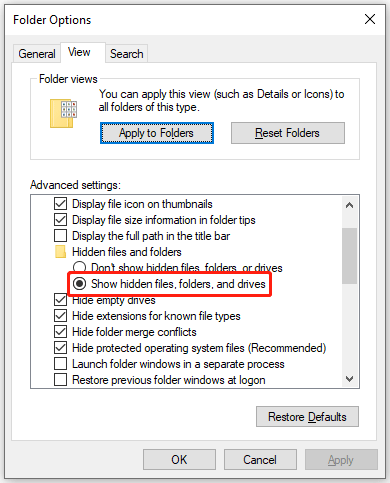
Step 4. Click Apply and OK to save the changes.
Step 5. Open the drive that is causing the error and check if any files end with the .zip extension. If such a file is not added by you, then right-click it and select Delete.
After that, reboot your PC and see if the compressed (zipped) folders error returns when you open File Explorer.
Way 3. Update or Reinstall the USB Driver
If the error occurs specifically with an external drive, an outdated or corrupted USB controller driver might be the cause. Updating the driver ensures that your computer can communicate properly with the USB device.
To update the USB controller driver, here are the steps:
Step 1. Right-click Start and choose Device Manager.
Step 2. In the Device Manager window, find and expand the Universal Serial Bus controllers.
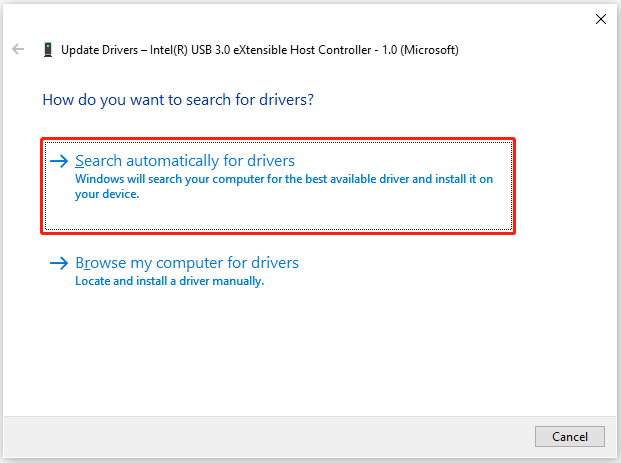
Step 3. Right-click the Host Controller and click Update driver.
Step 4. In the next pop-up window, choose Search automatically for drivers and wait for the process to complete.
If the problem persists, right-click the driver again and select Uninstall device. After uninstalling, restart your computer. The driver will automatically reinstall when Windows starts up.
Way 4. Run Windows Troubleshooter
If you’re experiencing the error “Please insert the last disk of a multi-volume set” while searching for files or folders, running the Windows Search and Indexing troubleshooter may help you diagnose and resolve the issue. Here is the guide:
Step 1. Press the Win + I key to open Settings.
Step 2. Go to Update & Security > Troubleshoot > Additional troubleshooters.
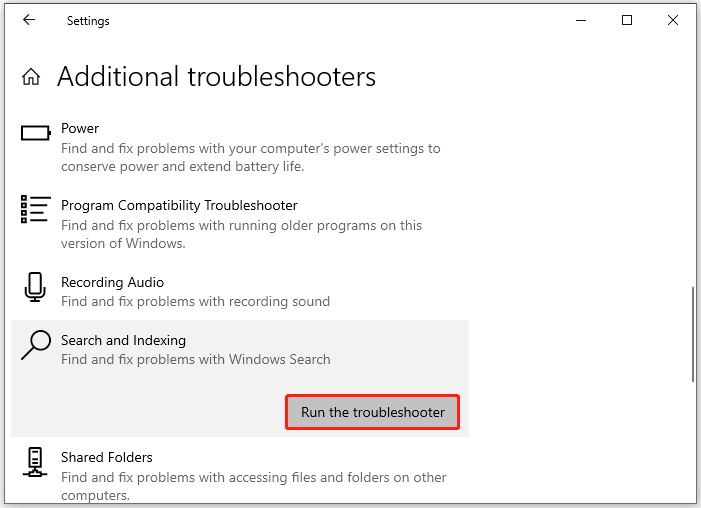
Step 3. Scroll down to find and click Search and Indexing.
Step 4. Then click Run the troubleshooter. Then follow the on-screen instructions to finish the process.
Way 5. Repair System Files
Corrupted system files can break Windows’ ability to handle archives. Use the SFC (System File Checker) and DISM (Deployment Image Servicing and Management) tools to fix this:
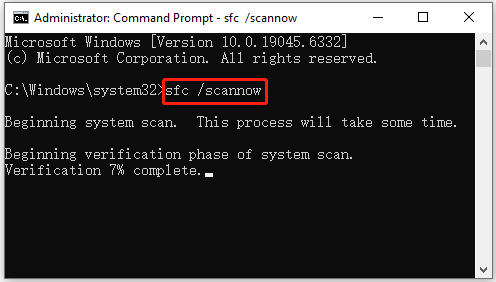
Step 1. Type cmd in the Search bar, right-click Command Prompt, and choose Run as administrator.
Step 2. In the elevated Command Prompt window, type the sfc /scannow command and press Enter. This command can scan for and repair corrupted or missing Windows system files.
Step 3. Once the SFC scanning is complete, execute the following commands one by one for DISM scanning:
- DISM.exe /Online /Cleanup-image /Scanhealth (scan the image to check for corruption)
- DISM.exe /Online /Cleanup-image /Checkhealth (check the image to see whether any corruption has been detected)
- DISM.exe /Online /Cleanup-image /Restorehealth (scan and repair the corrupted image)
Way 6. Fix File System Errors
If the compressed (zipped) folders error is due to file system corruption, you should try to fix the corrupted file system.
There are two free tools, MiniTool Partition Wizard and CHKDSK, to help you detect and repair file system errors. I highly recommend you use MiniTool Partition Wizard. That’s because it has a simple interface and is easy to use.
Option 1. Use MiniTool Partition Wizard
As a free partition manager, MiniTool Partition Wizard can detect and fix file system errors on hard disks. So, it is often used to perform HDD/SSD health checks.
Now, download and install MiniTool Partition Wizard on your PC. Then run it to check file system errors.
MiniTool Partition Wizard FreeClick to Download100%Clean & Safe
Step 1. Launch this free partition manager to enter its main interface.
Step 2. Right-click the drive and select Check File System.
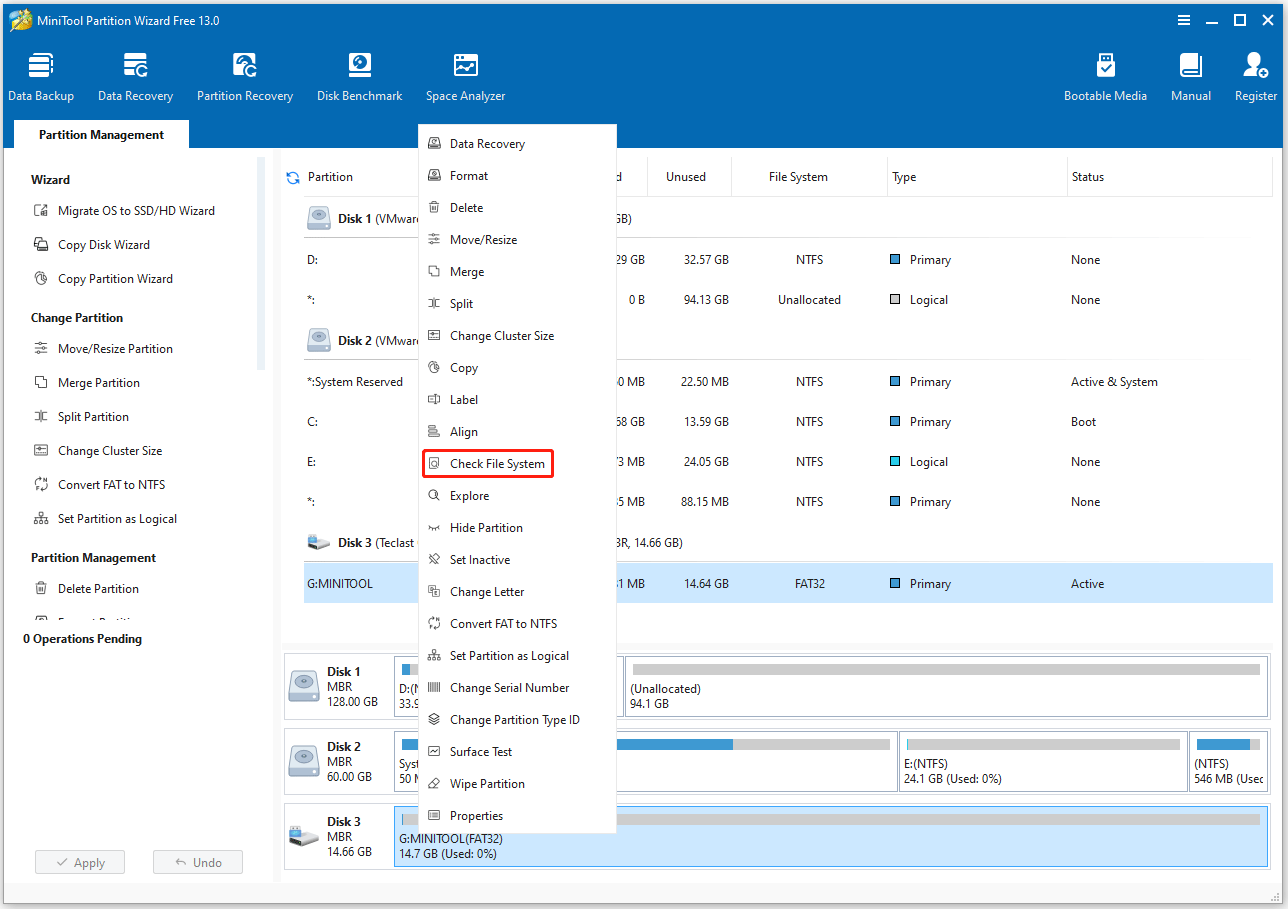
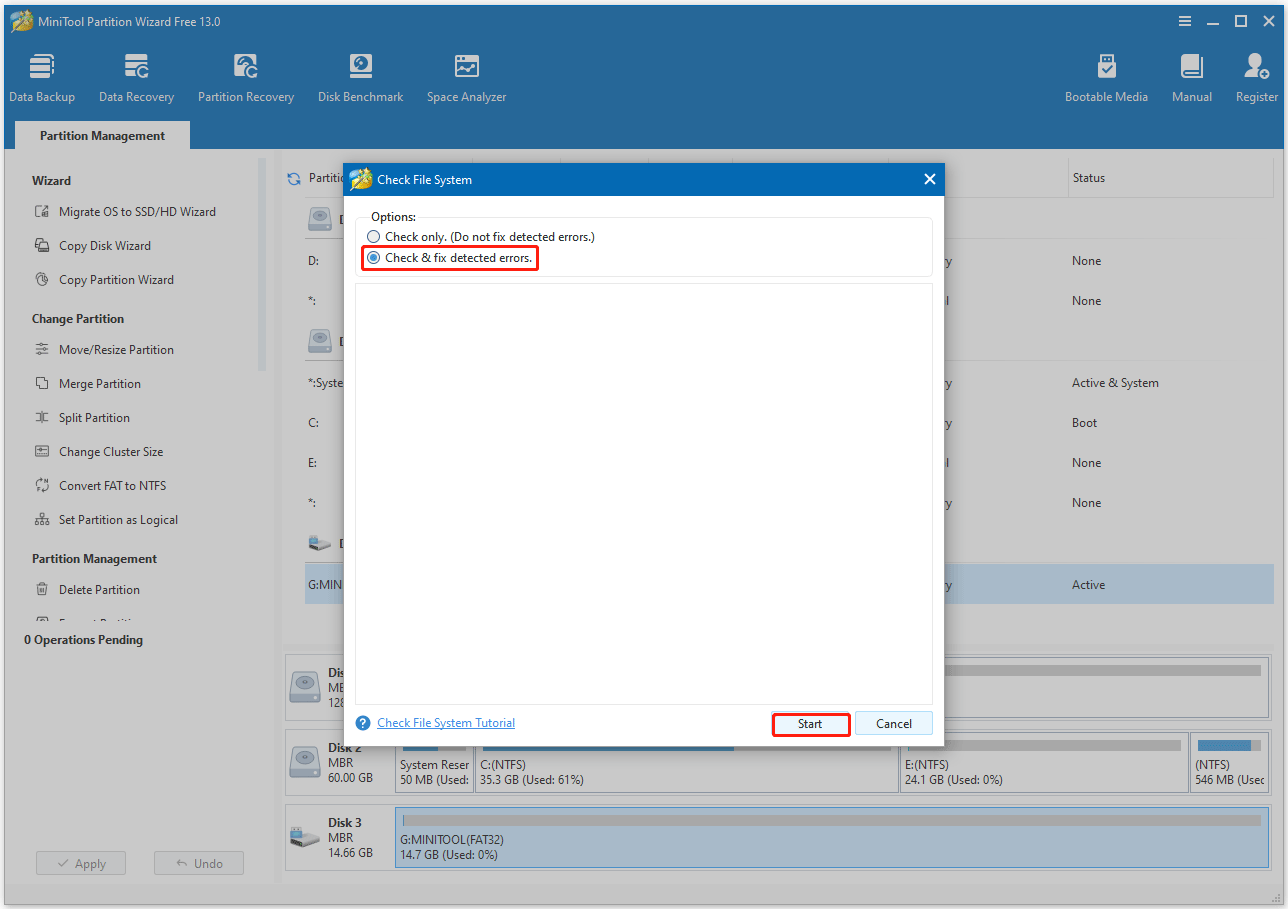
Step 3. In the pop-up window, choose the Check & fix detected errors option and click Start.
This free partition manager can not only check the drive’s health, but also manage your disks. It offers many features to do that, such as extending/resizing/formatting/wiping. It also offers some advanced features – clone a hard drive, migrate OS to SSD/HDD, recover data from a hard drive, etc.
Option 2. Use CHKDSK
CHKDSK is a command-line tool that can help you scan and repair file system errors on your hard drive. Follow the steps below to perform the task:
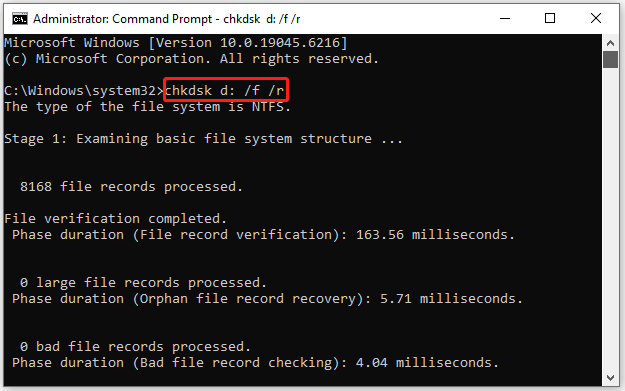
Step 1. Open the Command Prompt as administrator again.
Step 2. Type chkdsk x: /f /r and press Enter. Replace “x” with the letter of your drive.
- /f fixes errors found on the file system.
- /r locates bad sectors on the disk, recovers readable information from them, and marks them as bad.
![Windows Can’t Check the Disk While It’s in Use [Solved]](https://images.minitool.com/partitionwizard.com/images/uploads/2023/07/windows-cant-check-the-disk-while-its-in-use-thumbnail.jpg)
Way 7. Format the Drive
If the error happens automatically whenever you insert a USB drive or SD card, the drive or its contents are likely corrupted. The simplest fix is to format the drive.
Option 1. Use Disk Management
To format the drive, you can try the Windows built-in tool – Disk Management. It can help you perform some simple disk and partition operations, such as creating/formatting/deleting partitions, etc.
Now, let’s use Disk Management to format a drive.
Step 1. Right-click Start and choose Disk Management.
Step 2. Locate the drive where the problem occurs in the list of disks.
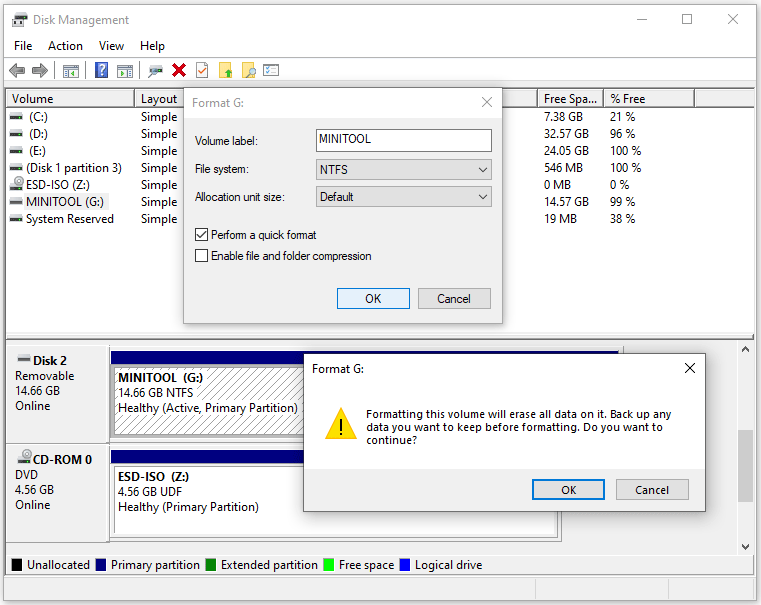
Step 3. Right-click the partition on the USB or SD card and select Format.
Step 4. Then follow the on-screen instructions to configure settings:
- Volume Label: Give the drive a new name.
- File System: Choose a file system among NTFS, exFAT, or FAT32.
- Allocate Unit Size: Leave this at the default setting.
- Perform a quick format: Keep this checked for most uses.
Step 5. Click OK and then OK again in the warning window to begin the format process.
Option 2. Use MiniTool Partition Wizard
Sometimes, Windows Disk Management may fail to format your drive and display error messages such as “Format did not complete successfully” or “Windows was unable to complete the format“.
In this case, you can use another partition manager, MiniTool Partition Wizard, for formatting drives.
Compared to Disk Management, this utility has more advanced features to help you manage disks and partitions on your Windows PC.
MiniTool Partition Wizard FreeClick to Download100%Clean & Safe
Step 1. Run MiniTool Partition Wizard to enter its main interface.
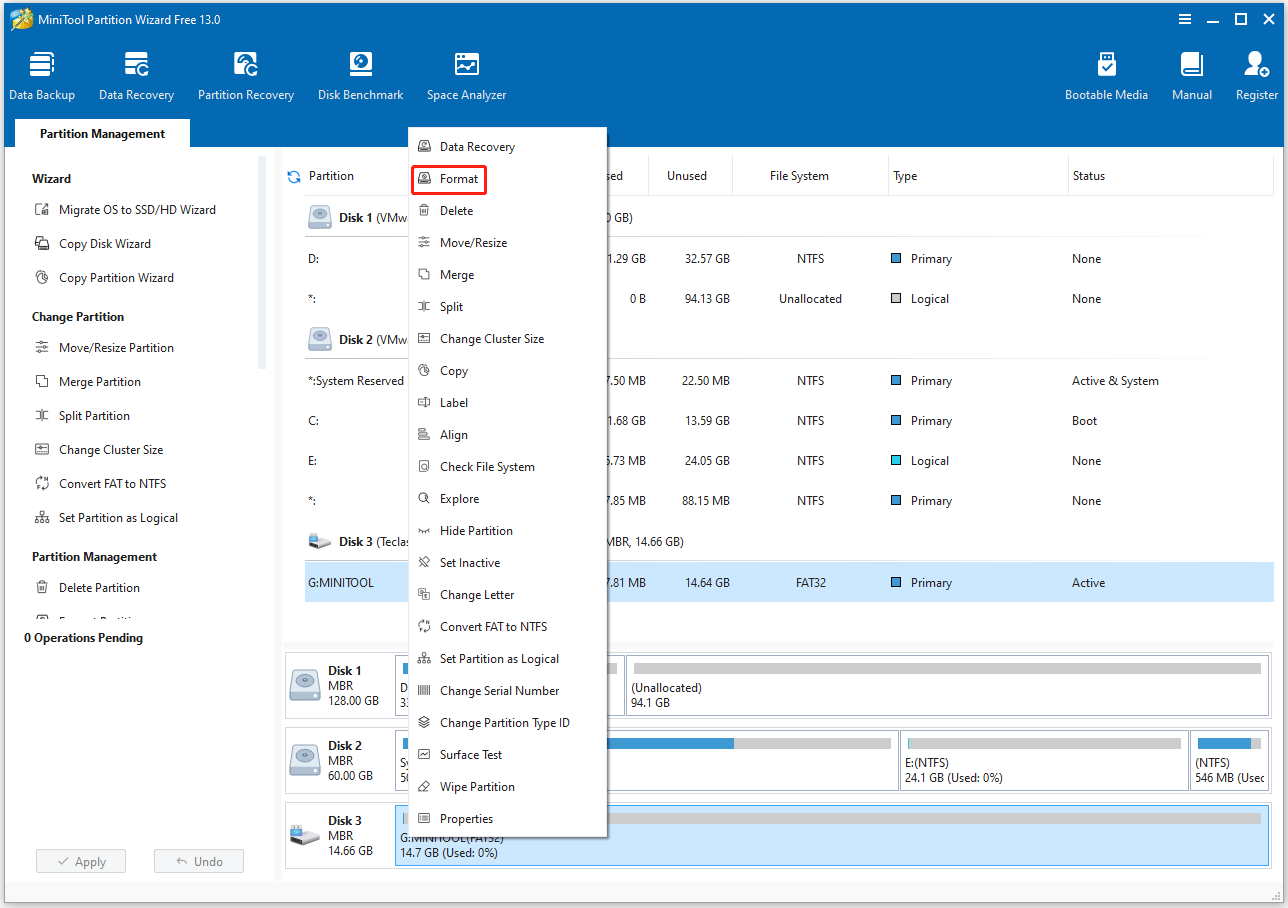
Step 2. Right-click the partition on the USB or SD card and choose Format.
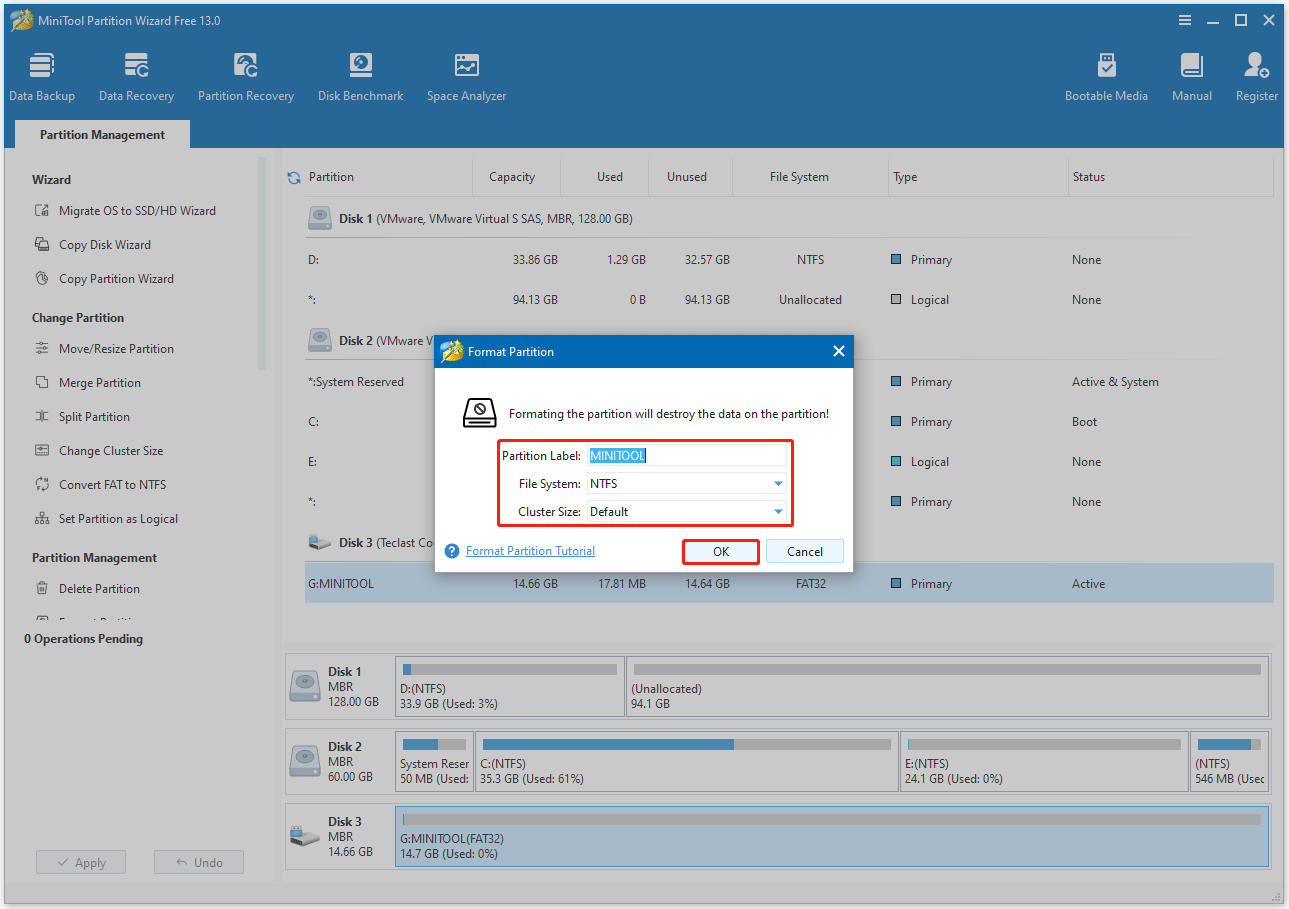
Step 3. In the pop-up window, configure some settings, like Partition Label, File System, or Cluster Size. Then click OK.
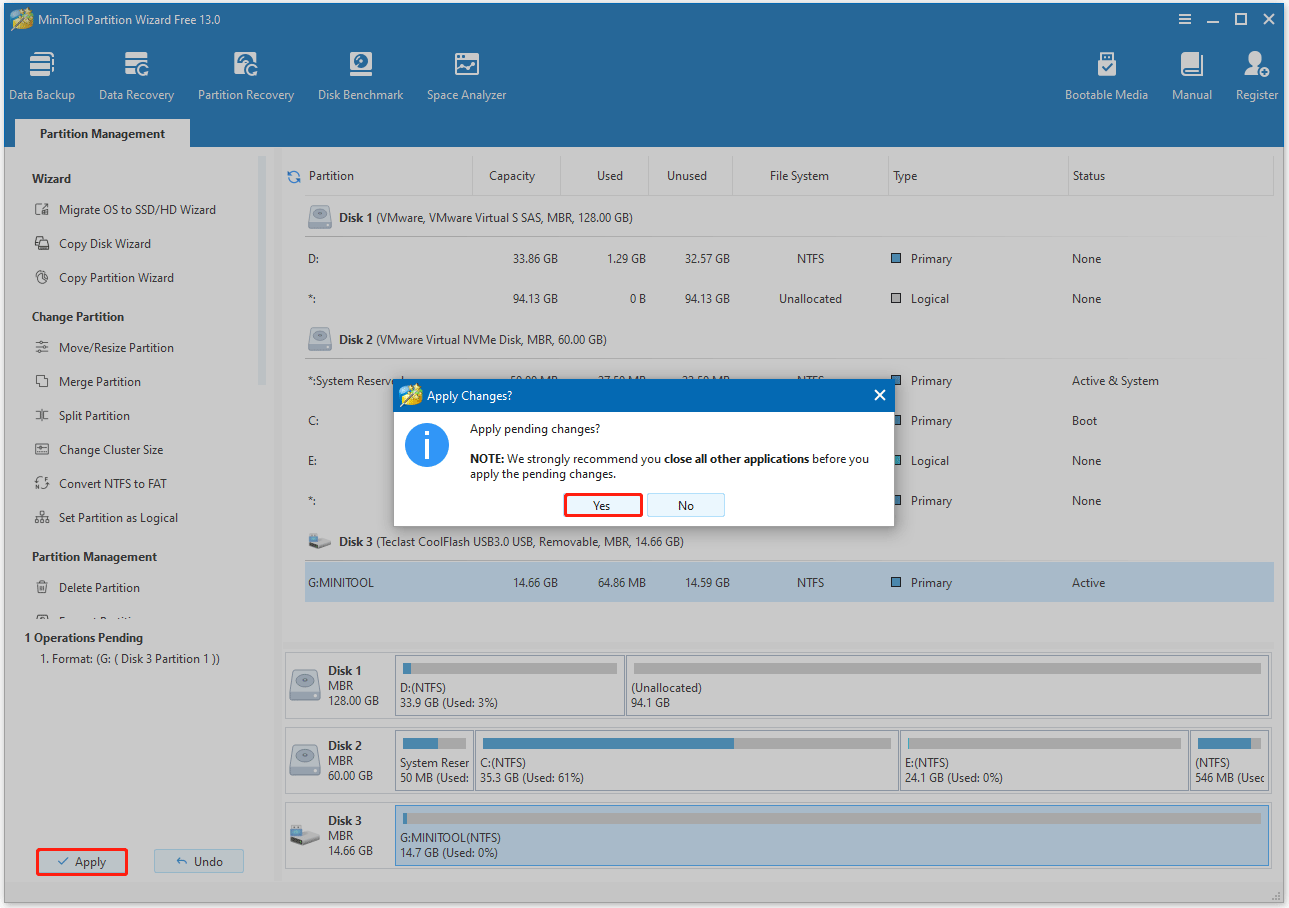
Step 4. Click Apply and Yes to perform and confirm the formatting process.
After formatting the drive, you can open File Explorer again and check if the error has been solved.
Way 8. Use a Dedicated File Archiver
The default Windows extractor has very limited support for ZIP. If you still encounter this error, use a specialized tool such as 7-Zip or WinRAR. These tools are designed to handle multi-volume archives and fix common problems.

Bottom line
The “Please insert the last disk of the multi-volume set” error is annoying, but it’s almost always fixable with a few simple methods. By following the steps in this guide, you’ll be able to extract your files.
Additionally, if you experience some issues or have some suggestions when using MiniTool Partition Wizard, please contact us by emailing [email protected]. We will respond promptly.
Please Insert the Last Disk of the Multi-Volume Set FAQ
About The Author

Position: Columnist
Vega enjoys helping people with computer problems, including disk management, data recovery, data backup, and more. She is constantly expanding her knowledge in related fields. And she will continue to bring more easy-to-understand professional articles to help people solve various problems on the PC.
User Comments :