When you work with Dynamic disks and volumes, you may get various errors or failures. This post explains the reasons and offers corresponding solutions. It also highlights how MiniTool Partition Wizard can offer a more flexible approach to managing dynamic disk errors.
Basic disks are the storage type most often used with Windows. Dynamic disks are converted from these basic disks.
A basic disk usually contains partitions (primary or logical), which are used to store systems, personal data, booting files, etc.
In contrast, a dynamic disk allows you to create volumes that span multiple disks (spanned and striped volumes) and fault-tolerant volumes (mirrored and RAID-5 volumes). All volumes on dynamic disks are called dynamic volumes, which offer greater flexibility than partitions.
Note: While dynamic disks are still functional, Microsoft has officially marked the technology as “deprecated” in favor of the more modern Storage Spaces feature for new implementations, except for specific mirror boot volumes scenarios.
Operations associated with dynamic disks and dynamic volumes include:
- Convert to dynamic disk
- Convert to basic disk
- Create simple, spanned, striped, mirrored, and RAID-5 volumes
- Reactivate disk
- Remove disk
- Online/offline disk
- Import foreign disk
- Extend/shrink volumes
- Format volumes
- Delete volumes
These operations can be carried out by Disk Management and DiskPart. However, when performing these operations, some errors may occur. Or, the dynamic disks or volumes show status errors. This post shows you how to solve them.
Dynamic Disk Status Errors
The dynamic disk may become invalid, missing, foreign, or offline, or just show status errors. This section illustrates how to solve them.
Dynamic Disk Invalid
The dynamic disk may become invalid suddenly or after connecting to another PC. Some causes are as follows.
- Unsupported OS: All consumer editions of Windows (Windows Home/Basic/Premium editions) do not formally support or fully recognize dynamic disks for all operations, especially when trying to boot the operating system from them or use advanced features like mirroring or spanning across different physical disks.
- Connecting the Dynamic Disk Externally: The dynamic disk feature is not supported on external drives.
- Incomplete to Corrupt LDM (Logical Disk Manager) Record: Volume manager incorrectly flags a Logical Disk Manager (LDM) record as incomplete if its size is the same as the size of a block on the disk. After the LDM record is flagged as incomplete, it is cleaned up. Then, the dynamic disk will be marked as “Invalid.”
To solve the dynamic disk invalid error, try the following methods.
#1. Connect the Dynamic Disk Internally
Don’t connect the dynamic disk to the computer via a USB cable. Use a SATA cable or other internal slots instead.
#2. Connect the Dynamic Disk to the Original Computer
If the dynamic disk invalid issue occurs after you insert the disk into a new computer, try connecting the disk to the original computer.
Back up the files of the dynamic disk to another disk, and then delete all volumes on the dynamic disk to convert it into basic. Then, connect the disk to the new computer for use.
#3. Convert the Dynamic Disk to Basic Without Data Loss
MiniTool Partition Wizard can convert a dynamic disk to basic without data loss, as long as it meets the following requirements:
- There are only simple volumes on the dynamic disk. No spanned, striped, mirrored, or RAID-5 volume. For a mirrored volume, break it first in Disk Management.
- Each simple volume on the dynamic disk is composed of one continuous segment of the disk, not multiple discontinuous segments.
- If the dynamic disk is to be converted to a basic MBR disk, there should be no more than 4 volumes on the dynamic disk. For more than 4 volumes, you need to shrink the fourth volume and all subsequent volumes to make sure there is space to write the address information of the extended partition and logical partitions.
Here are the steps:
MiniTool Partition Wizard DemoClick to Download100%Clean & Safe
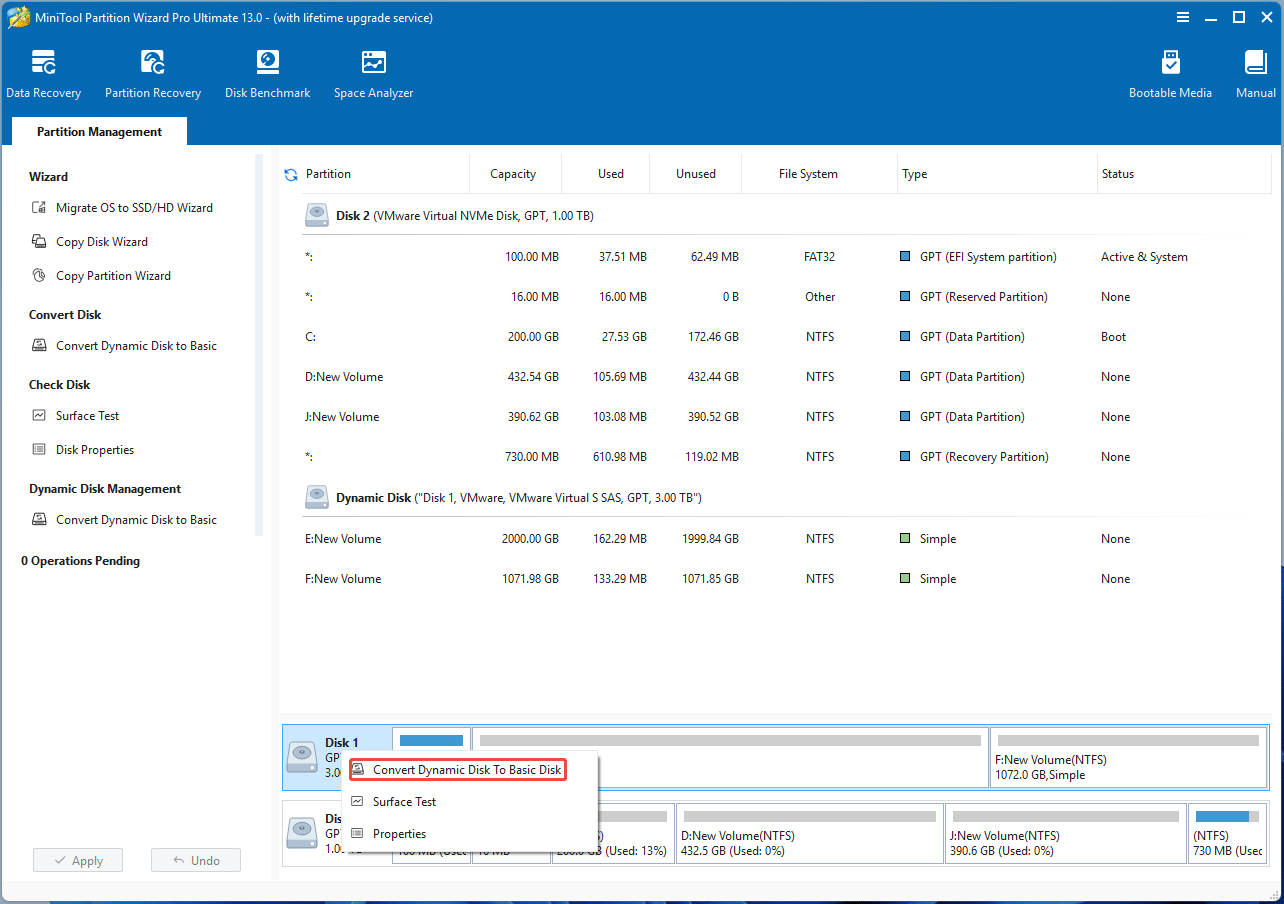
- Launch MiniTool Partition Wizard Pro or a higher edition.
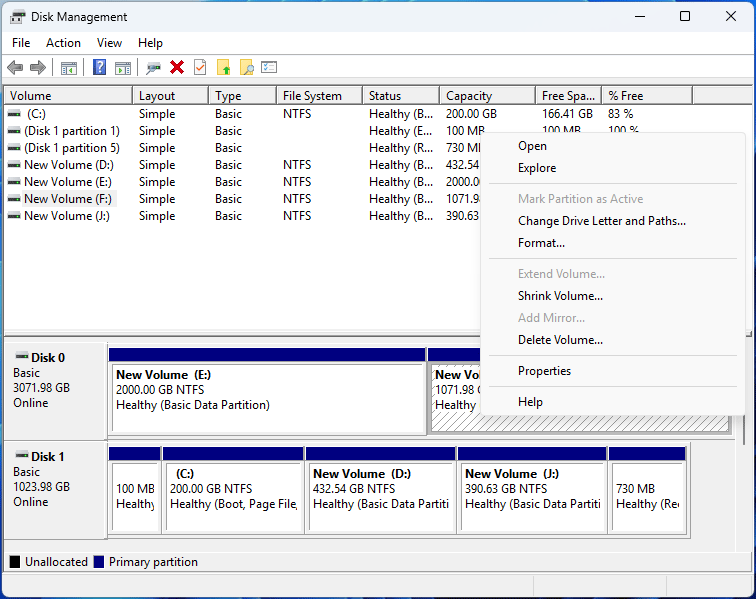
- Right-click the dynamic disk and choose Convert Dynamic Disk to Basic Disk.
- Click Apply and then Yes.
#4. Recover Data and Convert It to Basic Disk
You can recover data from the dynamic disk and then use Disk Management’s Convert to Basic Disk feature to solve the issue.
2. If the invalid dynamic disk has a part of spanned or striped volumes, try using Test Disk to recover data.
Taking MiniTool Partition Wizard as an example, the steps are as follows:
Step 1: Perform data recovery from dynamic disks.
- Launch MiniTool Partition Wizard.
- Click Data Recovery on the toolbar.
- Click the Devices tab.
- Hover the cursor on the dynamic disk and click Scan.
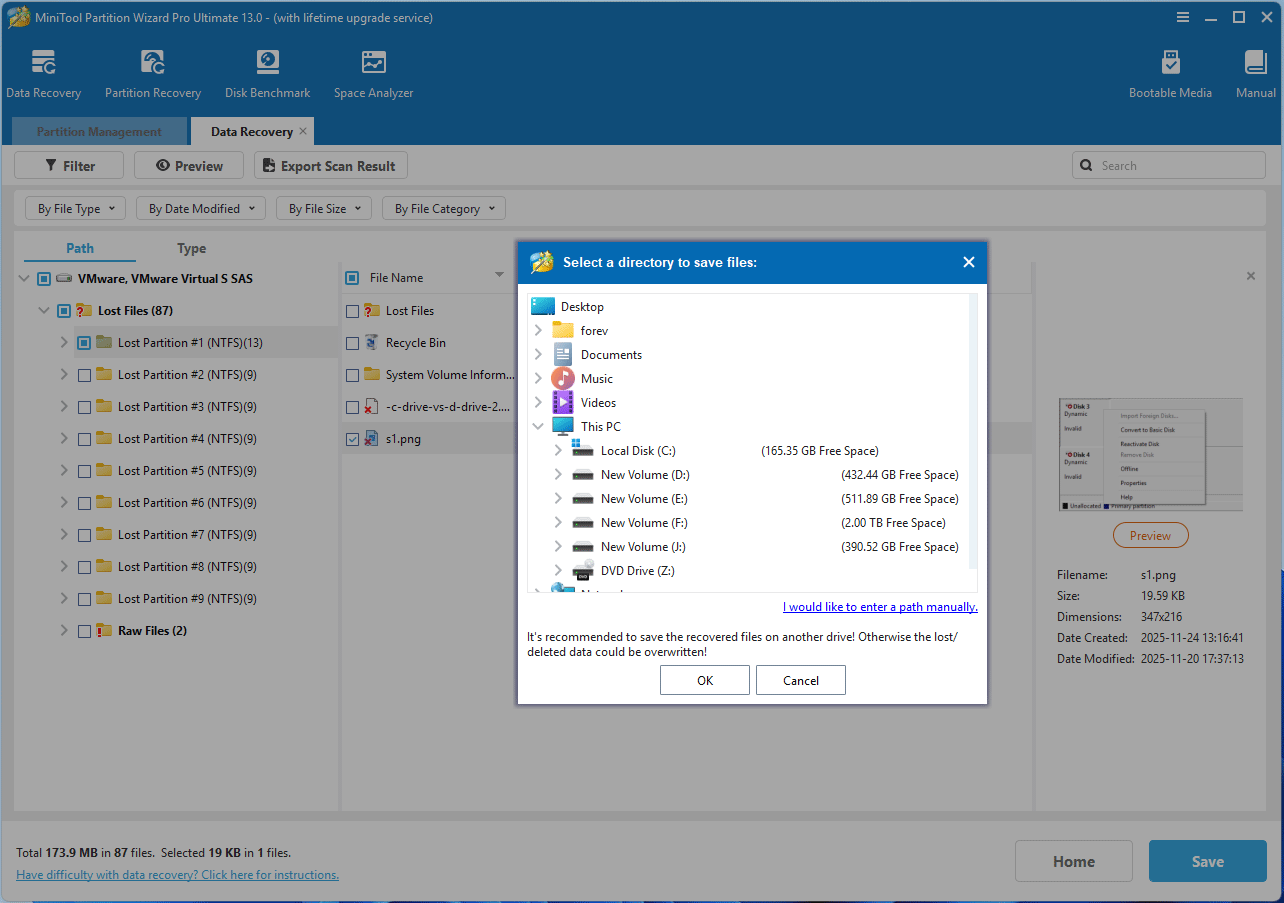
- After the scanning process is completed, use the Path, Type, or Filter tools to find the files that you want to recover.
- Select these files and then click Save.
- On the pop-up window, select a location other than the dynamic disk and then click OK. Then, you can get the recovered files.
Step 2: Convert the disk to basic using Disk Management.
- Press the Windows logo key + X and select Disk Management from the menu.
- Once Disk Management opens, right-click the dynamic disk and choose Convert to Basic Disk.
Dynamic Disk Offline
An Offline dynamic disk might be corrupted or intermittently unavailable. When the dynamic disk becomes offline, the first fix is to bring it back online. Here are 2 methods.
#1. Reactivate Disk
On Disk Management, right-click the dynamic disk and choose Reactivate Disk.
#2. Use DiskPart
Press the Windows logo key + R to open Run. Type “diskpart” and press Enter to open DiskPart. Then, type the following commands to bring the disk online.
- List disk
- Select disk * (* is the disk number of the dynamic disk)
- Online disk
If the disk is still offline, check the cables and disk controller, and make sure that the physical disk is healthy. Or, insert the disk into another computer and check if you can access the data.
If all the above methods don’t work, try recovering data from the dynamic disk and then clean the disk for use.
Missing Dynamic Disk
An offline disk may become missing, which means the disk was recently available on the system but can no longer be located or identified. The missing disk might be corrupted, powered down, or disconnected.
To solve the issue, the following approaches may help you.
- Repair any disk, controller, or cable problems. Then, try reconnecting the disk.
- Make sure the disk is correctly connected to the computer.
- Bring the disk back to online use the Reactivate Disk feature or the DiskPart Online Disk command.
- Recover the data. Then, right-click the disk and choose Remove Disk. Then, try connecting the disk again for use.
Foreign Dynamic Disk
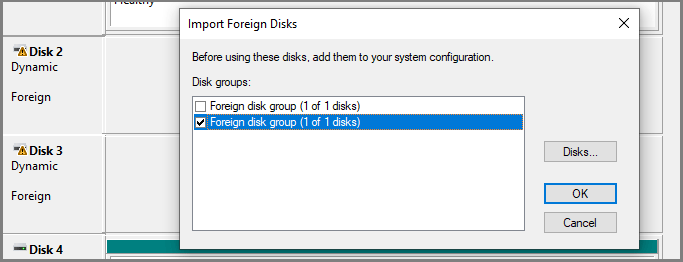
When you move a dynamic disk from one PC to another, it may show a Foreign error. In most cases, a foreign disk means the data on the disk is still there but invisible.
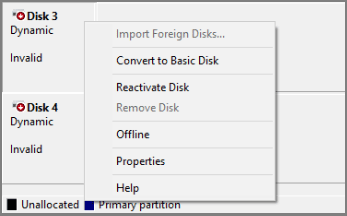
To access data on the disk, you must add the disk to your computer’s system configuration. On Disk Management, right-click the foreign disk and select Import Foreign Disks. After that, any existing volumes on the foreign disk will become visible and accessible.
In some cases, a disk that was previously connected to the system can display the Foreign status. This is because the configuration data for dynamic disks may be lost for some reason. Then, import the foreign disk and see if the issue is solved. If not, recover data.
Further Reading:
When you import foreign disks, you may encounter the following errors:
Error 1. A disk group with the specified name already exists.
This error occurs because two or more disk groups have the same name. To work around this issue, you need to modify the registry.
If your system/boot drive is still a basic disk, follow these steps to correct this condition:
- Start Registry Editor from Windows Search.
- Go to HKEY_LOCAL_MACHINE\SYSTEM\CurrentControlSet\Services\dmio\Boot Info.
- Under the Boot Info key, delete the “Primary Disk Group” key (you need to delete the CORRECT key for your DISK).
- Quit Registry Editor and then reboot the computer.
- After the reboot, try to import the foreign disks again.
Error 2. Some of the volumes you are importing will lose data because you have not moved all your disks to this system.
This error occurs because the disk may be a part of spanned, striped, mirrored, or RAID-5 volumes. To solve this issue, connect all these disks to the computer and then import them.
Error 3. No option to import a foreign disk.
If you connect a dynamic disk externally to a computer, it may also show the foreign status. When you import it, no option is offered. In this case, connect the disk internally or convert it into basic. MiniTool Partition Wizard can convert a dynamic disk to a basic one without data loss.
MiniTool Partition Wizard DemoClick to Download100%Clean & Safe
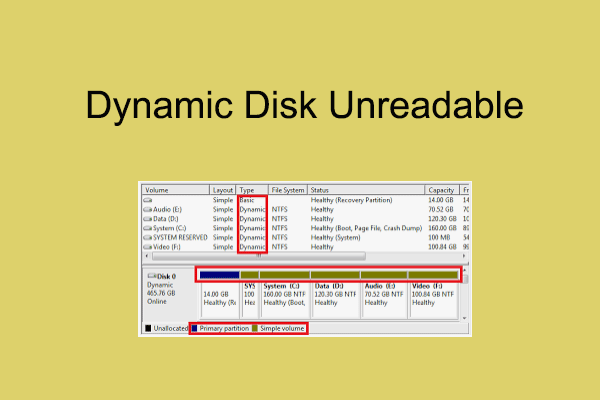
Unreadable Dynamic Disk
A dynamic disk may become unreadable because of corruption or I/O errors on the part of the disk, rather than the failure of the entire disk. To solve the issue, here are the approaches:
- Reconnect the hard drive, and change the connection cable and slot. Then, click Action > Rescan Disks in Disk Management.
- Convert the dynamic disk to basic. To protect data, you can recover data before the conversion.
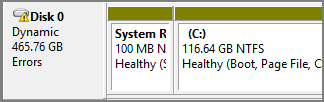
Dynamic Disk Showing Errors
A dynamic disk can be online, but with an Errors code and a warning icon. This is because the dynamic disk has I/O errors in a region of the disk. If the I/O errors are temporary, reactivate the disk can return it to Online status.
Dynamic Disk Volume Status Errors
Some people may also notice that the disk volume may show status errors like Failed, At Risk, etc. This section explains them.
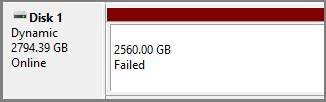
Dynamic Disk Volume Failed
A Failed status for a dynamic disk volume typically indicates that the volume cannot start automatically, the disk is damaged, or the file system is corrupt. If the Failed status is due to disk damage or file system corruption, the data will be lost, unless the disk or file system can be repaired.
To solve the issue, try the following approaches:
- Use the Reactivate Disk feature to return the disks and volumes to the Online status.
- For mirrored, spanned, striped, and RAID-5 volumes, the failed status may also mean that you have moved some but not all of the disks. Then, importing all of the dynamic disks may solve the issue.
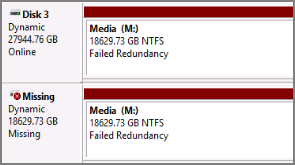
Dynamic Disk Volume Failed Redundancy
The failed redundancy status usually appears on mirrored or RAID-5 volumes.
On Mirrored Volumes
For mirrored volumes, the causes are as follows:
- Only one half of the mirrored volume was imported. The imported half of the mirrored volume gets the Failed Redundancy status, while the other disk that was not imported receives the Missing status.
- At least one member of the mirrored volume has failed. The volume is no longer fault-tolerant.
To solve the issue, try the following methods:
- Import the missing disk to restore redundancy.
- Break the mirror if you no longer require a mirrored volume. To do that, right-click the mirrored volume and click Remove Mirror. In the Remove Mirror dialogue box, click the Missing disk and then click Remove Mirror. This will retain the imported half of the mirror as a simple volume.
- Repair the mirrored volume. To do that, make sure that the physical disk is turned on, plugged in, and attached to the computer. If necessary, reattach the physical disk. Right-click the dynamic disk with failed redundancy volumes and then click Reactivate Disk.
On RAID-5 Volumes
For RAID-5 volumes, the causes are just a little different.
- You have imported all but one of the RAID-5 volumes. Note that if more than one disk is missing from the RAID-5 volume, the volume receives the Failed status.
- One member of the RAID-5 volume has failed, and the volume is no longer fault-tolerant.
The corresponding approaches to the issue are as follows:
- Move all disks that comprise this volume to the new computer at the same time, and then import all of the disks together.
- Repair the RAID-5 volume by right-clicking the volume, clicking Repair Volume, and then selecting another suitable dynamic disk to substitute the missing one.
- Check if the physical disk is turned on, plugged in, and attached to the computer. If necessary, reattach the physical disk. Then, reactivate the disk where the failed redundancy volume is located.
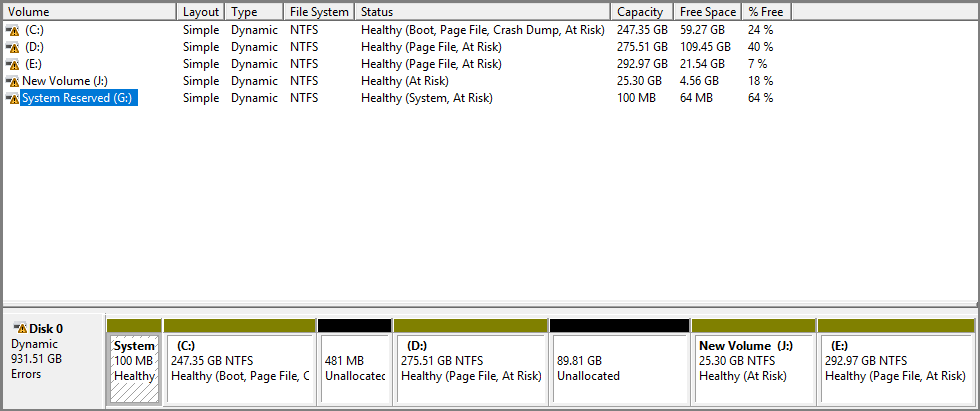
Dynamic Disk Volume Healthy At Risk
The Healthy At Risk status indicates that I/O errors have been detected on the underlying dynamic disk but the dynamic volume is currently still accessible. The I/O error on any part of a dynamic disk will result in the Healthy (At Risk) status on all volumes of the disk.
To solve the issue, just reactivate the disk to return it to Online status. Then, the volume should return to the Healthy status. If the Healthy (At Risk) status persists, the disk might be failing. Back up the data and replace the disk as soon as possible.
Dynamic Disk Volume Stale Data
This status appears in the Import Foreign Disks dialogue box when you import disks that contain a mirrored or RAID-5 volume. It indicates that one of the volumes on the disks contains stale mirror or parity information.
Usually, this is because the volumes on the disks you moved had a status other than Healthy before you moved them.
To solve the issue, move the disks back to the computer from where they came. Then, rescan disks or restart the computer to make sure all of the disks are installed correctly.
If the volume still shows status errors, take corresponding measures to troubleshoot them. Don’t move and import them to another computer until they are healthy without any errors.
Dynamic Disk Conversion Errors
A basic disk can be converted into a dynamic disk and vice versa. However, you may encounter issues during the conversion. This section explains how to resolve these conversion-related issues.
Can’t Convert Basic Disk to Dynamic Disk
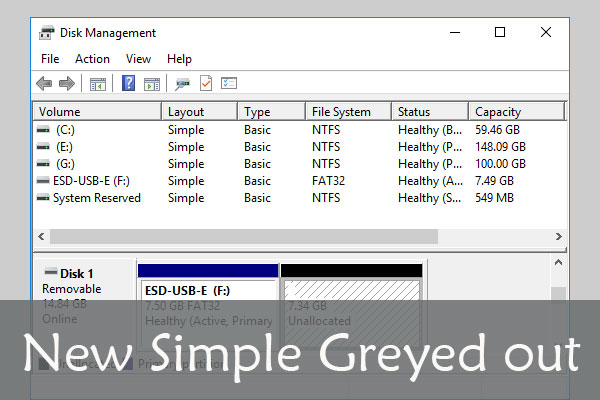
When you plan to convert a basic disk to a dynamic disk, you may encounter the greyed-out Convert to Dynamic Disk option or any of the following errors:
- The operation is not supported by the object.
- There is not enough space available on the disk(s) to complete this operation.
- The disk could not be converted to dynamic because security is enabled on one or more partitions.
- The pack name is invalid (This error only appears on Windows 8/7/Vista, and the workaround is to rename the computer using single-byte characters).
- Only the first 2TB are usable on large MBR Disks. Cannot create partitions beyond the 2TB mark, nor convert the disk to dynamic.
- The selected GPT formatted disk contains a partition which is not of type ‘PARTITION_BASIC_DATA_GUID’, and is both preceded and followed by a partition of type ‘PARTITION_BASIC_DATA_GUID’.
According to Microsoft’s webpage about Working with Basic and Dynamic Disks, converting a basic disk to a dynamic disk needs to adhere to certain rules. If you are unable to convert a basic disk to a dynamic disk, the reasons may be the following.
- There is not enough free space at the end of the disk (at least 1 MB is needed). To solve the issue, you need to shrink or delete the last partition.
- The disk capacity exceeds 2TB while it uses the MBR style. To solve the issue, you need to convert it to GPT.
- The GPT disk contains partitions that Windows doesn’t recognize, such as those created by another operating system. To solve the issue, reformat or delete the partition.
- You can’t convert disks that use sector sizes larger than 512 bytes (4K native disks, for example).
- You can’t use dynamic disks on portable computers or with removable media.
- You can’t convert a disk if the system or boot partition is part of a spanned, striped, mirrored, or RAID-5 volume (refers to hardware RAID). You’ll need to stop the spanning, mirroring, or striping before you convert.
2. If you convert a basic disk to dynamic, you will not be able to start installed operating systems from any volume on the disk except the current boot volume. Therefore, it’s recommended not to convert a disk containing multiple installations of the Windows operating system.
Based on the above reasons, here are the corresponding solutions.
#1. Shrink, Format, and Delete Partition in Disk Management
Shrink:
- Press the Windows logo key + X and select Disk Management to open it.
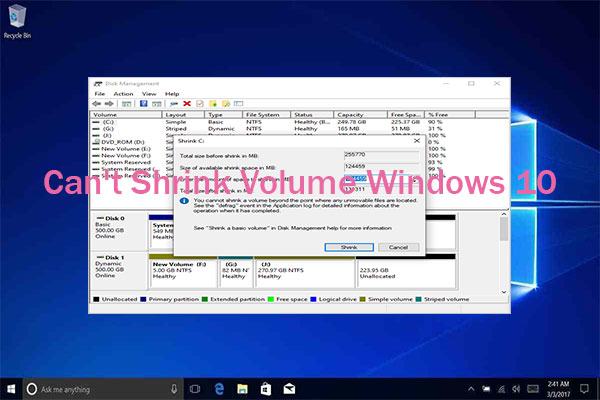
- Right-click the partition at the end of the disk and choose Shrink Volume.
- Enter the amount of space to shrink in MB and click Shrink.
Format:
- Right-click the partition and choose Format.
- Set the volume label, file system, and allocation unit size. Then, click OK.
- Click OK again to confirm the formatting.
Delete:
- Right-click the partition and choose Delete Volume.
- Click Yes to confirm the deletion.
#2. Move/Resize Partition in MiniTool Partition Wizard
Disk Management can’t shrink OEM partitions like the Recovery partition. In this case, try using MiniTool Partition Wizard to move/resize these partitions. Here are the steps:
MiniTool Partition Wizard FreeClick to Download100%Clean & Safe
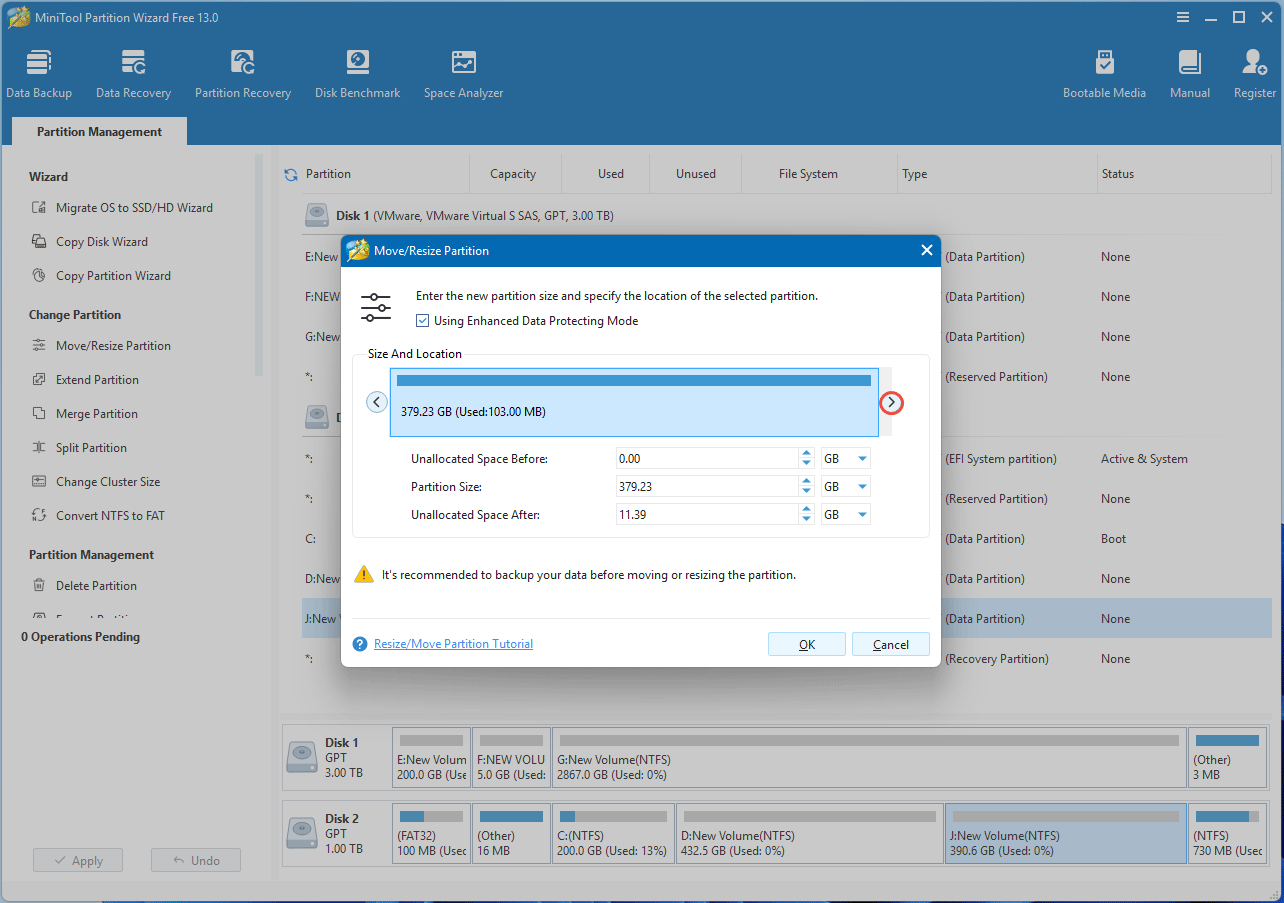
Step 1: Shrink the partition before the Recovery partition.
- Launch MiniTool Partition Wizard.
- Right-click the partition before the Recovery partition and choose Move/Resize.
- On the pop-up window, drag the right arrow icon to the left to shrink the partition and then click OK.
Step 2: Move the Recovery partition.
- Right-click the Recovery partition and choose Move/Resize.
- On the pop-up window, drag the partition block to the left and click OK.
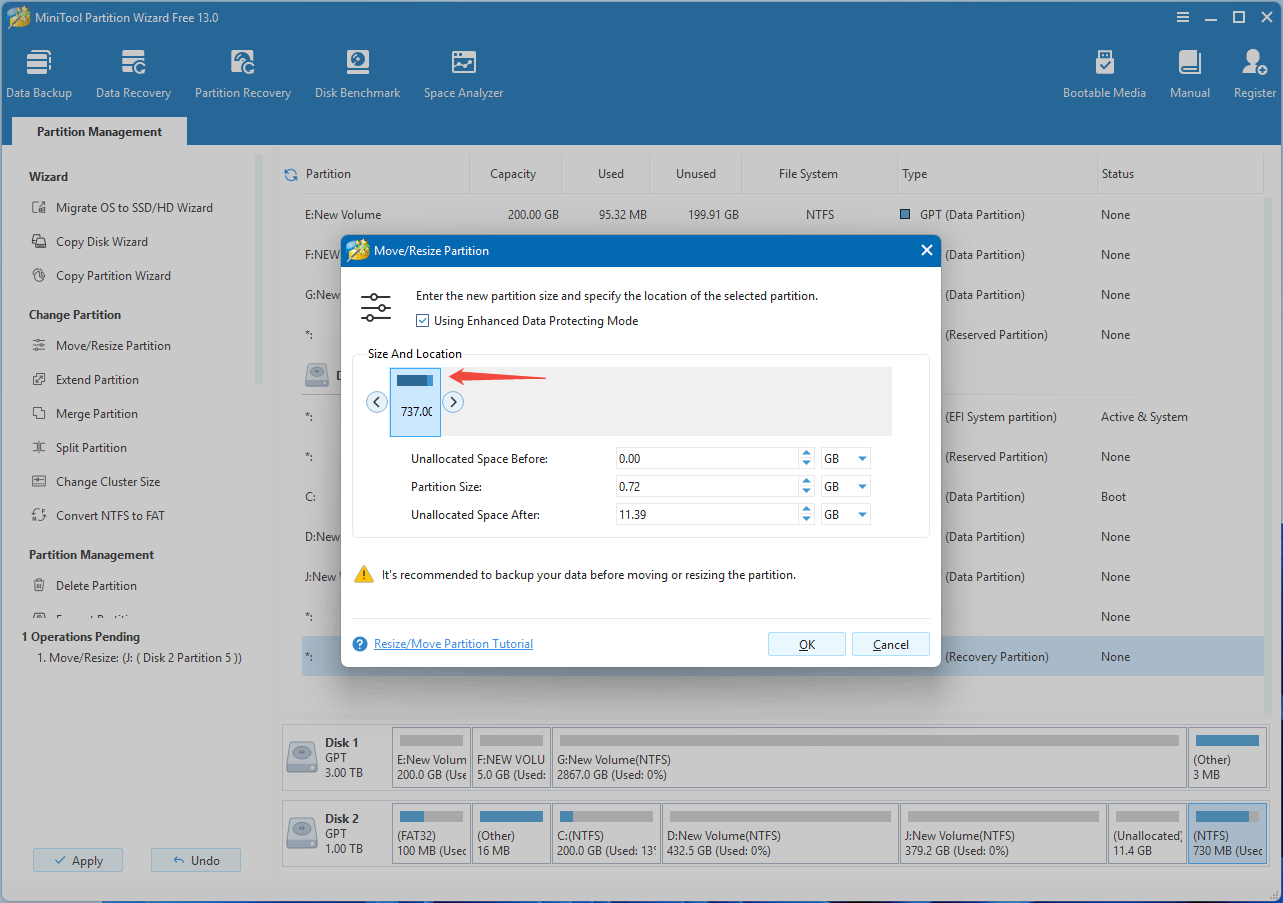
Step 3: Click the Apply button to execute the pending operations.

#3. Convert MBR to GPT
In Disk Management, delete all partitions on the disk, right-click the disk, and then choose the Convert to GPT Disk option.
If you want to convert MBR to GPT without losing data, use MiniTool Partition Wizard. Here are the steps:
- On the MiniTool Partition Wizard’s interface, right-click the disk and choose the Convert MBR Disk to GPT Disk option.
- Click Apply.

Further Reading:
After converting the system disk to a dynamic disk, you may encounter some issues. For example:
- Can’t boot from recovery partitions due to the error “Reinstallation is impossible because the Hard Drive was converted to dynamic.” This error will prevent you from booting into WinRE and OEM recovery mode.
- When you reinstall Windows with a USB, you may get the error “Windows cannot be installed to this hard disk space. The partition contains one or more dynamic volumes that are not supported for installation.” This issue usually occurs when you select a partition other than the C: drive to install the system.
The cause of the above issues lies in the warning window that appears when you convert the system disk to dynamic, telling you that you are unable to start installed operating systems from any volume on the disk except the current boot volume after converting a basic disk to dynamic. Therefore, you can’t boot from the recovery partitions where WinRE is located.
In addition, you can perform a fresh installation of Windows on a dynamic volume only if that volume was converted from a basic boot volume or basic system volume. If the dynamic volume was created from unallocated space on a dynamic disk, you cannot install Windows on that volume.
To solve these issues, convert the dynamic disk back to basic without data loss with MiniTool Partition Wizard.
If data loss is not a concern, boot the PC from Windows installation media, press Shift + F10 to open Command Prompt, type “diskpart” and press Enter. Then, clean the system disk with the DiskPart clean command (the steps are shown in the next section).
Can’t Convert Dynamic Disk to Basic Disk
The symptoms of an inability to convert a dynamic disk to a basic disk include the following:
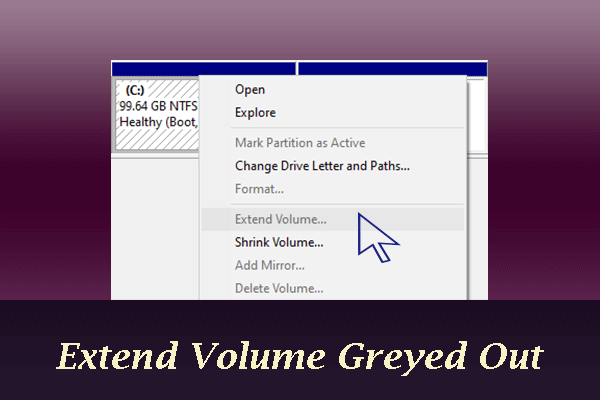
- The Convert to Basic Disk option is greyed out.
- Get the error: The disk is not empty.
- Get the error: The operation is not allowed on a disk that is offline.
For Windows built-in dynamic disk management tools, the dynamic disk to basic disk conversion requires deleting all volumes on the disk. Taking Disk Management as an example, you need to delete the volumes one by one. Then, the dynamic disk should be converted to a basic disk automatically.
If the error still occurs, you can use the DiskPart clean command. Here is the guide:
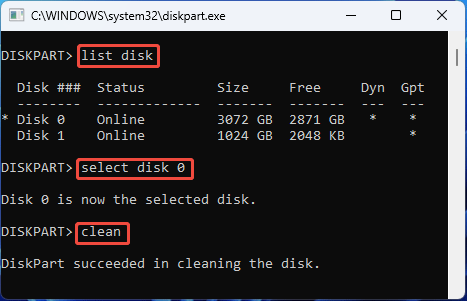
- Press the Windows logo key + R to open Run.
- Type “diskpart” and press Enter to open DiskPart.
- In the DiskPart window, type “list disk” and press Enter.
- Type “select disk *” and press Enter. * represents the disk number. You should replace it with an actual number.
- Type “clean” and press Enter. All volumes and other data will be removed from the disk. Then, the disk should become basic automatically, and you need to initialize it later.
Then, try converting the dynamic disk to basic again, using the DiskPart Convert Basic command, or Disk Management’s Convert to Basic Disk option.
MiniTool Partition Wizard DemoClick to Download100%Clean & Safe
Dynamic Disk Volume Errors
You may encounter issues when managing dynamic disk volumes. This section shows you how to get rid of them.
Can’t Create Dynamic Volumes
In general, Windows is able to create simple, spanned, striped, mirrored, and RAID-5 volumes on dynamic disks. If you are unable to create them, the reasons may be as follows.
- OS Support: The RAID-5 volume creation feature is only available on server editions. The Windows XP Pro edition also doesn’t support creating mirrored volumes.
- Disk Quantity Requirements: If you have only one dynamic disk, you can create only simple volumes. Spanned, striped, and mirrored volumes require at least two dynamic disks, and RAID-5 volumes require at least 3 dynamic disks.
The disk quantity is a hard requirement. There are no suitable measures to bypass it.
If you are using Windows Home editions, convert the dynamic disk to basic. MiniTool Partition Wizard is recommended because it can do that without data loss.
MiniTool Partition Wizard DemoClick to Download100%Clean & Safe
Can’t Extend/Shrink a Dynamic Volume
If you are unable to extend or shrink a dynamic volume, the reasons may be the following:
- The Extend Volume and Shrink Volume features are not supported on mirrored and striped volumes.
- You can extend or shrink a simple or spanned volume, but the premise is that the volume is “unformatted” or uses the NTFS file system.
- You can extend a simple or spanned volume, but you should make sure there is unallocated space on one of your disks.
- If the simple volume is the system volume or the boot volume, you can’t extend it.
- You can extend or shrink a RAID-5 volume, but the extending feature is only possible if unallocated space is immediately to the right of the volume.
- The space is separated by the MSR partition (Uncertain).
If you can’t extend or shrink a dynamic volume, try the following solutions.
#1. Reformat the Volume
If the volume’s file system is not proper and there is no important file in it, reformatting it to NTFS is a good choice.
#2. Use MiniTool Partition Wizard
This software is more flexible than Disk Management when doing dynamic disk and volume management tasks. For example, this software can:
- Move or resize simple, spanned, mirrored, striped, and RAID-5 volumes. The dynamic volumes move and shrink in the same way as the basic partitions.
- Copy dynamic volumes to unallocated space or a simple volume.
- Change cluster size without data loss.
- Convert dynamic disks to basic without data loss.
- Create, format, and delete dynamic volumes.
- And so on.
MiniTool Partition Wizard DemoClick to Download100%Clean & Safe
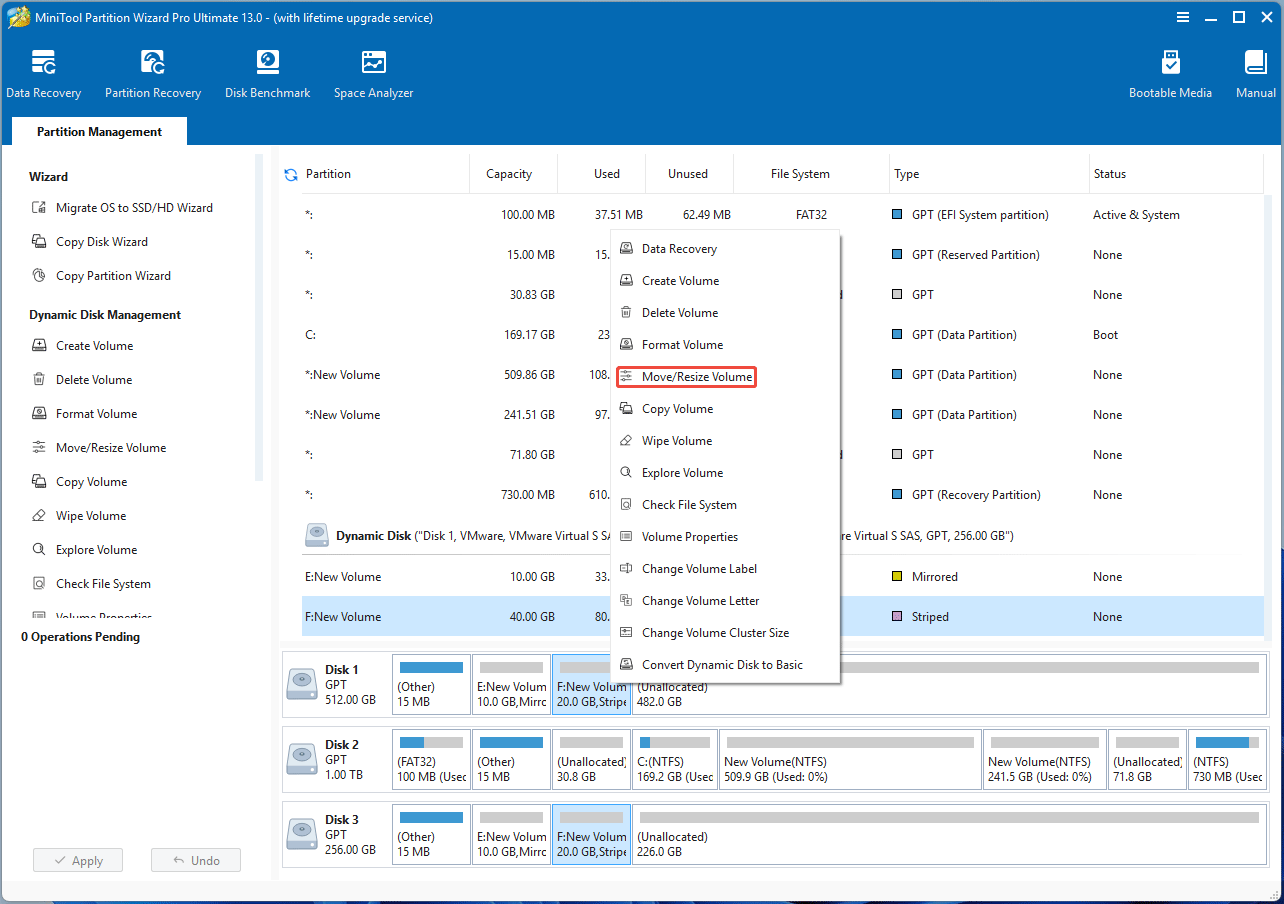
Here is how to move/resize a dynamic volume using MiniTool Partition Wizard.
- Launch MiniTool Partition Wizard.
- Right-click a dynamic volume and then choose Move/Resize Volume.
- Drag the arrow icons to extend or shrink the volume, and drag the volume block to move it.
- Click OK and then Apply.
#3. Delete the MSR Partition
An MSR (Microsoft Reserved) partition is a special, hidden partition on a GPT hard drive that is required for modern Windows operating systems to function properly. It is automatically created during Windows installation.
It doesn’t store user data but acts as a placeholder for future Windows use, such as creating new partitions or other system-managed operations.
Some users report that the MSR partition may interfere with extending a dynamic volume. Although this behavior is not common, you can try deleting the MSR partition and then recreating it after extending the volume.
Here are the steps:
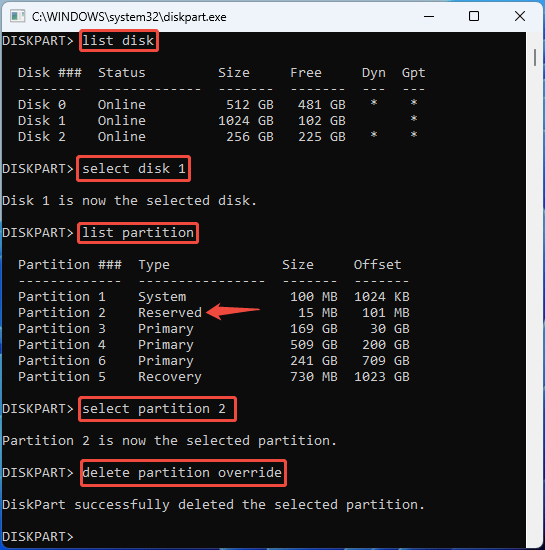
Step 1: Delete the MSR partition.
- Open DiskPart from Windows Search.
- In the window, type “list disk” and press Enter.
- Type “select disk *” and press Enter. * is the disk number of the system disk (you can identify it by the size).
- Type “list partition” and press Enter.
- Type “select partition #” and press Enter. # is the partition number of the Reserved partition.
- Type “delete partition override” and press Enter.
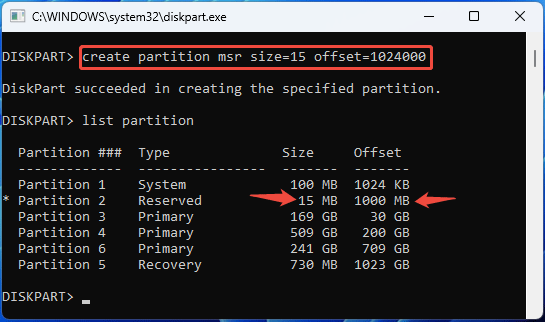
Step 2: Extend the dynamic volume. Note that you need to leave space for creating the MSR partition.
Step 3: Type “create partition msr size=* offset=#” and press Enter. In this command, * is the size of the MSR partition in MB, and # is the start location of the MSR partition in KB. If no offset, the MSR partition will be created in the first disk extent that is large enough to hold it.
#4. Convert the Dynamic Disk to Basic
If all the above methods don’t work, try converting the dynamic disk to basic. If you want to keep the files in it, try using MiniTool Partition Wizard.
Can’t Add Mirror
The Add Mirror feature is only available on basic partitions and simple volumes.
- On striped, mirrored, and RAID-5 volumes, there is no Add Mirror feature.
- On the system partition, recovery partition, and other OEM partitions, there is no Add Mirror feature either.
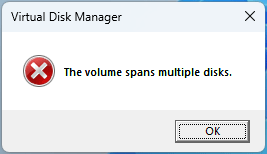
- On spanned volumes, there is the Add Mirror feature. Applying it, Disk Management will convert the two disks to dynamic and create a new volume whose size is the same as the spanned volume. However, the two volumes didn’t form a mirrored volume because of the error “The volume spans multiple disks.”
If you are unable to add a mirror to a basic partition or simple volume, the reasons and corresponding solutions may be as follows:
#1. Not Enough Unallocated Space
Adding a mirror to a partition or volume will create a volume whose size is the same as the source partition or volume. If there is not enough unallocated space, you can’t add a mirror. In this case, you need to shrink the source partition or volume and then try adding the mirror again.
Some people also report that they are unable to create a mirrored volume or add a mirror even if the two disks have the same capacity.
The actual reason is that the unallocated space on the disk where the mirror is placed must be slightly larger than the source partition or volume. Shrinking the source partition or volume, or creating a smaller mirrored volume, may solve the issue.
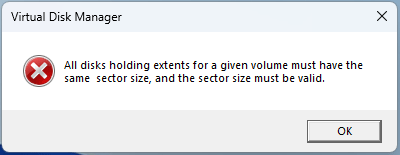
#2. Different Sector Size
If the two disks have different sector sizes (for example, one is 512, and the other is 4K), you will get this error: All disks holding extents for a given volume must have the same sector size, and the sector size must be valid.
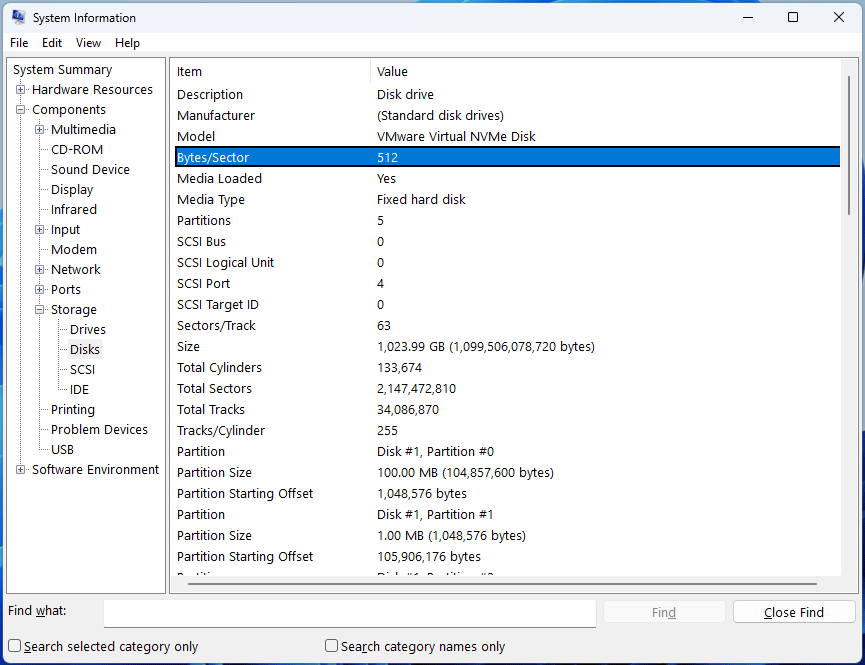
You can check the sector size of your hard drive using the following approach:
- Press the Windows logo key + R to open Run.
- Type “msinfo32” and press Enter.
- Once the System Information window opens, go to System Summary> Components > Storage > Disks.
- On the right panel, check the Bytes/Sector information of your hard drives. You can distinguish these disks by their sizes and partition layouts.
If the two disks have the same sector size but you still get the error, try using DiskPart commands to add a mirror or clean the disk.
How to add a mirror to a partition or a volume? Open DiskPart first and then execute the following commands one by one:
- List volume
- Select volume * (* is the volume number of the source partition/volume)
- Add disk n (n is the disk number of the disk where the mirror will be created and placed)

Can’t Format/Delete a Dynamic Volume
If you can’t format or delete a dynamic volume, check if it is a system volume in use. If not, there may be some issues with the volume. Then, I recommend you use MiniTool Partition Wizard to format or delete it.
Besides, you can also try using the DiskPart clean command if there is no important file on the disk.
Bottom Line
This post explains the causes and corresponding solutions of various dynamic disk and volume errors, including:
- Dynamic disk invalid/offline/foreign/missing
- Dynamic volume failed/failed redundancy/healthy at risk
- Basic disk to dynamic disk conversion failure and vice versa
- Dynamic volume create/extend/shrink failure
Each solution provides the required steps, except where they have already been covered. MiniTool Partition Wizard is recommended for its flexible and reliable dynamic disk management capabilities.
If you encounter issues when using this software, don’t hesitate to contact us via [email protected]. We will get back to you as soon as possible.
About The Author

Position: Columnist
Linda has been an editor at MiniTool for seven years. She continuously learns about computers and puts her knowledge into practice. Moreover, she is particularly knowledgeable in disk management, data recovery, system installation, and PDF editing. Her articles typically reference multiple examples or are based on her own experience, providing users with the most suitable solutions.
User Comments :