Can’t Shrink Volume on Windows 10
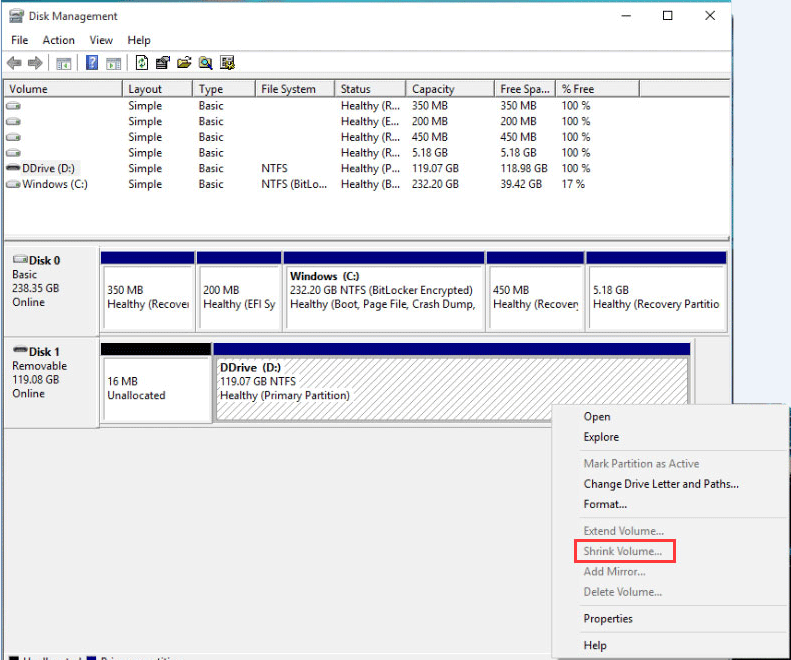
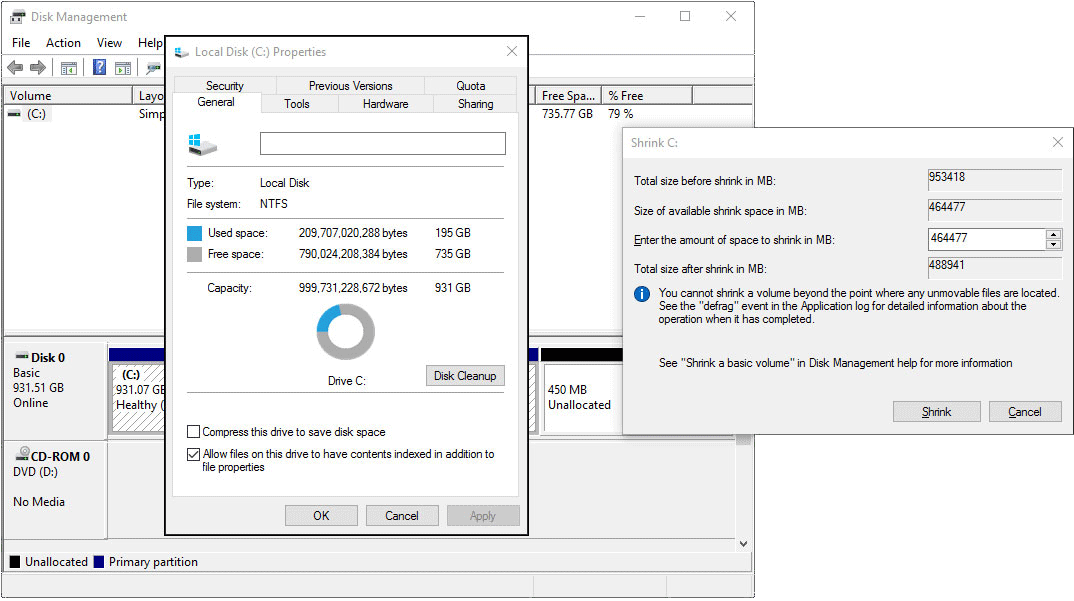
Sometimes, you may need to shrink a volume to make free space for other use. You open the Disk Management, right-click a partition, and then choose Shrink Volume. If everything goes well, you will get the following picture:

Then, you just need to enter the amount of space to shrink and then click Shrink button. After that, your partition can be shrunk successfully. However, many users report that they can’t shrink volume Windows 10. Read on to get to know what symptoms this issue will have.
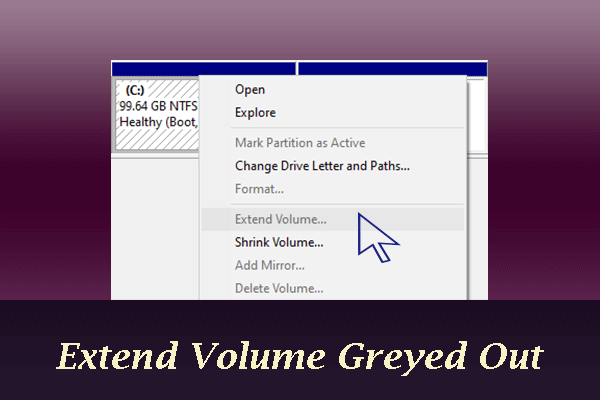
1. Shrink Volume Is Greyed out
The Shrink button in two places can be greyed out. The first place is there: you right-click the partition to choose Shrink Volume button, but you find this button greyed out, just like the following picture:
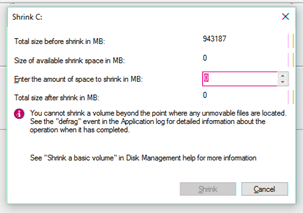
The other place is there: when you start the shrink window, the Shrink button is disabled, no matter what value you enter in the ‘amount of space to shrink in MB’, just like the following picture:
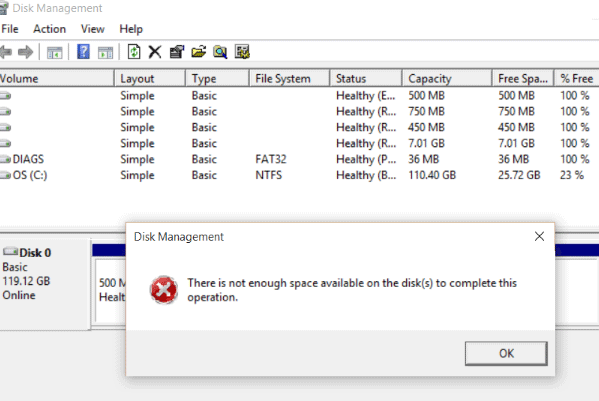
2. Not Enough Space Error
In this case, you are allowed to enter the amount of space to shrink and click the Shrink button, but you will then get an error message “There is not enough space available on the disk(s) to complete this operation.” The problem is that this error may occur even if there is enough space available for shrink.
![[Fixed] Not Enough Space Available to Complete This Operation](https://images.minitool.com/partitionwizard.com/images/uploads/2025/08/not-enough-space-available-on-the-disk-to-complete-this-operation-thumbnail.png)
3. Available Shrink Space is Much Less than Free Space
Before you shrink the partition, you may have checked the free space of the partition. However, when you start the shrink window, you find that the size of available shrink space is much smaller than that of free space you checked before.
How to Solve Shrink Volume Not Working Issue
To solve the problem, you have two options: making the shrink volume work again or using an alternative partition shrink tool.
Here is a video guide:
Way 1. Using an Alternative Volume Shrink Tool—MiniTool Partition Wizard
The reason why I introduce this method first is that it is simpler and more effective than the other method. Please refer to the following steps:
MiniTool Partition Wizard FreeClick to Download100%Clean & Safe
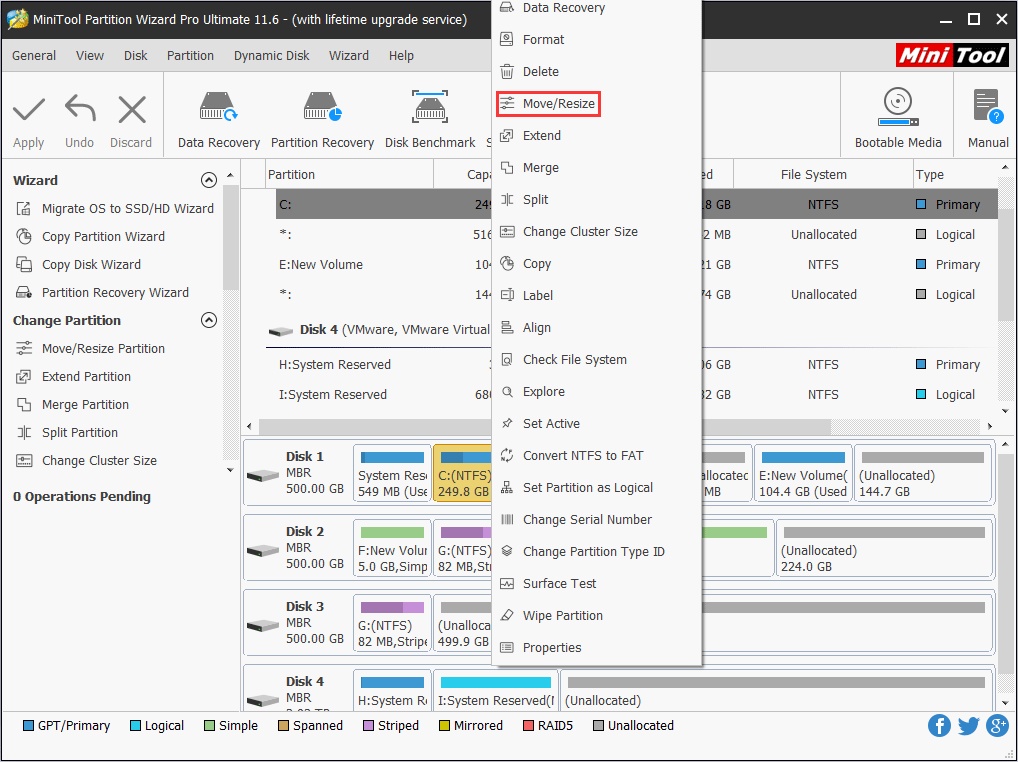
Step 1: Click the above button to free download MiniTool Partition Wizard. Then, launch it and get to its main interface. Right-click the partition you want to shrink and choose Move/Resize.
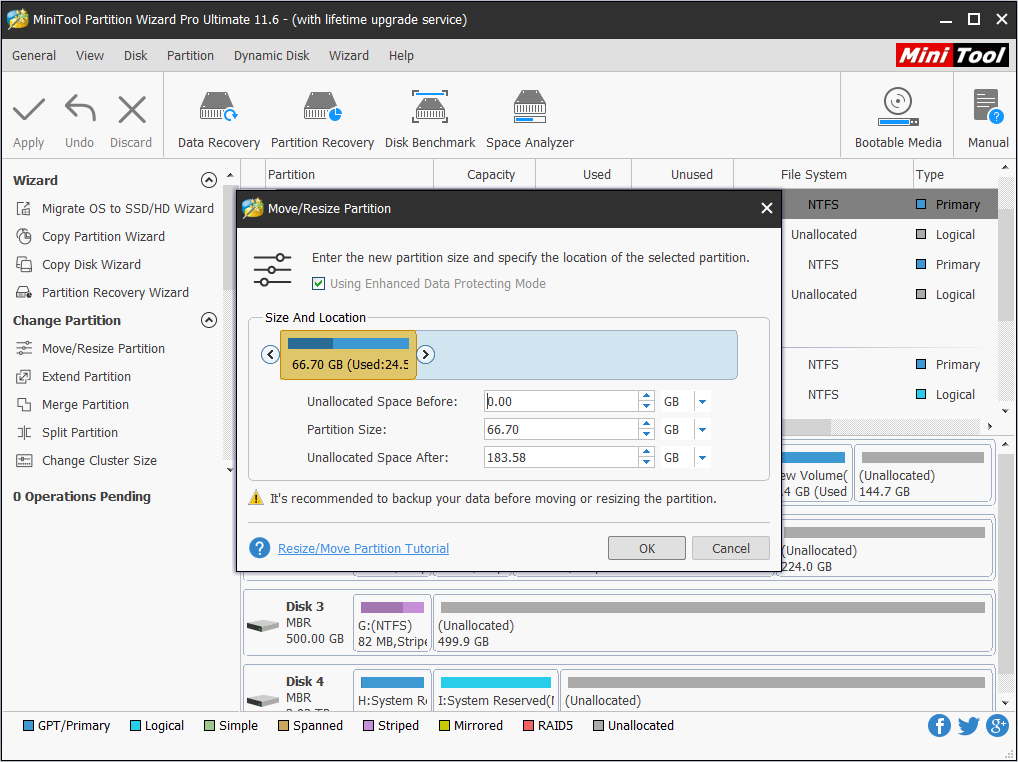
Step 2: In the Move/Resize Partition window, shrink the partition and click OK button. Please note that MiniTool Partition Wizard recommend you to back up data before you shrink a volume, especially the system drive C.
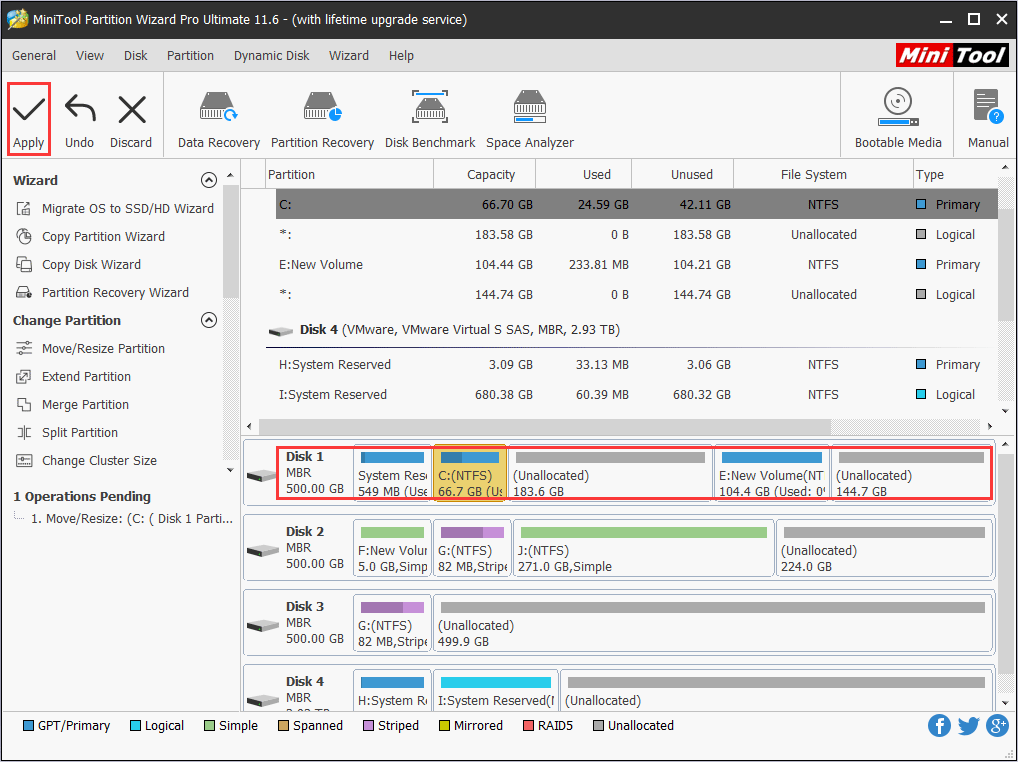
Step 3: Check new layout of the disk and then click Apply button to execute pending operations.
Way 2. Making the Shrink Volume Work Again
To make the shrink volume feature work again, you should perform the following steps:
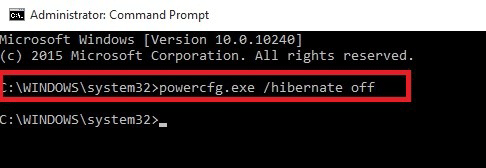
Step 1: Disable Hibernation.
- Click on Start, type “cmd“, and then right-click on Command Prompt to select Run as administrator.
- Enter command “exe /hibernate off“, and then press Enter.

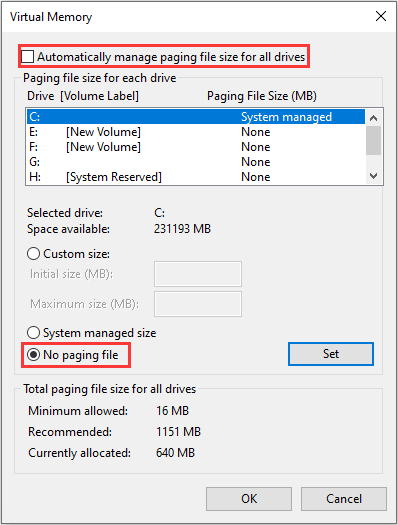
Step 2: Disable the Page File.
- Open File Explorer and right-click This PC to select Properties.
- On the left pane, click on Advanced system settings.
- In the Advancedtab, click on the Settings button under Performance
- Skip to Advancedtab and click on Change button under Virtual memory.
- Uncheck the Automatically manage paging file size for all drives
- Check No paging file option and click Set Then, click on Yesbutton to confirm.
- Click on OK button to save changes.
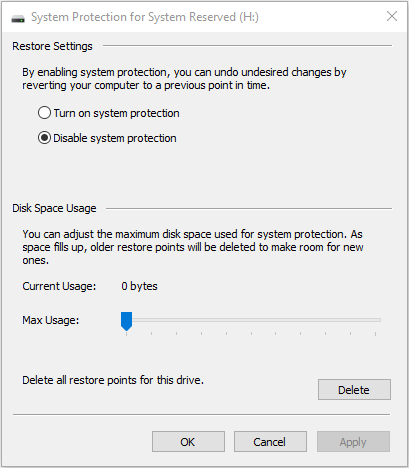
Step 3: Disable System Protection.
- Click on Start and search “system restore“. Then, click Create a restore point from the results to open it.
- In System Protection tab, click Configure
- Under Restore Settings, check Disable system protectionoption and click on Apply
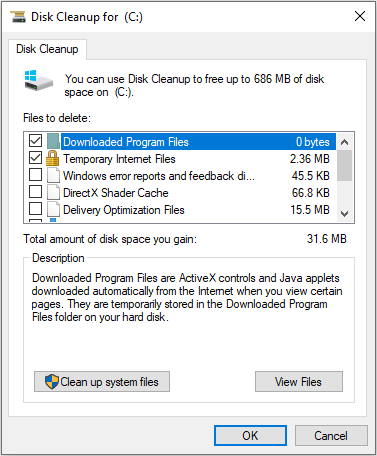
Step 4: Run Disk Cleanup.
- Open File Explorer and right-click the partition you want to shrink.
- Choose Properties and then click Disk Cleanup.
- Choose the files to delete and click OK

Step 5: Defrag/optimize drive.
- Open File Explorer and choose the partition you want to shrink.
- Click Drive Tools tab on the upper zone and then click Optimize.
- In the Optimize Drives window, click Optimize

Step 6: Restart your PC and try shrinking volume again to see whether the problem is solved.
About The Author

Position: Columnist
Linda has been an editor at MiniTool for seven years. She continuously learns about computers and puts her knowledge into practice. Moreover, she is particularly knowledgeable in disk management, data recovery, system installation, and PDF editing. Her articles typically reference multiple examples or are based on her own experience, providing users with the most suitable solutions.
User Comments :