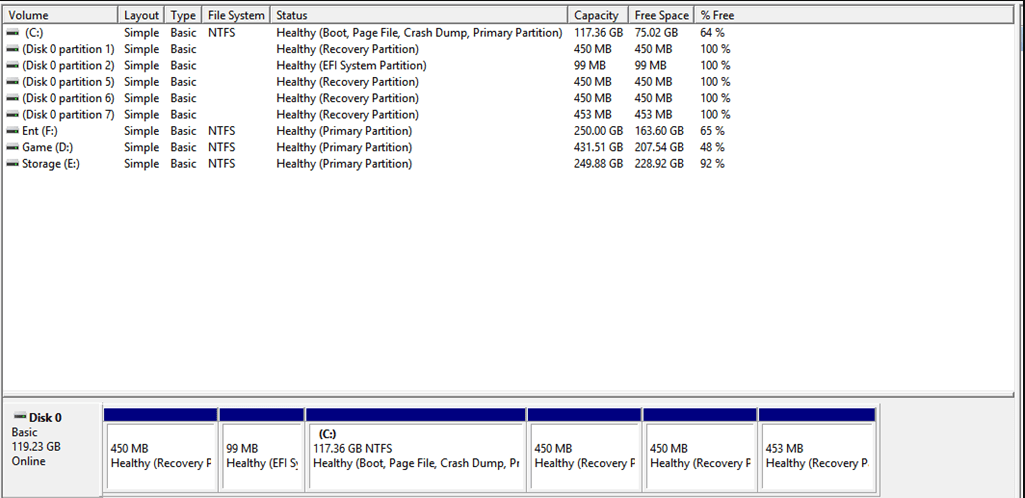
The Recovery partition is a special partition on a system hard drive, which can be used to restore your system to its factory settings in the event of system crashing issues. It usually has no drive letter to prevent it from being deleted or changed and is located next to the C drive or system reserved partition.
In most cases, a system hard drive has only one recovery partition. However, lots of users found that Windows created new recovery partition after update. Here is a user who posted the issue on the elevenforum.com forum.
Windows Created New Recovery Partition after Update. I note many people have had problems with failed Windows updates due to a small size recovery partition this week. I was not affected but note Windows inserted a new larger partition after the update this week. Can anyone explain this? Can I delete the new recovery partition after Windows 11 upgrade?https://answers.microsoft.com/en-us/windows/forum/all/windows-recovery-partition-after-upgrade/afe6b1c0-b461-4572-8c11-9be3532a1be1
Why Windows Creates New Recovery Partition After Upgrade
According to user reports, the problem often occurs after upgrading to Windows 11 from Windows 10 or installing Windows updates. Why Windows creates new recovery partition after upgrade? The main reason is that there is not enough disk space on your recovery partition (GPT disk) or system reserved partition (MBR disk).
To avoid the new recovery partition after upgrading to Windows 11, you can try increasing the size of the recovery partition or system reserved partition before upgrading. So, can you delete the Windows new recovery partition after upgrade? Of course, you can delete the previous recovery partition to free up disk space if you don’t want to revert to the previous Windows version.
![How to Delete Recovery Partition Windows Server 2022 [Tutorial]](https://images.minitool.com/partitionwizard.com/images/uploads/2024/01/delete-recovery-partition-windows-server-thumbnail.jpg)
How to Do If Windows Created New Recovery Partition After Update
How to fix it if Windows creates new recovery partition after upgrade? If the new recovery partition eats up your disk space, you can delete the unused recovery partition and merge it with other existing partitions. There are 2 simple ways to delete the recovery partition on Windows 10/11. Let’s start trying.
# 1. Use DiskPart
Since there is only the Help option in Disk Management, you need to use another Windows built-in tool – DiskPart. It enables you to forcefully delete the recovery partition on Windows 10/11. Here’s how:
Step 1. Type cmd in the Search box, and then right-click the Command Prompt app and select Run as administrator. Then click on Yes in the UAC windows to further confirm it.
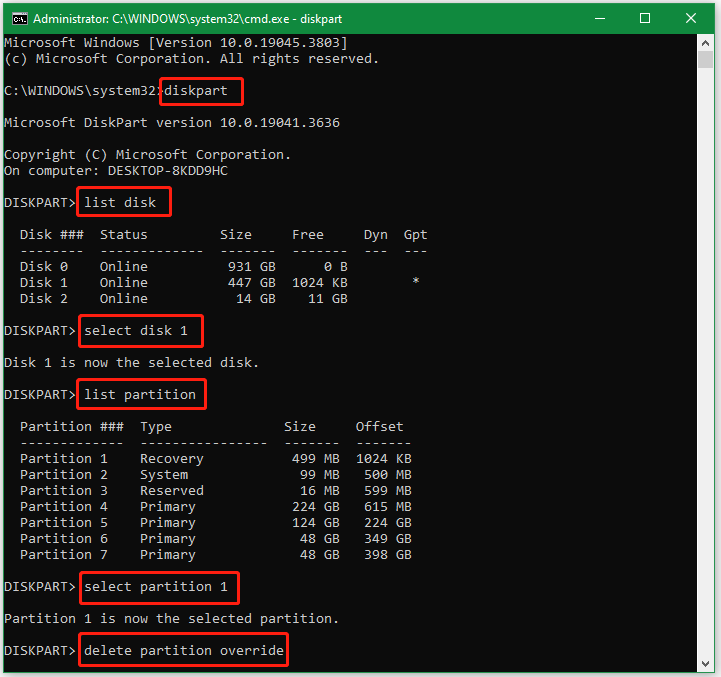
Step 2. In the elevated Command Prompt window, type diskpart and press Enter to access the tool.
Step 3. Input the following commands in order and press Enter after each one to delete the unused recovery partition.
- list disk
- select disk x (replace x with the correct disk number that contains the new recovery partition)
- list partition
- select partition n (replace n with the unused recovery partition)
- delete partition override
After you delete the partition successfully, you can create a new partition or extend it to another partition using the unallocated space. However, if the recovery partition is located before the C drive, you can’t extend the partition using the Windows tools. Besides, you may encounter some issues like “delete partition override not working”. So, it’s highly recommended to use MiniTool Partition Wizard.
# 2. Use MiniTool Partition Wizard
MiniTool Partition Wizard is a professional and feature-rich partition manager that can extend/resize/move/format/delete/copy/align partitions, convert FAT to NTFS without data loss, change drive letters, change serial number, change partition type ID, explore partition, recover lost data, and more. Here’s how to delete recovery partition and merge it with other partitions.
MiniTool Partition Wizard FreeClick to Download100%Clean & Safe
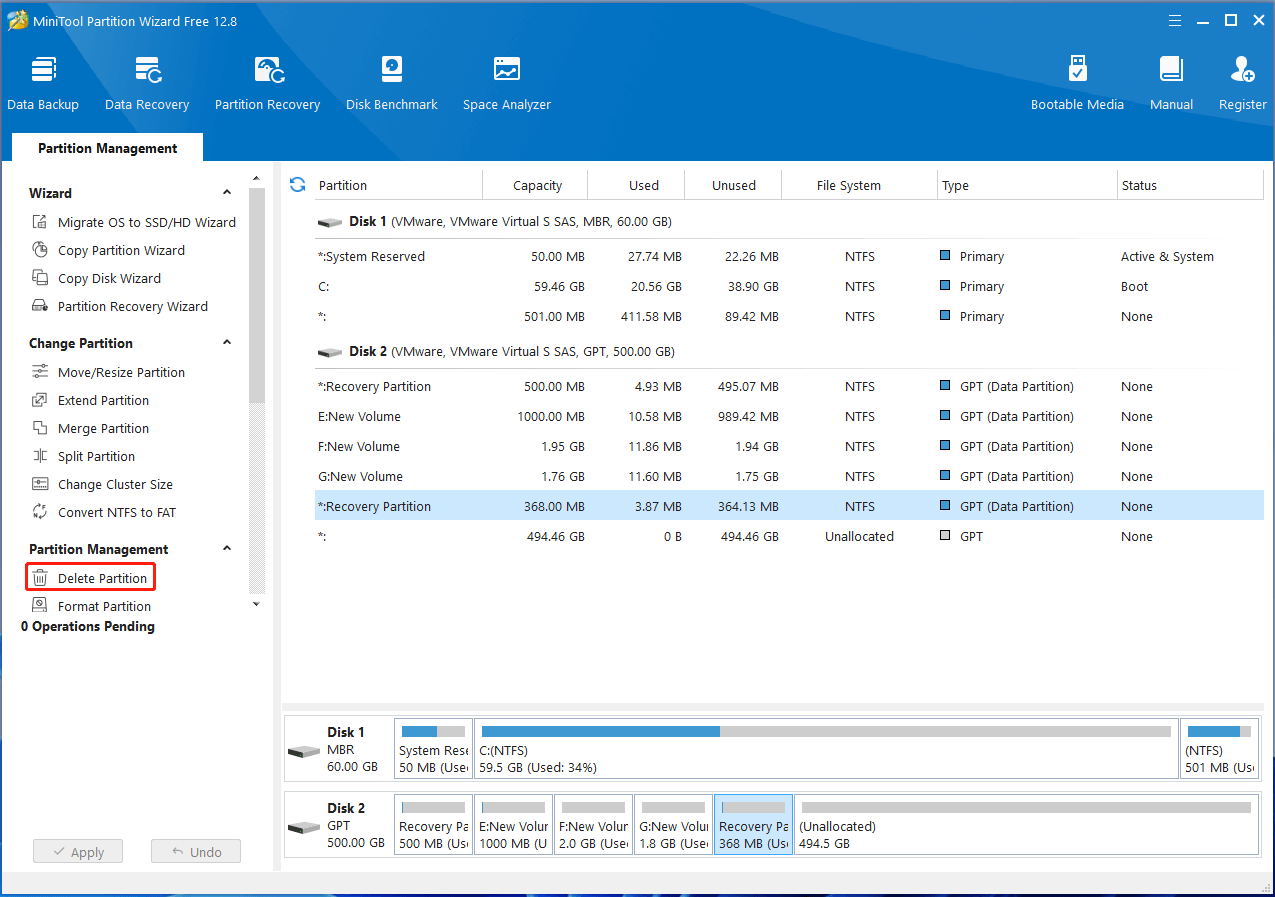
Step 1. Run MiniTool Partition Wizard to enter its main interface, select the recovery partition you don’t need any longer, and click on Delete Partition from the left action panel.
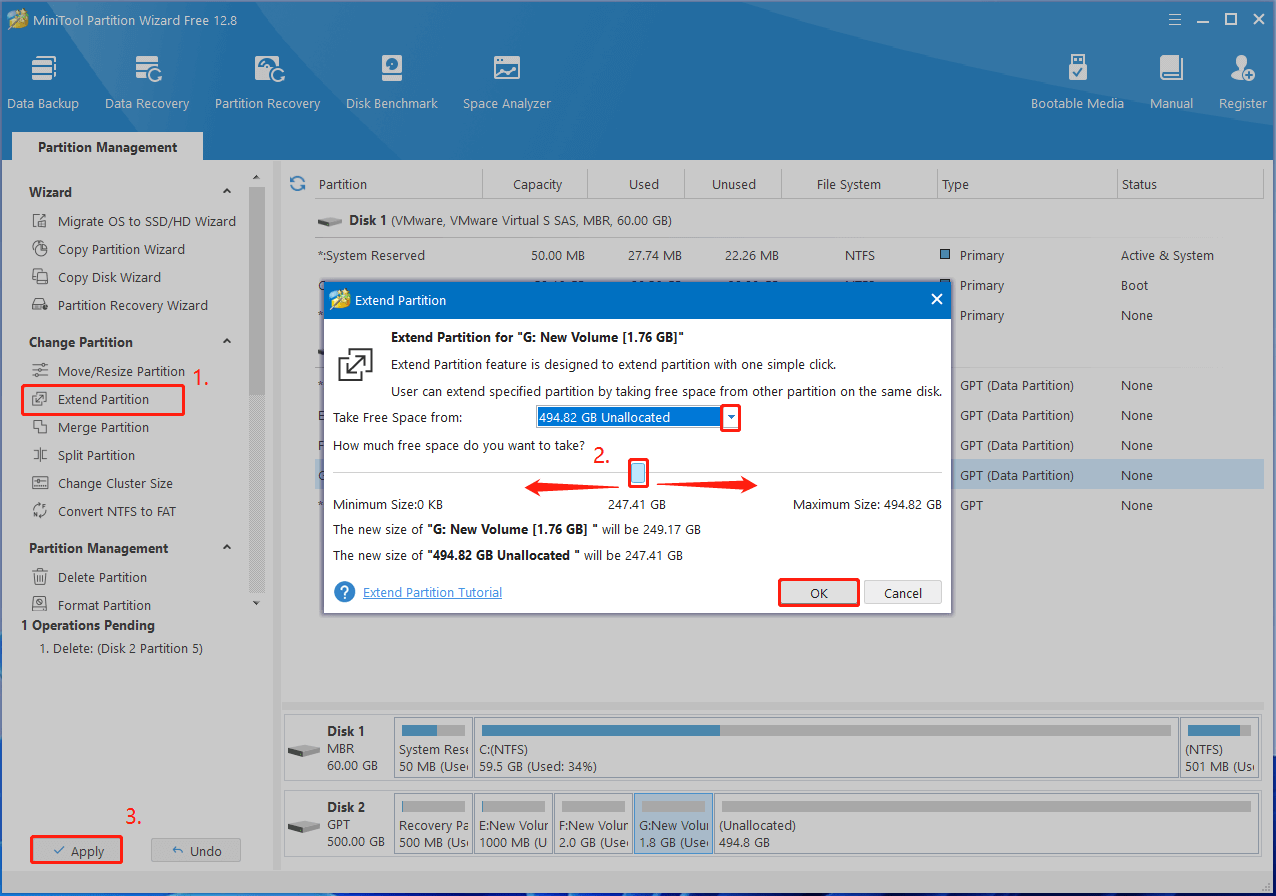
Step 2. Then you’ll find the recovery partition becomes unallocated space. To merge it with other existing partitions, right-click the partition you want to extend and click on Extend Partition. Thenselect the unallocated spaces that you want to take free space from the drop-down menu, drag the blue slider bar to occupy the space, and click on OK.
Step 3. Click on Apply to execute all pending operations.
What to do with the new recovery partition after upgrading to Windows 11/10? Now, I believe you know the answer. If you have other suggestions about the problem, please leave them in the following comment area.
User Comments :