When using a computer, you may often connect various external devices, such as USB flash drives and external hard drives.
However, when you click the “Safely Remove Hardware and Eject Media” icon in the taskbar and select the device to remove, a prompt pops up with a warning message: “Problem ejecting USB mass storage device. Windows is unable to stop the device”.

This error message means that a program or background process is actively using the device you are trying to eject. You can’t safely disconnect the device using normal procedures.
Forcibly unplugging the device can result in data loss, file corruption, and even damage to the device itself.
In this comprehensive guide, we’ll detail the causes, solutions, and prevention strategies for this error.
What Causes Windows to Be Unable to Stop the Device?
Before exploring solutions, it’s important to understand the cause. Windows can’t eject a device if it’s “in use” by the system or an active program. Here, “in use” doesn’t just refer to files open on the drive. It can also include background processes or hidden system tasks.
The following are the most common triggers:
Open files and applications
This is the simplest and most common cause. A program is opening a file (such as a document, photo, game save, or video) from an external drive. Even a minimized window or a preview window in File Explorer can lock the drive. For example:
- A Word document saved to a USB drive is still open in Microsoft Word.
- A folder on an external drive is still open in a tab in File Explorer.
Background processes
Many applications run tasks in the background, potentially accessing external drives. These processes include:
Tools such as antivirus software or security scans may scan external drives for malware in the background, temporarily locking files.
Cloud sync tools (OneDrive, Google Drive) typically synchronize files between the external drive and the cloud. If synchronization is in progress, the drive remains occupied.
Windows may be creating an index of the device’s contents to enable faster file searches.
Active transfers or operations
If you recently transferred files, copied, or moved data to the device, the process may not be fully completed. Even if the progress bar disappears, Windows may still be completing the operation.
How to Fix Windows Is Unable to Stop the Device
If you encounter this error, try the following solutions in order, from simple to complex.
Way 1. Close All Open Programs and Files
First, perform a quick check for any programs or windows that may be using the device, then try ejecting again.
- Close all open files: Make sure you close any documents, photos, or other files opened from the device.
- Close all programs: Quit any applications that may have accessed files on the drive, such as media players, browsers, or backup software.
- Check the taskbar: Look for background application icons (such as media players and cloud sync tools) in the system tray (bottom right corner). Right-click and close any applications that may be accessing the drive.
After completing these steps, try ejecting the device again. If successful, the issue is resolved. If not, proceed to the next step.
Way 2. End the Process with Task Manager
If you can’t find the program that’s using the drive, such as a hidden background process, you can use Task Manager to identify and end the locking process.
Step 1. Open Task Manager.
Right-click an empty space on your taskbar and select Task Manager, or press Ctrl + Shift + Esc.
Step 2. View processes.
In the Processes tab, look for any applications that you suspect are accessing the USB drive.
Step 3. End the task.
Right-click the suspicious process and choose End Task. Try this for programs like Windows Explorer, media players, or antivirus software.
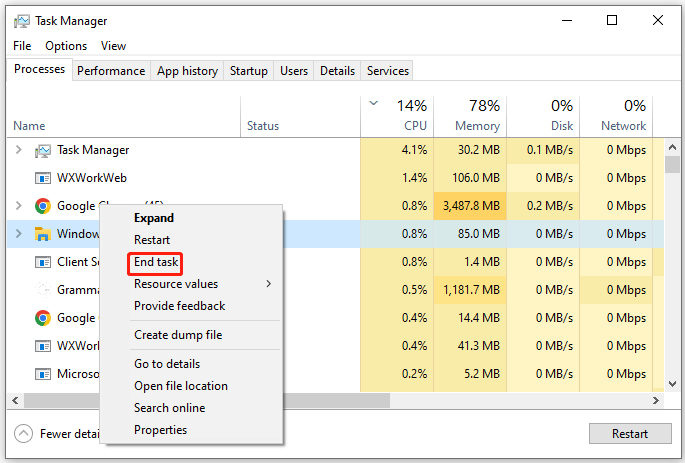
If you can’t identify the specific program, a good step is to restart Windows Explorer.
- In Task Manager, go to the Processes tab and find Windows Explorer.
- Right-click Windows Explorer and select Restart.
After restarting the process, attempt to eject the device.
Way 3. Eject the Device with Disk Management
If standard ejection fails, you can force the device to eject using Disk Management.
Step 1. Open Disk Management.
Press Win + X and select Disk Management.
Step 2. Find your device.
Locate your USB drive in the list of connected storage devices.
Step 3. Eject the device.
Right-click on the device and select Eject. This forces Windows to release control of the device.

You can now safely unplug the device.
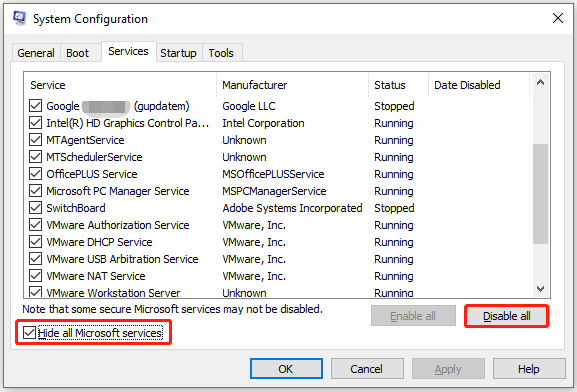
Way 4. Disable Background Services
To resolve this issue, you can temporarily disable all background services on your computer. This can help you determine if any program is interfering with the removal of the USB device.
Step 1. Press Win + R to open the Run dialog box. Then type msconfig and press Enter to open System Configuration.
Step 2. Go to the Services Tab and check the box for Hide all Microsoft services to avoid disabling critical system components.
Step 3. Then check all of them and click Disable all to disable them. Finally, click Apply and OK.
Way 5. Enable Quick Removal
USB devices have an option that allows you to remove the USB device without ejecting it. To enable Quick Removal, you can follow the steps below:
Step 1. Right-click Start and choose Device Manager.
Step 2. Once in Device Manager, expand the Disk Drives category, find your device, right-click it, and select Properties.
Step 3. In the pop-up window, navigate to the Policies tab. Ensure the Quick Removal option is selected. Press OK to save the changes and exit.
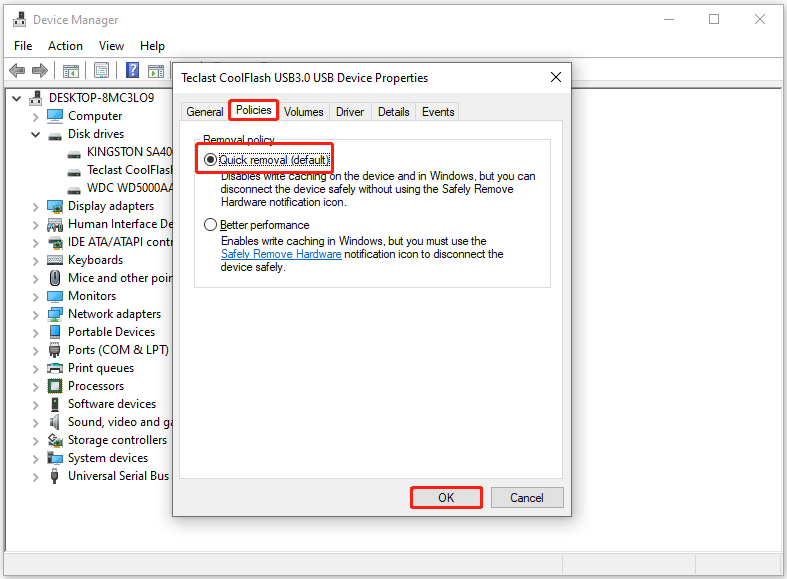
Now, you can unplug the storage device after saving all your work without having to remove the device safely.
Way 6. Check the Event Log
You can also check the event logs to find errors logged when your computer encounters the prompt. To check the event log, do the following steps:
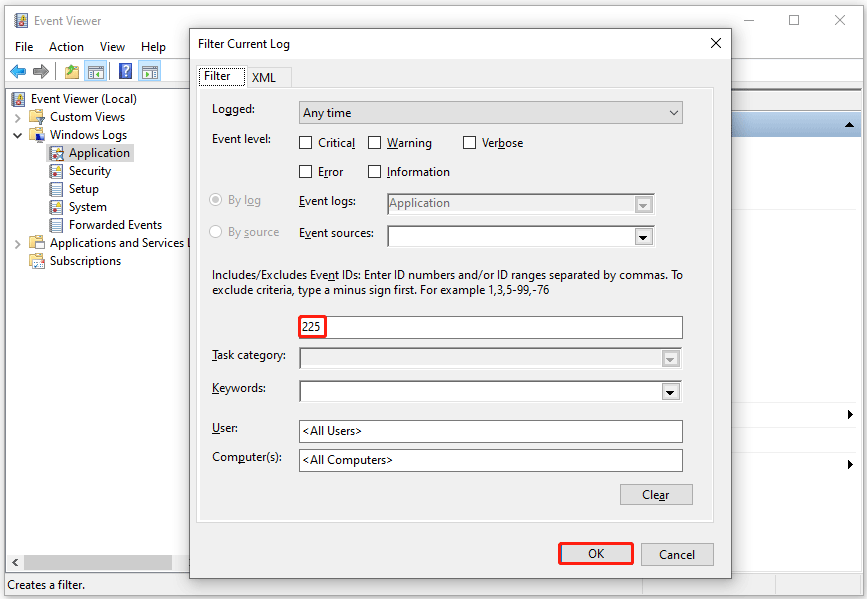
Step 1. Launch the Run dialog box. Type eventvwr and press Enter to open Event Viewer.
Step 2. Click Windows Logs in the left navigation pane. Then click Application.
Step 3. Click the Filter Current Log button on the right side of the screen in the right navigation pane.
Step 4. Type 225 in the Event Log ID field in the middle of the window. Then click OK. This will filter out all other events in the log, leaving only those with ID 225. Event ID 225 is the ID for errors generated when the computer is unable to shut down a device successfully.
Step 5. Now open the remaining log. Under the General tab, you will see the application that was leading to “Windows is unable to stop the device”.
Since you have identified the application causing the problem, you can try ending the process using Task Manager before ejecting the storage device.
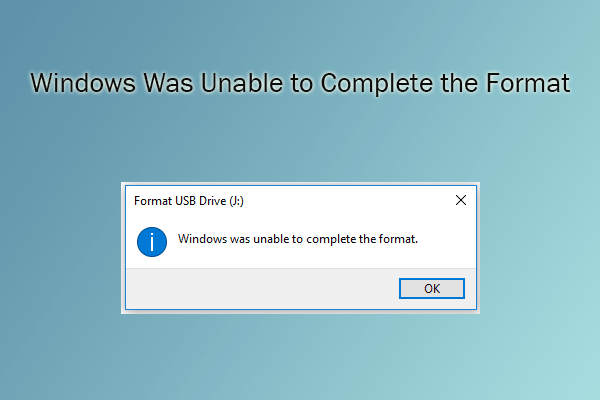
Way 7. Format Your USB Drive
If all the above solutions fail, you can format the USB drive to safely unplug it without interruption.
For the USB formatter, MiniTool Partition Wizard is a great choice. It can not only format the USB drive to NTFS, FAT32, or exFAT, but also format the internal/external hard drive, SD card, and SSDs.
This free partition manager can also format drives larger than 32GB to FAT32, which Windows usually cannot do. Besides, it helps you convert drives between FAT32 and NTFS without data loss.
Now, let’s format the USB drive using MiniTool Partition Wizard.
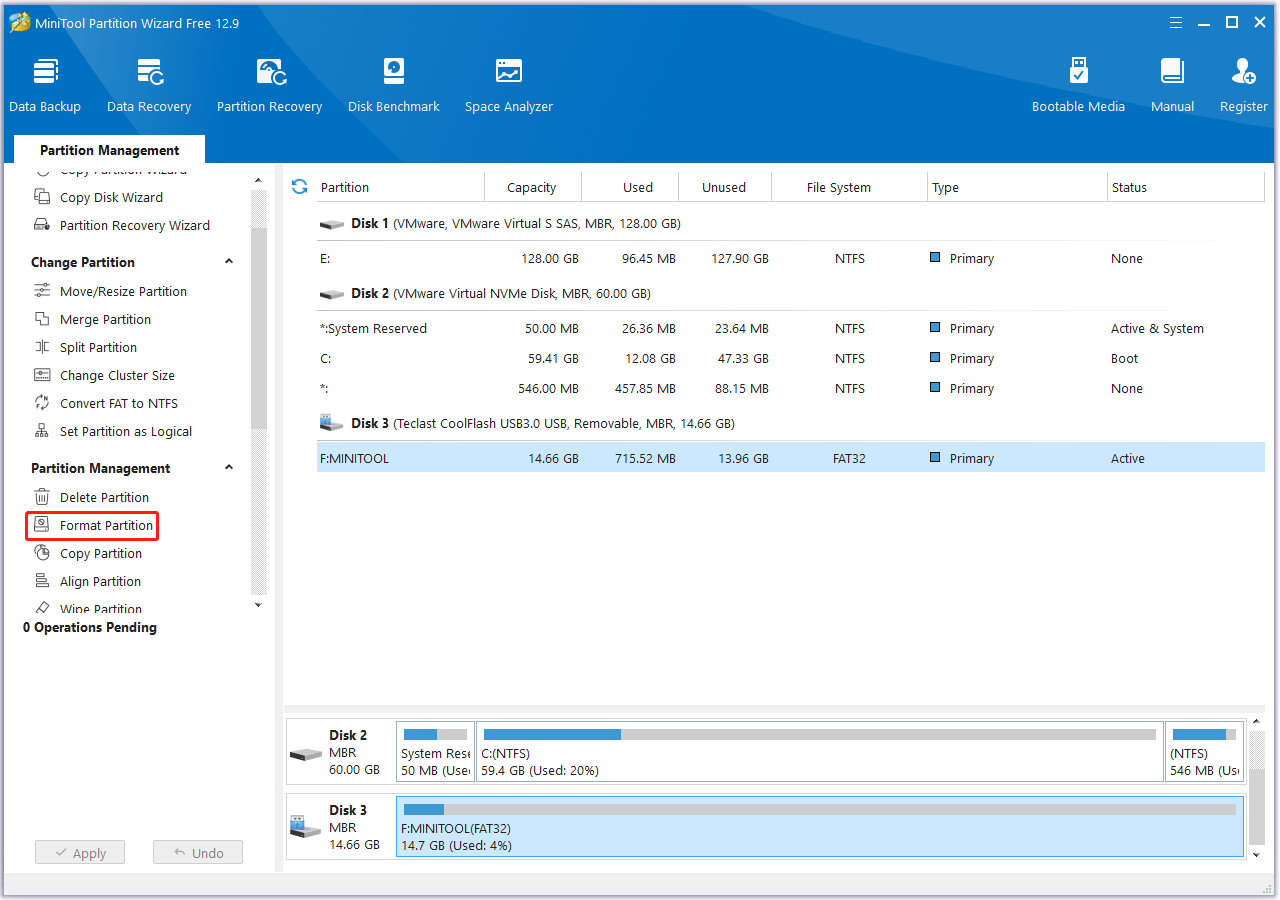
Step 1. Choose the partition on the USB drive.
- Open MiniTool Partition Wizard after installation.
- Choose the specific partition on the USB drive that you want to format.
- Select the Format Partition feature from the left action panel.
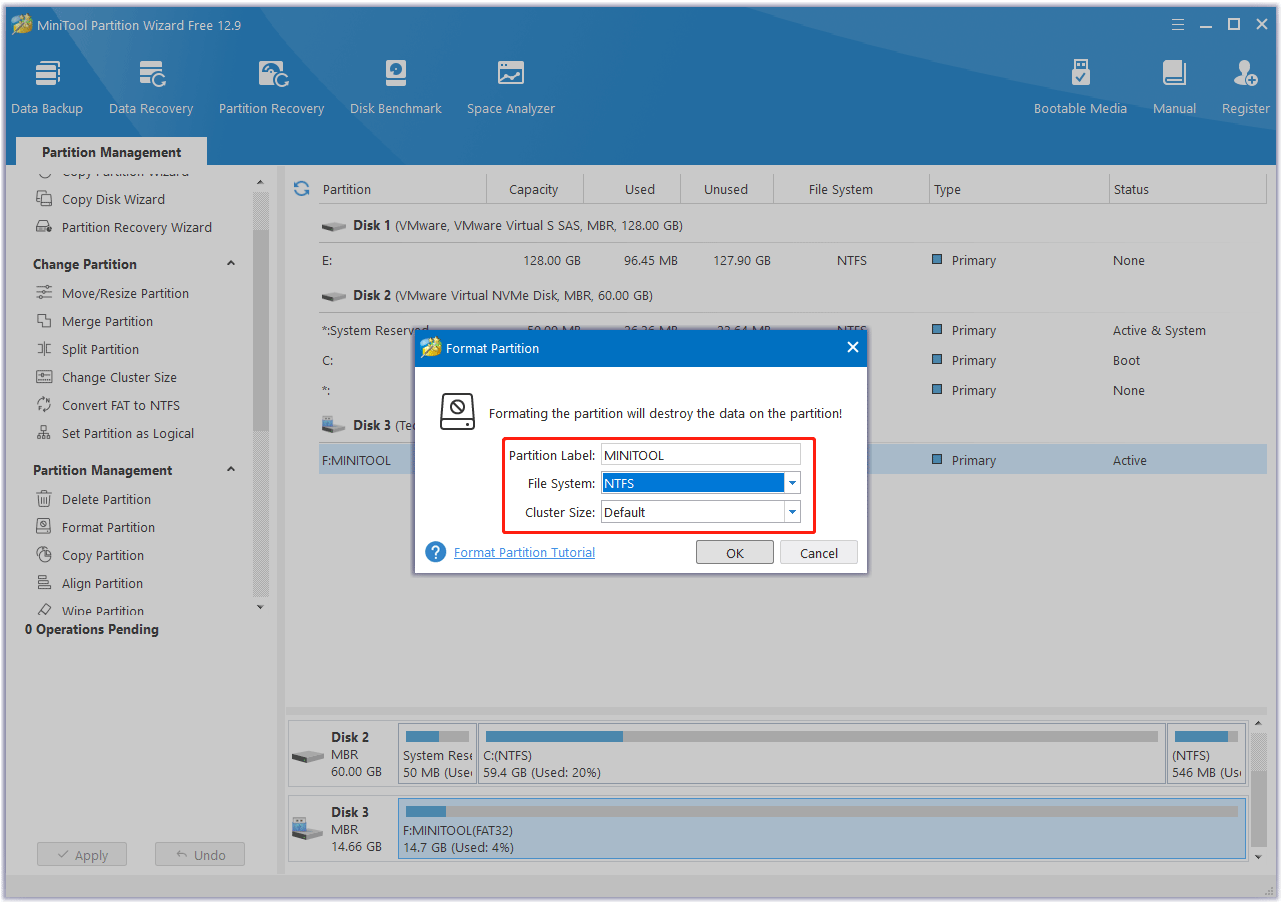
Step 2. Configure the formatting settings.
In the Format Partition window, you will need to do:
- Select a file system: Choose between options like NTFS, FAT32, or exFAT.
- Assign a volume label (optional): Give your formatted drive a name.
- Set cluster size: This determines the size of data blocks on the drive. The default is usually fine.
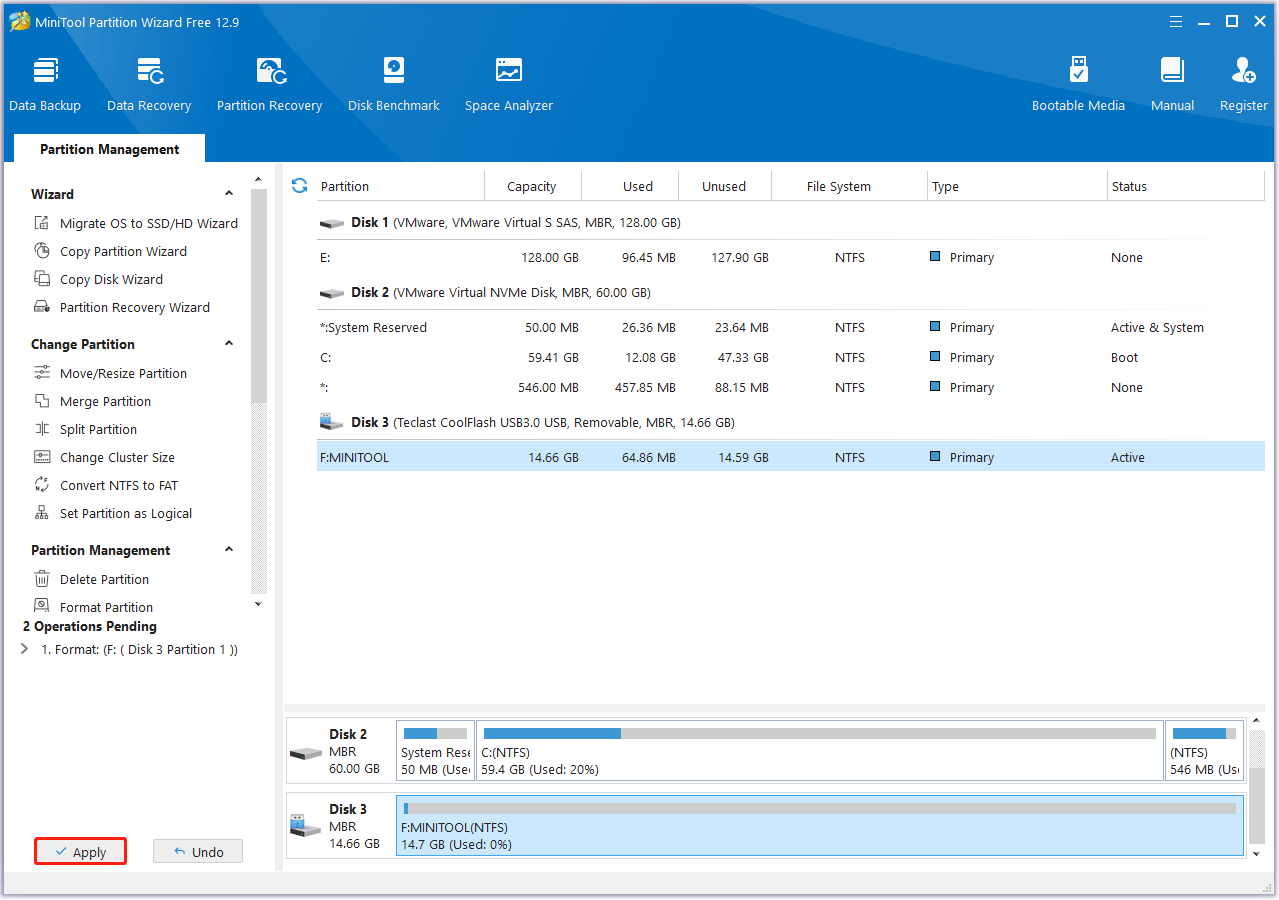
Step 3. Apply the changes and confirm.
- Click OK on the Format window.
- Then click Apply the start the formatting process.
- Click Yes to proceed when this tool prompts.
After that, you can continue using MiniTool Partition Wizard for other features. This versatile tool also lets you create/resize/extend partitions, wipe disks, partition a hard drive, check disk health, convert disks between MBR and GPT, clone a hard drive, etc.
Recover Lost Data from Improper USB Storage Device Ejection
If you forcibly unplug the drive despite the error message, you may lose data, or the partition on the device may become RAW.
How can you recover lost data? There are many USB data recovery tools on the Internet. Here, I recommend that you use MiniTool Partition Wizard. It can recover all types of files on the USB, such as documents, photos, audio, video, email, archives, etc.
The Data Recovery feature is only available in MiniTool Partition Wizard Pro Platinum and above editions.
MiniTool Partition Wizard DemoClick to Download100%Clean & Safe
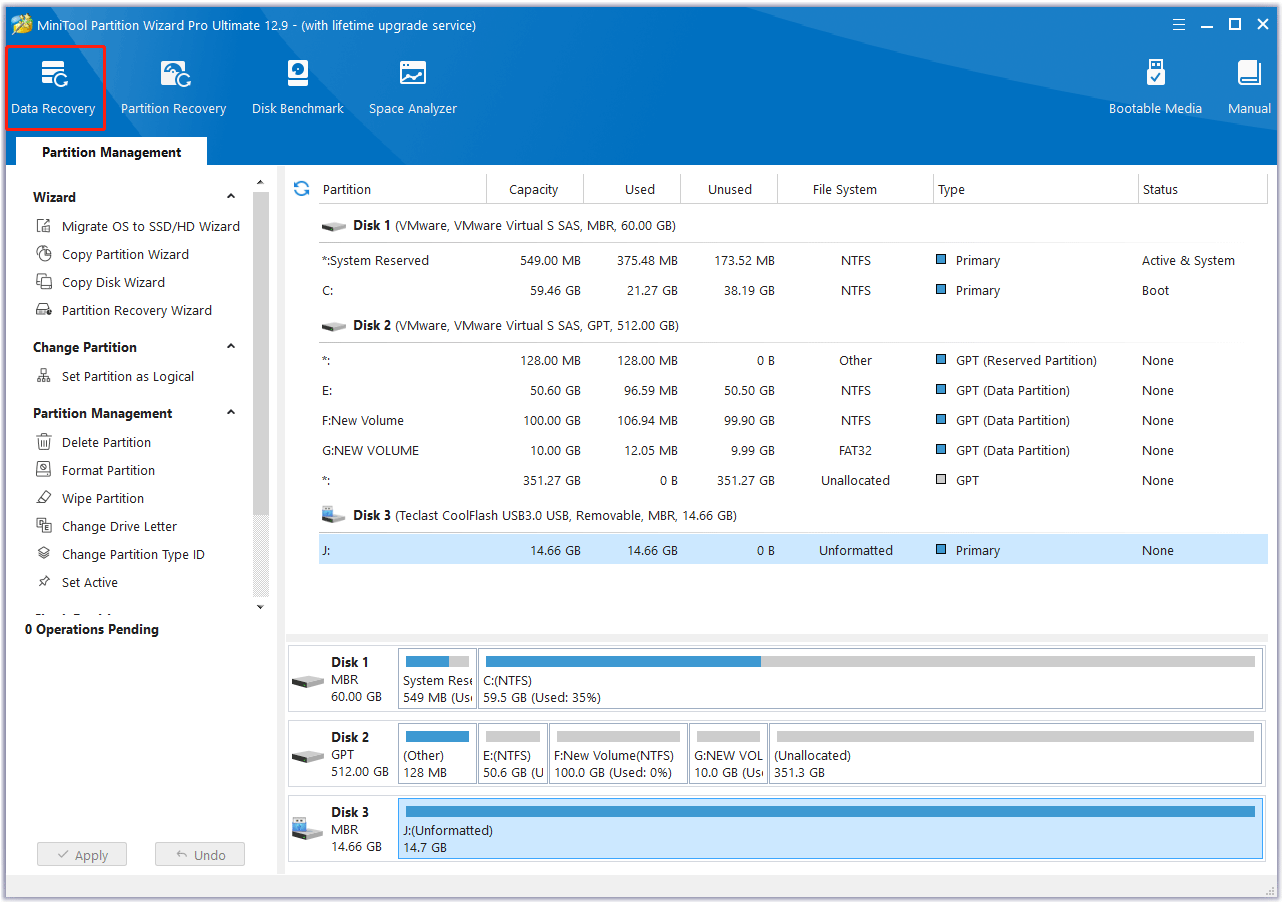
Step 1. Launch Data Recovery.
- Connect the USB flash drive to your PC.
- Launch MiniTool Partition Wizard.
- Click Data Recovery.
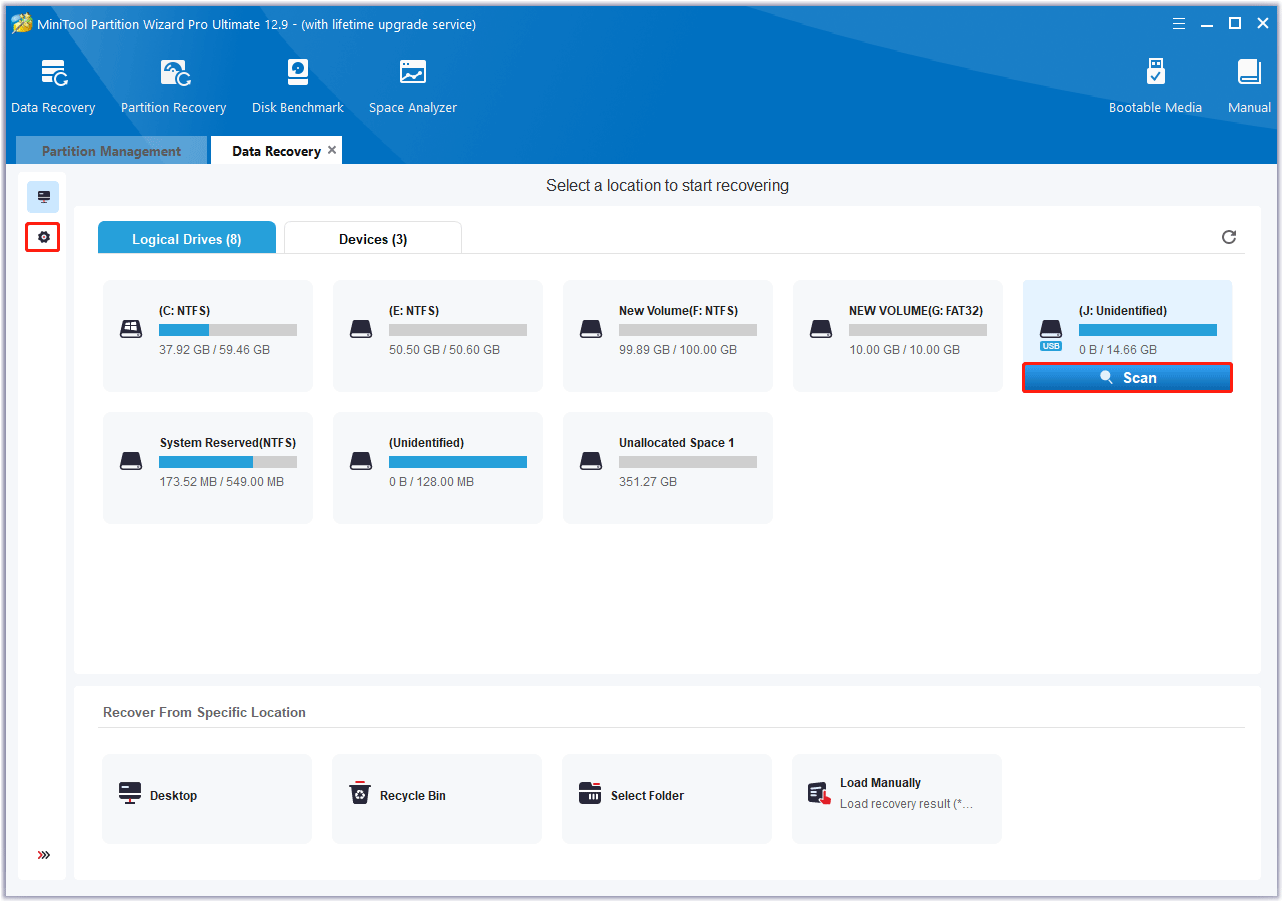
Step 2. Scan the USB drive.
- Select the target USB drive.
- Click Scan.
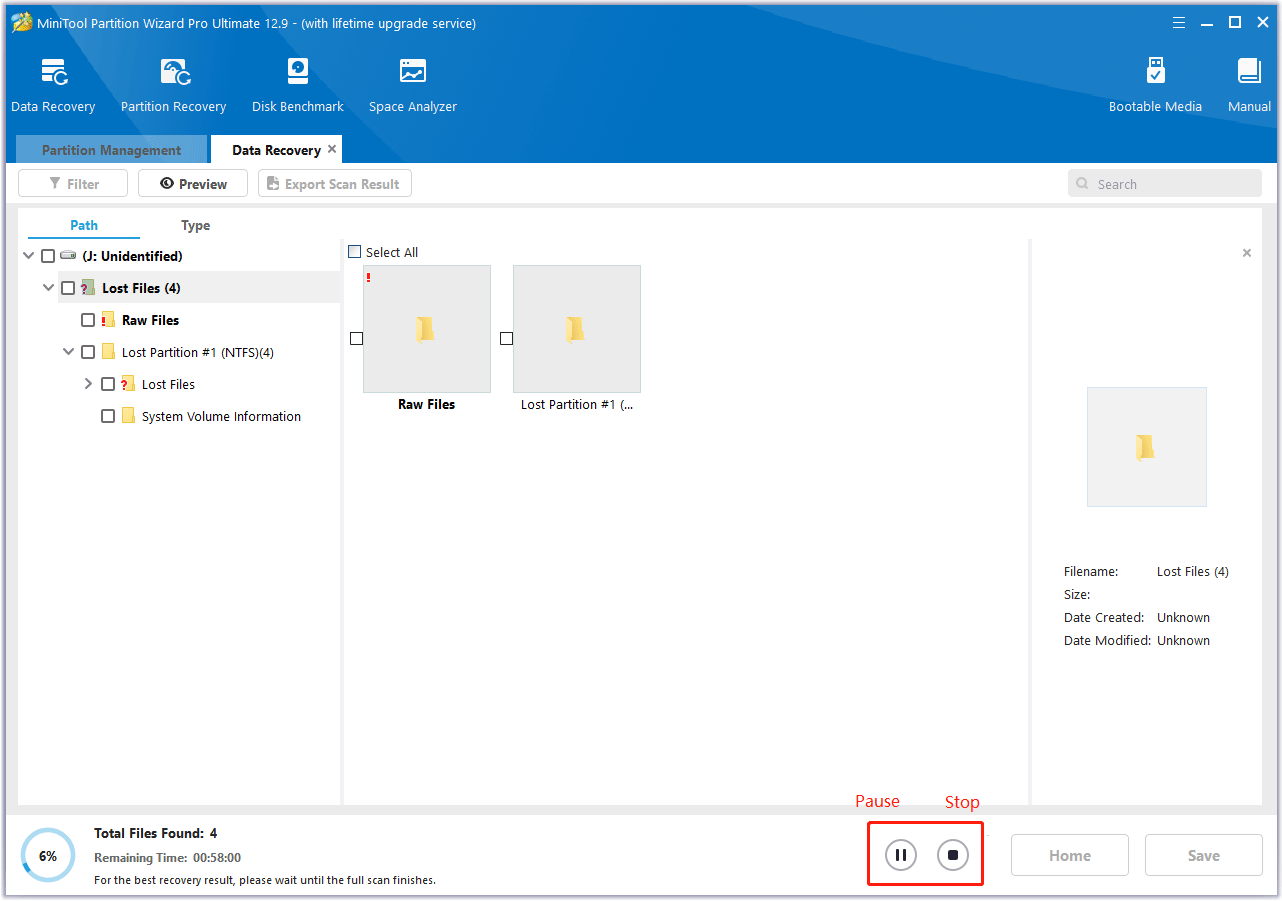
Step 3. Check the needed files in the scan result.
Wait for the scan to complete. If the desired data is found, you can click the Pause or Stop icon to get instant data recovery. Then find and check the needed files to recover.
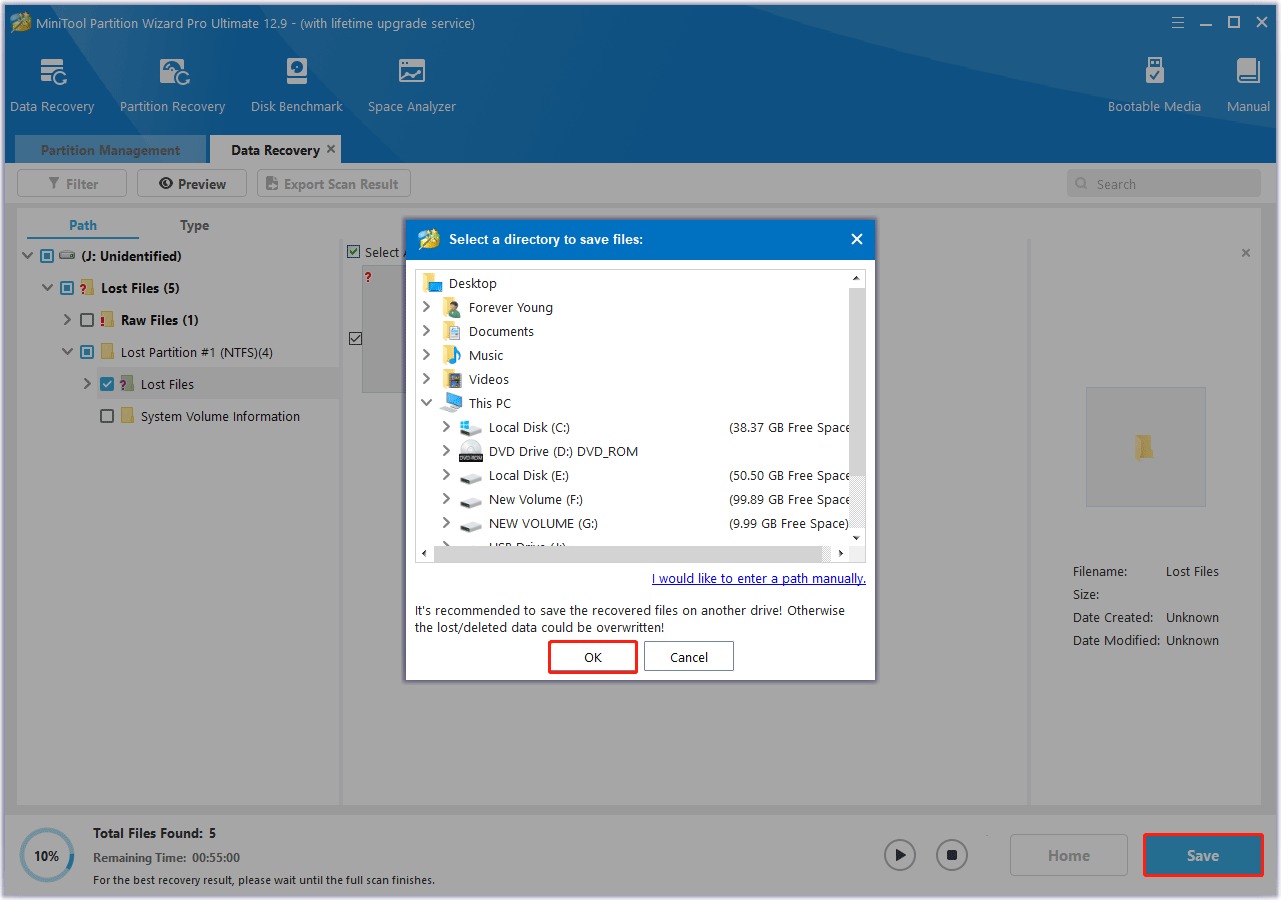
Step 4. Save files to a safe place.
- Click the Save button.
- Choose a directory to save the selected files.
Bottom line
While the “Windows is unable to stop the device USB mass storage device” error can be frustrating, it can be resolved with simple steps.
Understanding the root cause and practicing preventative habits (safe ejection and regular maintenance) can help you avoid this problem.
If you have any questions or suggestions on how to use MiniTool Partition Wizard, please do not hesitate to contact us via [email protected].
Windows Is Unable to Stop the Device FAQ
About The Author

Position: Columnist
Vega enjoys helping people with computer problems, including disk management, data recovery, data backup, and more. She is constantly expanding her knowledge in related fields. And she will continue to bring more easy-to-understand professional articles to help people solve various problems on the PC.
User Comments :