USB flash drive, a kind of portable data storage device, is widely used because of its tiny and light features. It is often used to store data, back up files, and transfer files. It is vital in the operations like making the installation media, creating Chromebook Recovery Utility, or creating Windows 10 Recovery Drive.
Therefore, it would be very confusing if the USB flash drive gets infected. After a USB drive is infected, multiple issues will occur. What are they? The section below will explore the question.
What Will Virus Do to the USB Drive
The virus is a self-replicating program, which can spread to other devices by attaching itself to other applications. A USB flash drive can be infected if it is connected to an infected computer.
Computer viruses are software codes that can’t physically damage computer hardware. Though the USB device can be used as a virus transmission media, the USB port itself won’t be affected by the virus.
The USB port hardware isn’t damaged or altered physically by the virus, but it hurts the computer’s capability of utilizing USB ports. Some viruses contain malicious codes that attack computer files and functionality.
The computer virus usually makes your computer act in an unexpected manner. In addition to that, it can drag your PC down, erase important files, encrypt files, hide files, change file extension to .locky or .encrypt, or even give hackers access to personal information.
Further reading:
Shortcut virus is one of the most common types of USB viruses. It comes in two forms.
- Computer virus: It can replace the folders on the desktop and the file icons on the device with shortcut icons that won’t lead you to the actual file.
- USB flash drive virus: It takes all your files and attributes them as hidden or puts them in a hidden folder. It also generates a shortcut.exe application file. Once you open this file, the virus will be released and activated into the computer that the USB drive is connected to.
USB Virus Removal Methods
In this section, several methods to remove USB virus will be illustrated. You can delete virus from the USB drive with Windows built-in programs or third-party USB virus removal tools.
Method 1: Remove USB Virus via CMD
Command Prompt is an embedded program in Windows 10 that can help you remove viruses from the USB flash drive. It is a free USB virus remover. With Command Prompt, you can delete viruses just with some command lines.
Step 1: Connect the infected USB flash drive to your computer.
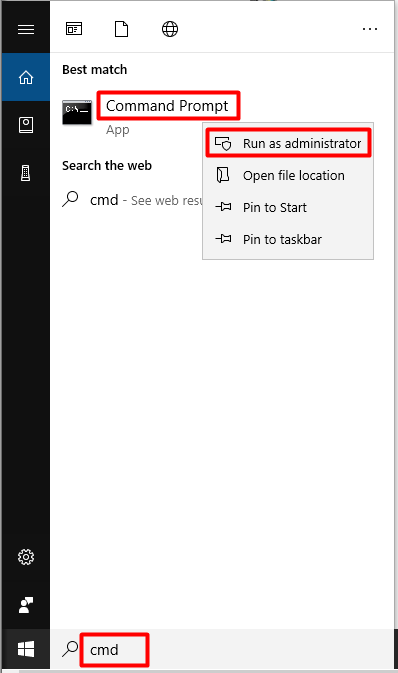
Step 2: Run Command Prompt as administrator.
- Type cmd in the search box.
- Right-click on Command Prompt under Best match.
- Click on Run as administrator in the pop-up menu.
Step 3: In the elevated window, type L and hit Enter. The L stands for the drive letter of your USB flash drive that can be found in the Disk Management or File Explorer.
Step 4: Type dir /w/a and press Enter. By doing so, a list of files inside the USB drive can be opened. You can find any unfamiliar files from the list. Most viruses have names like “svchost.exe”, “Ravmon.exe”, as well as “Autorun.inf” and “Heap41a”.
Step 5: Type del *.lnk or del autorun.inf and hit Enter.
Step 6: Type attrib -h – r -s /s /d L:*.* and hit Enter. Likewise, you are also required to replace L with your USB drive letter.
Also read: 2 Ways to Back up Files on USB Drive to Protect Data
Method 2: Run a Virus & Threat Scan
You can run a virus & threat scan via Settings. This is also a Windows-embedded virus cleaner. It is very easy to remove viruses via this tool.
Step 1: Open Settings by pressing Windows and I keys, and then navigate to the Update & Security section.
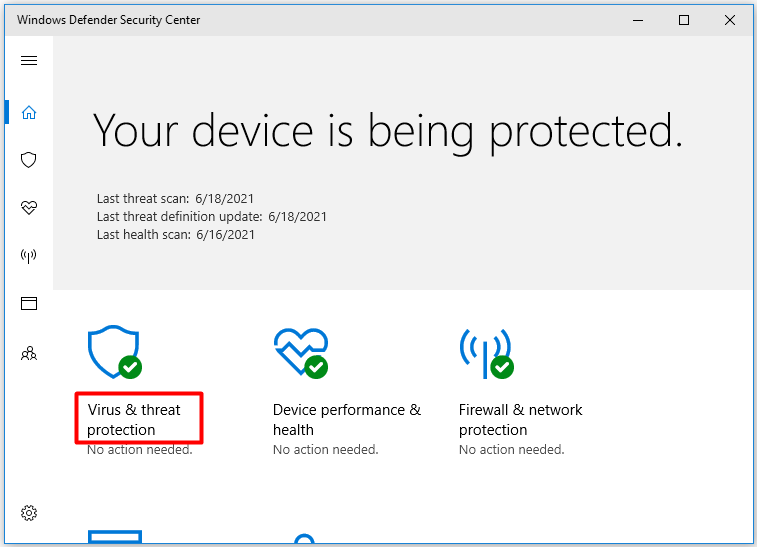
Step 2: Click on Windows Defender and Open Windows Defender Security Center.

Step 3: In the next window, click Virus & threat protection.
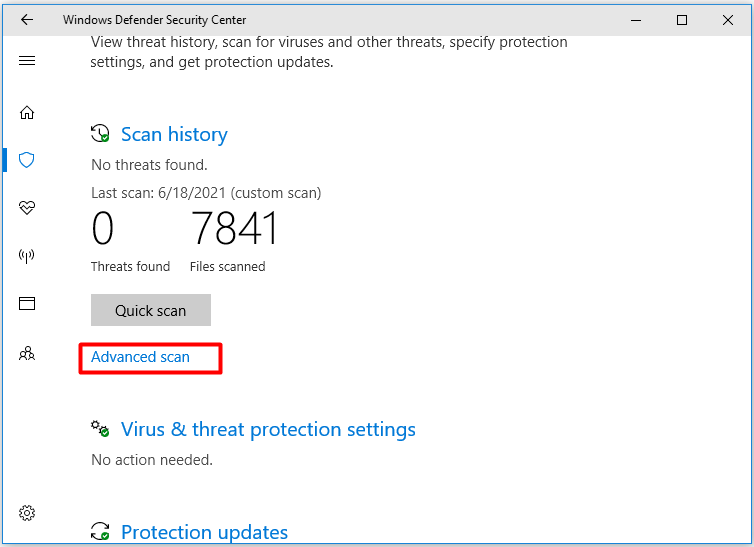
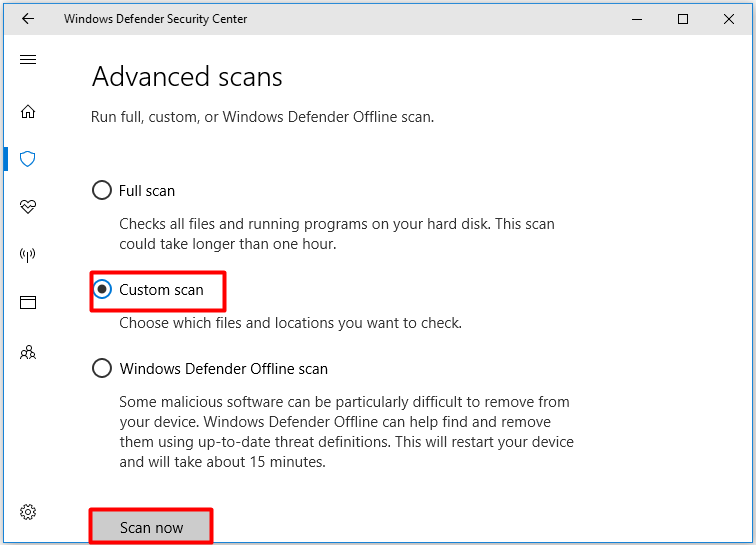
Step 4: Click the Advanced scan button.
Step 5: Click on the Custom scan and Scan now options to continue.
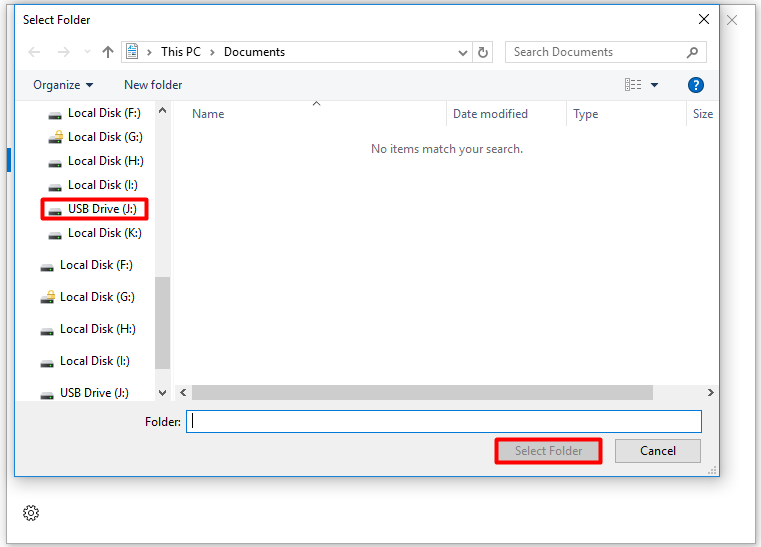
Step 6: In the prompted window, choose your USB drive and click Select Folder.
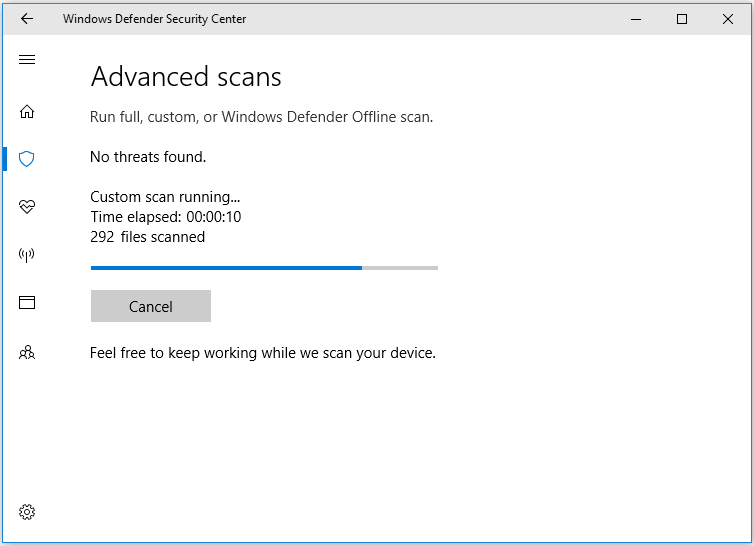
Step 7: Then you can view the scan process. You just need to wait patiently until the process ends. After that, follow the on-screen instruction to finish the USB virus removal operation.
Also read: Thumb Drive VS Flash Drive: Compare Them and Make a Choice
Method 3: Run Microsoft Safety Scanner
Microsoft Safety Scanner can also scan USB drive for viruses. It can detect and remove USB viruses including spyware and other potentially unwanted software on your PC. Here’s how to run it.
Step 1: Connect USB drive to your PC and then click here to move to the official website of Microsoft Safety Scanner.
Step 2: Click a link based on your computer specs to download Safety Scanner.

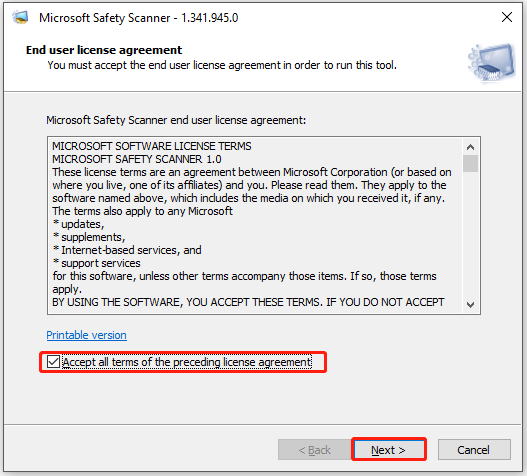
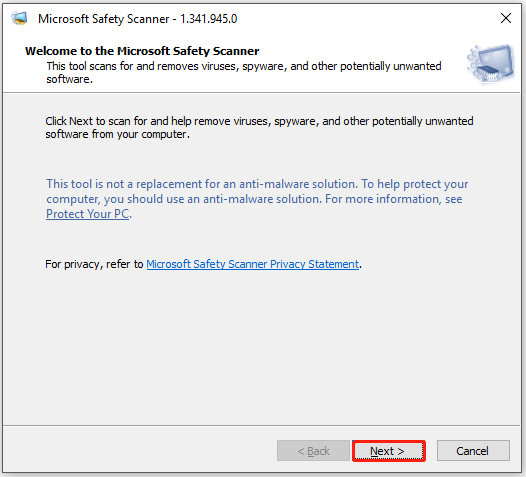
Step 3: After the download finishes, open the setup file. Accept the license agreement and click Next.
Step 4: Click Next.
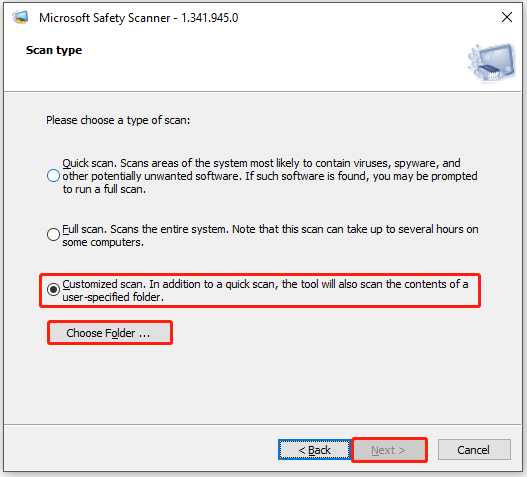
Step 5: In this next window, choose the Customized scan option and click Choose Folder. In the pop-up window, select your USB drive and click Select Folder. Click Next in the Scan type window to begin the process.
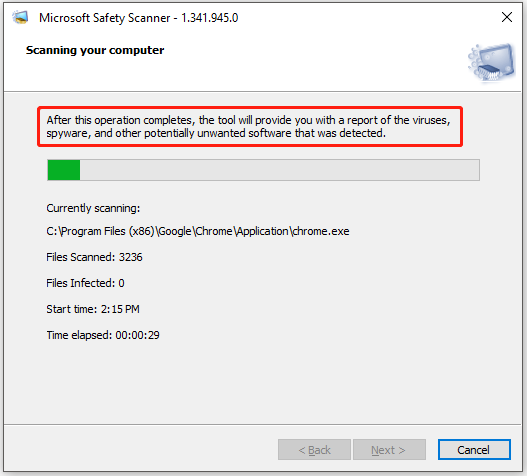
Step 6: Now, Microsoft Safety Scanner scans your USB drive for the virus.
Also read: Get Microsoft Windows USB Troubleshooter to Fix USB Issues
Method 4: Use Third-Party Anti-Virus Software
You can make use of third-party anti-virus software to remove USB virus as well. When you search USB virus removal tool online, you will find a list of programs. Among them, Shortcut Virus Remover, USBFix Free, USB Virus Remover, and Shortcut Virus Fixer are highly recommended.
You can download and install one of these programs on your PC and then scan for USB viruses.
Method 5: Format the Infected USB Flash Drive
Formatting the USB drive can remove all the existing content including personal data, viruses, and malware from the drive. Then you will get a clean and virus-free USB drive. Though the formatting process causes data loss, you can recover files from a formatted hard drive after removing the USB virus.
MiniTool Partition Wizard can format devices like external hard drive, SD card, and USB flash drive into file systems including FAT32, exFAT, NTFS, EXT2/3/4, or Linux Swap. Download and install MiniTool Partition Wizard, and then follow the steps below to format USB drive.
MiniTool Partition Wizard FreeClick to Download100%Clean & Safe
Step 1: Connect the USB drive to computer.
Step 2: Run MiniTool Partition Wizard to enter its main interface.
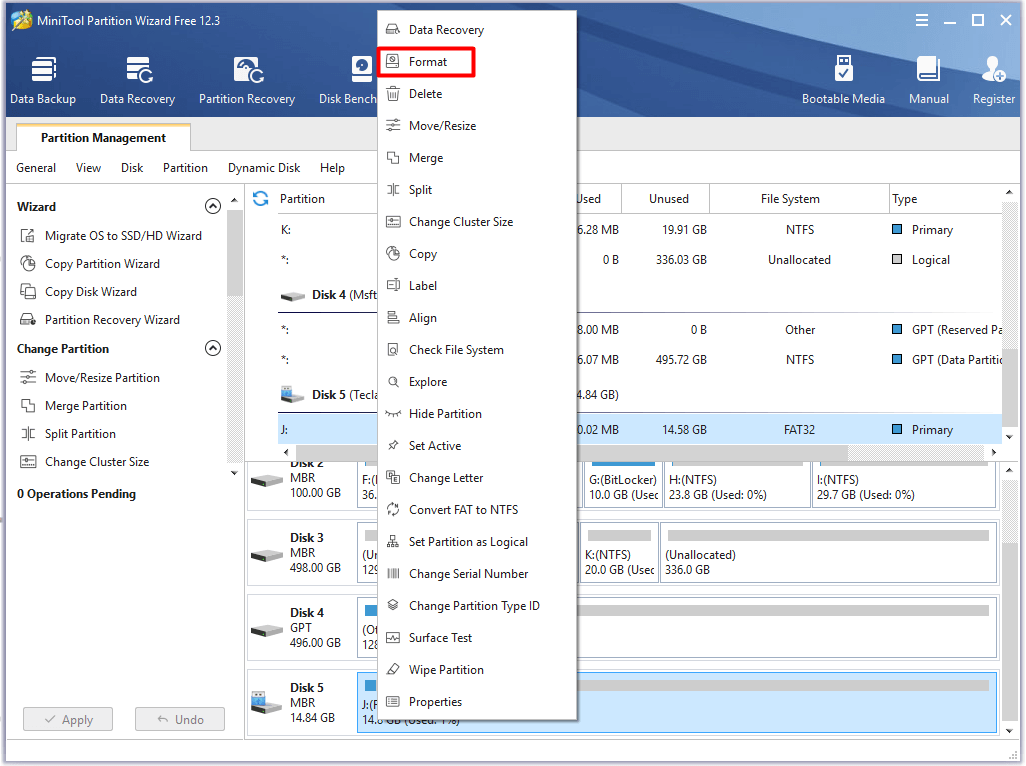
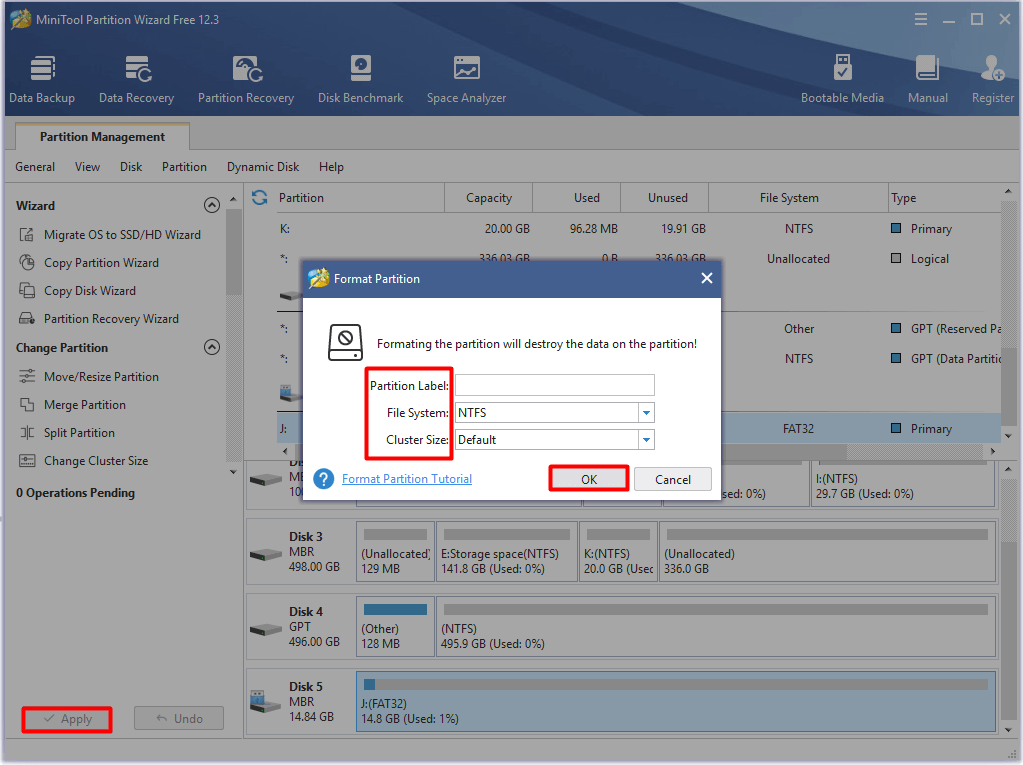
Step 3: Right-click on your USB flash drive and click Format.
Step 4: In the elevated window, set partition label, file system, and cluster according to your demands. Then click OK to save the changes you’ve made.
Step 5: Finally, click Apply to execute the operation.
Also read: How to Fix an Unformattable and Unusable USB Drive? Solved
Method 6: Create a BAT File
The shortcut virus in the USB drive can be removed by running the BAT file. How to create and run the BAT file? The following steps will show you how.
Step 1: Insert the USB drive into your PC.
Step 2: Launch Notepad on your computer.
Step 3: Copy and paste the codes below into the Notepad.
@echo off
attrib -h -s -r -a /s /d H:*.*
attrib -h -s -r -a /s /d H:*.*
attrib -h -s -r -a /s /d H:*.*
@echo complete
Step 4: Save the file with an appropriate name and end the file text with .bat.
Step 5: Double-click the .bat file on the desktop and wait for the finish of the process. Now, the shortcut virus on your USB drive should be removed.
Method 7: Delete Suspicious Keys via Registry Editor
Deleting suspicious keys can also remove USB viruses. Here’s how to do that.
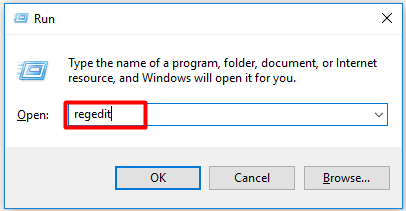
Step 1: Press Windows and R keys to open the Run window, and then input regedit and hit Enter.
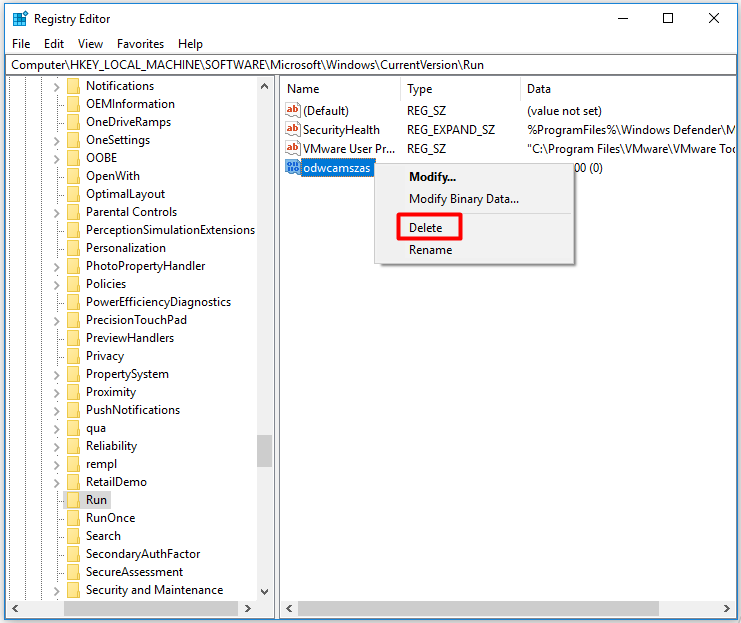
Step 2: In the Registry Editor window, navigate to the destination by following the path below.
HKEY_CURRENT_USER > Software > Microsoft > Windows > CurrentVersion > Run
Step 3: Move to the right side of the window and find suspicious keys like odwcamszas, WXXKYz, ZGFYszaas, and OUzzckky from the list.
Step 4: Right-click on the suspicious key and choose the Delete option in the pop-up menu.
Recover Missing Data
As mentioned earlier, virus can remove important files and hide files. Moreover, you may suffer from data loss while formatting USB drive. Hence, you need to recover data after removing the USB virus.
The Data Recovery feature of MiniTool Partition Wizard can help you recover missing/deleted/formatted data. This program can recover data on the RAW partition and internal/external hard drives as well.
MiniTool Partition Wizard DemoClick to Download100%Clean & Safe
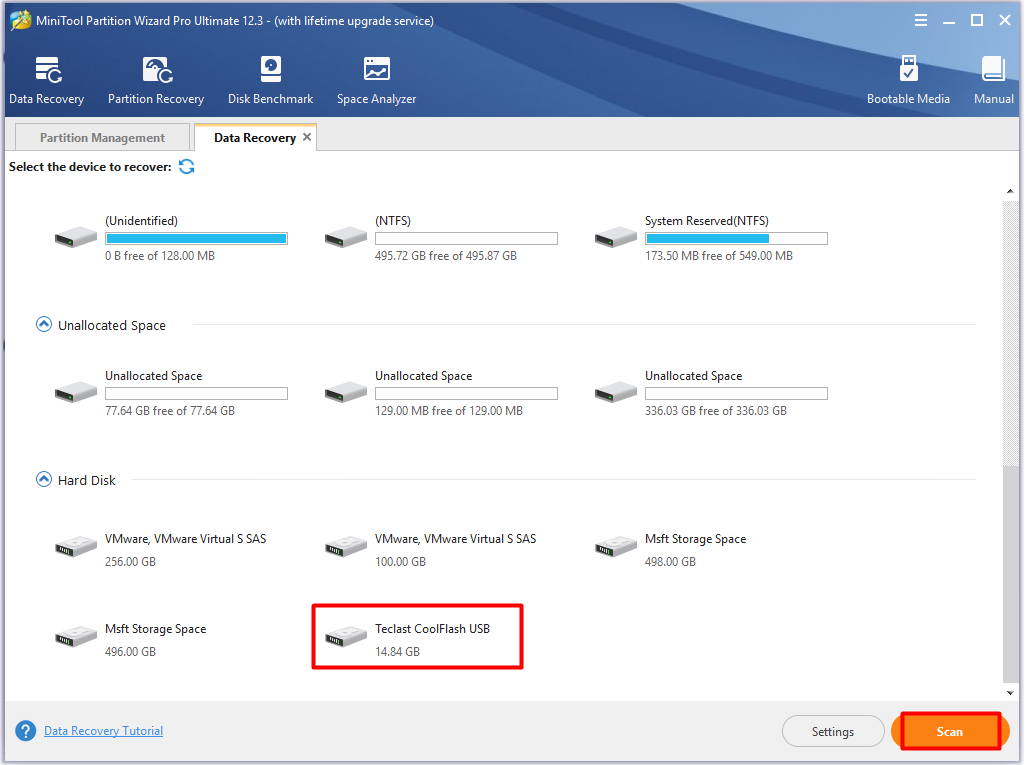
Step 1: After connecting USB flash drive to your computer, launch MiniTool Partition Wizard. Click on Data Recovery on the top bar.
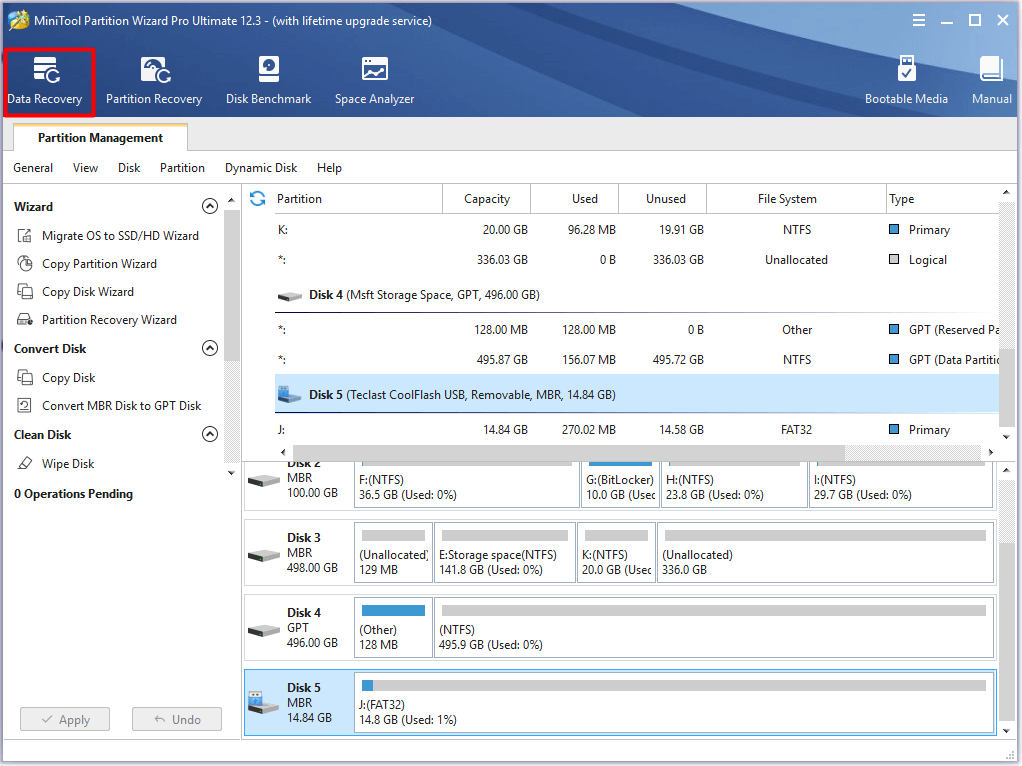
Step 2: In the next window, choose the connected USB drive under the Hard Disk section and click Scan.
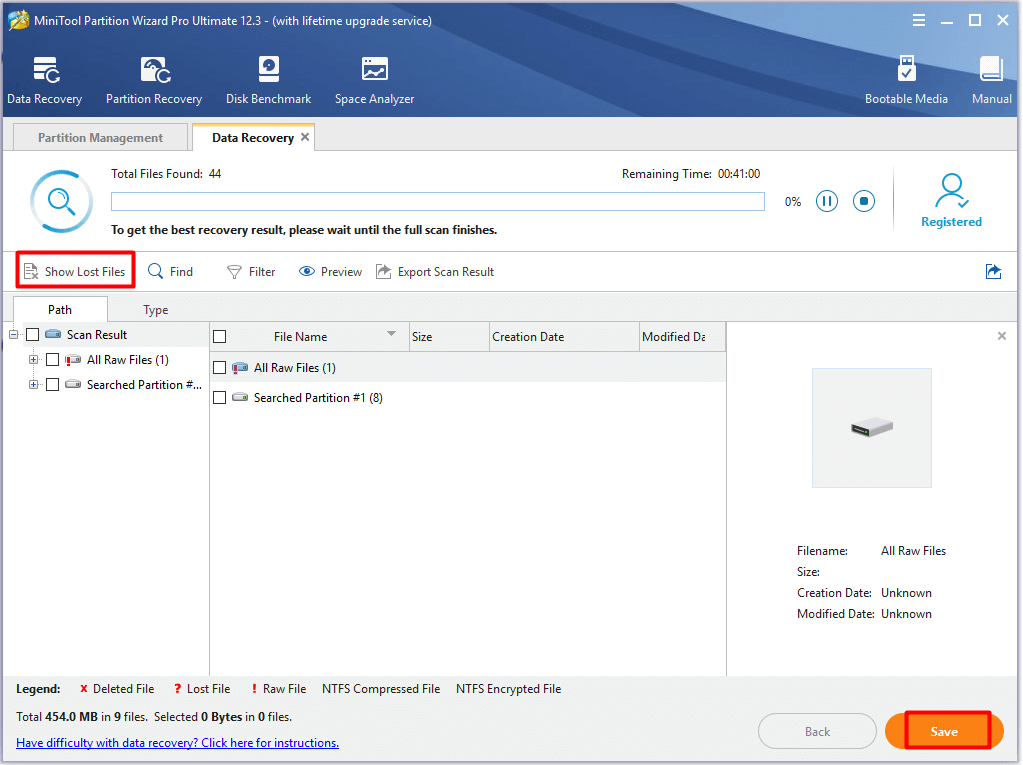
Step 3: You can view the scan process in this window. After the process ends, click the Show Lost Files tab and choose the files you want to recover. Then, click the Save button to go on.
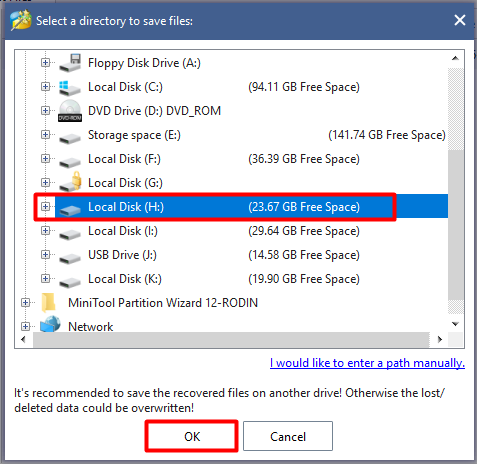
Step 4: You are required to choose a destination for the recovered data. After that, click OK to save changes. Then follow the prompted instruction to finish the operation.
Also read: How Long Does Data Last on a USB/SD Card and How to Protect Data
Tips for Preventing Virus from the USB Drive
To keep USB drive from viruses and protect data in the device, you need to take some measures. Several tips on stopping virus from the USB drive are summarized as follows.
- Write-protect the USB flash drive: A write protecting USB drive indicates that no data can be written to the drive. You can only view files in the drive. You need to note that not all the USB drives have a physical write-protect switch.
- Keep only one antivirus program: As multiple antivirus tools consume many resources, compete over the virus, kill each other, and even cause performance issues, you are recommended to keep only one USB virus cleaner.
- Be alert to the unknown websites: You may get a USB drive virus from the Internet or from sharing files and from other PCs. Besides, your USB drive can be infected because you click on random links online or download files from dubious websites.
- Make a backup of USB files: Last but not the least, back up the files in your USB drive to other places.
Conclusion
This USB virus removal guide mainly illustrates how to remove USB viruses, recover missing data due to virus attack, and prevent virus from the USB drive. If you don’t know how to get rid of virus from the USB, this full tutorial is strongly recommended.
For any thoughts on USB virus removal, please share with us in the following comment area. You can directly contact us by sending an email via [email protected] if you encounter any issues while using the MiniTool software.
USB virus Removal FAQ
You can remove virus from USB drive without deleting files with the following methods.
- Use CMD to remove shortcut virus.
- Create BAT file.
- Tweak registry files.
- Make use of anti-virus software.
User Comments :