Can I get the upgrade to Windows 11 from my existing Windows 8.1.
from Microsoft Community
Since the support for Windows 8.1 is coming to an end, your computer will not receive security or maintenance updates anymore after its expiration date. Your computer will be vulnerable to threats, virus attacks, and bugs. It’s a better choice to upgrade Windows 8.1 to Windows 11.
As the latest version, Windows 11 increases security over Windows 10. Besides, it’s possible to upgrade Windows 8.1 to Windows 11 for free. You can refer to the following guide to check if your computer meets the requirements of Windows 11. Also, the ways to upgrade and fix the possible issues during the update are introduced.
Also read: [6 Aspects] Windows 11 vs Windows 10: What Are the Differences?
Requirements of Windows 11
According to the official information, your PC must meet the following requirements to install Windows 11 successfully. Also, you can use the PC Health Check app to confirm if your device meets the minimum system requirements for Windows 11.
- Processor: 1 gigahertz (GHz) or faster with 2 or more cores on a compatible 64-bit processor or System on a Chip (SoC)
- RAM: 4 GB or higher
- Storage: 64 GB or larger storage device
- System firmware: UEFI, Secure Boot capable
- TPM: Trusted Platform Module (TPM) version 2.0
- Graphics card: DirectX 12 compatible graphics / WDDM 2.x
- Display: greater than 9″ with HD Resolution (720p)
- Internet connection and Microsoft account: Microsoft account and internet connectivity required for setup for Windows 11 Home edition
It is more convenient to download and run PC Health Check app to check if your PC is compatible with Windows 11. However, it requires Windows 10, version 1803 or later to install this app. Thus, if you want to use this app to check your PC, you’d better upgrade to Windows 10 first.
Ways to Fix Compatibility Issues in Upgrading
1. Check TPM 2.0 on the System
As Windows 11 requires a TPM 2.0 chip, you need to check if your computer supports TPM 2.0. If your PC supports TPM 2.0, you should enable it in BIOS to get Windows 11 update. Follow the detailed steps below.
Step 1. Press the Win + R keys on the keyboard to open the Run box. Then type tpm.msc command in the box and press Enter key to execute the command.
Step 2. In the pop-up Trusted Platform Module (TPM) window, check if the TPM is in use.
Step 3. Under the TPM Manufacturer Information section, check the TPM version. If it is TPM 2.0, you can try to enable it to install and run Windows 11 on your computer.
2. Convert Disk from MBR to GPT
Windows 11 requires the GPT partition style for UEFI and Secure Boot Modes. You need to check the partition style of your disk. Open Disk Management and right-click the disk containing OS. Then select Properties and click the Volumes tab to check the Partition style.
If it is MBR, you need to convert the disk from MBR to GPT. To convert the disk without data loss, it’s recommended to use a professional partition manager – MiniTool Partition Wizard. As a professional partition manager, it can help you manage your disk and partition easily.
MiniTool Partition Wizard has a number of useful functions. For instance, its Data Recovery and Partition Recovery functions can help recover lost data. Besides, you can also use Migrate OS to SSD/HD Wizard function to move your operating system to another disk.
You can use MiniTool Partition Wizard to convert MBR disk to GPT disk without data loss. Follow the detailed steps below.
MiniTool Partition Wizard DemoClick to Download100%Clean & Safe
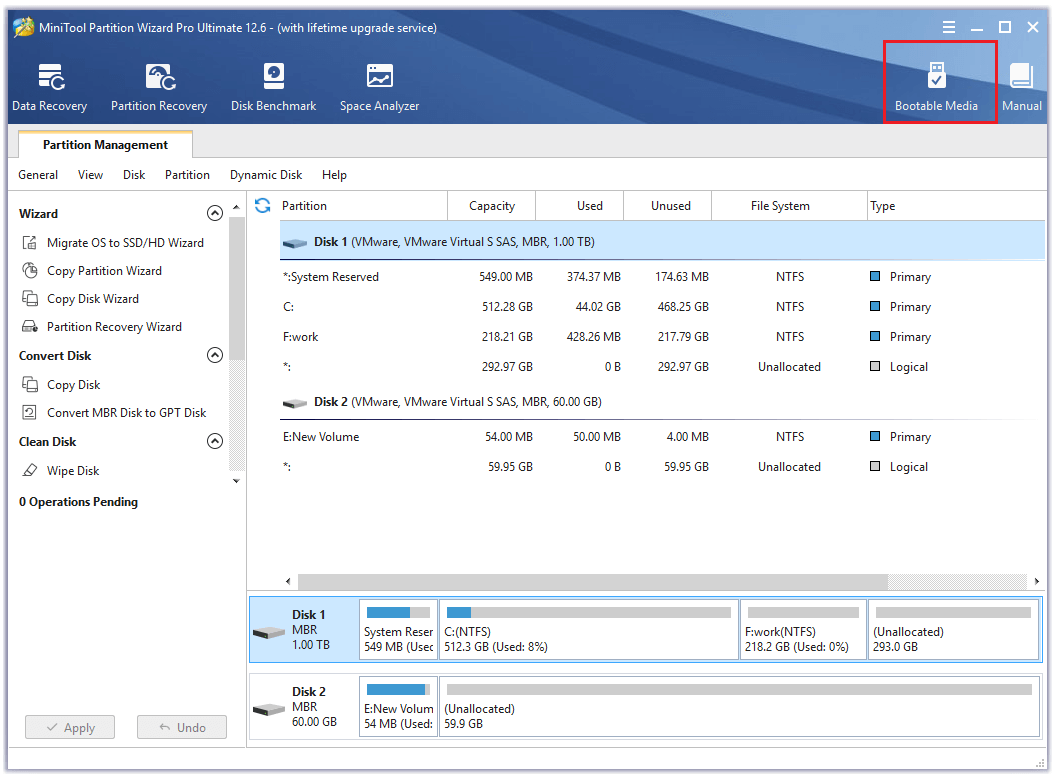
Step 1. Download MiniTool Partition Wizard PRO Edition, install and launch it to get its main interface. Then click Bootable Media on the main interface to create a burned MiniTool bootable media.
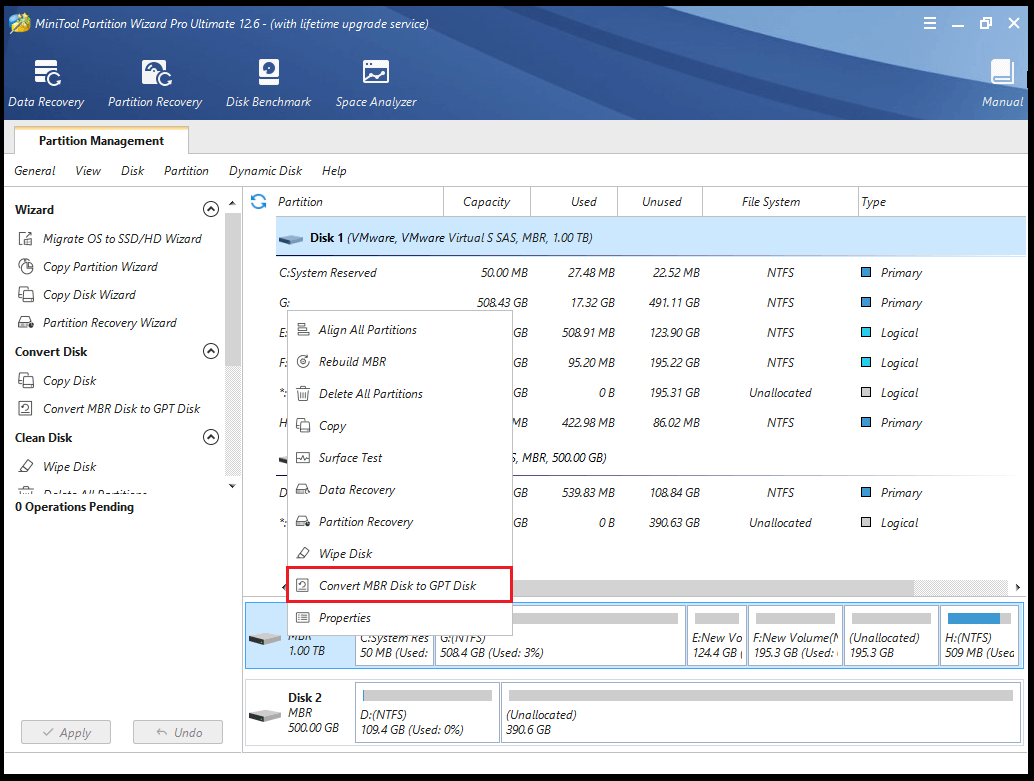
Step 2. After the bootable USB is created successfully, you can refer to this article to boot from the burned MiniTool bootable USB. Then right-click the disk and select Convert MBR Disk to GPT Disk. Click Apply button to apply the changes.
Step 3. After converting successfully, you need to reboot your PC and change the Boot mode and boot order in BIOS. Enable UEFI mode in BIOS to boot from GPT disk successfully.
3. Enable TPM 2.0 chip, UEFI and Secure Boot Modes
If your computer supports TPM 2.0, you can enable TPM 2.0 in BIOS. Restart your computer and press the specific key such as F2/F10/Del to enter BIOS. However, if your computer does not meet the TPM requirement, you can refer to this article to install Windows 11 without TPM. Besides, the following article can help you check and enable Secure Boot, or bypass Secure Boot to install Windows 11.
Ways to Upgrade Windows 8.1 to Windows 11
If your computer meets the minimum system requirements for Windows 11, you can refer to the following methods to install Windows 11 on your computer. Besides, these methods are also suitable for installing Windows 10. If you cannot upgrade Windows 8.1 to Windows 11 now, you can upgrade your PC to Windows 10 instead through the following methods.
Before upgrading, you’d better back up important data in Windows 8.1. With backed-up data, you can restore your computer to the previous state to avoid file loss or system breakdown.
You can use the Copy Disk and Copy Partition functions of MiniTool Partition Wizard to back up data in a quick and convenient way. After launching the MiniTool Partition Wizard, click Copy Disk Wizard and then click Next. Select the disk to copy and click Next.
Then choose the target disk to copy to and click Next. After selecting, you can choose the copy options for your target disk in an empty USB. Finally, click Apply to save and execute operations. Besides, you can also refer to the following article to back up data for free.
Method 1. Use Media Creation Tool
After backing up data, you can go to the Microsoft official website and use the media creation tool to create Windows 11 installation media.
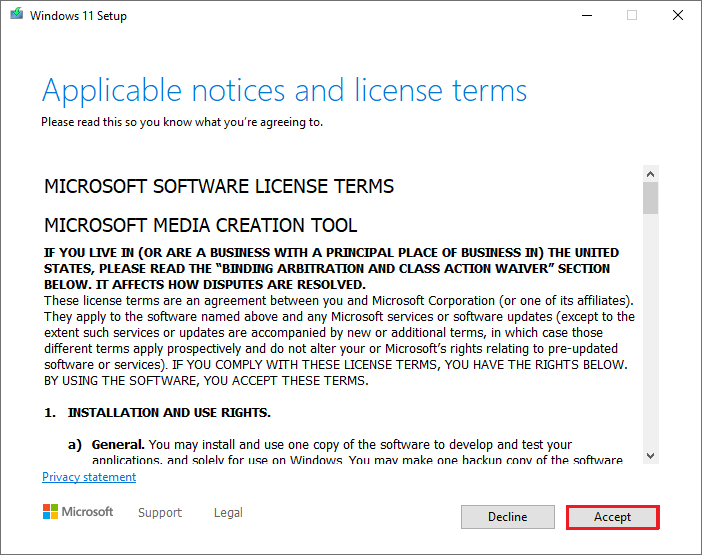
Step 1. Click Download Now button on the website. After downloading, open the media creation tool. In the pop-up window, click Accept.
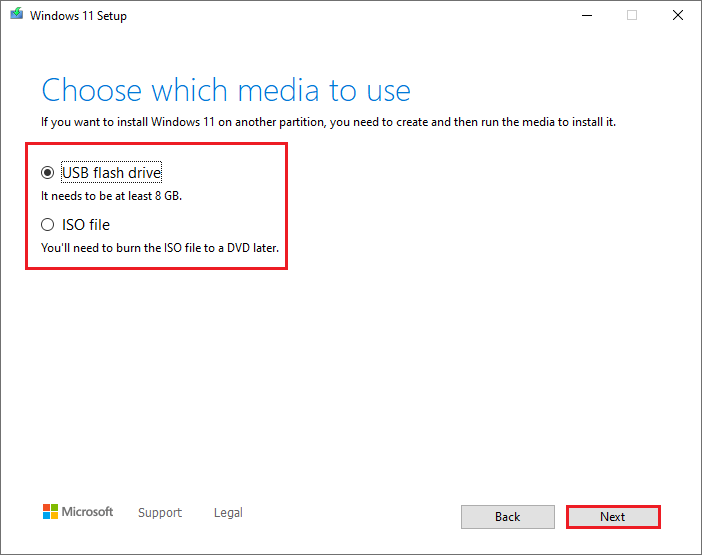
Step 2. Then choose the language and edition, click Next. You can choose USB flash drive or ISO file to create and run the media to install Windows 11. The USB external drive must have 8 GB or bigger space.
Step 3. After completing downloading, you can use the created installation media to install Windows 11 on your computer.
Step 4. Restart your PC and press the specific key such as F2/F10/Del to enter BIOS. Then set the USB drive as the boot drive.
Step 5. After setting, the computer will boot from USB disk, you can follow the on-screen instructions to install Windows 11.
Method 2. Upgrade to Windows 10 First
You can also download and install Windows 10 first, and then upgrade Windows 10 to Windows 11. You can upgrade Windows 8.1 to Windows 10 via Control Panel and Media Creation Tool. Also, if you have Windows 10 on another PC, you can use MiniTool Partition Wizard to directly migrate the OS.
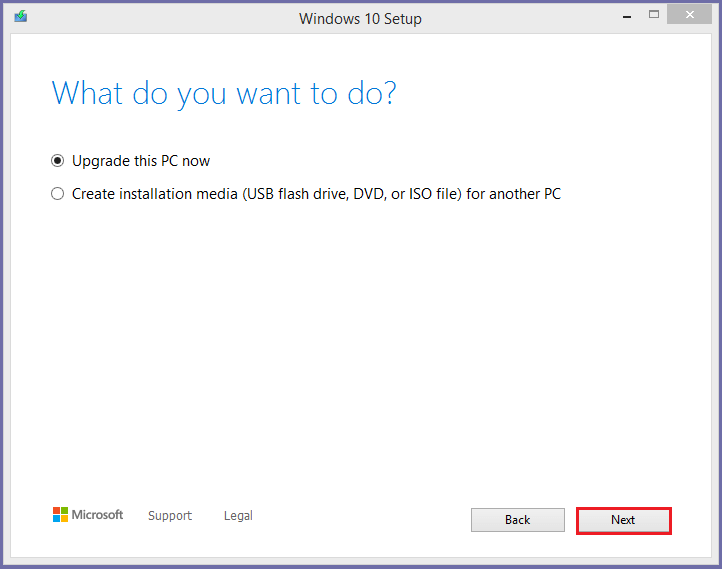
After downloading Windows 10 media creation tool, open it and chooses Upgrade this PC now.
Then you need to wait until the process completes. You can refer to the following article to see how to upgrade Windows 8.1 to Windows 10 for free. After installing Windows 10, you can try to upgrade Windows 10 to 11. If your PC does not meet the minimum system requirements for Windows 11, you can refer to above content to bypass the TPM and Secure Boot to install Windows 11.
Method 3. Use MiniTool Partition Wizard
If you have Windows 11 on another computer, you can use MiniTool Partition Wizard to migrate Windows 11 to the existing PC. Migrate OS to SSD/HD Wizard is a function of MiniTool Partition Wizard. It can help you to migrate system disk or operating system to another hard disk. Besides, it can keep all your previous data on source disk.
If you are trying to upgrade a laptop from Windows 8.1 to Windows 11, you can take out its hard drive and use a USB to SATA adapter to connect it to another laptop/desktop which has Windows 11 installed. To upgrade a desktop from Windows 8.1 to Windows 11, place its hard drive to the disk bay of a Windows 11 desktop.
Then follow the detailed steps below to migrate Windows 11 into the disk of your existing PC.
- Before the operation, please remember to back up your important data on your target disk containing Windows 8.1, because all the data on the target disk will be erased during the process.
- The Migrate OS to SSD/HD Wizard function is supported by MiniTool Partition Wizard Pro Edition and above editions.
Step 1. Download MiniTool Partition Wizard Pro Edition, install and launch it on the computer running Windows 11.
MiniTool Partition Wizard DemoClick to Download100%Clean & Safe
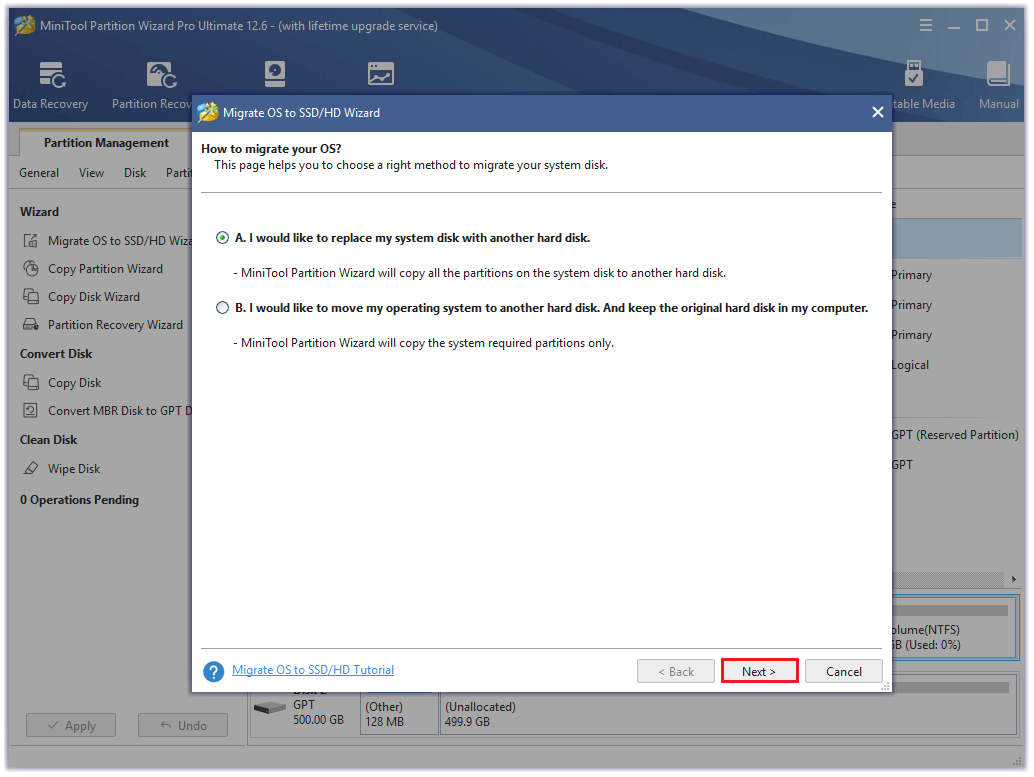
Step 2. Select the disk containing Windows 11 as the source disk. Then click the Migrate OS to SSD/HD Wizard option from the action panel.
Step 3. In the pop-up window, select option A or B according to your needs. Then click Next.
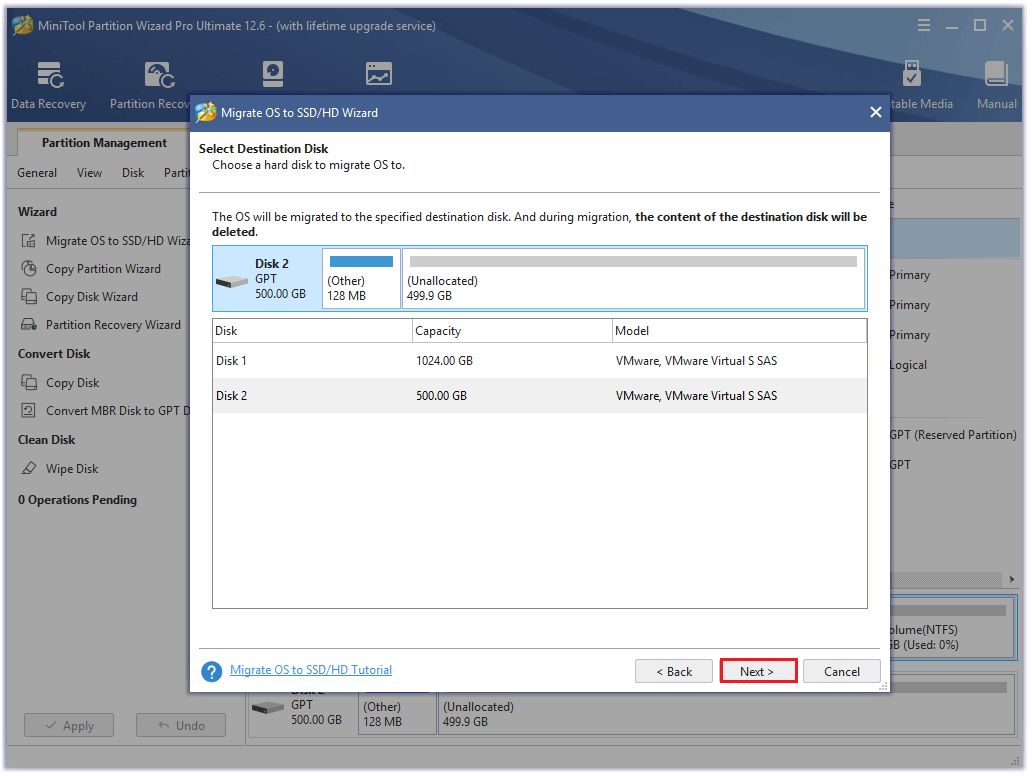
Step 4. Select the destination disk to migrate OS to and click Next to continue. There will be a warning window showing that all the data on the disk will be destroyed. If you have already backed up your important data, click Yes to continue.
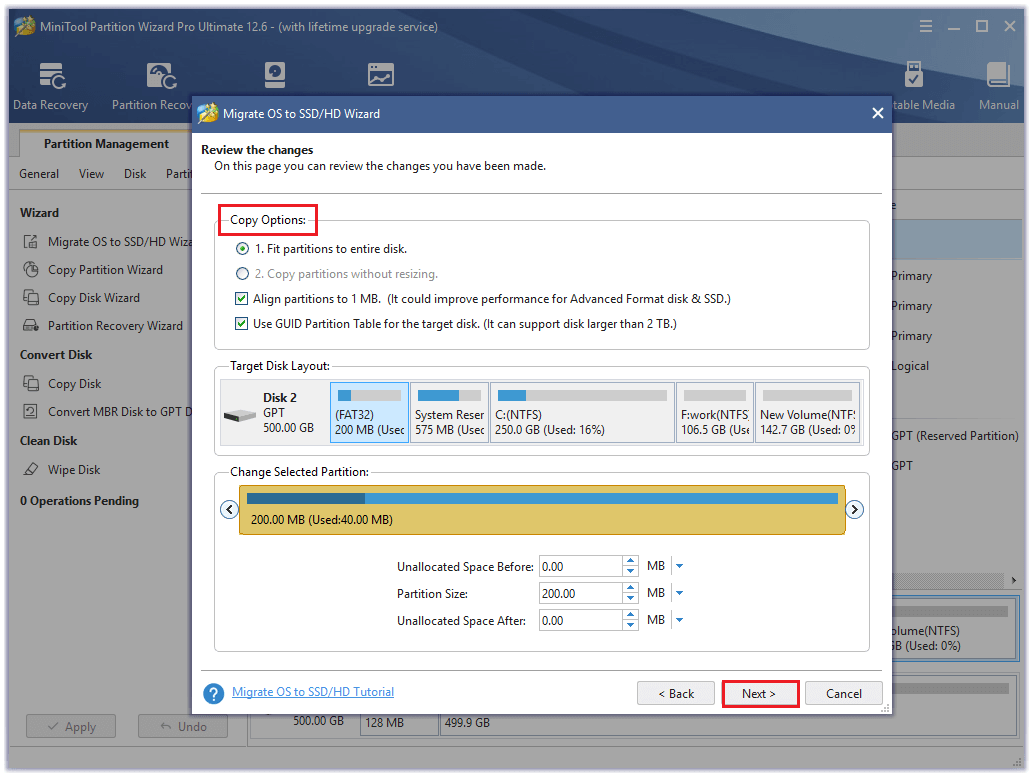
Step 5. There are four options of Copy Options, and you can choose proper options and preview changes that will happen on the target disk. You need to check Use GUID Partition Table for the target disk option for upgrading to Windows 11 successfully. Then click Next.
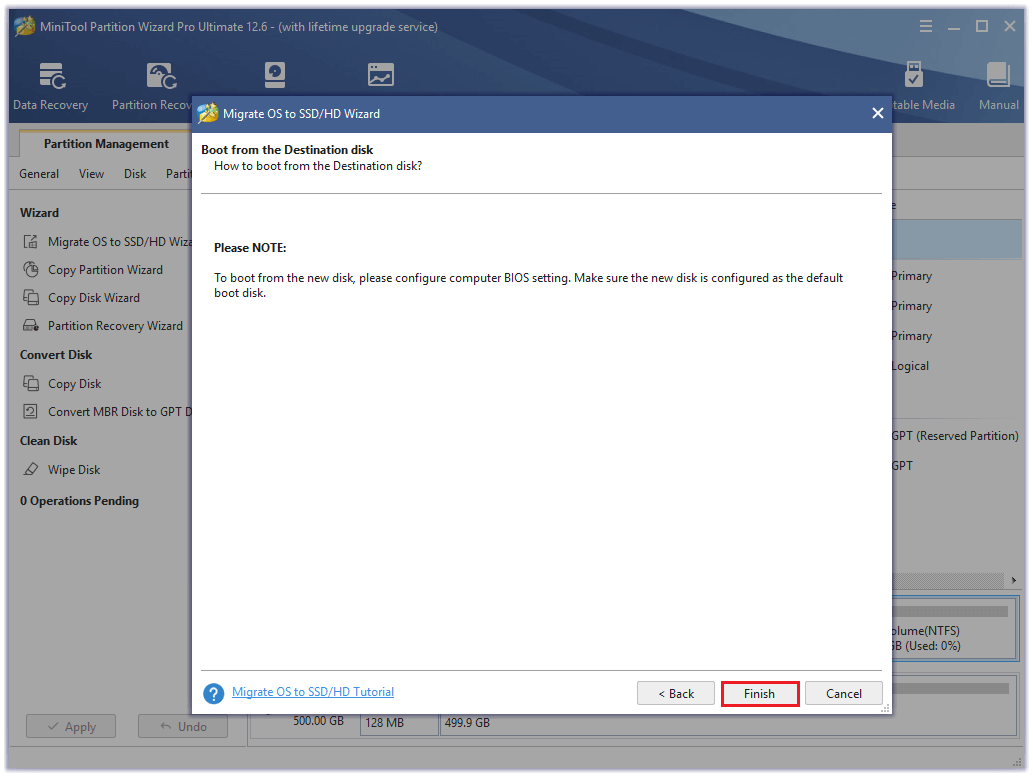
Step 6. Read the note “how to boot from the Destination disk” and then click Finish.
Step 7. Click the Apply button to apply changes. Then allow MiniTool Partition Wizard to restart to complete changes.
Now, you can wait until MiniTool Partition Wizard has finished moving Windows 11 to the disk. Then you need to put the target disk back to the computer which needs Windows 11 upgrade. Finally, you can transfer other backup files back to the target computer.
If you can’t upgrade Windows 8.1 to Windows 11, you can try to upgrade to Windows 10 instead. Migrate OS to SSD/HD Wizard function of MiniTool Partition Wizard is also suitable for migrating Windows 10 to another PC.
Wrapping Things Up
In this post, you have learned the Windows 11 and ways to upgrade Windows 8.1 to Windows 11. You need to check if your computer meets the minimum requirements of Windows 11. Then you can try above ways to upgrade Windows 8.1 to Windows 11. It’s a good choice to use MiniTool Partition Wizard to migrate Windows 11 to your PC directly.
Should you still have problems about how to upgrade Windows 8.1 to Windows 11 for free, you can put them forward in the comment zone below. If you have issues with MiniTool Partition Wizard, just feel free to contact us via [email protected] or leave us a message.
User Comments :