Do You Need to Upgrade Surface Pro 9 SSD?
The Microsoft Surface Pro 9 is a 2-in-1 detachable tablet computer announced on October 12, 2022, and developed by Microsoft to supersede the Surface Pro 8 and Surface Pro X, merging both brands.
This computer is shipped with a 128GB, 256GB, 512GB, or 1TB SSD. In addition, it has 2 USB C ports (USB 4.0/ Thunderbolt 4 or USB 3.2) and 1 Surface Connect port (using the Surface Dock, it can be expanded to 4 USB 3.0 ports, 2 Mini DisplayPort ports, 1 audio interface, and 1 Ethernet interface).
Some people want to upgrade Surface Pro 9 SSD. As we all know, the most common reason why users want to upgrade the SSD in a laptop is that the hard drive is small or slow. However, do Surface Pro 9 users really need a Surface Pro 9 SSD upgrade? The following content will give you the answer.
#1. Do You Have Enough Storage?
In general, this depends on how you use Surface Pro 9. If you just install some necessary programs and free up the disk space regularly, 512GB is enough. However, if you install many programs and games and save many files on this computer, you may be short of storage even if you are using the 1TB SSD.

#2. Does Surface Pro 9 Have Expandable Storage?
Surface Pro 9 doesn’t have an SD card slot or a second SSD slot. Therefore, you can neither install a second hard drive nor add an SD card to expand the storage. However, it has two USB C ports and one Surface Connect port. You can use them to connect an external hard drive to expand the storage.
The disadvantage is that the external hard drive may be slower than the internal hard drive and the connection between the external hard drive and the computer might not be so much stable.
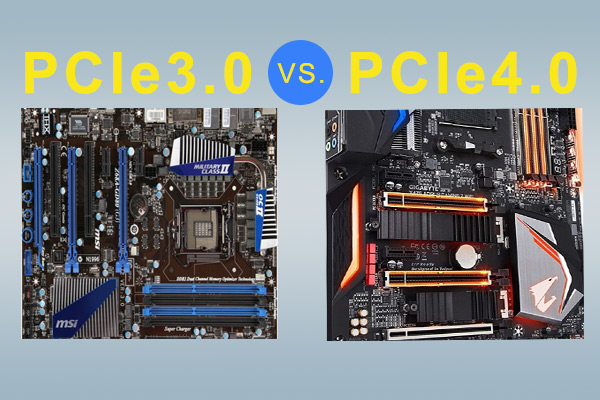
#3. How Fast Is Surface Pro 9 SSD?
Surface Pro 9 uses PCIe 3.0 x4 SSDs and supports PCIe 4.0 x4 SSDs. You can use CrystalDiskInfo to verify that.
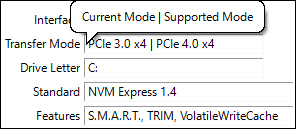
However, even if you use a PCIe 4.0 x4 SSD, you may not get a performance benefit with a Gen4 model, because Microsoft has deliberately restricted the bus speed to the PCIe 3.0 x4 mode at a BIOS/firmware level. In addition, there is no way to enable the PCIe 4.0 x4 mode.
On the other hand, some users who have made the Surface Pro 9 SSD upgrade find that they have gotten the write performance improvement. After all, the Surface Pro 9 SSD write speed is just around 1200 – 1600 MB/s (this data comes from forum users).
How to Choose the Best SSD for Surface Pro 9
Can Surface Pro 9 upgrade SSD? The answer is YES. In addition, the process is very simple. Do you want to do a Surface Pro 9 SSD upgrade? If so, you should choose a new SSD carefully.
How to choose a new Surface Pro 9 SSD? You should consider the following 3 things.
#1. Storage
Since Surface Pro 9 has only one SSD slot, I recommend you choose a large enough SSD. 1TB or 2TB is OK.
#2. Form Factor
Surface Pro 9 uses an M.2 2230 SSD and supports PCIe 3.0 x4 and PCIe 4.0 x4. The 2230 SSD is smaller than the common M.2 2280 SSD, so there are fewer purchasing options.
#3. Speed
Currently, the Surface Pro 9 SSD speed tested by each person is a little different. It is recommended that you test it on your Surface Pro 9 computer. Then, choose a new SSD faster than the current one.
To benchmark the SSD on your computer, you can try MiniTool Partition Wizard. This tool is multifunctional and powerful. You can use it to benchmark hard drives, partition hard drives, migrate OS, clone hard drives, recover data from hard drives, etc.
How to benchmark an SSD using MiniTool Partition Wizard? Here is the guide:
MiniTool Partition Wizard FreeClick to Download100%Clean & Safe
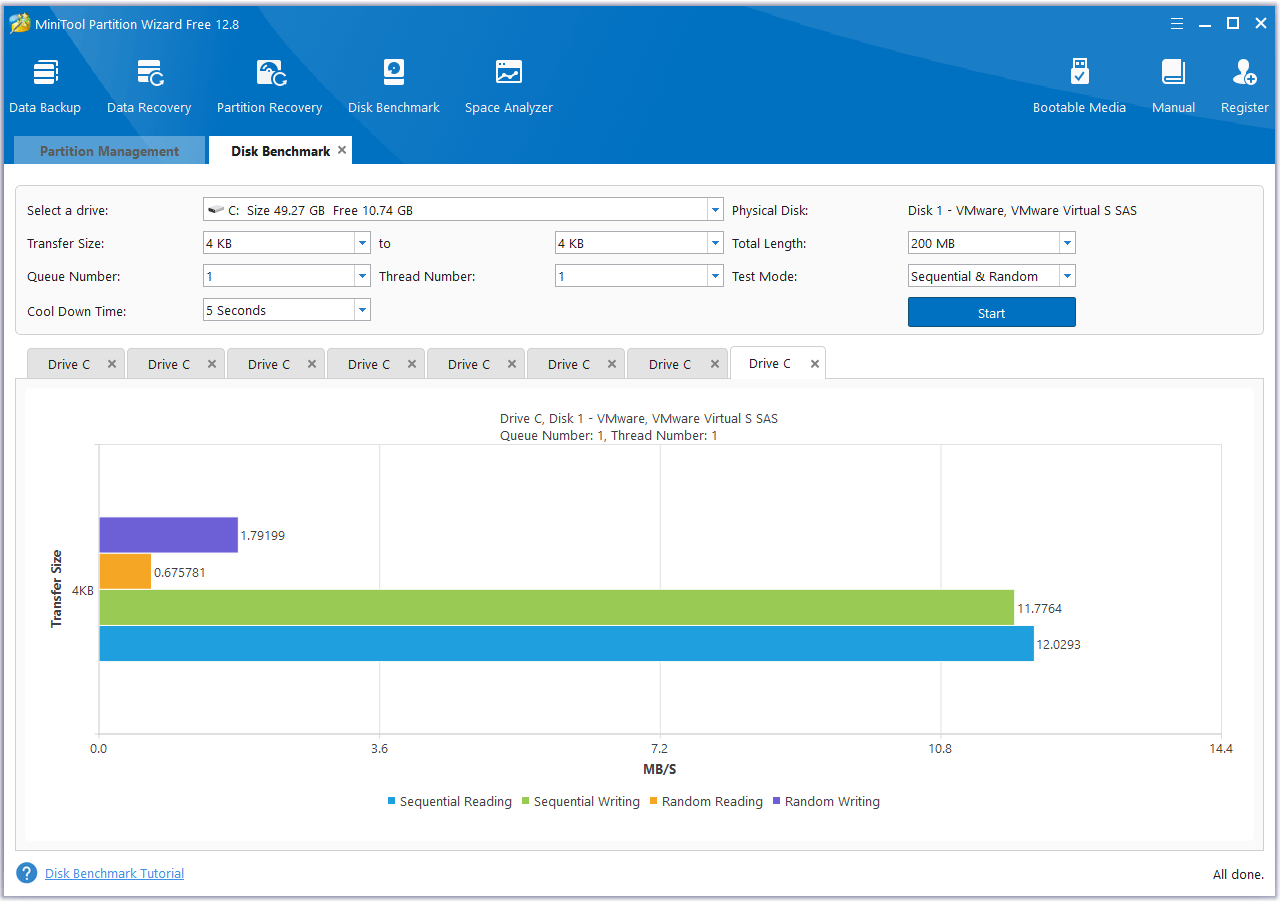
Step 1: Launch MiniTool Partition Wizard on your Surface Pro 9 computer and click Disk Benchmark.
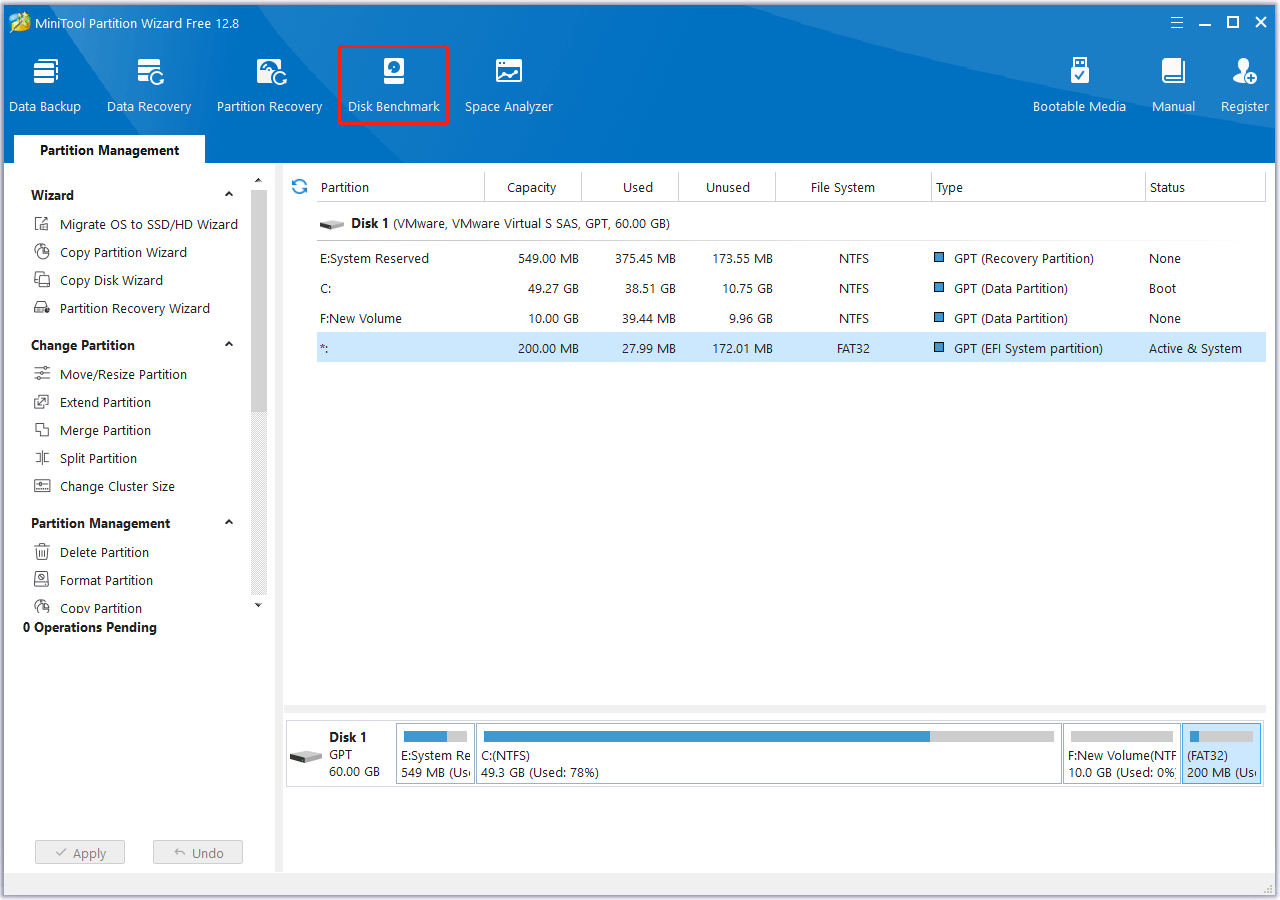
Step 2: On the Disk Benchmark tab, make sure the C drive is selected. Then, set the Transfer Size (4 KB to 4 KB), Queue Number (1), Thread Number (1), and Test Mode (Sequential & Random). Then, click Start. After the test is completed, you can know the speed of the SSD.
Further Reading:
Surface Pro 9 uses Samsung MZ9L4256HCJQ-00BMV SSDs, but we don’t know its speeds. Therefore, I recommend you benchmark the SSD again after the Surface Pro 9 SSD upgrade. Then, you can know whether the SSD upgrade is worthy.
#4. Recommendations
In this part, I will recommend some M.2 2230 SSDs to you. You can choose one from them.
#1. Sabrent Rocket 2230 NVMe PCIe 4.0 M.2 Internal SSD
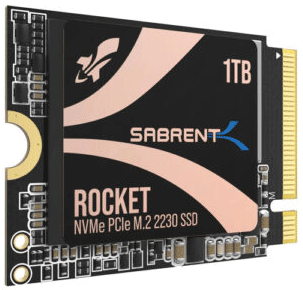
This SSD offers sequential read speeds of up to 3,400 MB/s and sequential write speeds of up to 2,900 MB/s. It outperforms other 2230-sized SSDs, such as the Samsung 960 Evo Plus and the WD Black SN750. In addition, it offers storage up to 2TB and comes with a 5-year warranty.
#2. Corsair MP600 Mini 1TB M.2 NVMe PCIe x4 Gen4 2 SSD

This 2230 SSD offers 1TB capacity and up to 4,800 MB/s sequential read and write speeds. It is fully compatible with Microsoft Surface, Valve Steam Deck, and other ultra-thin devices.
#3. WD_BLACK SN770M NVMe SSD
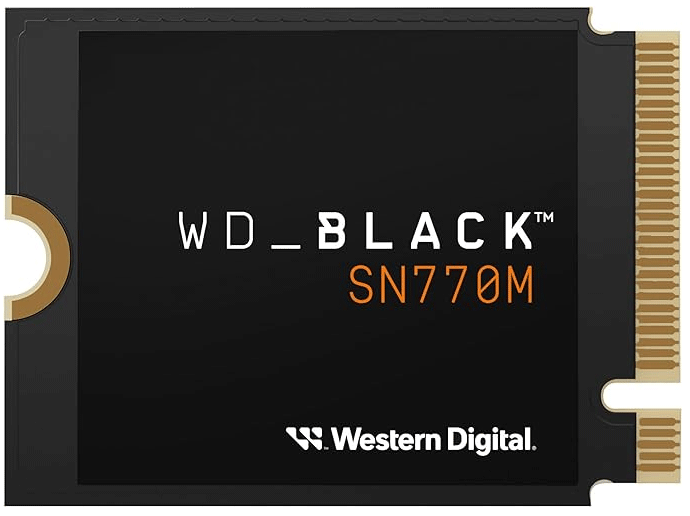
This SSD offers up to 2TB of storage, up to 5,000 MB/s sequential read speed, and 4,000 MB/s sequential write speed. It also includes a 5-year warranty and is compatible with Microsoft Surface, ASUS ROG Ally, Steam Deck, and other devices.
#4. Seagate FireCuda 520N M.2 2230 SSD

This SSD provides sequential read speeds of up to 5,000 MB/s and sequential write speeds of up to 4,750 MB/s. The 1TB or 2TB capacity can store almost all of your things. In addition, it comes with Seagate’s three-year Rescue Data Recovery Services and a five-year warranty.
#5. Lexar 1TB Play 2230 PCle Gen 4×4 NVMe SSD

This SSD has 1TB of storage and provides transfer speeds of up to 5200MB/s and write speeds of 4700MB/s. It is compatible with Steam Deck, ASUS ROG Ally, and M.2 2230-compatible laptops.
How to Perform the Surface Pro 9 SSD Upgrade
Can Surface Pro 9 upgrade SSD? Yes, you can. How to upgrade Surface Pro 9 SSD? You can refer to the following guide.
In general, when you upgrade Surface Pro 9 SSD, there are two choices for you.
- Clean Install: Back up important data to an external hard drive. Replace the SSD. Clean install Windows on your computer. After that, install the necessary apps on your computer again and move data back to the computer.
- Migrate OS: Clone your entire computer to the new SSD and then replace the SSD. The disadvantage is that you need an M.2 to USB adapter to connect the new SSD to the computer via the USB port.
To know more about the two methods, you can read this post: New SSD, Clean Install or Clone Disk or Migrate Windows OS?
In this part, I will show you how to upgrade Surface Pro 9 SSD using the OS migration method. To migrate the OS, MiniTool Partition Wizard can be useful. Here is the guide:
Step 1: Connect the new SSD to the Surface Pro 9 via the M.2 to USB adapter. When you buy the adapter, make sure it supports the 2230 SSD and uses USB 3.2 or USB 4.0 protocol.
Step 2: Launch MiniTool Partition Wizard on the Surface Pro 9 computer and then click Migrate OS to SSD/HD Wizard.
MiniTool Partition Wizard DemoClick to Download100%Clean & Safe
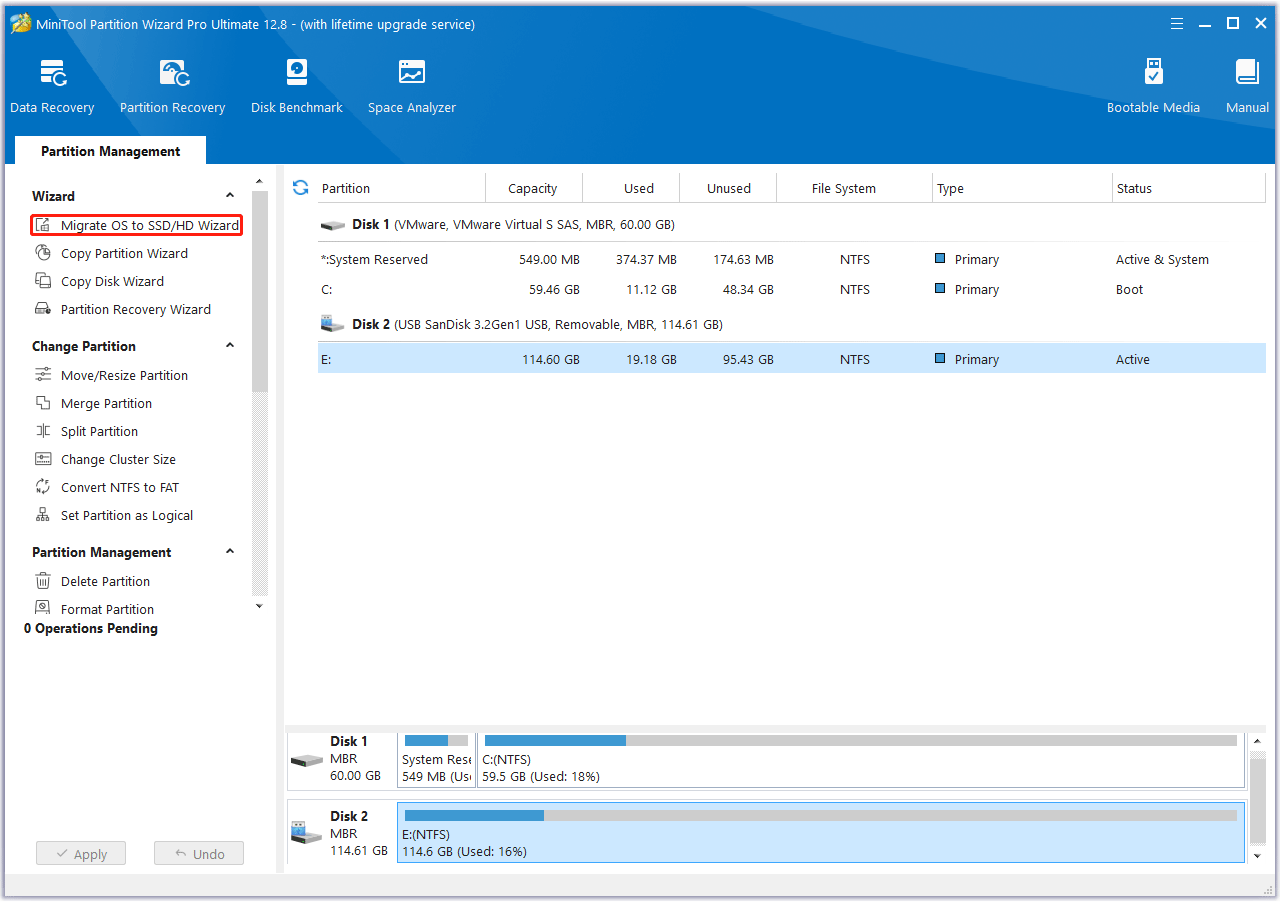
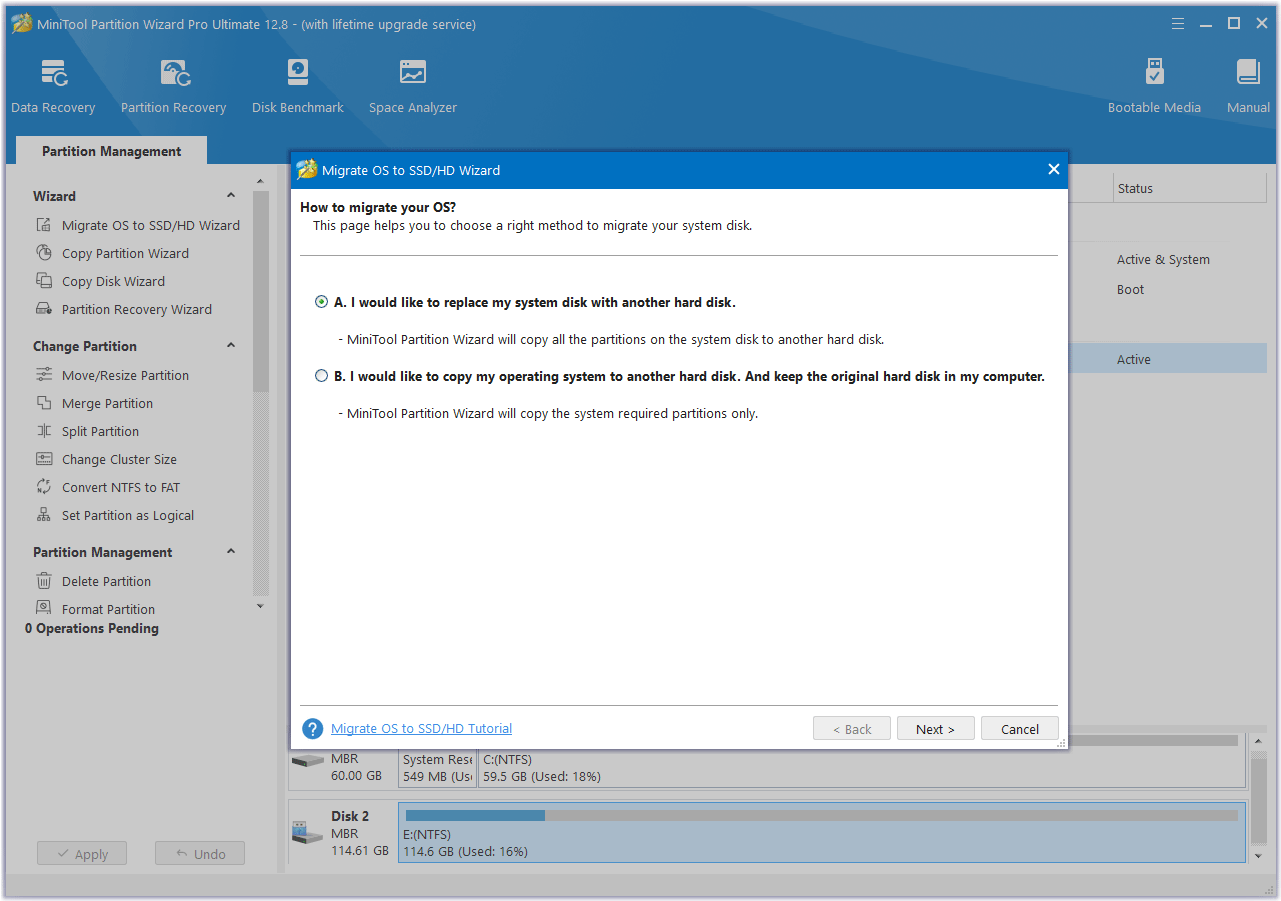
Step 3: On the pop-up window, choose Option A and then click Next. It will clone the entire disk to the new SSD.
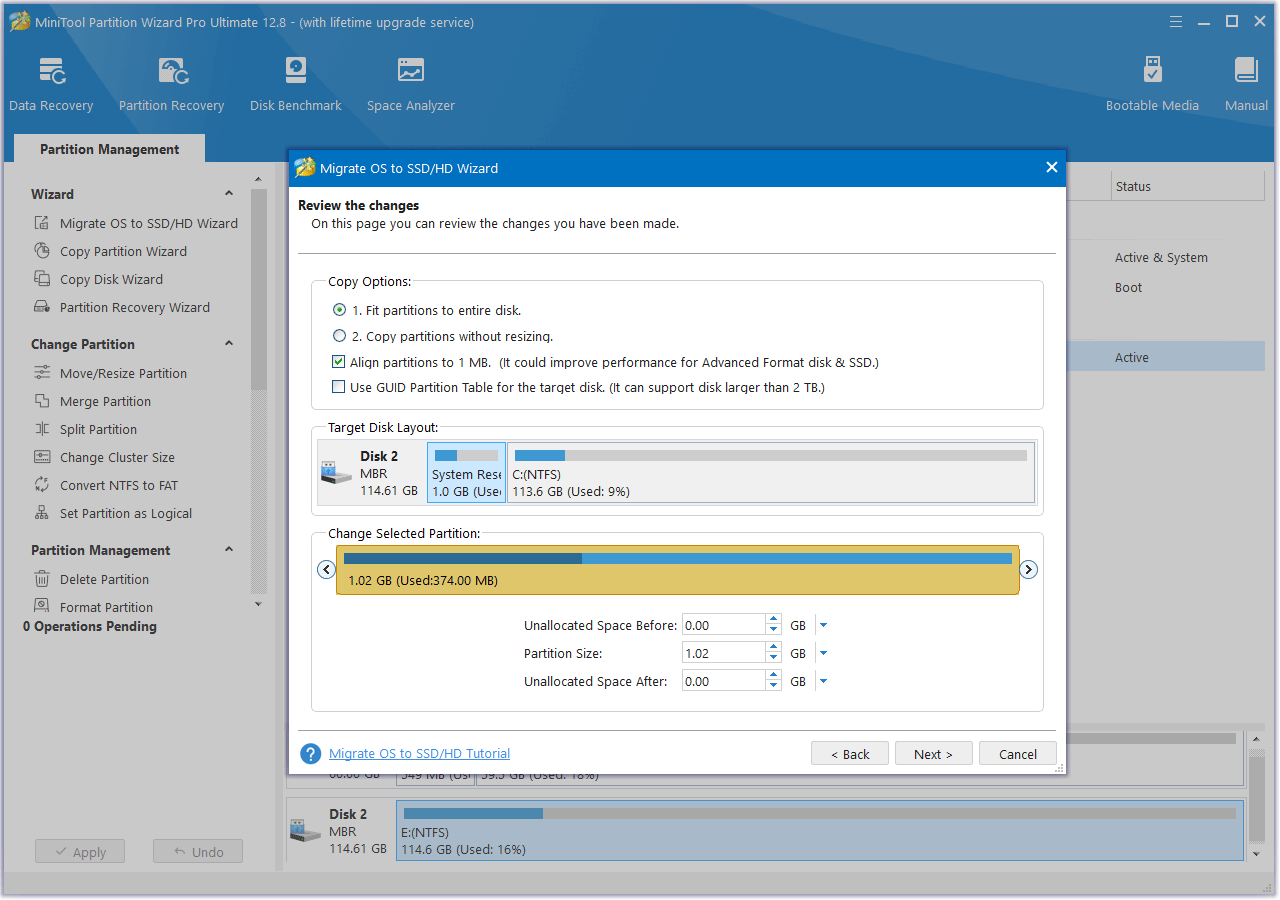
Step 4: Select the new SSD as the destination disk and then click Next. A warning window will pop up. Read it and click Yes to continue.

Step 5: Review the changes. You can resize the partitions here. If all is OK, click Next.
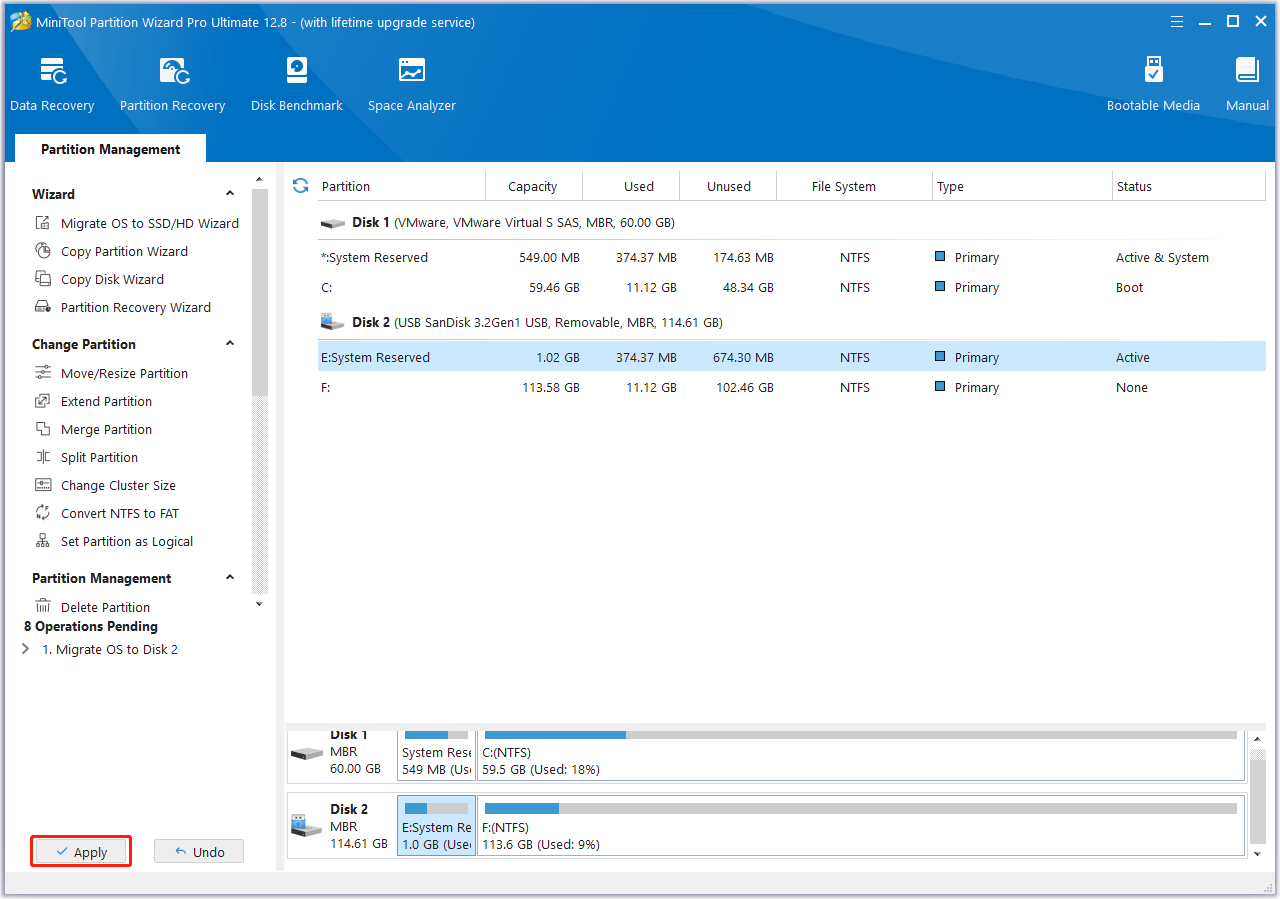
Step 6: Read the NOTE information and then click Finish. Then, click the Apply button to start executing the OS migration operation.
Step 7: Eject the new SSD like a USB drive and then replace the SSD through the following steps:
- Power down the computer and plug off the power cord.
- Place Surface Pro 9 bottom side up on the table.
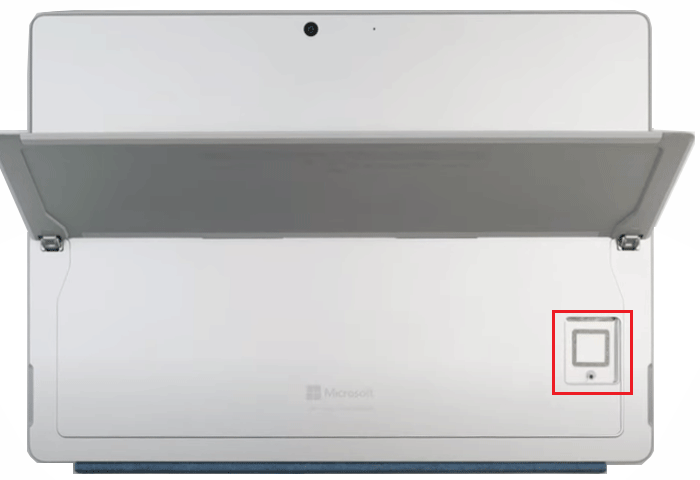
- Pull up the kickstand of the computer and you will see a really neat little button at the corner of the bottom panel.
- Push down on this and the edge will pop up. You can pull it off.
- Use a T2 or T3 magnetic torx screwdriver to unscrew the screw used to fasten the SSD.
- Now you can remove the SSD, but you need to use tools to lift it first. You can also use the screwdriver but should be careful in case the SSD gets damaged.
- Place the new SSD into the slot. Pay attention to the alignment of the interface.
- Use the same screw to fasten the new SSD.
- Now you need to place back the cover of the SSD. If you want to tighten the SSD cover, you can apply a thermal pad (around 1.5 millimeters) between the SSD and the cover.
Step 8: Power on your computer to see if it works normally.
Do you want to upgrade Surface Pro 9 SSD? This post offers a step-by-step guide.Click to Tweet
Bottom Line
Do you have other opinions on the Surface Pro 9 SSD upgrade process? Leave your comment in the following zone. In addition, if you encounter problems when using MiniTool Partition Wizard, please feel free to contact us via [email protected]. We will get back to you as soon as possible.
About The Author

Position: Columnist
Linda has been an editor at MiniTool for seven years. She continuously learns about computers and puts her knowledge into practice. Moreover, she is particularly knowledgeable in disk management, data recovery, system installation, and PDF editing. Her articles typically reference multiple examples or are based on her own experience, providing users with the most suitable solutions.
User Comments :