How to perform MSI BIOS update? This post from Partition Magic analyzes the advantages of updating the BIOS for the MSI motherboard and offers a complete guide on updating the MSI BIOS.
The safest way to update an MSI BIOS is to download the correct BIOS version for your motherboard from MSI’s support website, copy the extracted BIOS file to a FAT32-formatted USB drive, and use M-FLASH from the BIOS setup screen.
During the update, never turn off the computer, remove the USB drive, or interrupt the flashing process. Doing so can corrupt the BIOS and prevent the motherboard from booting.
Should you update your MSI BIOS? Updating the BIOS is recommended only when it provides a clear benefit.
| Situation | Recommendation |
| Installing a newer CPU | Update |
| Memory compatibility issues | Update |
| BIOS security or stability fixes | Update |
| MSI specifically recommends an update | Update |
| Your PC works normally with no issues | Usually not necessary |
Why Need to Perform an MSI BIOS Update
BIOS plays a crucial role in the computer’s startup and operation. Therefore, keeping it up to date is very important for system stability, hardware compatibility, and security.
For instance, updating BIOS can improve system stability, enhance compatibility with new hardware (like CPUs and RAM), resolve security vulnerabilities, and fix bugs that can cause crashes or performance issues.
Also, when you encounter hardware/software problems on your PC, updating the BIOS is a recommended step. Here’s the detailed explanation of why we need to perform an MSI BIOS update:
- Hardware Compatibility: Newer CPUs, graphics cards, and other components might not be compatible with an outdated BIOS version. Updating it ensures your motherboard properly recognizes and operates with the latest hardware.
- Stability and Bug Fixes: BIOS updates can often help you resolve stability issues, system crashes, freezes, and other unexpected behaviors associated with outdated firmware.
- Security Enhancements: BIOS updates can help fix the security vulnerabilities, including issues in Intel’s Management Engine and AMD’s platform security features.
- Improved Performance: BIOS updates can enhance memory performance, decrease boot times, and support newer processors, resulting in improved overall system performance.
- New Features: Some updates add new features or enhance existing ones, such as improved memory support for RAM kits.
What Should You Notice Before Updating MSI BIOS
From the above content, you can see that updates are important for BIOS. Then, what should you consider before updating your MSI BIOS? Continue reading to find the answer.
Is an Update Necessary?
The first step before you decide to update the MSI BIOS is to evaluate whether an update is truly needed. If your system is stable and running as you expected, there is no need for you to update it. Otherwise, it may result in instability in the system.
You can navigate to the official MSI website to check the changelog for the latest BIOS version, and then see if it can solve the issue you are actually encountering.
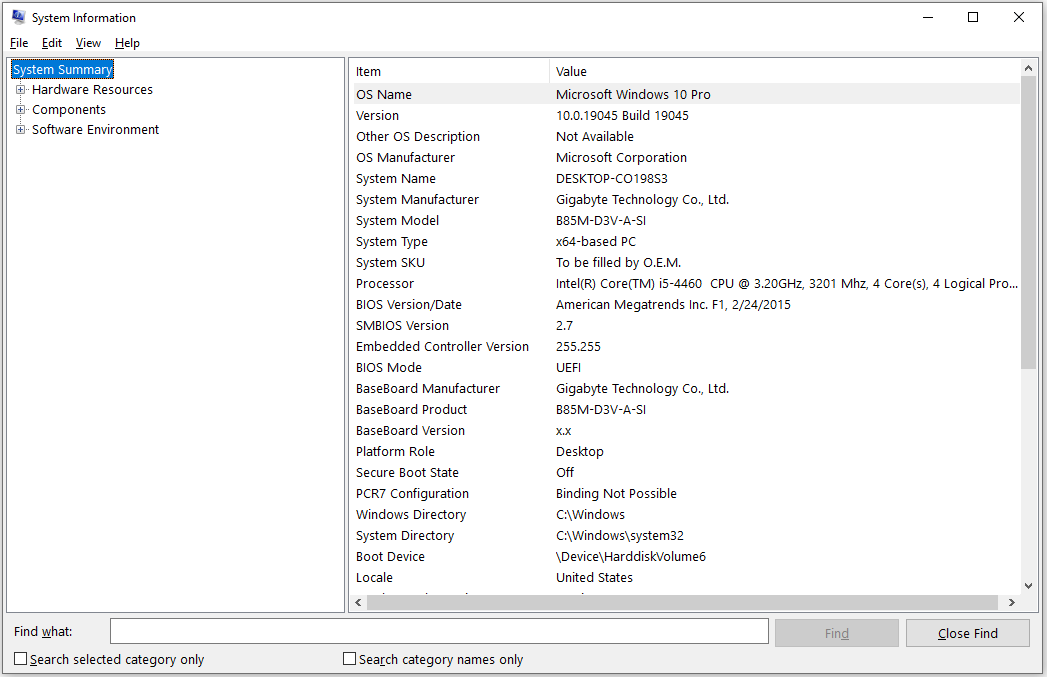
Check the Motherboard Model & BIOS Version
You also need to check the BIOS version on your computer and compare it with the latest available version on the MSI website to determine if an update is necessary. Here’s how to check the BIOS version on your Windows computer:
- Press Win + S to open the Search window.
- Type “system information” in the search box and press Enter.
- In the pop-up window, you can see your motherboard model and BIOS version.
Note Your Current BIOS Settings
Updating BIOS may reset your customized settings, including overclocking values (XMP/EXPO). Therefore, you can note your current BIOS settings first, and then be prepared to re-apply them after the update is complete.
Secure a Stable Power Supply
A power interruption during a BIOS flash is one of the biggest risks and can corrupt your motherboard’s firmware.
Therefore, ensure a reliable power source, such as an Uninterruptible Power Supply (UPS), for your desktop computer or plug in your laptop to prevent power loss during the update.
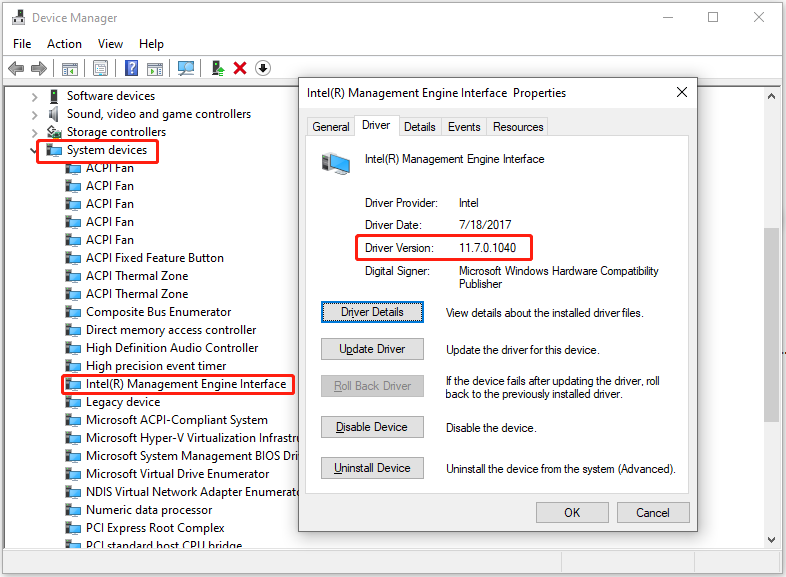
Update Your Management Engine (ME) Firmware
On newer motherboards, you may need to update the Intel Management Engine (ME) firmware before performing MSI motherboard BIOS update. To check and update your current ME firmware version in Windows, follow these steps:
Step 1. Press the Win + I to open the Quick Link menu, and select Device Manager.
Step 2. Expand the System devices category, and find the Intel (R) Management Engine Interface driver.
Step 3. Double-click this driver to enter its properties. Then, go to the Driver tab, and check the Driver Version here.
Step 4. If the ME firmware is outdated, you can do the following steps to update it:
- Go to the MSI official website.
- Enter your motherboard model name.
- Go to the Driver & Utility tab.
- Find the latest Intel ME version you need.
- Download and unzip it to your PC.
- Run the MEUpdateTool.exe and follow the on-screen guide to update it.
- Once done, restart your computer.
Suspend BitLocker (if enabled)
If your system has BitLocker enabled, you must suspend it before updating the BIOS. Failure to do so can prevent your system from booting correctly. To suspend BitLocker, please do the following steps:
- Open the Search window.
- Type “control panel” and press Enter.
- Go to System and Security > BitLocker Drive Encryption.
- Select Suspend protection for the desired drive.
- Click Yes in the prompt window.
Avoid Beta BIOS Versions
MSI provides beta BIOS versions that introduce the latest features but may be less stable. For maximum stability, stick to the latest recommended non-beta version unless you are resolving a specific issue that a beta update addresses.
Clone System Disk to Another Location
The BIOS is firmware located on a dedicated memory chip on the motherboard, separate from the storage drive that holds your operating system and personal files. However, if a BIOS update fails or is interrupted, it can still cause problems that may prevent you from accessing your data.
Therefore, cloning the disk to another disk is necessary. To do that, I highly recommend MiniTool Partition Wizard. It offers the Copy Disk feature that can help you clone your whole disk to another disk in a few clicks.
Here’s how to do that:
Step 1. Download and install MiniTool Partition Wizard on your computer, and then launch the software to access its main interface.
MiniTool Partition Wizard DemoClick to Download100%Clean & Safe
Step 2. Select Copy Disk Wizard from the left panel. Then, click Next in the pop-up window.
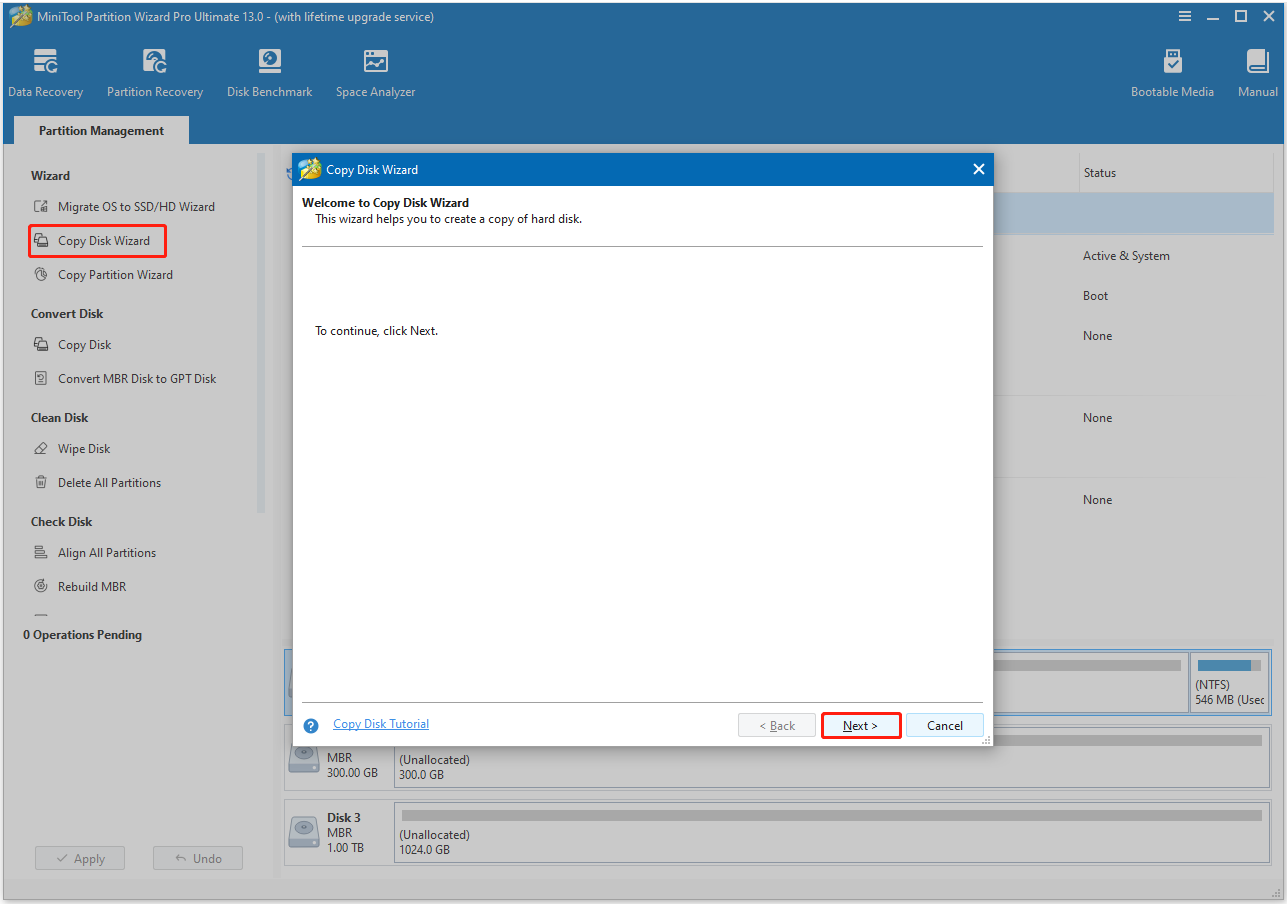
Step 3. Choose your system disk and click Next. In the next screen, select the target disk and click Next.
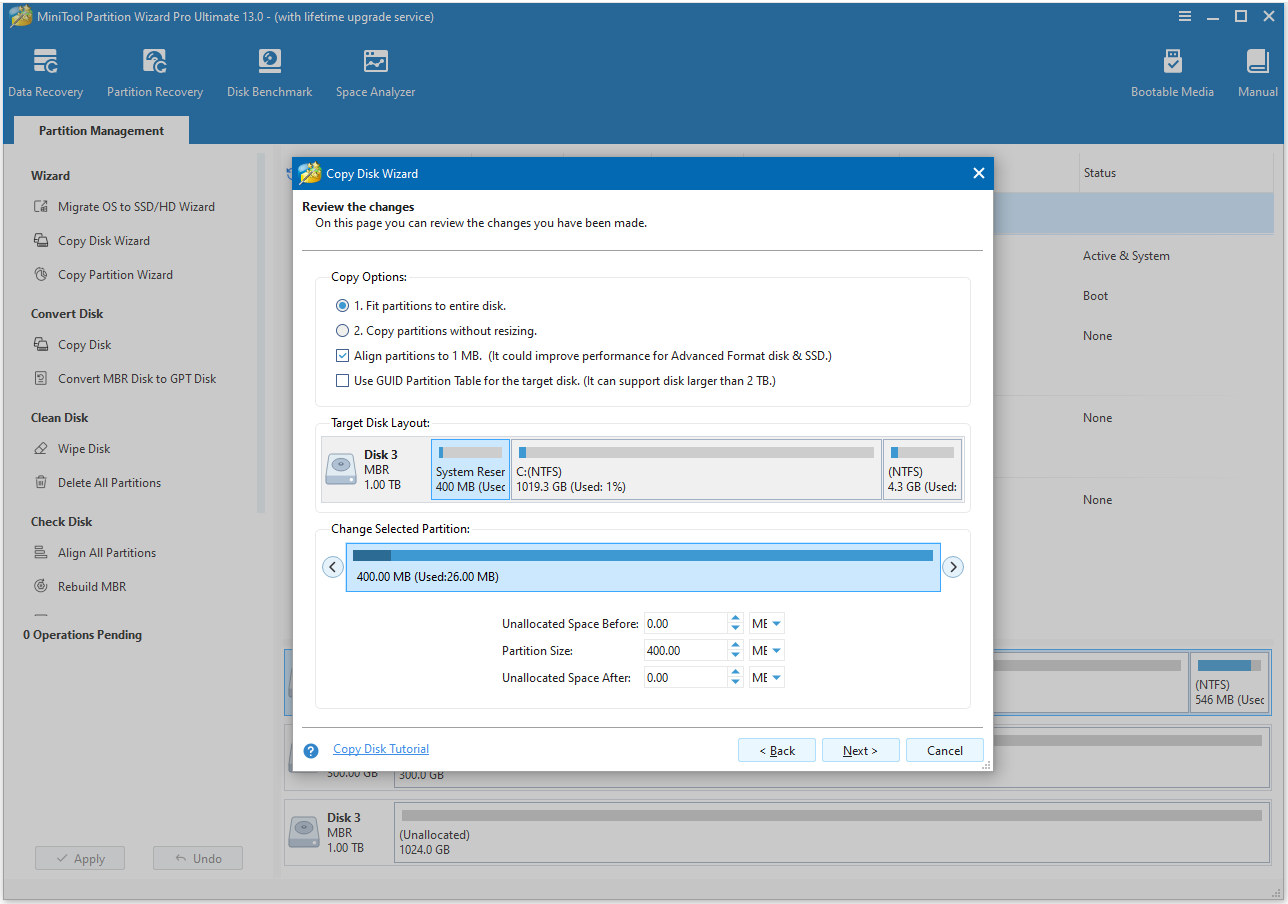
Step 4. In the Review the changes window, set Copy Options and adjust Target Disk Layout. Then, click Next to continue.
- Fit partition to entire disk. This option is selected by default. It will extend or shrink the partitions on the original disk by an equal proportion to fill the target disk.
- Copy partitions without resizing. If you select this option, the size of the source disk partitions will be used on the target disk.
- Align partitions to 1MB. (It could improve performance for Advanced Format disk & SSD.) This option is also selected by default. It will apply 4K alignment on the SSD. If the original disk is a GPT disk, you won’t see this option.
- Use GUID Partition Table for the target disk. (It can support larger than 2TB.) This option only appears when the original disk is an MBR disk. It will apply GPT on the SSD.
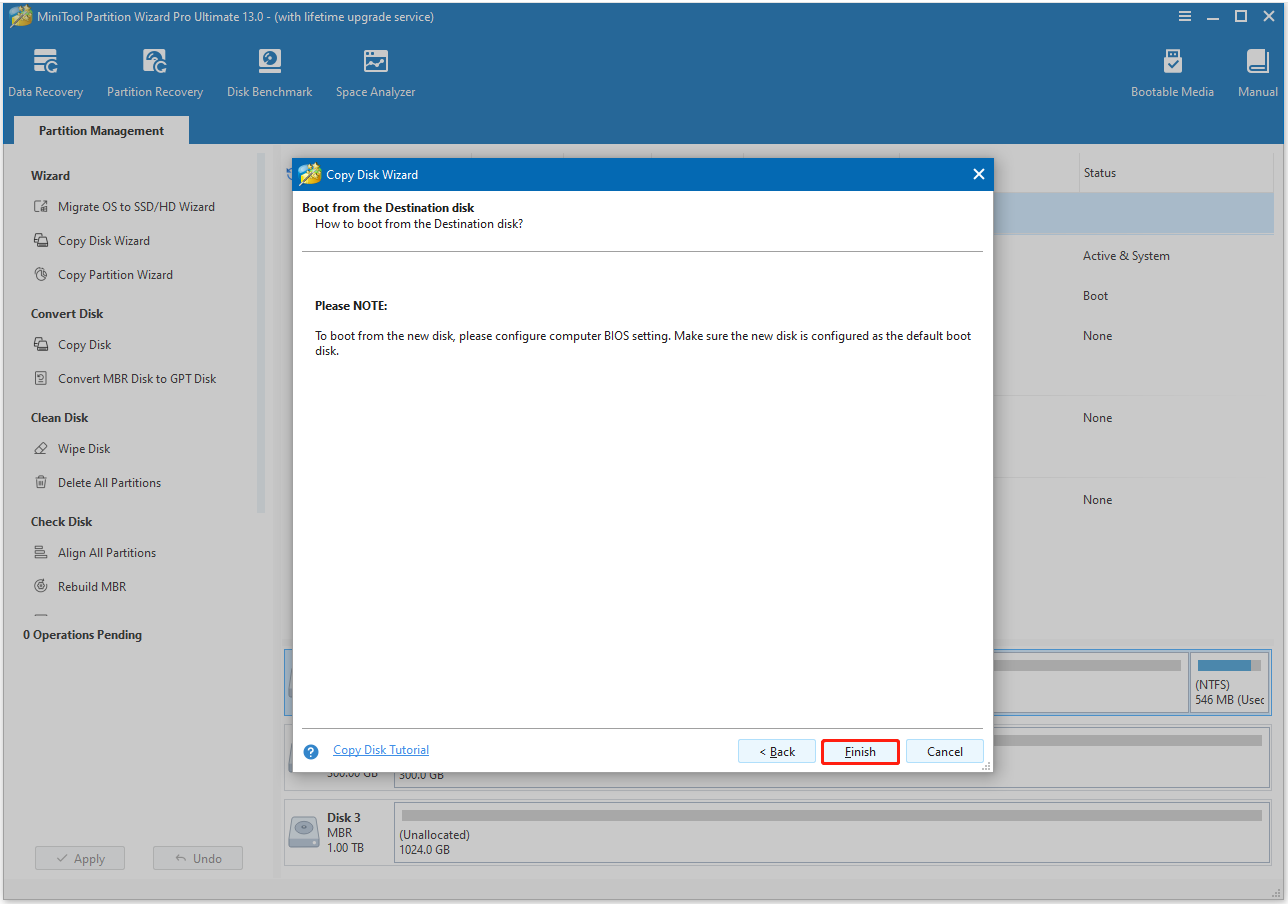
Step 5. Read the Please NOTE carefully and click Finish to go back to the main interface.
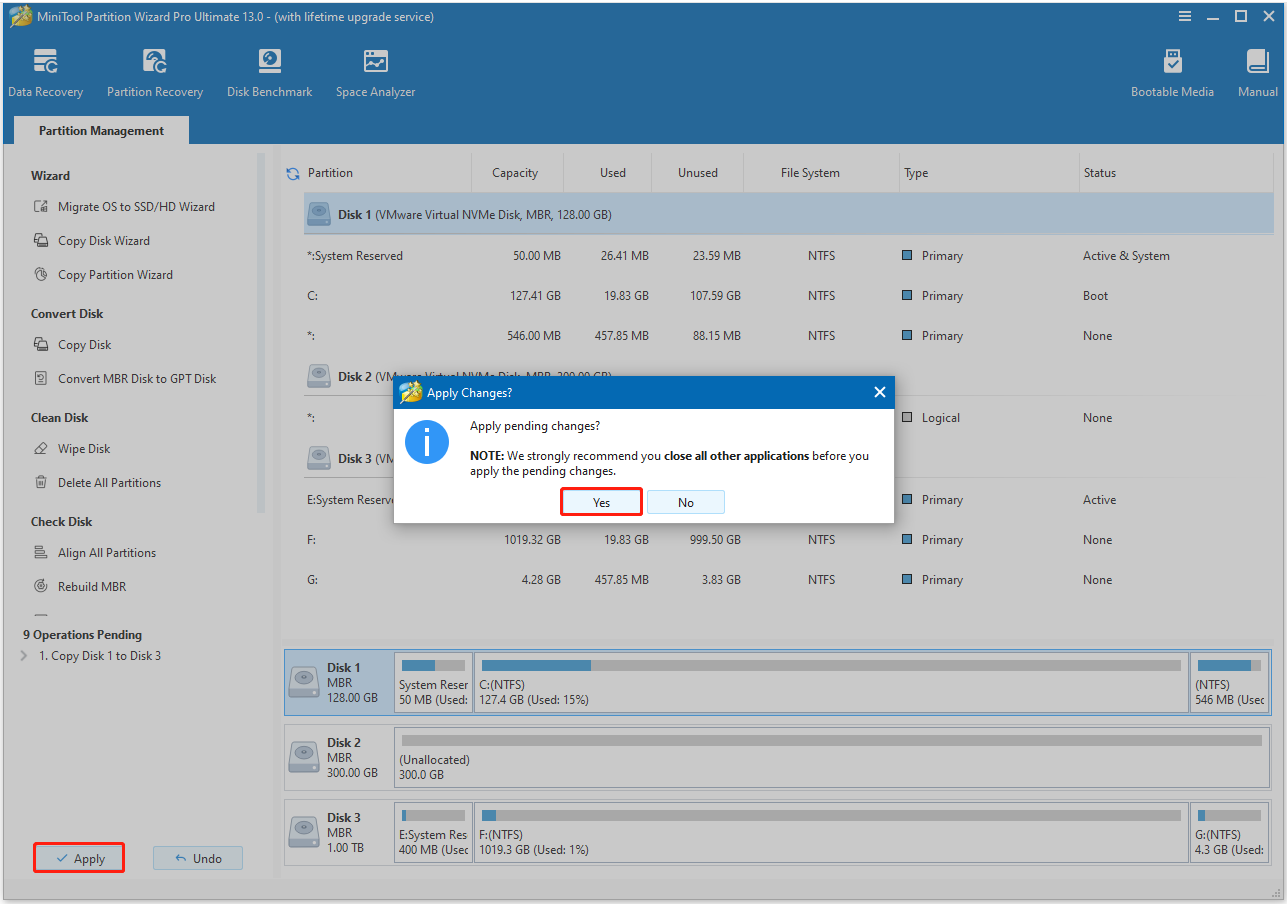
Step 6. Click the Apply button at the bottom, and then click Yes in the pop-up window to confirm executing the pending operation.
Step 7. When this migration process is ended, you can see a Successful window pop up, click OK to confirm.
Prepare a USB Flash Drive
Updating the BIOS needs a USB flash drive with the FAT32 format. Therefore, if your USB flash drive is using another file system, you need to format it first.
To do that, you can use MiniTool Partition Wizard’s Format Partition feature. It can help you format a partition to FAT32/NTFS/Ext 2/3/4 quickly.
What’s better, it can break the limitation of Windows built-in tools, help you format partitions of any size, including bigger than 32GB, to FAT32 with ease.
Here’s how to use its Format Partition feature to format your USB flash drive to FAT32:
- Connect the USB flash drive to your PC.
- Launch MiniTool Partition Wizard to enter its main interface.
- Choose the USB drive’s partition from the disk map.
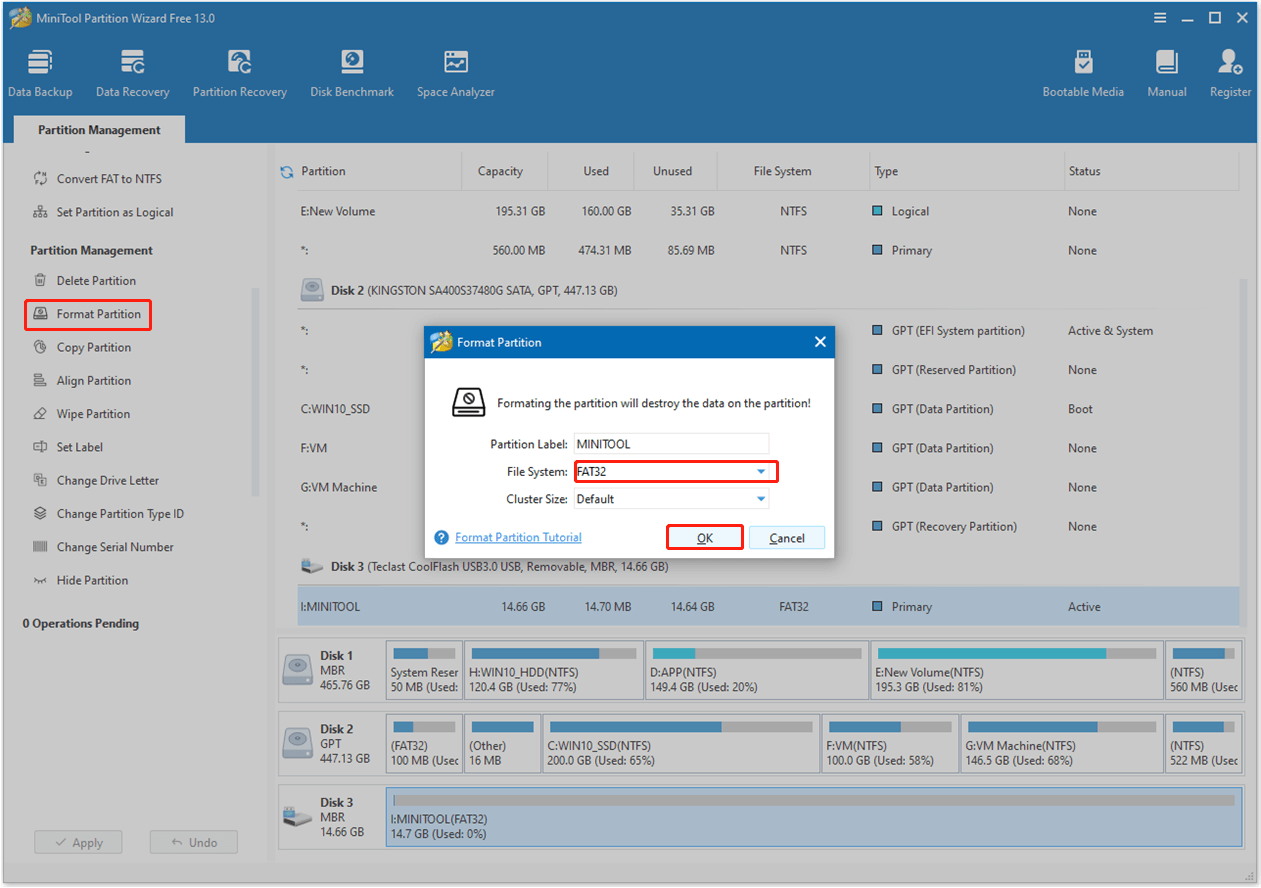
- Select Format Partition from the left panel.
- Choose FAT32 from the drop-down menu of File System.
- Set the Partition Label and Cluster Size according to your needs.
- Then, click OK to go back to the main interface.
- After that, click Apply and Yes sequentially to execute the pending operation.
- Once done, the USB flash drive will be formatted to the file system you choose successfully.
How to Perform MSI BIOS Update?
After preparing all the necessary items, you may want to know how to update MSI BIOS. In this section, you can get the answer. Here’s the detailed breakdown:
# 1. Download the Latest BIOS to a USB Drive
Before updating MSI BIOS, you need to prepare a USB flash drive with the BIOS update file, and then update it with the USB. Here’s the guide:
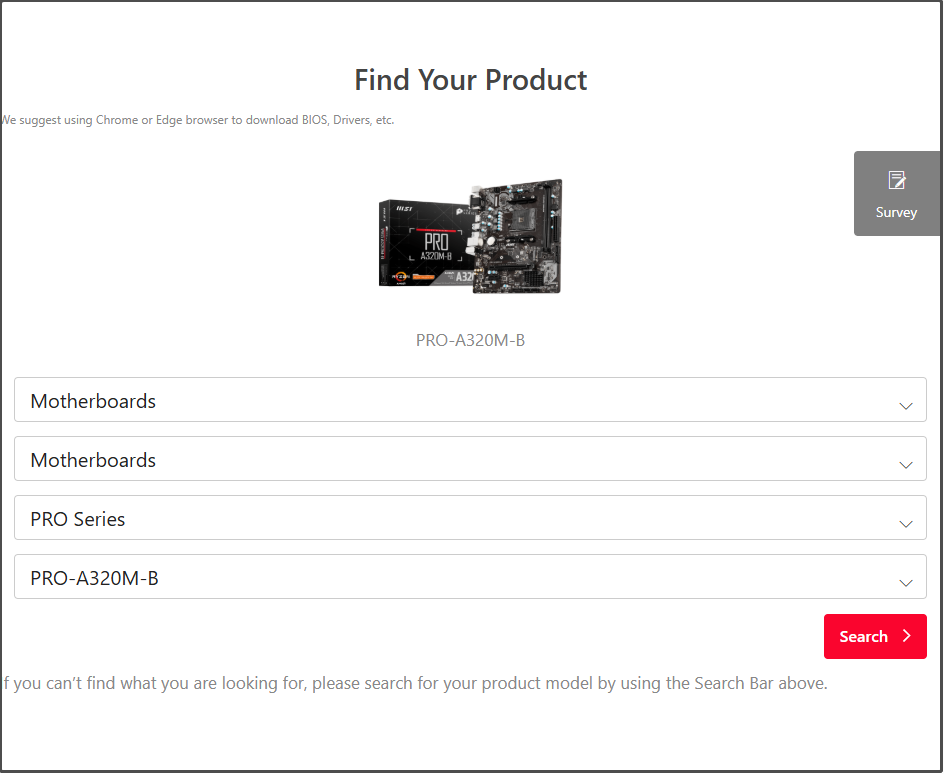
Step 1. Go to the MSI Download official website, which offers the MSI BIOS download.
Step 2. Select your Product Line, Product Category, Product Type, and Product Model. Then, click the Search button.
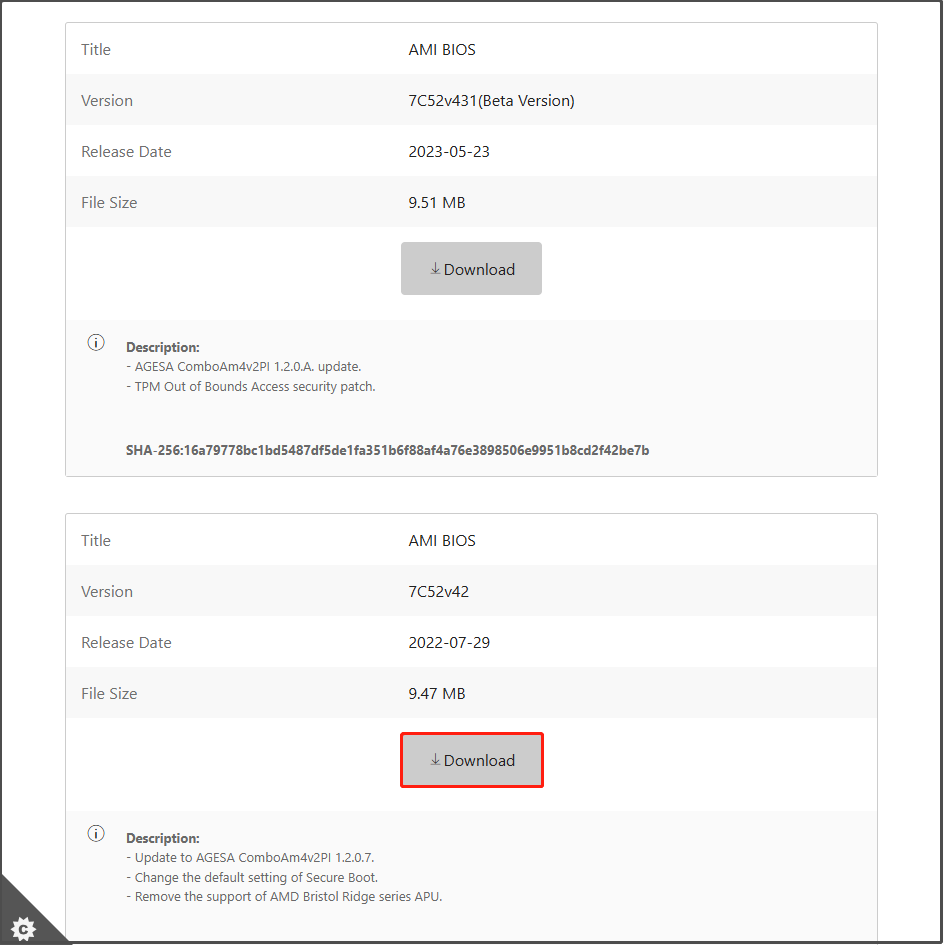
Step 3. Find the BIOS version you need, and click its Download button to save this file on your computer. Note that you do not choose the Beta Version as it may be unstable.
Step 4. Right-click the downloaded BIOS update file and select Extract All.
Step 5. Click the Browse button in the pop-up window to select the formatted USB flash drive as the saved location. After that, click Extract to execute the operation.
# 2. Update MSI BIOS
When you’re ready the prepare a USB with the BIOS update file, you can boot your PC into the BIOS menu and then perform the MSI motherboard BIOS update. Here’s how to do that:
Step 1. Boot your PC to enter the BIOS menu.
Step 2. Select the M-FLASH section to enter the BIOS update environment. If a window pops up, click Yes to continue.
Step 3. After entering the M-Flash mode, select the USB drive that contains the BIOS update file.
Step 4. Select the BIOS update file and press the Enter key.
Step 5. Now, the BIOS will start to update. Do not turn off your computer or disconnect the USB flash drive during this process. Otherwise, your motherboard may crash and become a brick.
Step 6. Once done, your PC will restart automatically. Next, you can enter the BIOS menu again to check if the latest version of BIOS is installed. Also, if you want to keep your overclocking or other settings, you need to re-apply them in the BIOS menu.
How to Perform MSI BIOS Update without USB?
Is it possible to perform an MSI BIOS update? Of course, it is possible. There are three other methods to help you update MSI BIOS without USB. However, it may only for some specific models.
Method 1. Use MSI M-Flash with Another Drive
If you prefer not to use a USB flash drive, you can utilize MSI M-Flash with another type of drive. However, using a USB drive remains the most common and safest method for desktops. Here’s how:
Step 1. Download the correct BIOS file from the MSI support website for your specific motherboard model.
Step 2. Extract the BIOS file to the root directory of any SSD or other drive.
Step 3. Reboot your computer and repeatedly press the Delete key to enter the BIOS setup.
Step 4. Locate and click the M-Flash option in the bottom-left corner of the screen.
Step 5. Click Yes to confirm entering M-Flash mode.
Step 6. Select the SSD or drive where you saved the BIOS file and then select the BIOS file itself.
Step 7. Click Yes to begin the update process and wait for the system to automatically restart.
Once done, you may update the MSI BIOS successfully.
Method 2. Use MSI Center (for Applicable Models)
Some MSI motherboards allow you to update the BIOS version via the MSI Center application. If your motherboard is also an included model, you can do the following steps to perform the MSI BIOS update:
Step 1. Open the Microsoft Store on your PC and search for MSI Center. Then, download and install this app.
Step 2. Open the software and navigate to its advanced scan or feature set options.
Step 3. Look for an option to check for and install BIOS updates directly from the software.
Method 3. Use Network Update
Also, you can try using Network update to update MSI BIOS. Here’s the guide:
Step 1. Connect your PC to the internet with an Ethernet cable.
Step 2. Enter the BIOS settings by pressing the Delete key during boot.
Step 3. Look for a Network Update or similar option within the BIOS menu. Then, use it to check for updates over the internet.
Step 4. Follow the on-screen instructions to perform the update.
Common Problems When Performing MSI BIOS Update
When performing MSI BIOS update, you may encounter some issues. Here are some issues and solutions.
Issue 1. M-FLASH Cannot Find the BIOS File
Check that:
- The BIOS matches your exact motherboard model.
- The archive has been extracted.
- The BIOS file is in the USB root directory.
- The USB drive is formatted as FAT32.
- You are not using a retail BIOS on an OEM motherboard. Community reports show these are among the most common reasons M-FLASH cannot detect the update file.
Issue 2. BIOS Update Appears Frozen
If the progress bar stops moving, wait several minutes before taking any action. MSI advises not to interrupt the update, as some stages take longer than others.
Issue 3. BIOS Update Failed
If your motherboard supports Flash BIOS Button, you may be able to recover by re-flashing the BIOS. Otherwise, contact MSI support for recovery options.
In Conclusion
Updating the MSI BIOS has many advantages for your computer. However, it is not an easy thing. You need to make some preparations before you do that, such as formatting a USB drive, cloning data to another location.
Here, this post introduces a powerful tool – MiniTool Partition Wizard to help you do that. If you encounter any issues or have any suggestions while using this software, you can contact us by sending an email to [email protected]. We will respond to you as soon as possible.
MSI BIOS Update FAQ
About The Author

Position: Columnist
Vega enjoys helping people with computer problems, including disk management, data recovery, data backup, and more. She is constantly expanding her knowledge in related fields. And she will continue to bring more easy-to-understand professional articles to help people solve various problems on the PC.
User Comments :