Do you want to check your computer’s RAM for problems freely? It is crucial to test RAM regularly so that you can keep your computer stable. In today’s article, MiniTool will introduce several free RAM test programs to you.
If your computer gets unstable or runs slowly, you may consider checking your computer’s RAM for problems. To test RAM, you can use the Windows built-in utility or download another free advanced tool.
So how to test RAM in Windows 10? Here are 4 options that can help you make a ram test Windows 10, including Windows Memory Diagnostic, MemTest86, Memtest86+, and DocMemory Memory Diagnostic. Let’s begin!
MiniTool System Booster TrialClick to Download100%Clean & Safe
Option 1. Use the Windows Memory Diagnostic
Windows Memory Diagnostic is a hidden system tool included in Windows 10. You can follow these steps to run this utility.
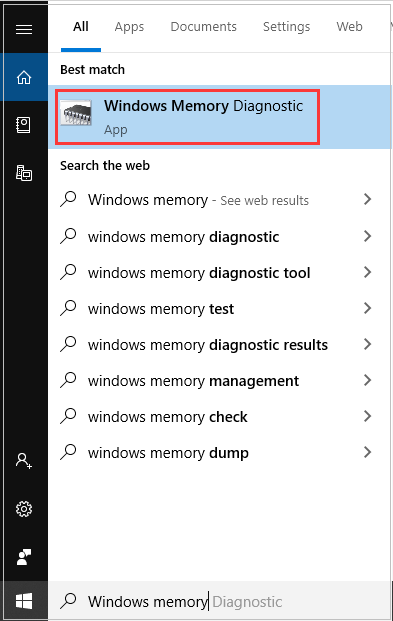
Step 1. Type Windows Memory Diagnostic in the search box and double click this program under the Best match.
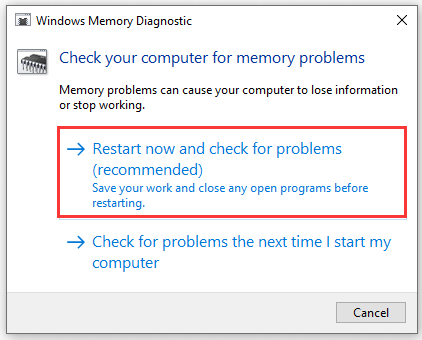
Step 2. You will receive a message saying Check your computer for memory problems. Here are 2 options for you to perform a RAM test. It is recommended that you click Restart now and check for problems. Well, you can click Check for problems for next time I start my commuter
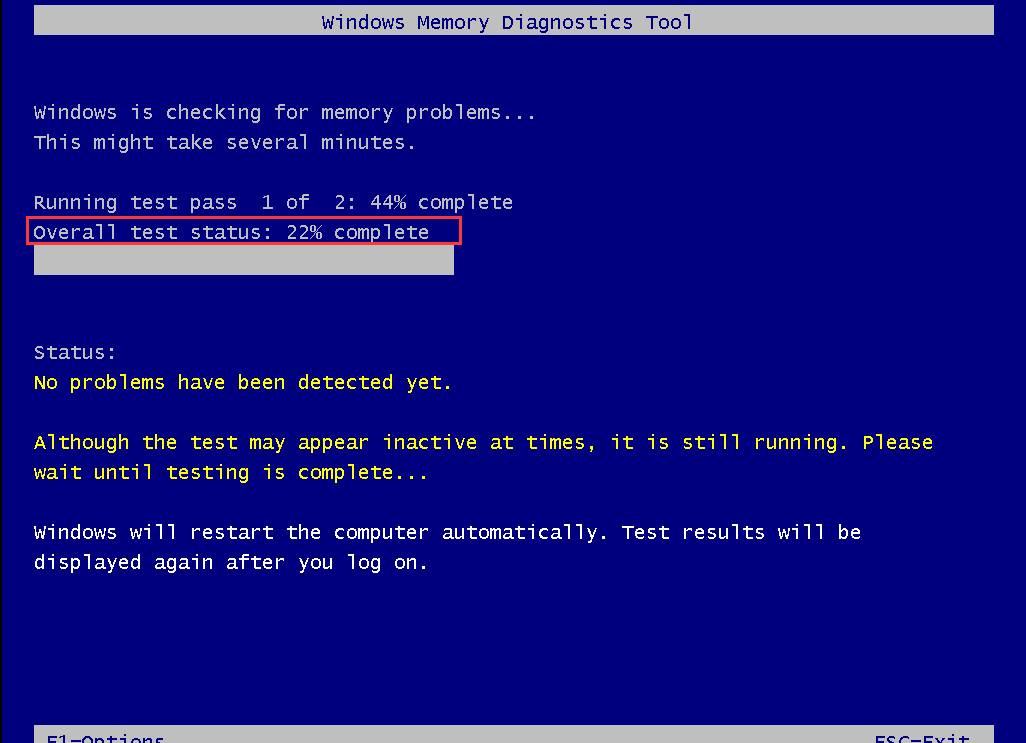
Step 3. Then your computer will restart and Windows Memory Diagnostics Tool will automatically perform the RAM test. This process may take you some time. You can see the overall test status bar and the detected problems during this process.
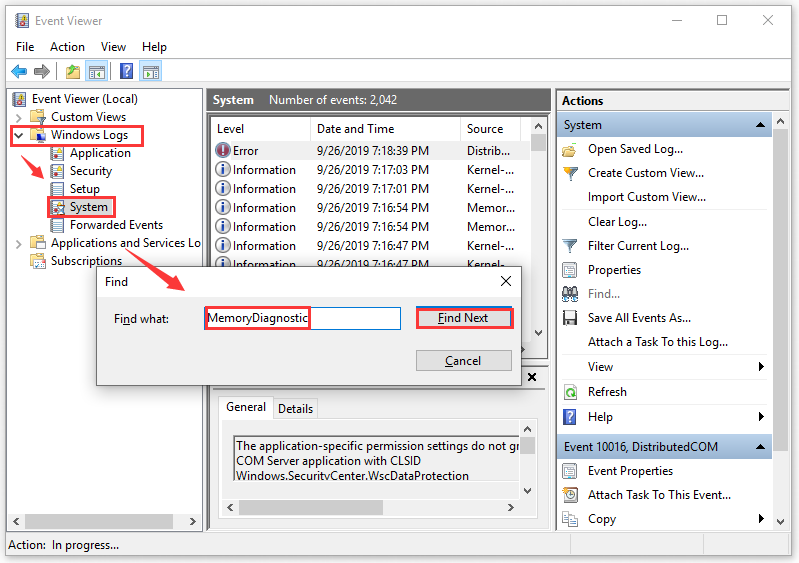
Step 4. After the RAM test finishes, your computer will reboot automatically. If you want to see the test results, you need to open the Event Viewer by right-clicking the Start menu and select Event Viewer.
Step 5. Go to Windows Logs and System, you will see a list of events. To find the RAM test results, you can click Find on the right pane and type MemoryDiagnostic in the box. After clicking Find Next, you will see the results at the bottom of the window.
Option 2. Use MemTest86
MemTest86 is another RAM test program that you can use it for more powerful features. It can find some issues that Windows Memory Diagnostic won’t find and perform wider RAM tests. More importantly, this tool provides you with an ISO image that can be burned to a CD or copied to a USB drive.
Here is a simple guide you can follow to run this app.
Step 1. Run the MemTest86.exe file and create a bootable USB drive with the ISO image.
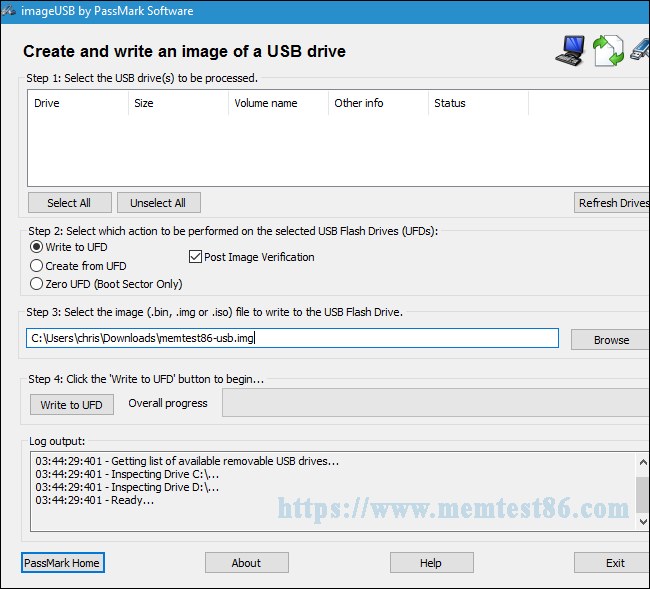
Step 2. Reboot your computer with this bootable USB drive. Then this tool will automatically perform a RAM test. This process will take a few minutes, you can see the information about any errors during the process. When the process completes, exit the window and restart your computer.
Option 3. Use Memtest86+
Memtest86+ is a modified version of Memtest86. It also provides you a free RAM test. It is recommended that you perform a RAM test with Memtest86+.
This software has some similarities with Memtest86. You can run it on Windows as well as Mac to create a bootable USB drive, but this program operates differently and provides you with a more comprehensive RAM test.
Option 4. Use DocMemory Memory Diagnostic
In addition to the above 3 options, DocMemory Memory Diagnostic is also a free program to perform a RAM test. This software is similar to the other 3 programs we listed above, but its major disadvantage is that you need a floppy disk to create a bootable disc, while most computers today don’t have a floppy drive.
Nevertheless, it is also recommended that you use this program if all the above 3 programs fail to test RAM or work unsatisfyingly. In other words, DocMemory Memory Diagnostic might be exactly what you have been looking for since MemTest86 and MemTest86+ require a bootable disc or USB drive.
In a word, Windows Memory Diagnostic is a good option to check your PC’s RAM for problems if you don’t want to use any third-party software. The other 3 programs also provide you with a more advanced RAM test. So, you can choose one based on needs.

User Comments :