A lot of users want to install Hyper-V to create a dual boot of Windows 10 and Windows 11. How to enable Hyper-V on Windows 11? This post of MiniTool will walk you through a full guide to install Hyper-V Windows 11.
What Does Hyper-V Do
Microsoft Hyper-V is a piece of virtualization program that enables users to create one or more virtual machines without any additional hardware or software support. With this feature, users can have hard disks, graphics card drivers, switches, and other items on an individual virtual machine.
Users can create dual boot Windows 10 and Windows 11 with the help of Hyper-V. In addition, it can help users run lots of software which don’t run on the current operating system. Here comes a question, how to enable Hyper-V on Windows 11? Let’s keep reading.

Before Your Do
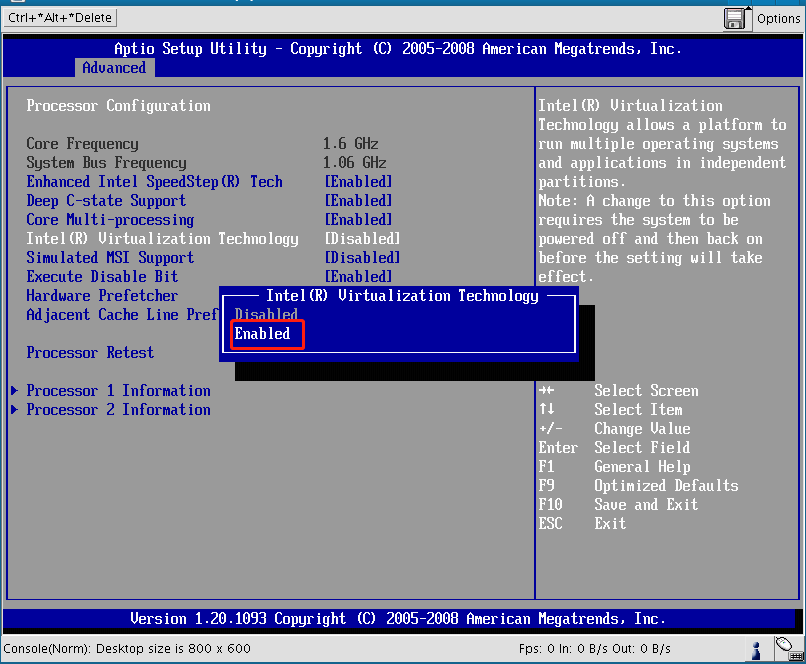
Before you enable Hyper-V in Windows 11, you need to make sure the Hardware Visualization/ Virtual Technology is enabled in BIOS. This is because the option to Enable Hyper-V or its submenus will be greyed out once the Hardware Visualization/ VT-x is disabled.
Step 1. Restart your computer and press the Delete or F2 key when the startup screen appears to enter BIOS.
Step 2. Navigate to the Advanced tab, and then select the Intel Virtualization Technology option and change it to Enabled using the arrow keys.
Step 3. Press the F10 and Enter keys to save changes and exit the BIOS. Then your computer will restart automatically.
After that, you can install Hyper-V in Windows 11 via the Control Panel, Command Prompt, and Windows PowerShell.
How to Enable Hyper-V on Windows 11
There are 3 ways on how to install Hyper-V on Windows 11. Let’s start exploring them one by one.
Way 1. Enable Hyper-V Windows 11 via Control Panel
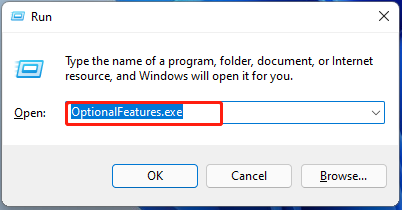
Step 1. Press Win + R to open the Run dialog box, and then type OptionalFeatures.exe in it and hit Enter. Also, you can type Windows features in the Search box and select Turn Windows features on or off from the Best match.
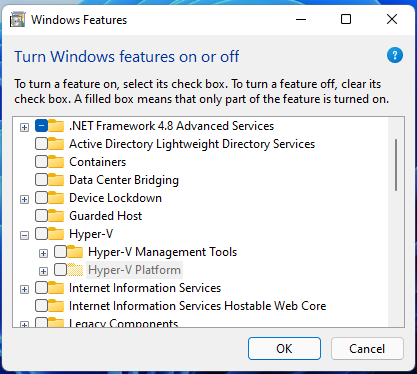
Step 2. Expand the Hyper-V category, and tick all checkboxes under the category, including Hyper-V Management Tools and Hyper-V Platform.
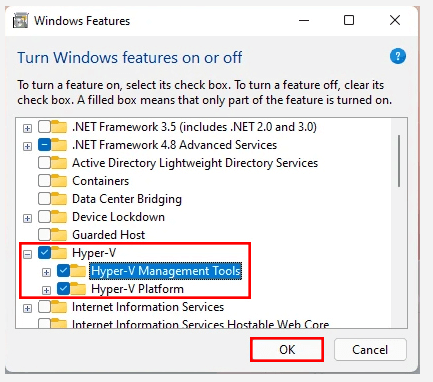
Step 3. Click on OK to save changes. After that, Windows will execute the changes. This process may take you some time.
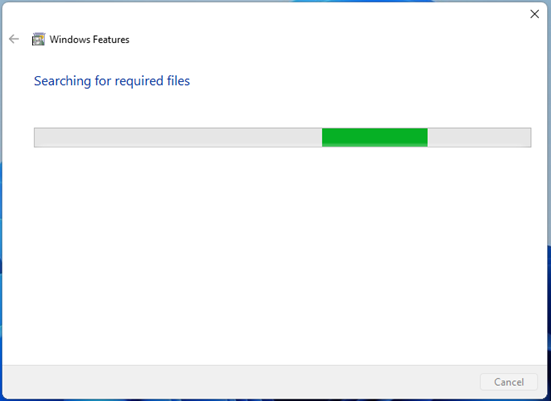
Step 4. Once done, you will be prompted to reboot the computer. Click on Start now to finish the installation of the required changes.

Way 2. Enable Hyper-V Windows 11 via Command Prompt
How to enable Hyper-V Windows 11? Another simple method is to use the Command Prompt tool.
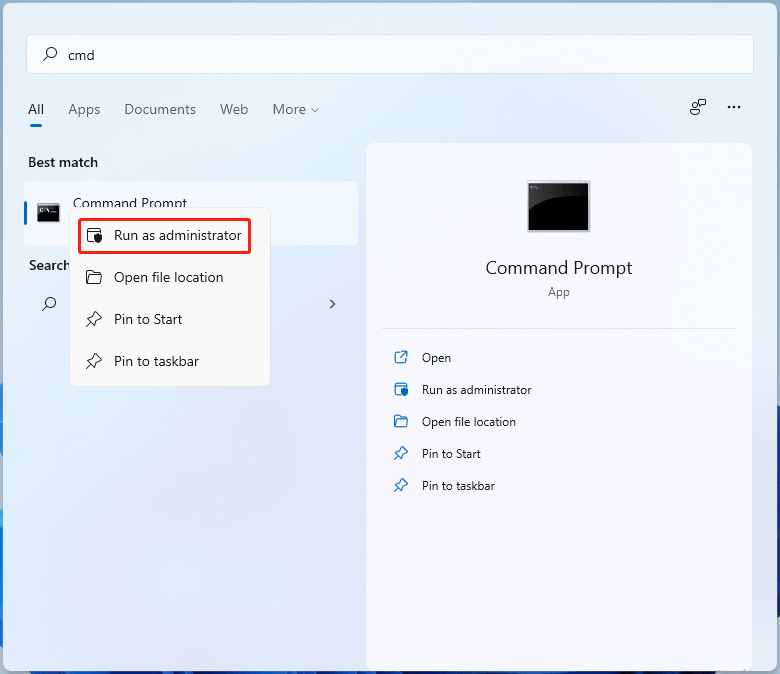
Step 1. Type cmd in the Search box, and then right-click the Command Prompt app and select Run as administrator. Click on Yes when you are prompted to open the elevated command prompt.
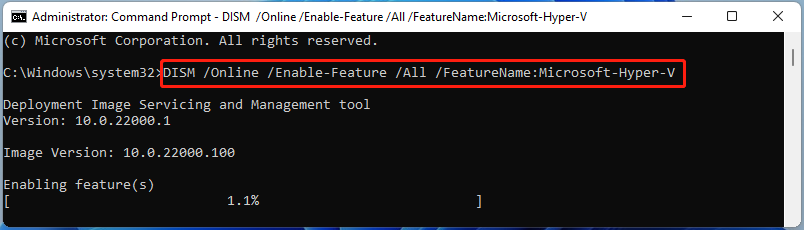
Step 2. In the pop-up window, type the following command and hit Enter.
DISM /Online /Enable-Feature /All /FeatureName:Microsoft-Hyper-V
Step 3. Once the process completes successfully, you will be prompted to restart the computer. Press Y to reboot your Windows 11.
Way 3. Enable Hyper-V Windows 11 via Windows PowerShell
PowerShell is an easy tool like Command Prompt to enable Hyper-V in Windows 11. Here’s how to do that:
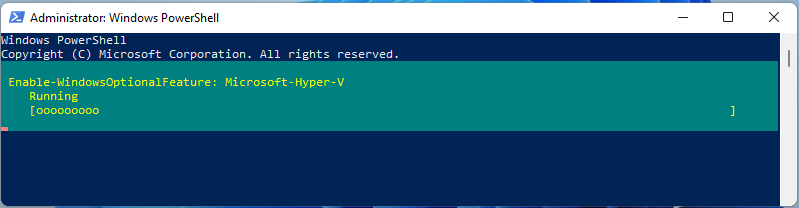
Step 1. Type PowerShell in the Search box, and then right-click the Windows PowerShell app and select Run as administrator.
Step 2. Type the command below in the pop-up window and hit Enter. Then Windows will start the process to install Hyper-V in Windows 11.
Enable-WindowsOptionalFeature -Online -FeatureName Microsoft-Hyper-V -All
Step 3. Now, a blue box will show you the process of enabling Hyper-V. Once enabled, press Y to restart your system.
You may also be interested in these topics on Windows 11:
How to View Battery Usage by Apps in Windows 11
How to Make Windows 11 Bootable USB Drive [Step-by-Step Guide]
Go Back Button Not Working in Windows 11? Here’s How to Bypass It
User Comments :