The computer may be stuck on the Preparing Automatic Repair loop if it can’t boot properly. Multiple reasons can trigger the Preparing Automatic Repair error. Here, MiniTool Partition Wizard summarizes the potential causes and corresponding solutions to the issue.
Causes of Preparing Automatic Repair
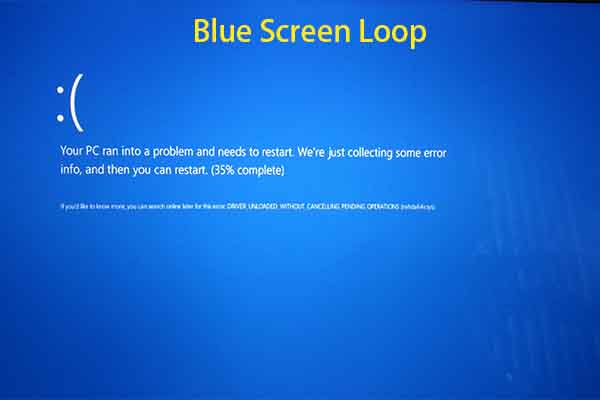
Windows Preparing Automatic Repair error is a common error, but it confuses plenty of users. It may occur along with the “Preparing Automatic Repair” or “Diagnosing your PC” error message. Sometimes, it leads to a black screen with nothing on or a blue screen with a “Your PC did not start correctly” or “Automatic repair couldn’t repair your PC” message.
Anyway, you need to find the reasons behind Preparing Automatic Repair Windows 10 to get it fixed. After looking into the issue, we found the following factors that can result in the error.
- The bootloader or the essential booting files are missing.
- The Master Boot Record (MBR) is corrupted.
- Some changes have been made in the BIOS settings or Boot Configuration Data (BCD) is missing.
- The hard disk has been corrupted, missing, or its connection is loose.
- The Windows drive or the firmware has been corrupted.
- There is something wrong with the system’s display, graphics card, or installed drivers.
- There are issues with any other software.
Also read: Fixed: SPECIAL POOL DETECTED MEMORY CORRUPTION BSOD
Kindly remind:
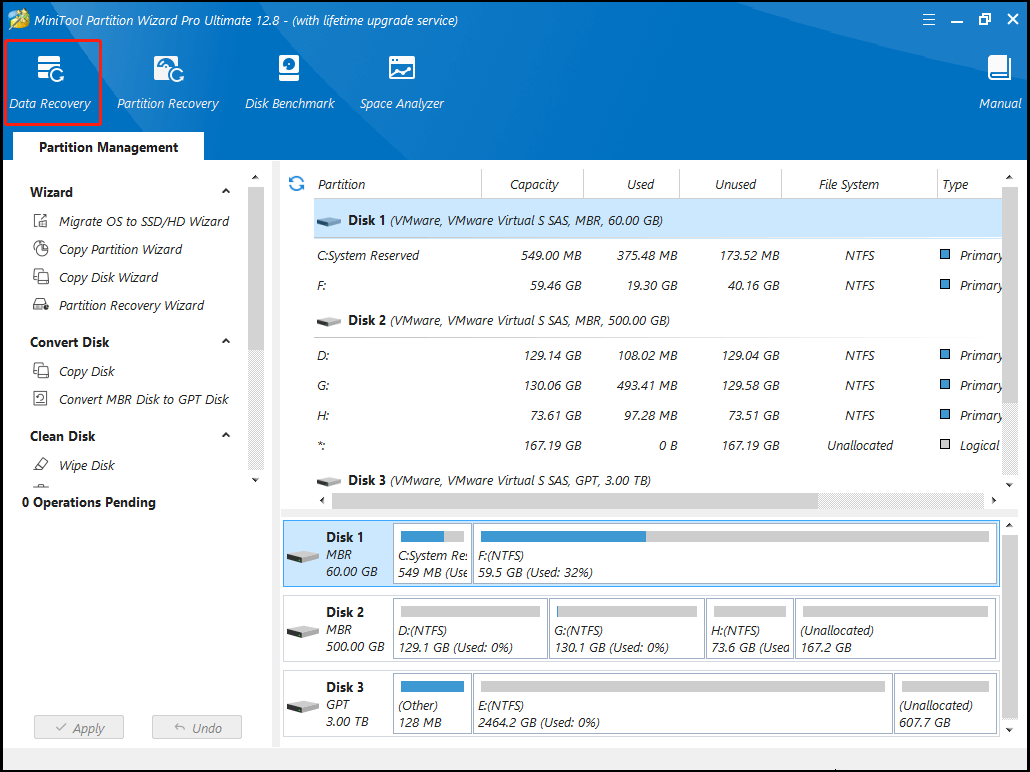
Before you fix the Preparing Automatic Repair loop error, get your data back via MiniTool Partition Wizard. Since your computer is unbootable here, you need to make a bootable CD/DVD/USB drive via MiniTool Partition Wizard on another normally working computer. Then boot the faulty PC from the burned MiniTool bootable flash drive.
MiniTool Partition Wizard DemoClick to Download100%Clean & Safe
Tap on Data Recovery at the upper left corner of the window and then follow the given instructions to recover the missing data.
Fix 1: Perform a Hard Reboot
A hard reboot is a way to restart the computer manually rather than using the operating system controls, which can eliminate glitches on the computer, solving errors like “Preparing Automatic Repair loop”. The following steps show you how to perform a hard reboot.
- Hold the Power button until your PC shuts down completely.
- Remove all peripherals from your computer.
- Wait for 1 minute and then boot the computer.
Now, check if the Preparing Automatic Repair black screen disappears. If not, try the rest of the fixes in this post immediately to troubleshoot the error.
Fix 2: Repair MBR and Rebuild BCD
Master Boot Record (MBR) and Booting Configuration Data (BCD) are vital for booting the system. If either of them is corrupted or not working, your computer won’t boot and may prompt the Preparing Automatic Repair black screen. Once you receive the error, try repairing MBR and rebuilding BCD by following these steps.
Step 1: Click Troubleshoot > Advanced Options > Command Prompt.
Step 2: In the opened Command Prompt window, type the following commands and hit Enter after each.
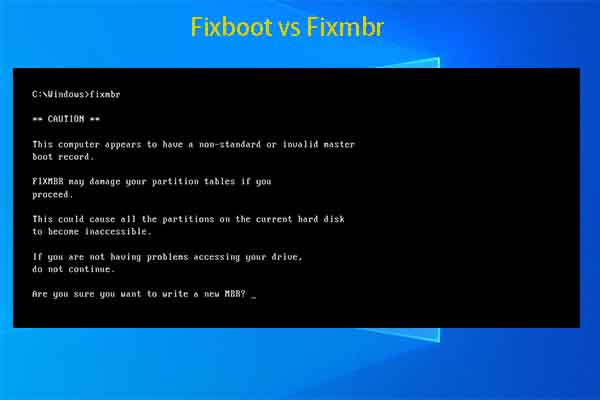
- bootrec /fixboot
- bootrec /scanos
- bootrec /fixmbr
- bootrec /rebuildbcd
- exit
Step 3: Restart your computer and see if your computer is stuck on the “Preparing Automatic Repair” screen.
In addition to Command Prompt, MiniTool Partition Wizard can also rebuild MBR for you. Besides, this multifunctional partition manager also allows you to clone hard drives, convert MBR to GPT, migrate Windows 10, recover data from external hard drive, format USB to FAT32, etc.
Boot your PC with the MiniTool bootable USB drive. After that, follow the given steps to rebuild MBR.
MiniTool Partition Wizard DemoClick to Download100%Clean & Safe
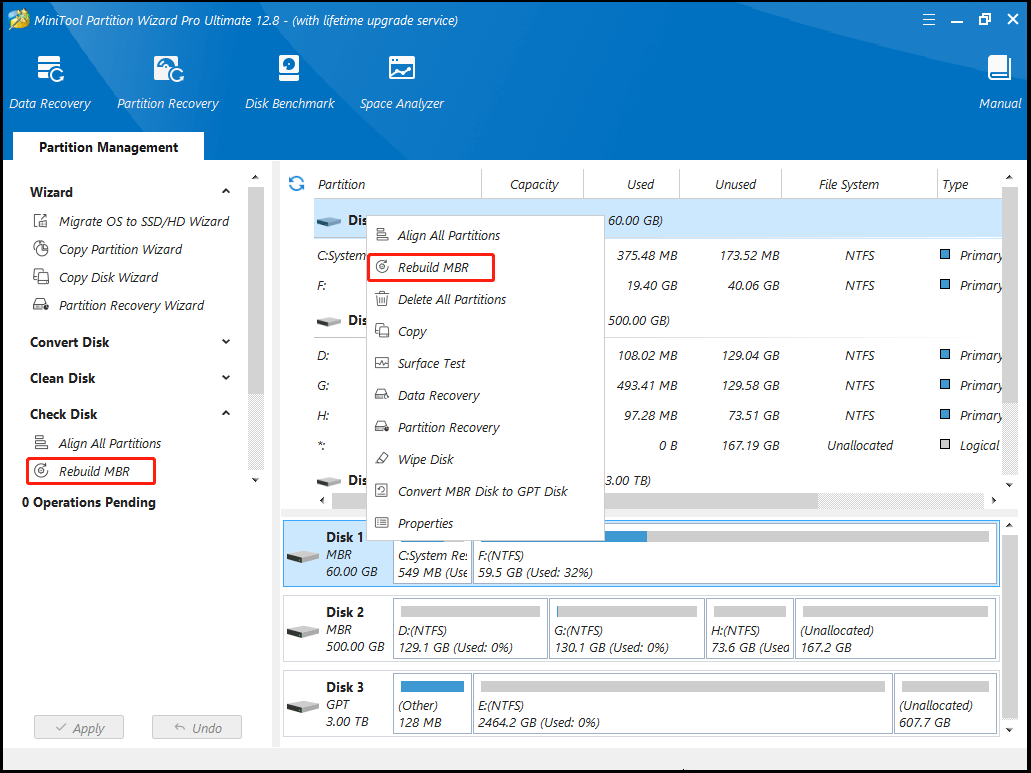
Step 1: After you enter the main interface of MiniTool Partition Wizard, right-click on the disk that runs your system and click Rebuild MBR in the pop-up context menu. Alternatively, you can also highlight the target disk and hit the Rebuild MBR option under the Check Disk tab.
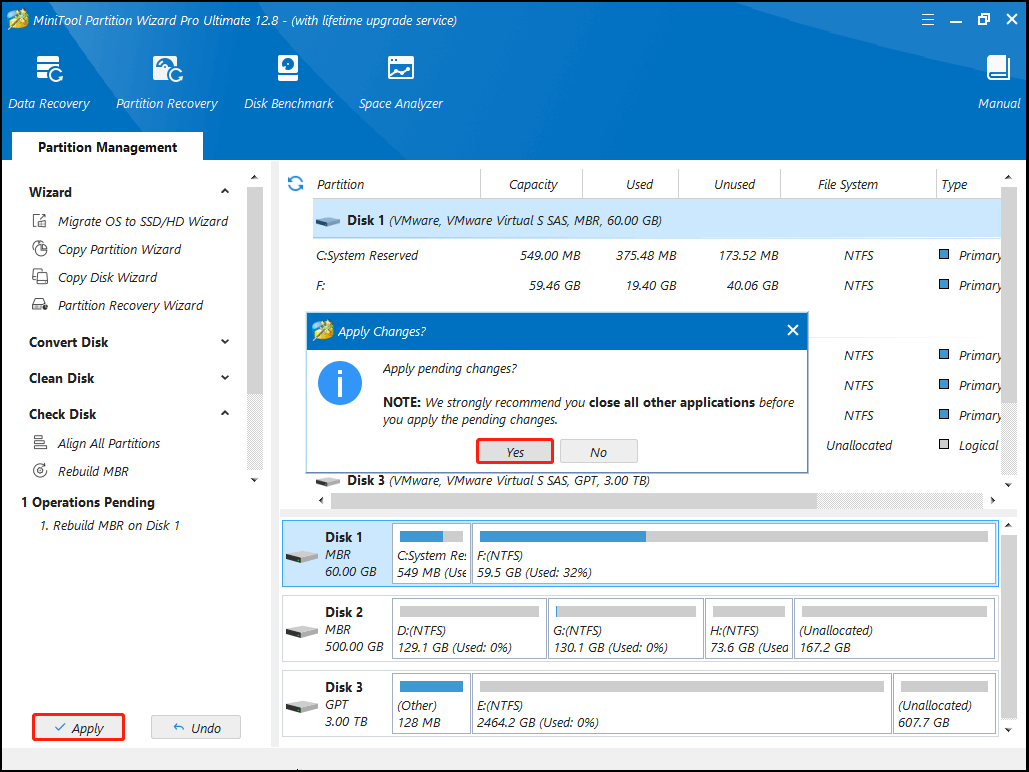
Step 2: Tap on the Apply button to carry out the pending operation.
Fix 3: Extend System Reserved Partition
Like applications and games, Windows systems also need enough disk space to work properly. If the system drive (system reserved partition) is running out of space, you may encounter errors like “there is not enough memory or disk space”, “not enough space for Windows 10 update”, “Preparing Automatic Repair”, etc.
In this case, you should extend system reserved partition to get rid of the issue. In Disk Management, the Extend Volume option usually is unavailable for the system reserved partition. So, you’d better use third-party tools like MiniTool Partition Wizard to extend the partition.

Both the Extend and Move/Resize features of MiniTool Partition Wizard can help you enlarge the system reserved partition (work for other partitions too). If the free or unallocated space is adjacent to the target partition, simply use the Move/Resize feature. In other cases, try the Extend function instead.
Likewise, you should boot your computer with a burned MiniTool USB drive and access the main interface of MiniTool Partition Wizard. Then complete the operation by following the steps below.
MiniTool Partition Wizard DemoClick to Download100%Clean & Safe
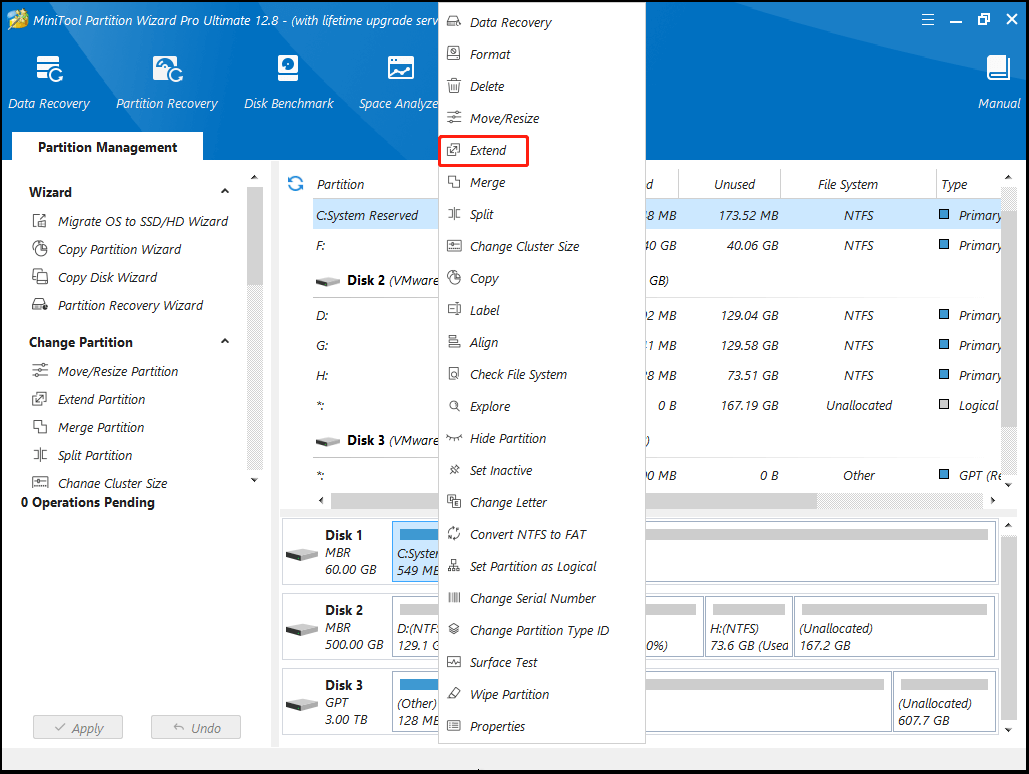
Step 1: Right-click on the system reserved partition and click on the Extend option in the prompted menu.
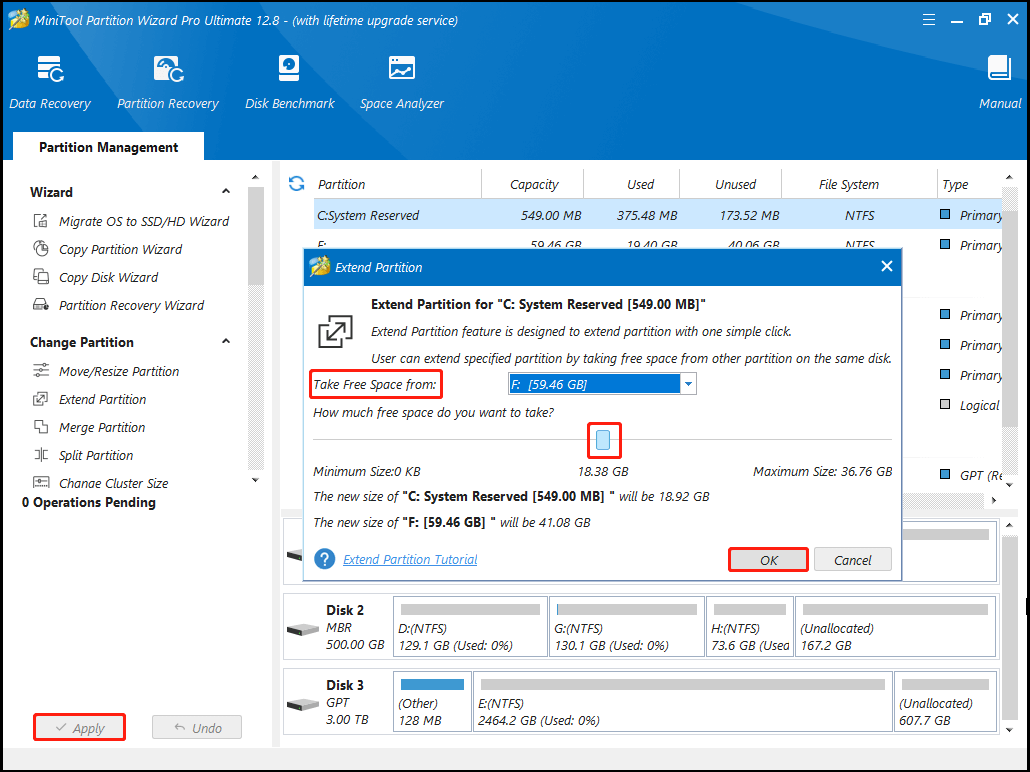
Step 2: In the next window, choose unallocated space or a partition to take free space and then drag the blue block to decide the amount of space you would like. After that, click OK to save changes.
Step 3: Finally, click the Apply button to execute the operation.
Fix 4: Run an SFC Scan
As mentioned earlier, damaged or missing system files can also trigger the Preparing Automatic Repair loop. System File Checker (SFC), a built-in utility on the Windows computer, can scan and repair missing or corrupted system files. Here, you can run an SFC scan to repair system files to see if it works for the Preparing Automatic Repair error.
Step 1: Follow the instructions given in Fix 2 to open Command Prompt in the Windows Recovery Environment.
Step 2: Type sfc /scannow and hit Enter.
Step 3: Wait for the finish of the scan process.
Step 4: After the process ends, restart your computer to see if Preparing Automatic Repair Windows 10 disappears.
Related article: How to Stop Checking File System on C? Here’re Some Methods
Fix 5: Disable the Automatic Repair Tool
Sometimes, you need to disable the Automatic Repair tool to solve the Preparing Automatic Repair loop. To do that, please refer to these steps.
Step 1: Navigate to Command Prompt in WinRE.
Step 2: Type the command below and hit Enter.
bcdedit /set {default} recoveryenabled no
Step 3: If the above command doesn’t work, type bcdedit /set {current} recoveryenabled no and press Enter.
Step 4: Type exit and press Enter to close Command Prompt.
Step 5: Reboot the PC to see if it boots normally.
Fix 6: Reinstall the Graphics Driver
For outdated or corrupted drivers, you can reinstall them from scratch. Boot your computer into Safe Mode and then follow the offered steps to finish the operation. Boot the PC into WinRE and then click Troubleshoot > Advanced Options > Startup Settings > F4 > Restart.
Step 1: Open the Run window, type devmgmt.msc, and then click OK.
Step 2: In the Device Manager window, find and double-click Display adapters to expand it.
Step 3: Right-click on your driver and click Uninstall device.
Step 4: After uninstallation, go to the official website of your driver and then download the latest driver.
Step 5: Launch the setup and follow the on-screen instructions to finish the installation.

Fix 7: Use System Image Recovery
If you have created a system restore point before, troubleshoot the Preparing Automatic Repair loop by restoring the PC to previous state. You don’t have to worry about losing personal data because the system restore point saves OS files, Windows registry, settings, drivers, and similar important information as a backup.
Step 1: After entering WinRE, navigate to Troubleshoot > Advanced options > System Image Recovery.
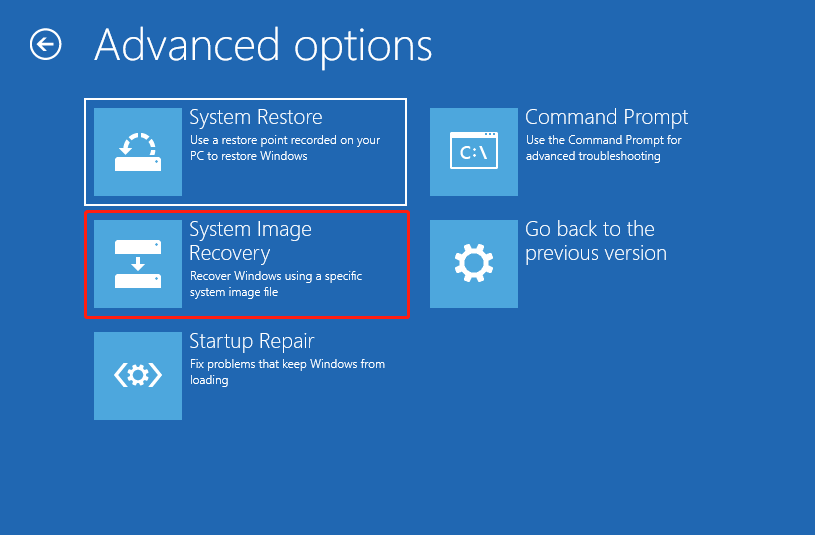
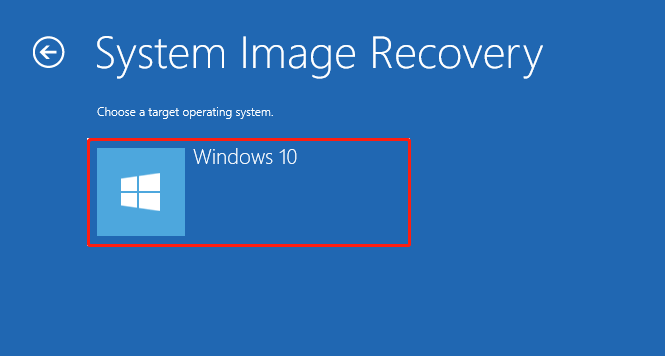
Step 2: On the next screen, click on Windows 10 to continue.
Step 3: Then Windows will detect system images you created before. On the prompted window, tick the “Select a system image” option and click Next.
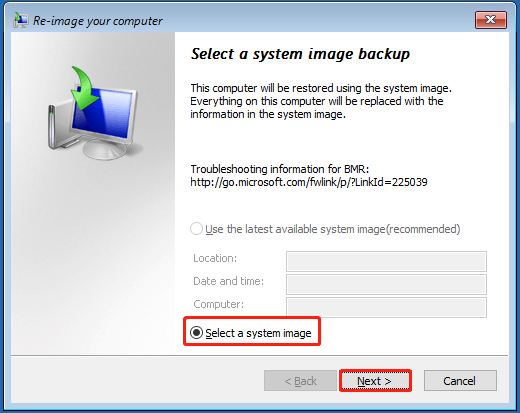
Step 4: Choose a system image in the next window and click Next.
Step 5: Follow the prompted instructions to complete the operation.
Fix 8: Reset the Windows Device
The last resort for fixing the Preparing Automatic Repair loop is to reset the PC.
Step 1: After you enter WinRE, click Troubleshoot > Reset this PC.
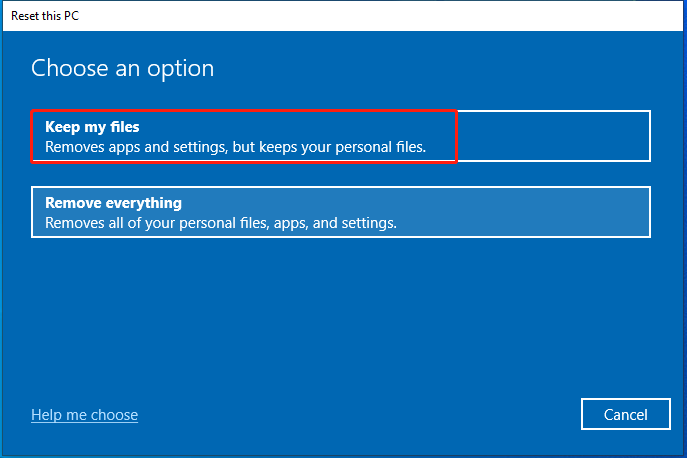
Step 2: On the next window, choose an option. In this scenario, we select Keep my files.
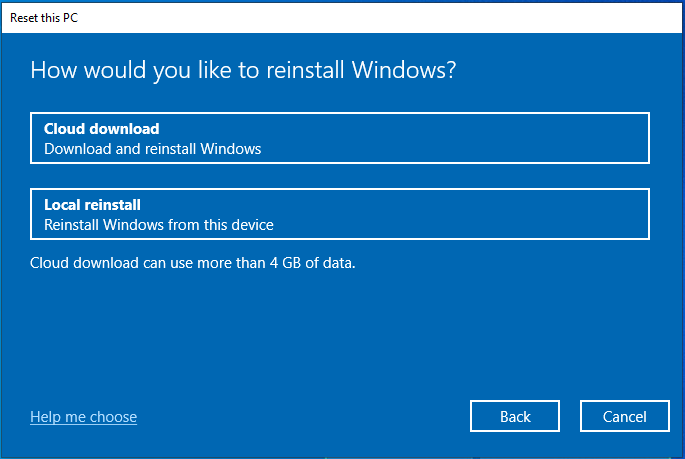
Step 3: Select a way to reinstall Windows.
Step 4: Follow the on-screen instructions to complete the operation.
You might be interested in this: How Long Does It Take to Reset a PC? Find Answers and Speed Up It
Bottom Line
This post tells you why Preparing Automatic Repair Windows 10 occurs and how to resolve the issue successfully. If you are experiencing this issue, this comprehensive guide deserves your attention. You can leave your words in the following comment area if you have any thoughts about this error.
For questions related to MiniTool Partition Wizard, directly send us an email to [email protected] to seek assistance. We will make a reply as soon as possible.
User Comments :