Hello everyone, yesterday I noticed lots of folders and shortcuts having 2 blue arrows on the top right of the icon. This means the file is compressed in the properties. But how do I make it stop? Every new file/folder I add automatically compresses and I don't want it to.
--from Microsoft Community
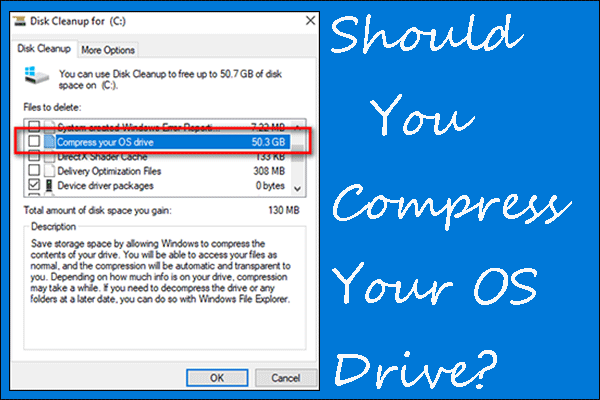
The issue “Windows 10 automatically compressing files” mostly occurs when your PC is running out of disk space. When the hard drive space is running out, the computer will have performance issues. Sometimes, Windows may automatically compress files or folders to save space in a hard drive getting low space, which is also known as NTFS file compression.
How to stop automatically compressing files in Windows 10? There are several ways to help you fix the issue. Besides, if your files are lost during the operation, there is an easy way introduced to help you retrieve the lost data.

How to Stop Automatically Compressing Files in Windows 10
You can try to stop Windows 10 automatically compressing files by disabling NTFS file compression. Besides, if your disk is running out of hard drive space, it’s better to free up the disk space to fix this issue. You can back up the important data so as to avoid data loss.
Method 1. Disable Automatic File Compression
There are five ways to help you stop automatically compressing files. For instance, you can disable automatic file compression by using Group Policy Editor, Registry Editor, Command Prompt, File Explorer, and Local Security Policy.
1. Change File Explorer Settings
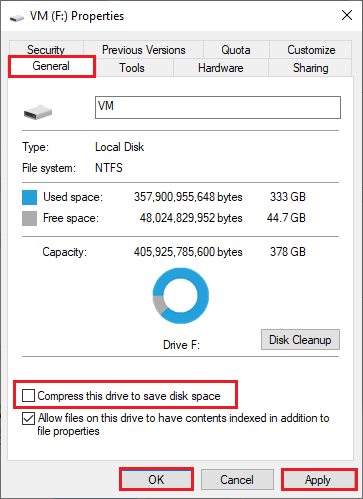
You can open File Explorer and then navigate to the hard drive which has the “automatic file compression” issue. Then right-click the hard drive and select Properties. In the pop-up window, uncheck the Compress this drive to save disk space box under the General tab. Then click Apply and OK sequentially to save changes.
Besides, you can also disable the folder compression in File Explorer. Follow the detailed steps below.
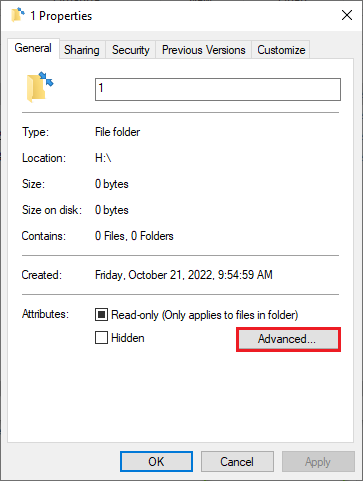
Step 1. Go to the compressed file or folder. Right-click on it and select Properties.
Step 2. In the pop-up window, click Advanced under the General tab.
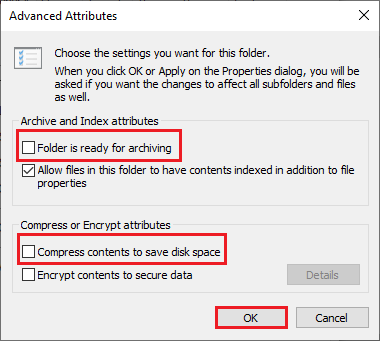
Step 3. When the Advanced Attributes window pops up, uncheck the Folder is ready for archiving and Compress contents to save disk space options. Then click OK to save changes. After closing the window, click Apply and OK sequentially in the Properties window.
You can repeat the operation if you have more files and folders to disable compression. After disabling the compression, restart your computer and then check if the issue is fixed.
2. Disable File Compression via Group Policy Editor
You can use Group Policy Editor to disable automatic file compression. Follow the detailed steps below.
Step 1. Press Windows + R on the keyboard to open the Run box. Then type gpedit.msc in the box and press Enter to open it.
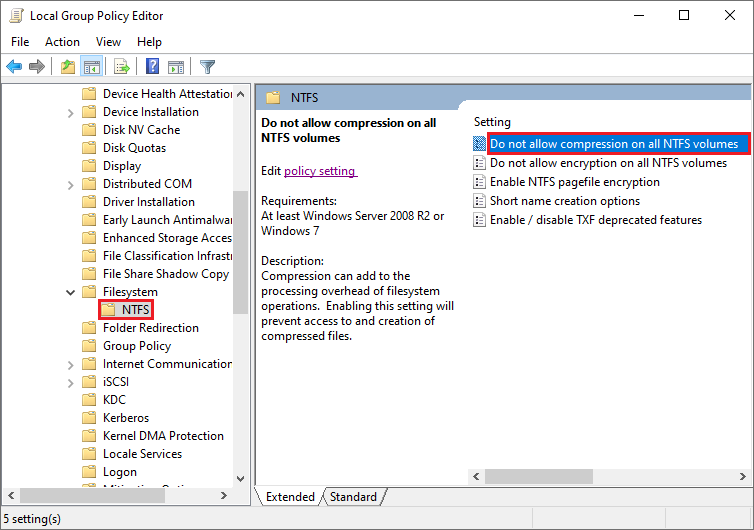
Step 2. In the Local Group Policy Editor window, go to Computer Configuration > Administrative Templates > System > Filesystem > NTFS.
Step 3. Then double-click the Do not allow compression on all NTFS volumes option to open its configuration.
Step 4. In the prompted window, select Enabled. Then click Apply > OK.
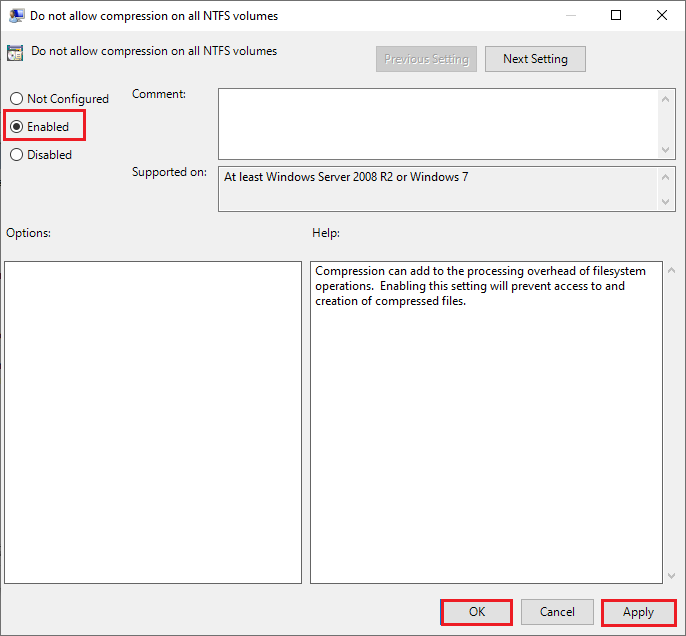
Step 5. Restart your computer and check if the “Windows 10 automatically compressing files” issue is fixed.
3. Disable File Compression via Registry Editor
You can refer to the following steps to disable automatic file compression through Registry Editor.
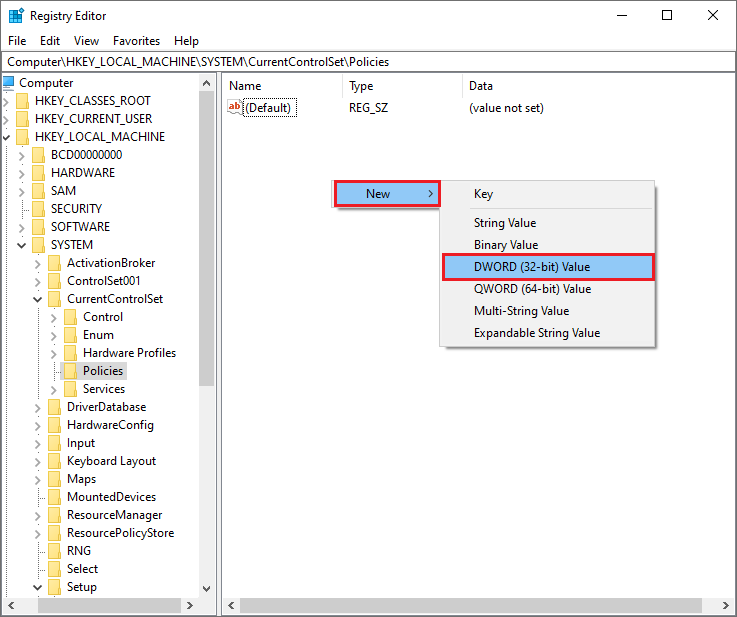
Step 1. Press Win + R key combinations to run “regedit”. Then go to HKEY_LOCAL_MACHINE > SYSTEM > CurrentControlSet > Policies.
Step 2. Right-click the blank area and select New > DWORD (32-bit) Value.
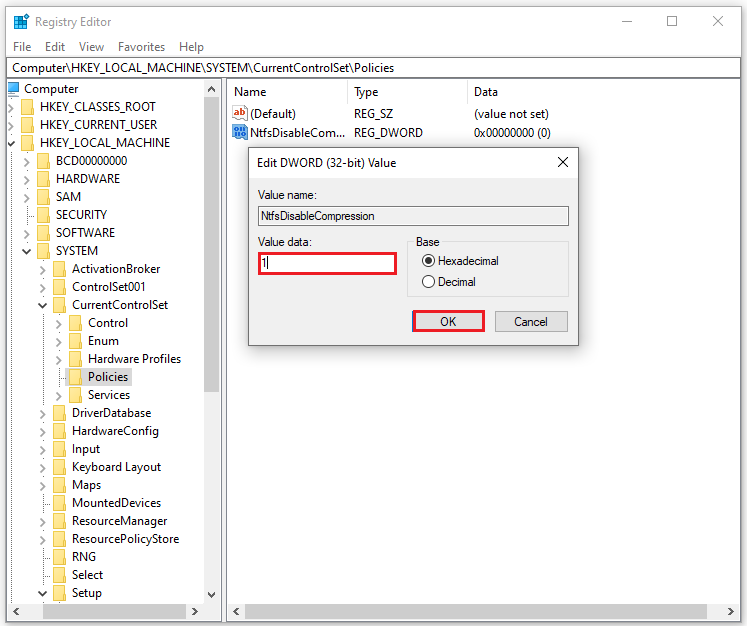
Step 3. Right-click the new value to rename it as NtfsDisableCompression. Then right-click it and select Modify.
Step 4. In the pop-up window, change the Value data to 1 and then click OK.
Step 5. Restart your PC.
4. Disable File Compression via Command Prompt
You can also use Command Prompt to stop Windows 10 automatically compressing files.
Step 1. Press the Windows + R keys to open Run box. In the box, type cmd and press Ctrl + Shift + Enter keys to run Command Prompt as administrator.
Step 2. In the pop-up window, type the following command and press Enter to excute it.
fsutil behavior set DisableCompression 1
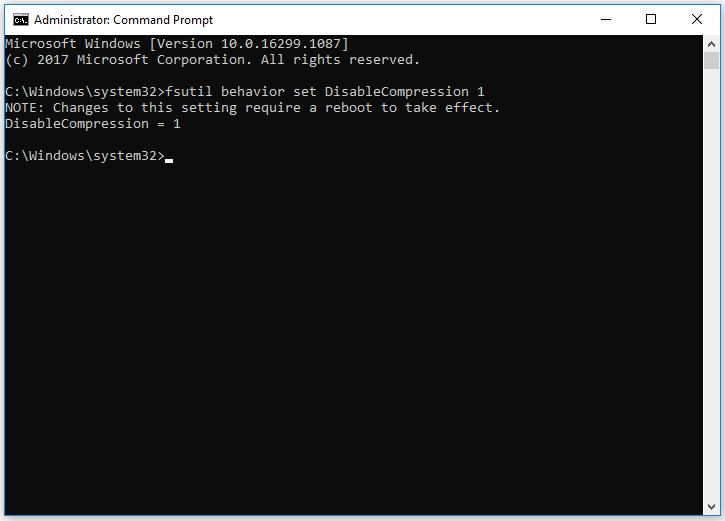
Whenever you want to enable file compression again, you can execute the command: fsutil behavior set disablecompression 0.
Step 3. Once done, restart your PC to make the action take effect. Then run the Command Prompt as administrator again and type the following command to check if the compression is disabled.
fsutil behavior query disableCompression
Step 4. If the compression is disabled, you may receive the following message.
DisabledCompression = 1 (Enabled)
5. Disable File Compression via Local Security Policy
You can stop Windows 10 automatically compressing files by using Local Security Policy. Follow the detailed steps below.
Step 1. In the Run box, type secpol.msc and press Enter to open it.
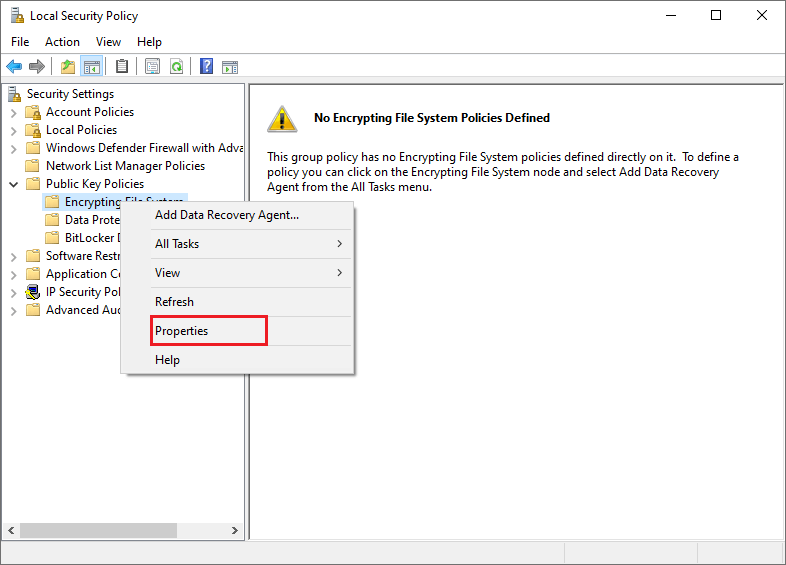
Step 2. In the prompted window, go to Security Settings > Public Key Policies > Encrypting File System.
Step 3. Then right-click the Encrypting File System option and select Properties.
Step 4. When the Encrypting File System Properties window pops up, choose Don’t allow. Then click Apply and OK sequentially.
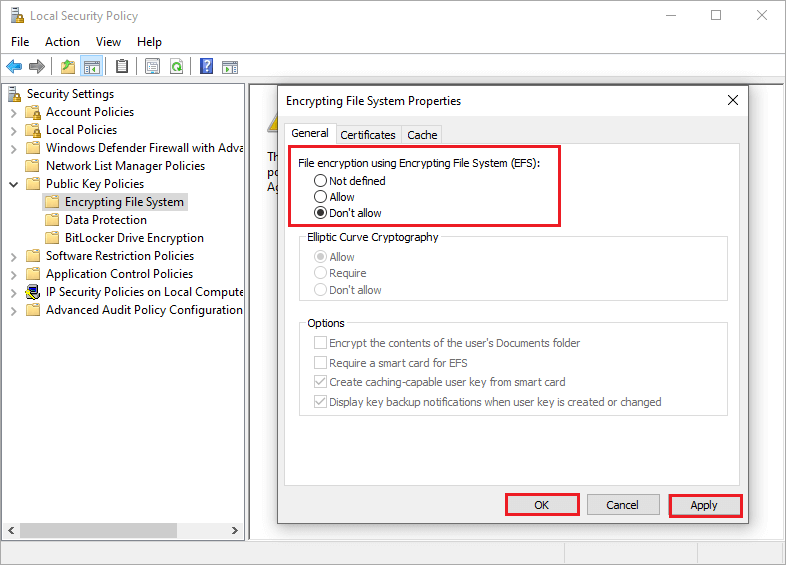
Step 5. Reboot your computer and check if the Windows 10 automatically compressing files issue is fixed.
Method 2. Free Up Hard Drive Space
Once the NTFS file compression function is disabled, files will take up larger disk space. If your PC is running out of space, you can free up some space on your hard drive.
To free up the space on hard disk, you can manually check files and folders on the hard drive and delete the unnecessary files and folders. Besides, you can delete the temporary files and perform a disk cleanup. However, it’s a waste of time and energy to do these.
Thus, it’s recommended using a professional partition manager – MiniTool Partition Wizard to help you. As a multifunctional tool, MiniTool Partition Wizard aims to manage hard dives safely and conveniently.
Its Move/Resize Partition function can modify the partition size flexibly. Besides, its Data Recovery and Partition Recovery functions are the best options to retrieve lost data and partitions. More importantly, its Space Analyzer function can help you analyze the hard drive space usage and free up disk space.
1. Use MiniTool Partition Wizard
You can follow the detailed steps below to free up the disk space.
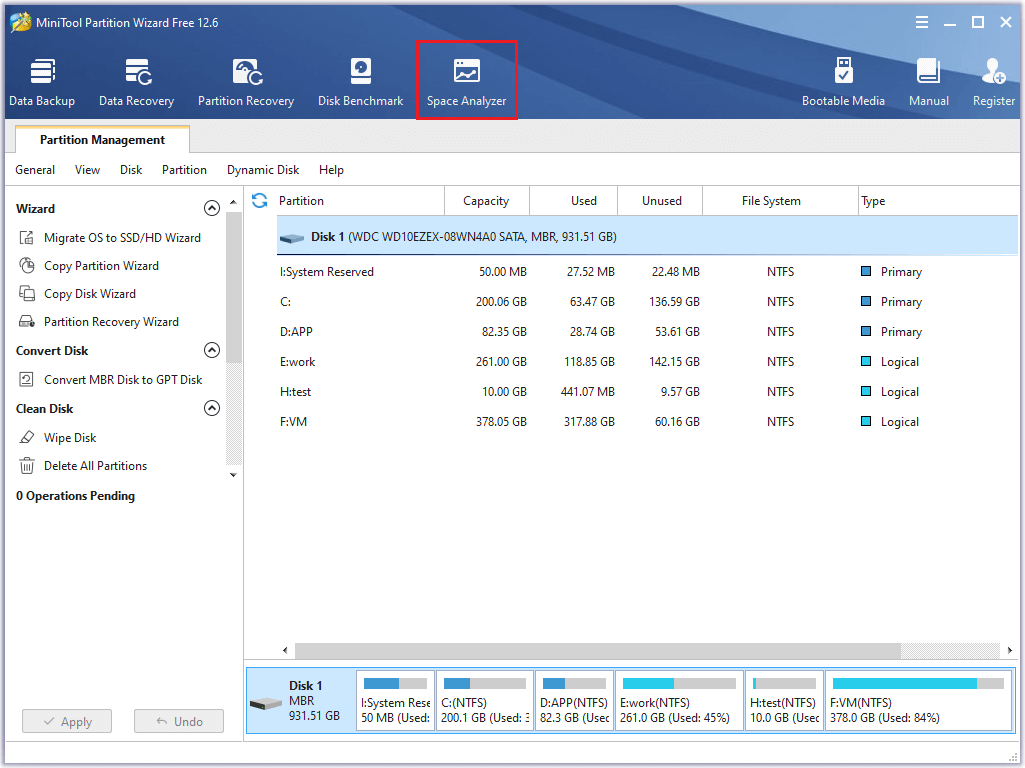
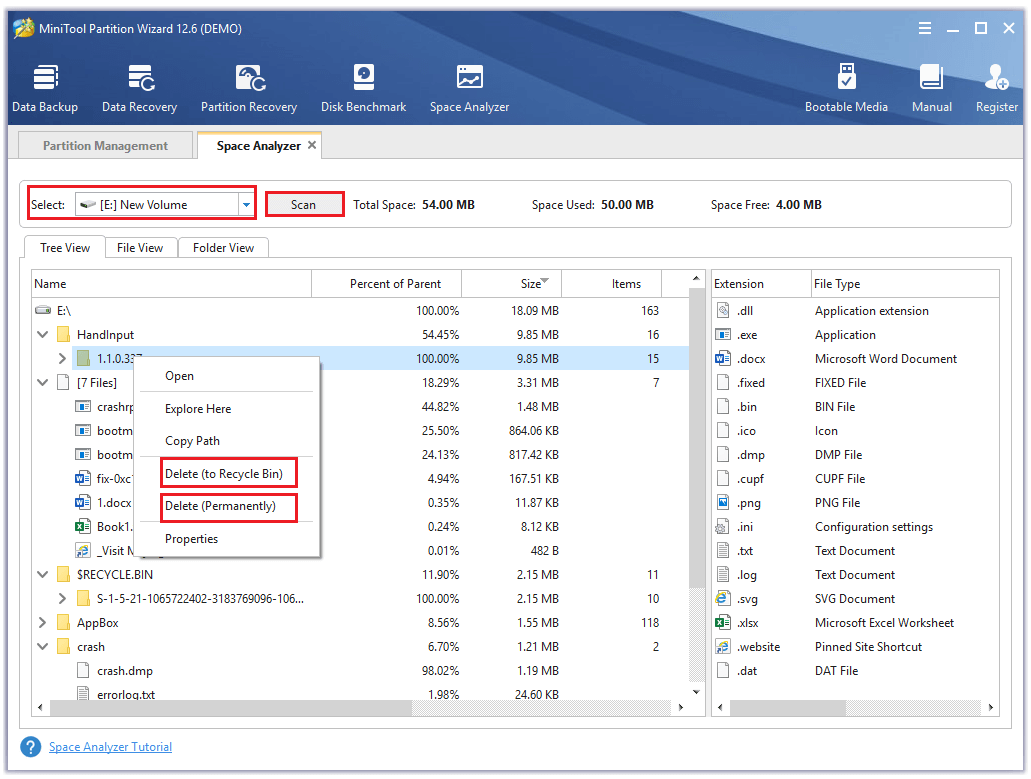
Step 1. Download MiniTool Partition Wizard, install and launch it to get its main interface. Then click Space Analyzer on the toolbar.
MiniTool Partition Wizard FreeClick to Download100%Clean & Safe
Step 2. In the pop-up window, choose the hard drive or folder which is running out of space or has NTFS file compression issue to scan. Wait patiently until the scanning is completed.
Step 3. Once done, the scanning result is displayed in Tree View by default. You can choose to view the space usage as Tree View, File View and Folder View.
Step 4. To free up the disk space, choose and right-click the data that you don’t need and choose delete to Recycle Bin or delete Permanently. Pay attention to the properties of the file and do not delete the system files.
2. Use Windows Storage Sense
You can choose to delete unnecessary files manually by checking the hard drive space and selecting the unnecessary files and folders to Recycle Bin. Another way is to use Storage Sense to free up space.
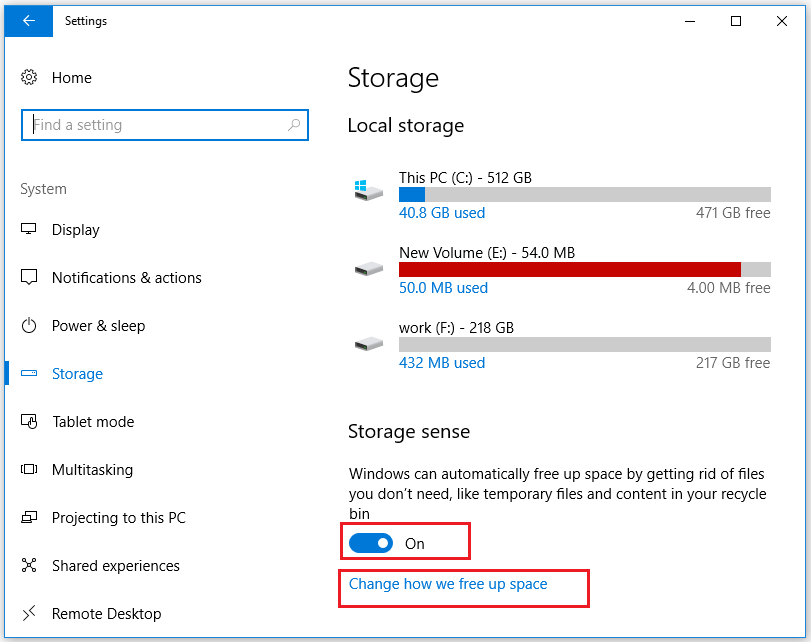
Step 1. Go to Settings > System > Storage. Find and turn on the Storage Sense. Then click Change how we free up space.
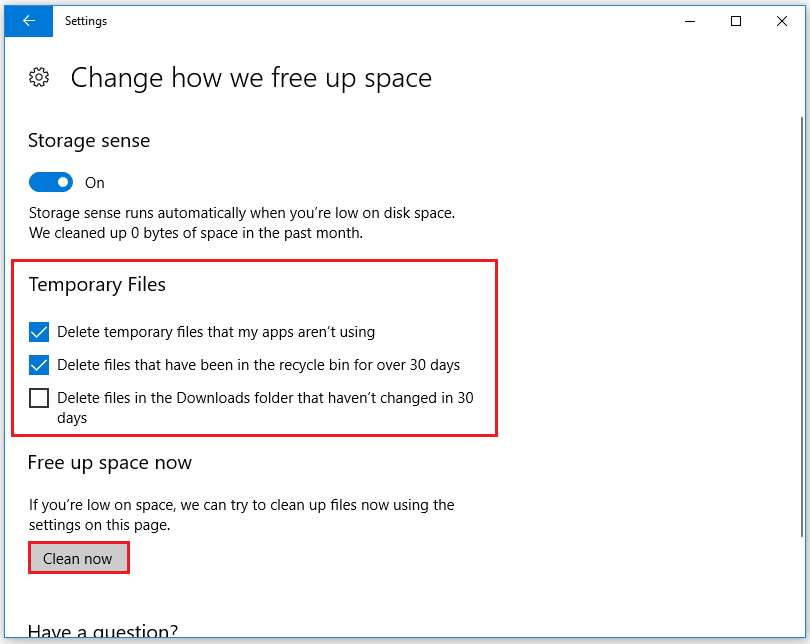
Step 2. In the pop-up window, choose and check what kind of temporary files to delete. Click Clean now to free up disk space.
3. Use Command Prompt
You can follow the steps below to delete the temporary files by using Command Prompt.
Step 1. Press Windows + R keys to open the Run box. Then type cmd command in the box and press Ctrl + Shift + Enter keys to run it as administrator.
Step 2. In the Command Prompt window, type the following command and press Enter.
del /q/f/s %TEMP%*
Then all the temporary files should be removed. Besides, you can choose to type temp command in the Run box and press Enter key to open it. Then in the pop-up window, select all the temporary files to delete.
![Fix Windows 10 Temporary Files Won’t Delete [Complete Guide]](https://images.minitool.com/partitionwizard.com/images/uploads/2020/07/win10-temporary-files-wont-delete-thumbnail.jpg)
4. Use the Disk Cleanup Tool
Disk cleanup is a Windows built-in tool that can help you delete some files to free up space on the hard drive. The specific steps are as follows.
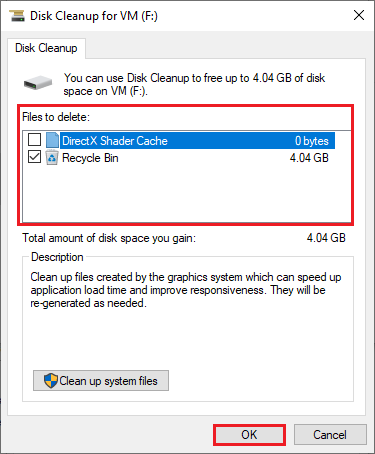
Step 1. Open Windows File Explorer, click This PC, and then right-click the hard drive which has the file compression issue and select Properties. After the window pops up, click Disk Cleanup.
Step 2. Select the files you want to delete and click OK.
Besides, you can also uninstall the unneeded apps to free up the disk space.
How to Recover the Lost Data during the Process
If you find some files or data missing on the computer or you have deleted some files mistakenly, you can use MiniTool Partition Wizard to recover lost data.
Remember to save the recovered files on another drive so as to avoid being overwritten.
Step 1. Download MiniTool Partition Wizard, install and launch it to get its main interface.
MiniTool Partition Wizard DemoClick to Download100%Clean & Safe
Step 2. Click Data Recovery on the Toolbar and choose the partition where the lost files are saved to scan.
Step 3. Wait patiently for scanning. After the scanning is completed, you can find and save the lost data.

Wrapping Things Up
In this post, you have learned some ways to stop automatically compressing files. You can try these methods one by one. Besides, MiniTool Partition Wizard is a good choice to free up the disk space and recover the lost data.
If you have any suggestions or better ideas, you can leave a message in the comment part below or contact us via [email protected].
User Comments :