Are you also confused about the PowerShell map network drive? Now, you come to the right place. This post of MiniTool will show you how to map network drive with PowerShell Windows 10/11 in detail.
PowerShell is a powerful graphical user interface that can access various services of an operating system as an administrator via command lines. It can be used to deal with many different works such as PowerShell get current username, PowerShell change directory, PowerShell copy files, PowerShell install SSH, PowerShell run exe, etc.
However, lots of users still don’t know what cmdlets can be used to do these works in PowerShell. For example, many people are confused about the PowerShell map network drive command line. Here we will explain this operation in detail.
What Is the PowerShell Map Network Drive Command Line
What command can be used to map network drive in PowerShell? According to a survey, the New-PSDrive cmdlet can help you create a temporary and persistent network drive on local or remote computers. It can create a shortcut for a shared drive/folder on network and assign it a drive letter under This PC in Windows File Explorer.
How to Map Network Drive with PowerShell Windows 10/11
Windows provides users with different ways to map network drive on computers, including Command Prompt, File Explorer, and PowerShell. However, many users don’t know how to map network drive in PowerShell.
Don’t worry. Here we provide 4 simple ways to map network drive PowerShell in Windows 10/11. Let’s choose one from them according to your preference.
# 1. PowerShell Map Network Drive Temporary
If you want to map a temporary network drive on Windows 10/11, you can follow the guide below. Note that the temporary network drive only exists in the current PowerShell session.
Step 1. Type PowerShell in the search box, and then right-click the Windows PowerShell and select Run as administrator. Then click on Yes to confirm it.
Step 2. In the pop-up window, type the following command and hit Enter. For instance, this command can map the MiniTool folder to the computer with the “G” drive letter: New-PSDrive -Name “G” -PSProvider “FileSystem” -Root \PC-101MiniTool.
Make sure you replace Drive Letter with the letter that is not in use such as G. Then change the DEVICE-NAME-OR-IPSHARED-FOLDER section to the computer name or IP address of the device that hosts the shared folder and the name of the shared.
New-PSDrive -Name "Drive Letter" -PSProvider "FileSystem" -Root \DEVICE-NAME-OR-IPSHARED-FOLDER
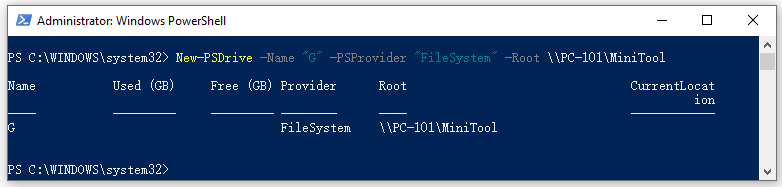
Step 3. Once done, the network-shared folder “MiniTool” should map on the computer and show in File Explorer.
# 2. PowerShell Map Network Drive Persistent
In addition, you can use the PowerShell script to map network drive persist. The persist mapped network drive will be saved in Windows instead of the specific session. For example, if you want to map network drive persistent in drive letter G, you can run the following PowerShell script:
New-PSDrive -Name "G" -PSProvider "FileSystem" -Root \PC-101MiniTool -Persist
# 3. PowerShell Map Network Drive with Credentials
Of course, you can PowerShell map network drive with credentials. To map a network drive with your username and password, you can refer to the following steps.
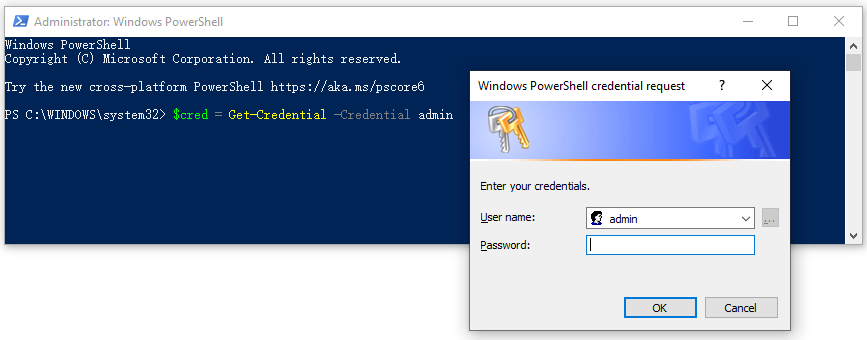
Step 1. Open the elevated PowerShell window as we explained above, and then type the following command and hit Enter to create a variable with the proper credentials. Make sure you replace Username with your account.
$cred = Get-Credential -Credential USERNAME
To map a network drive in Active Directory, you need to use the network name like networkadmin to specify the credentials.
Step 2. In the pop-up window, input your account password and click on OK to confirm it.
Step 3. Type the following command and hit Enter to map a drive with the driver letter G. Note that you need to replace the drive letter and device name according to your actual situation.
New-PSDrive -Name "G" -Root "\DEVICE-NAME-OR-IPSHARED-FOLDER" -Persist -PSProvider "FileSystem" -Credential $cred
Once done, these commands will map the shared folder as a drive on Windows 10/11
# 4. PowerShell Map Network Drive to a Local Folder
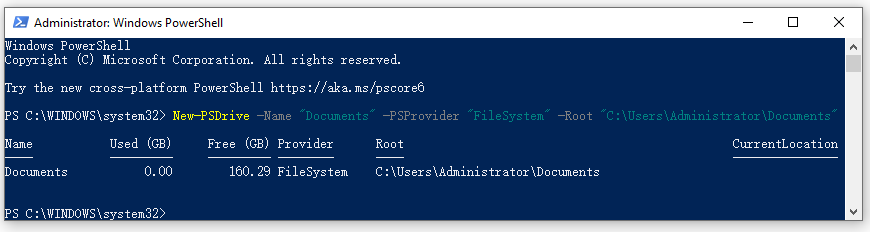
In addition, you can map a temporary network drive to a local folder so that you can access the folder quickly later. For example, to map the network drive for the C:UsersAdministratorDocuments, you can run the following command.
New-PSDrive -Name "Documents" -PSProvider "FileSystem" -Root "C:UsersAdministratorDocuments"
How to Disconnect the Mapped Network Drive with PowerShell Windows 10/11
If you want to disconnect or remove the mapped network drive in PowerShell, you can follow the guide below:
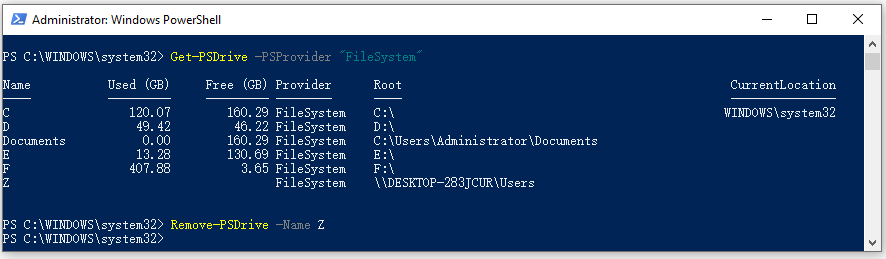
Step 1. In the elevated PowerShell window, type the following command and hit Enter to list all mapped network drives.
Get-PSDrive -PSProvider "FileSystem"
Step 2. Type the following command and hit Enter to disconnect the mapped network drive. Here you need to replace the Drive Letter with the drive letter that you want to disconnect.
Remove-PSDrive -Name Drive Letter
Further reading: If you enter some issues like file system corruption and low disk space on Windows, don’t worry. MiniTool Partition Wizard can help you fix them easily by checking file system errors, extending/resizing partitions, analyzing disk space, upgrading to a larger hard disk, etc.
User Comments :