Do you know how to share the data saved in your PC via NAS? You can do it by just mapping your network drive. This guide will show you how to map a network drive in Windows 10. In addition, if you want to manage hard drive on Windows 10 with ease, you can try MiniTool Partition Wizard.
About Network Drive
Network drive is also known as Network Attached Storage (NAS). It is a storage device on a local access network (LAN) within a business or home, allowing its contents to be accessible for all your devices within the same LAN and even remotely over the internet.
If you need to share files between colleagues when doing your work, or you simply want to stream your media from one room to the next, setting up a network drive is the feasible solution for you.
Furthermore, network drive brings convenience for users to a large degree:
- It allows Windows users to share files and store files without using up any computer resources.
- It can help Windows users back up all the computers on the network if the drive has enough capacity.
In the next content, you will find out how to map a network drive in Windows 10 easily.
Map Network Drive from This PC
You can set up a network drive with ease in This PC. After connecting your network drive to your router, you can map the network drive according to the following steps:
Step 1: Open File Explorer by right-clicking Start and selecting File Explorer from the menu. Alternatively, you can press the shortcut Windows key + E.
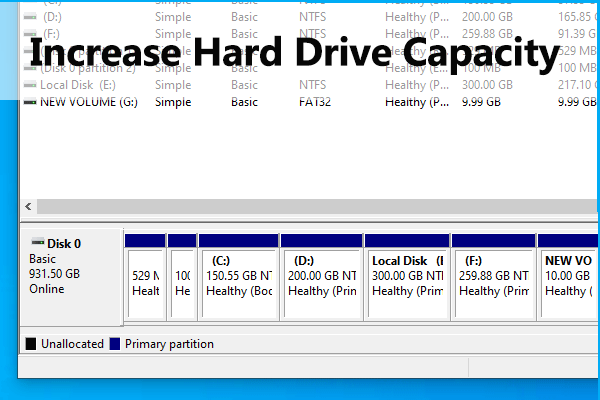
Step 2: Select This PC tab from the left panel. In the main interface, you’d better note the drive letters which have been assigned to the existing drives, because these letters cannot be assigned again to the network drive.
Step 3: Under Computer tab, click Map network drive from the upper tool panel and select Map network drive from the drop-down menu.
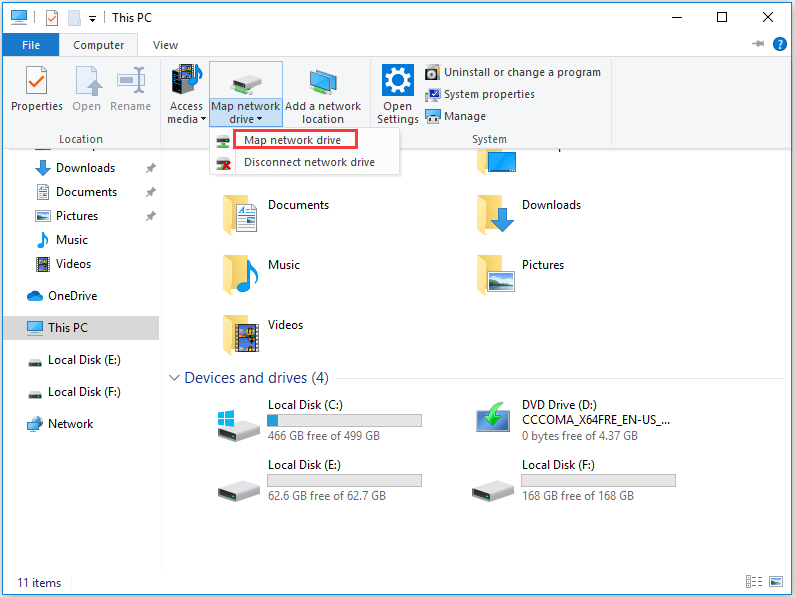
Step 4: In the Drive list, select a drive letter you want to assign for the network drive. In the Folder box, input the path of the network folder you want to map. Alternatively, you can hit the Browse button to find the target from the pop-up menu.
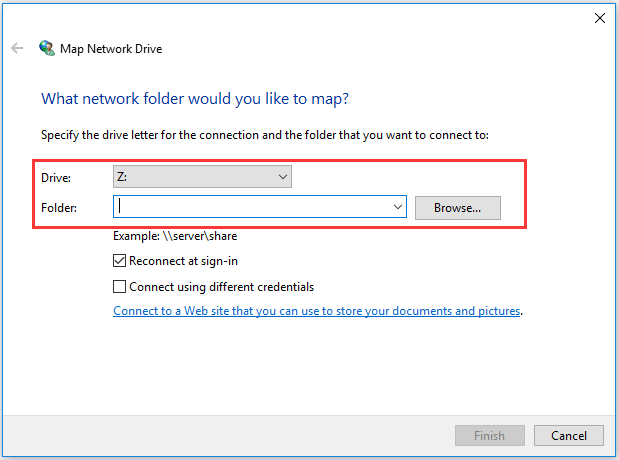
Reconnect at sign-in option is checked by default, which allows connecting the network drive every time you log on to your computer.
Map Network Drive from Command Prompt
If you have already known the network path for the shared folder, you can map a network drive quicker using Command Prompt (you can also use Windows PowerShell).
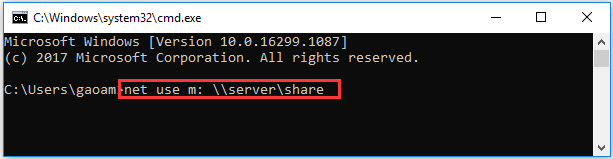
Step 1: Press Windows + R to open Run window, type cmd in the empty box and click OK to run Command Prompt.
Step 2: In general, you should type the following command according to the actual information of your network folder: net use DRIVE: PATH, then hit the Enter key.
Now you have known how to map a network drive in Windows 10, just follow the steps above to have a try.
User Comments :