When it comes to blue screen of death error, ndis.sys is always one of the most annoying ones. If you are facing the ndis.sys error unfortunately, you can keep reading this guide, where MiniTool provides 8 solutions to fix this error.
About Ndis.sys and Ndis.sys Error
NDIS is short for Network Driver Interface Specification which is one of the legitimate components of Windows operating system. It is designed to help the computer system to communicate with other connected devices and hardware on a computer network.
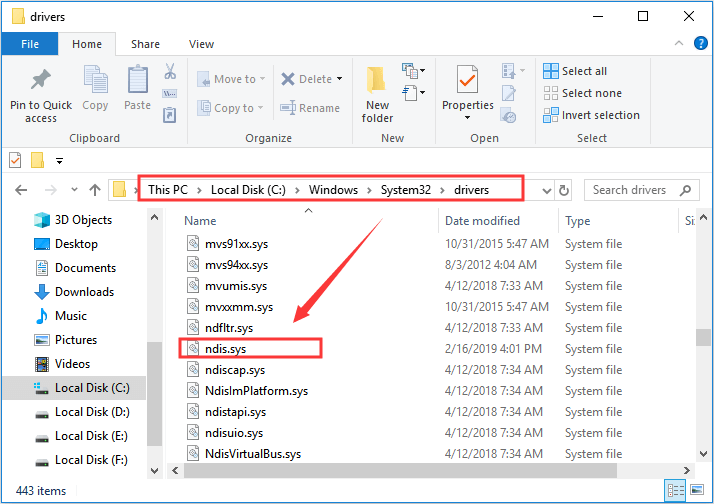
Ndis.sys, a critical system file developed by Microsoft, is an essential part of your Windows operating system. It is related to Network Driver Interface Specification and is a repository of system driver settings used by Windows to communicate with connected devices and hardware. This ndis.sys file is stored in the path of C:WindowsSystem32drivers by default.
Commonly, the file won’t bring any damages to your computer or affect computer performance. However, various factors may lead to problems related to ndis.sys file, like ndis.sys failed BSOD (with the error message driver_irql_not_less_or_equal), high latency and so on. The most likely factors of this error are as follows:
- Bad device drivers.
- Malware or virus attack.
- Corrupted or missing system files.
- Registry issues.
- Hard disk damage.
Of course, there are some other potential reasons. Some users have tried disabling the ndis.sys to fix this error, but you are not recommended to do so. After all, it is essential for the normal functioning of your Windows and it will restart automatically if you disable it.
So, what can you do to fix this ndis.sys failed error? Just continue reading this guide to get feasible troubleshooting.
Complete Guide to Fix Ndis.sys BSOD Error in Windows 10
- Update Device Drivers
- Rollback Network Drivers
- Scan Your Computer for Malware
- Temporarily Disable Your Antivirus Program
- Run SFC Scan
- Run DISM Command
- Check Your Hard Drive for Errors
- Perform A System Restore
You don’t have to try them all. Just employ these solutions one by one until you remove the ndis.sys error successfully.
Quick Video Guide:
Solution 1: Update Device Drivers
As mentioned before, an outdated or corrupted device driver is the most common reason for ndis.sys latency or blue screen error. Thus, you are recommended to update your device drivers in Device Manager at first.
You should pay attention to the driver with a yellow exclamation mark, which indicates that there are some problems with this driver. If no yellow exclamation mark appears, you’d better focus on your network adapter. Just follow the steps below to update drivers.
Step 1: Press Windows + R to open Run window. Input devmgmt.msc and click OK to launch Device Manager.
Step 2: Now, locate the driver with a yellow exclamation mark or your network driver. Right-click the target driver and choose Update driver from the context menu.
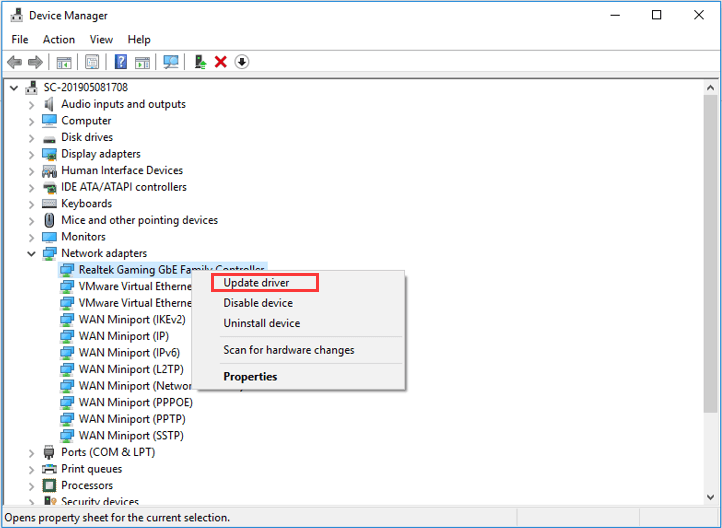
Step 3: Choose Search automatically for updated driver software to make your Windows search for the needed driver online. Then, follow the onscreen instruction to complete the driver update.
After that, you can restart your computer to see if the ndis.sys error has been solved.
Solution 2: Roll Back Network Driver
According to the report of some users, they have fixed the ndis.sys failed error simply by rolling back the recently-installed network drivers. This is a nice try if you run into the issue after updating a certain network driver.
Here’s what can you do to restore the previous network driver.
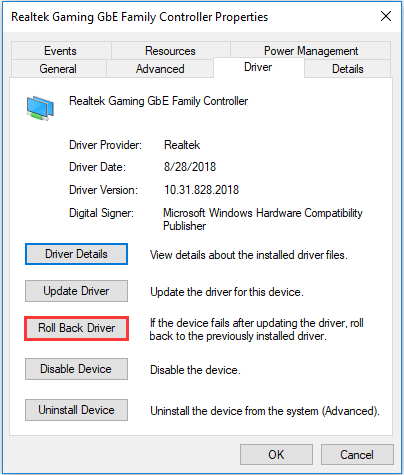
Step 1: In Device Manager, right-click the network driver that you have updated recently and choose Properties.
Step 2: When you get the following window, switch to Driver tab and click Roll Back Driver button.
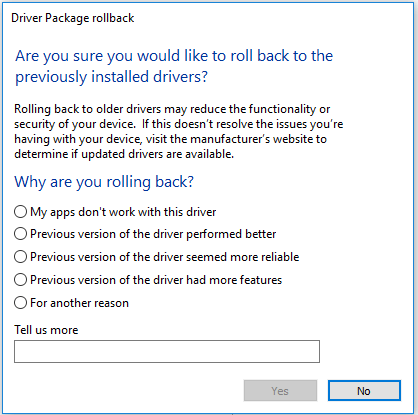
Step 3: There will be a confirmation window. You just need to choose a reason why you roll back the driver, and then click Yes button to continue.
Once it’s done, you can restart the system to check if the error is fixed.
Solution 3: Scan Your Computer for Malware
A lot of malware entities often succeed in masquerading as ndis.sys, resulting in various ndis.sys problems. So, it is necessary to scan your computer for malware and potential virus.
Apart from the third-party antivirus program, the built-in Windows Defender is also a convenient tool that can remove the malware on your computer.
Step 1: Press Windows + I to open Settings.
Step 2: Go to Update & Security > Windows Security > Virus & threat protection.
Step 3: When you enter Windows Defender Security Center, click Run a new advanced scan and choose Full scan.
Step 4: Click Scan now to start scanning your computer.
There will be a result report after the scanning is finished. If any threats are detected, just follow the onscreen suggestions to remove these threats. Then, you can reboot your computer to see if this method works.
Solution 4: Temporarily Disable Your Antivirus Program
Although your antivirus program can help to safeguard your computer, it can lead to certain issues (such as ndis.sys latency) actually. Particularly, if your antivirus is installed not long before the ndis.sys error occurs, it might be the culprit.
So, you can temporarily disable your newly-installed antivirus program. If the ndis.sys failed error is gone after disabling it, you should stop using this program and ask its manufacturer for help. Or, you can uninstall the program and switch to another reliable one.
Solution 5: Run SFC Scan
If the above simple methods fail to fix the issue, chances are that the related critical system files (not limited to ndis.sys file) get corrupted or missing. If so, you can employ the System File Checker tool to fix it.
Step 1: Type cmd in the Run window and press Ctrl + Shift + Enter to open Command Prompt with administrative privilege.
Step 2: Input the command sfc /scannow and press Enter to start the scanning.
Step 3: You just need to wait patiently until the system scan is 100% completed.
You will get a scanning result once the verification process finishes. If any corrupted files are detected, you need to exit the tool and restart your computer during which the problematic system files will be replaced by a cached copy.
Solution 6: Employ DISM Tool
As for the current ndis.sys BSOD or latency problem, it is worthy of taking a shot at Deployment Image Servicing and Manage (DISM) tool.
This is a rather simple method, just run Command Prompt as administrator and input the following commands and press Enter after each command:
- DISM /online /Cleanup-Image / ScanHealth
- DISM /Online /Cleanup-Image /RestoreHealth
You are required to wait for a few minutes. Then, restart your computer after the process is finished. Now, this error should have been removed.
Solution 7: Check Your Hard Drive for Errors
Does the ndis.sys failed error still exist after trying all the solutions above? Don’t panic. It is time to check your hard drive for file system errors. Besides the issues of drivers, virus and even the system file itself, corrupted hard drive is also a reason for ndis.sys problems.
To help you check your hard drive more effectively, I provide 3 ways for you – you can make it in File Explorer, Command Prompt and a powerful third-party program.
Use File Explorer
For most Windows users, checking hard drive in File Explorer should be the most convenient way.
Step 1: Double-click This PC icon in the Desktop to open File Explorer.
Step 2: In the Devices and drives section, right-click one of the drives and choose Properties.
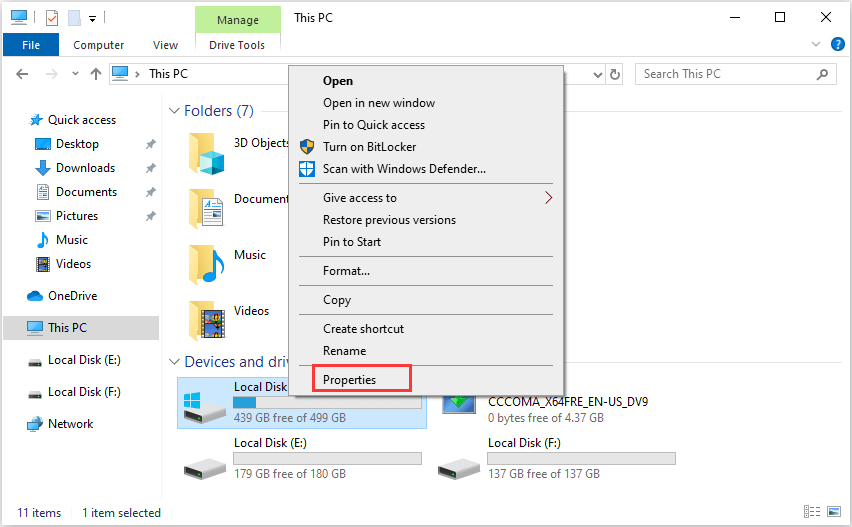
Step 3: In the new window, switch to Tools tab and click Check button in Error checking section.
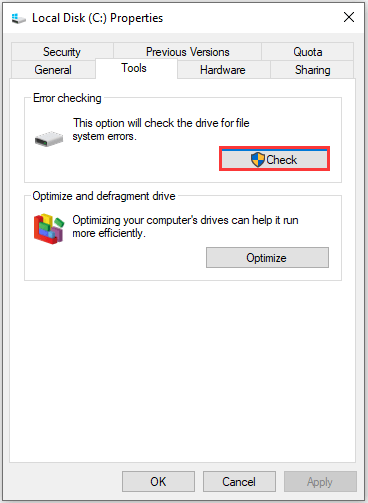
Step 4: Another window will pop up. Just click Scan drive to start checking the selected drive. Then, all you need to do is waiting for the scanning result.
You should perform the same operation for the left drives in this section to make sure the potential file system error on your disk is removed.
Use Command Prompt
You can also check your disk with Command Prompt, but note that you need to give the administrative privilege to this tool.
In the Prompt, type the command chkdsk /f /r and hit Enter key to start checking your disk. Then, wait for the scan to finish and restart your computer. In this way, the ndis.sys error should be solved as expected.
See also: If you have been waiting for a long time after executing CHKDSK command, you might need some solutions in this post – Quickly Fix: CHKDSK Gets Stuck in Windows 10.
Use MiniTool Partition Wizard
If your File Explorer is not responding or you find it troublesome to type the command, a third-party might be a good choice for you.
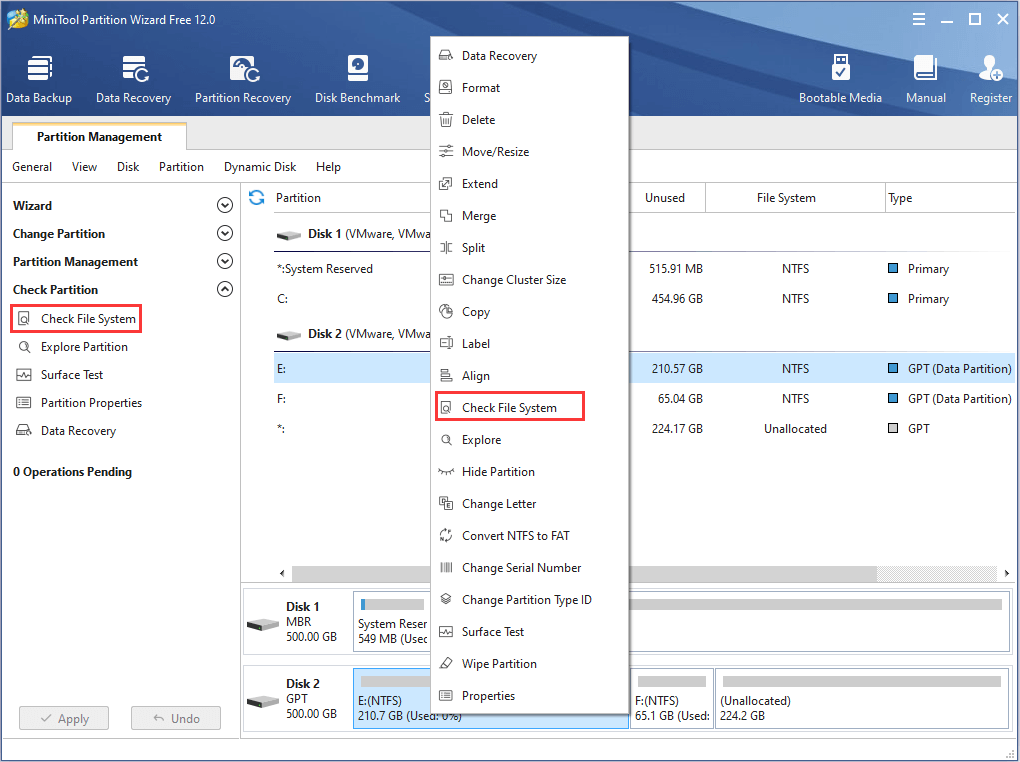
You can check your hard drive easily with the help of MiniTool Partition Wizard. This professional program allows you to better manage your partitions and disks. As for the file system error on your hard drive, MiniTool Partition Wizard provides a feature of Check File System.
Let’s see how to use this feature to check and fix the file system errors.
Step 1: Download and install MiniTool Partition Wizard on your computer. Launch it to get the main interface.
MiniTool Partition Wizard FreeClick to Download100%Clean & Safe
Step 2: Select a partition on your disk and choose Check File System from the left pane. Alternatively, you can right-click the partition and choose Check File System from the pop-up menu.
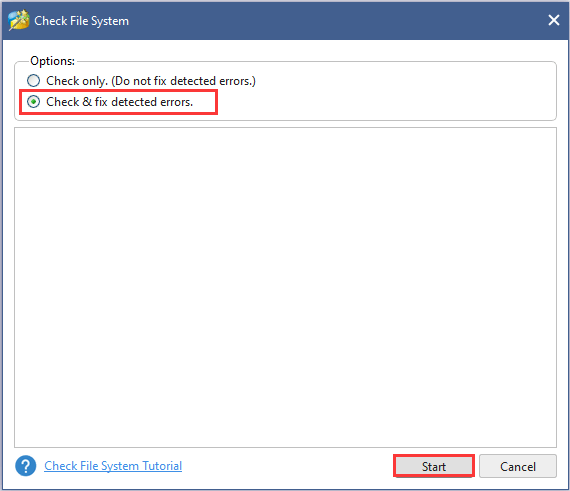
Step 3: A new window will pop up. You need to choose the scan option of Check & fix detected errors and click Start to continue.
Step 4: After checking and fixing the error on the selected partition, you need to repeat the same operation to the rest of partitions on your disk.
The ndis.sys should be removed by using any of the methods to check your hard drive if it’s caused by file system errors.
Solution 8: Perform A System Restore
If all the solutions fail to resolve this ndis.sys error, you can consider performing a system restore to bring your Windows back to an earlier date.
To use this method, the system restore feature should have been enabled before, and at least one system restore point should be created. You can still have a try even if you didn’t create one, as your Windows often creates restore point automatically when something important occurs to your PC.
Here’s how to do it:
Step 1: Type restore in the Search bar and choose Create a restore point from the results.
Step 2: In the System Properties window, click System Restore under System Protection tab.
Step 3: Choose a restore point and click Scan for affected programs to check the programs you need to reinstall after this operation.
Step 4: Click Next button. Then, follow the onscreen instruction to finish the process of restoring.
Bottom Line
That’s all I want to share with you about the ndis.sys error. Hope the solutions introduced in this guide could help you get rid of it easily and successfully.
If you have any problem using these methods, please feel free to leave a message below or send a message to [email protected].
Ndis.sys FAQ
As other device drivers, you can also update your NDIS driver in Device Management:
- Open Device Management by choosing it in Start menu.
- Expand Network adapters.
- Right-click the NDIS driver you want to update and click Update driver.
- Choose Search automatically for updated driver software.
RAS (Remote Access Service) refers to a variety of computer networking tools depending on the context where it is used, while NDIS (Network Driver Interface Specification) represents a specific type of networking software.
The former uses a modem to connect remote users to the network, and the latter allows multiple network protocols to run in tandem without multiple NICs.
User Comments :