Want to run Windows on Chromebook? Do not know how to do that? Read the post. In this post, MiniTool discusses the Windows installation on a Chromebook in detail and shares a good utility that you can use after installing Windows on Chromebook.
As to Windows laptop vs Chromebook, which one is better? Some users may choose Chromebook because it can be hundreds of dollars cheaper than a comparable Windows PC and it is easy to carry and boots quickly.
However, some such users now wonder whether they can run Windows on Chromebook. The reason could be that a notebook PC powered by Microsoft Windows offers several the following advantages:
- Windows offers the most flexibility to run just about any app, including games;
- Windows supports Chrome as well as other main browsers, like Firefox.
Can You Run Windows on Your Chromebook?
Chromebook officially does not support Windows, but that does not mean that you cannot run Windows on Chromebook. Many Chromebook users can experience Windows 10 on Chromebooks in several unofficial ways.
How to make sure whether you can install Windows on Chromebook? You need to carefully follow the instructions one by one.
- Check your Chromebook specifications. Firstly, it should have an Intel processer. To do that, flip your Chromebook over and find its model. Then go to Google to figure out what the specifics are. Secondly, it should be 32GB.
- Go to the website where Coolstar offers a list of Chromebook models that you can install Windows 10. Plus, detailed information about which built-in hardware components will or will not work afterward is also displayed.
- Go to the website where allows you to select your model of Chromebook and get instructions for Windows.
If you still have some doubts, you can go to the community devoted to installing Windows on Chromebook.
Things You Should Know About Installing Windows on Chromebook
Have you ensured whether you can run Windows on your Chromebook? If you can install Windows on Chromebook, let’s continue to learn about the things related to the installation of Windows on Chromebook.
Before Installing Windows on Chromebook
1. Secure the data on your Chromebook:
Undoubtedly, the installation process will destroy all data on your Chromebook. Furthermore, there are always certain risks in system installation. That means that you should first back up the important data stored in your Chromebook to prevent any possible data loss.
2. Prepare some devices:
There are three important items you should prepare for. You need a USB keyboard and mouse because your Chromebook’s built-in keyboard and mouse will not work in the installation. Furthermore, you need to prepare two (blank) USB flash drives. The one (at least 8GB of space) will be used to create a Windows installation USB on a Windows PC. And the other one is used to save the Chromebook’s firmware backup.
Before creating a Windows installation USB on a Windows PC and using a USB drive for storing the firmware backup, you should transfer the important files in case of data loss. Then you should make a Windows installation USB. If you don’t know how to do that, you can refer to the guide.
3. Plug your Chromebook into power:
The installation process takes a while, so you should plug your Chromebook into power in case the battery runs out.
During Installing Windows on Chromebook
During the installation process, your Chromebook might freeze or stuck. If you run into this situation, you can force it to shut down by holding the Power button for ten seconds or so.
How to Install Windows on Chromebook?
If you have made sure that you can run Windows on Chromebook, then you can follow the steps below to install Windows on Chromebook.
- Disable the write protection feature;
- Replace the Chromebook’s BIOS with the UEFI BIOS;
- Install Windows on Chromebook;
- Install third-party drives for hardware.
Stage One: Disable the Write Protection Feature
As a Chrome user, you may have ever known that the BIOS of Chromebook is locked by a special hardware feature (a write-protect screw/switch) that prevents you from modifying the BIOS. So, to replace the BIOS of the Chromebook, you need to remove the write-protect screw/switch. The tutorial is below.
Step 1: Gain access to the motherboard of your Chromebook.
- Turn off your Chromebook;
- Flip it over and then unscrew the bottom.
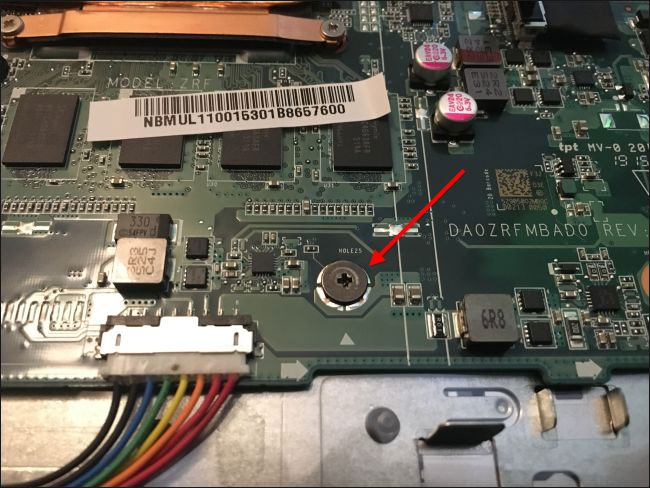
Step 2: Locate the write-protect screw on the motherboard.
How to locate this screw? The write-protect screw looks visibly different from the other screws on the motherboard.
- The screw is a dark gray color, while the other screws are bright silver.
- There is a bright silver underneath the screw, while the other screws have a bronze color under them
If you can’t distinguish the write-protect screw from other screws on the motherboard, you can search the web for the model name and number of your Chromebook.
Step 3: Remove the write-protect screw and then re-attach the bottom onto your Chromebook.
Stage Two: Replace the Chromebook’s BIOS with the UEFI BIOS
Now, you need to replace the Chromebook’s BIOS with the UEFI BIOS. To do that, you should first enable Developer Mode to get full root access.
Before enabling Developer Mode, you should keep the following TWO WARNINGS in your mind.
Data on your Chromebook will BE WIPED when you enable or disable Developer Mode.
Google does not offer support for Developer Mode.
Now, you can follow the tutorial below to enable Developer Mode.
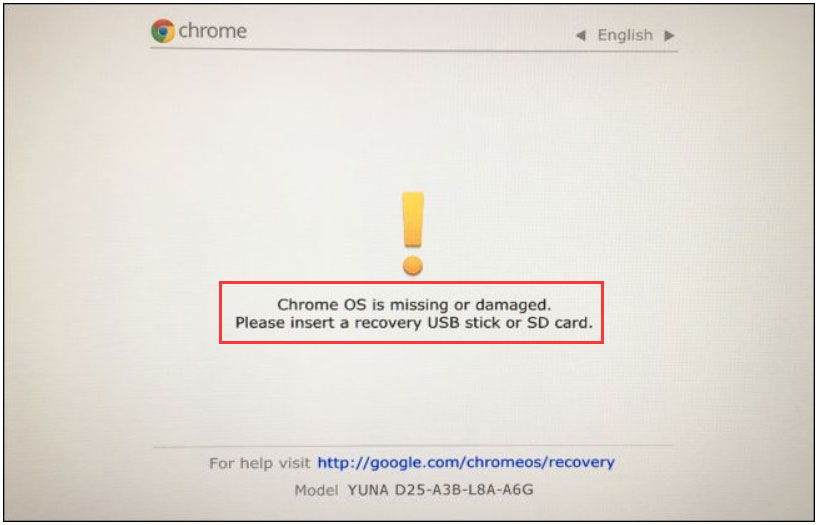
Step 1: Boot your Chromebook into Recovery Mode by pressing Esc + Refresh (F3) + Power.
Under Recovery Mode, you will receive a message that “Chrome OS is missing or damaged. Please insert a recovery USB stick or SD card”. Take it easy as this message is not real and you need to press Ctrl + D at the current screen.
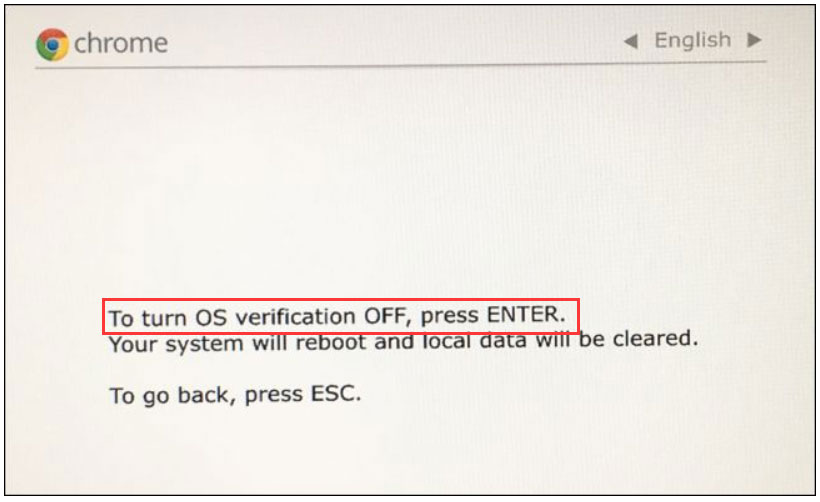
Step 2: Press Enter to enable Developer Mode.
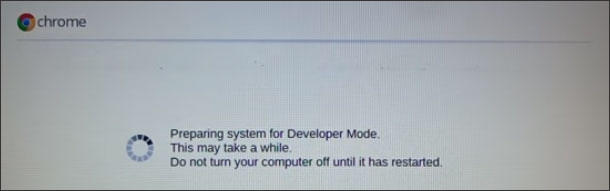
After a few seconds, you will receive another message that “To turn OS Verification OFF, press ENTER”. Follow the instruction and then you will successfully enable Developer Mode.
Following the several steps, you should have successfully enabled Developer Mode on your Chromebook. You should continue to replace the Chromebook’s BIOS with the UEFI BIOS.
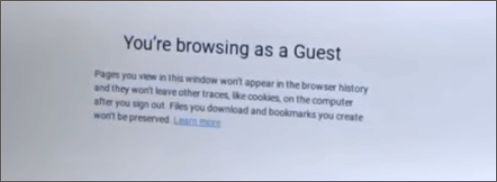
Step 1: Follow the on-screen instructions. When the Sign-in window shows up, choose Browse as Guest.
Step 2: Once you see You’re browsing as a Guest, press Ctrl + Alt + T to open a terminal window.
Step 3: Access a Linux shell environment by typing shell into the terminal window and hitting the Enter key.
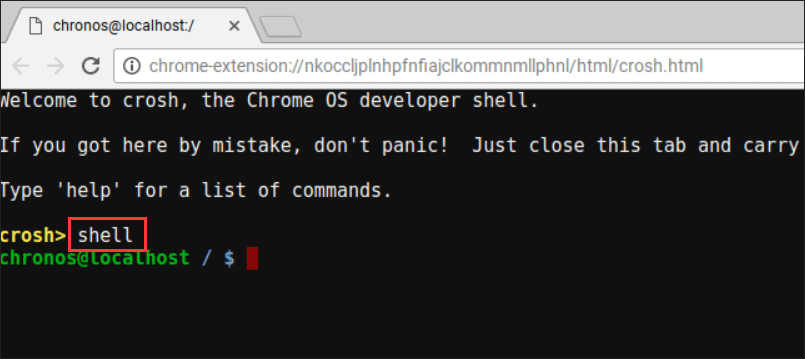
Step 4: Replace the Chromebook’s BIOS by running the following command in the terminal window. To run this command, do not forget to hit the Enter key.
cd ~; curl -L -O http://mrchromebox.tech/firmware-util.sh; sudo bash firmware-util.sh
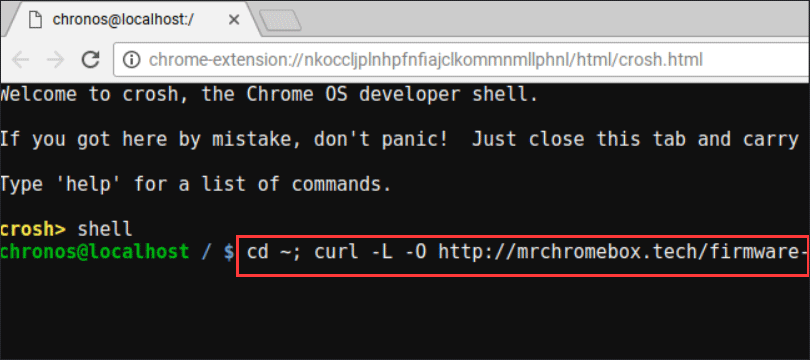
Once you run this command, it will change your home directory, download a script file that will replace your Chromebook’s BIOS (go to the website to know more information about this script), and run with root privileges.
Step 5: You will get the following list. In the list, you should choose Install/Update Custom coreboot Firmware (FULL ROM) by pressing 3 and Enter.
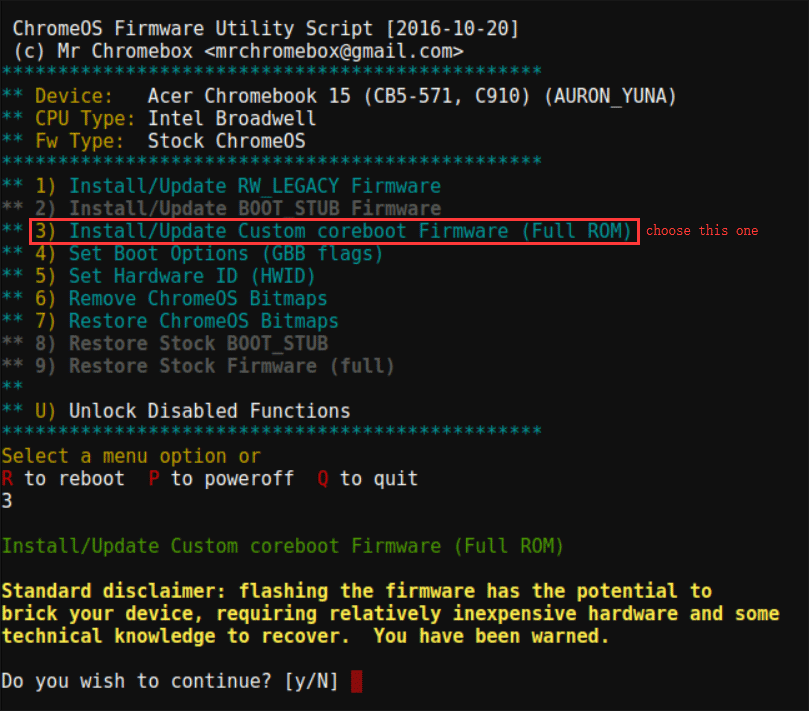
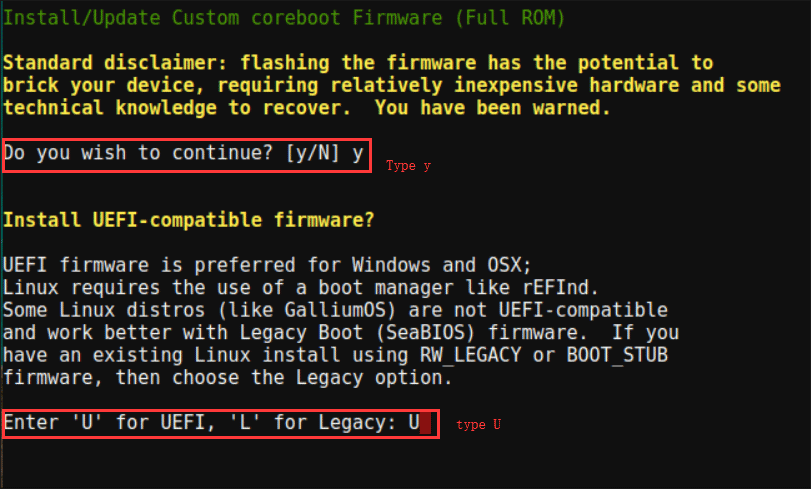
Step 6: You will be asked whether to continue. To continue, click y. After that, you receive another question “Install UEFI-compatible?”. Here you should choose UEFI by pressing U to boot Windows.
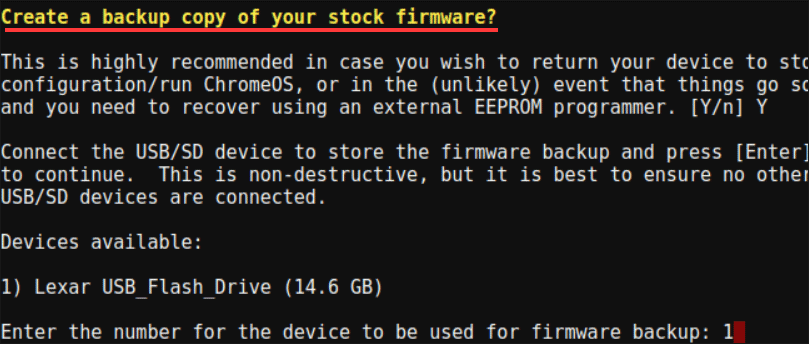
Step 7: You will be asked whether to create a backup copy of your stock firmware. You should do that if you want to restore the Chromebook’s original BIOS more easily in the future.
If you want to do that, follow the instruction:
- Type Y and Enter to confirm that you want to create a firmware backup copy.
- Connect one of the prepared USB drives to store the backup copy and hit Enter.
- Enter the number for the device to be used for firmware backup and press Enter.
Step 8: When the backup process ends, you should remove the USB drive and then hit the Enter key to continue. After that, the script will replace the Chromebook’s BIOS. When this process finishes, connect the Windows installation media to your Chromebook and then power off or restart your Chromebook.
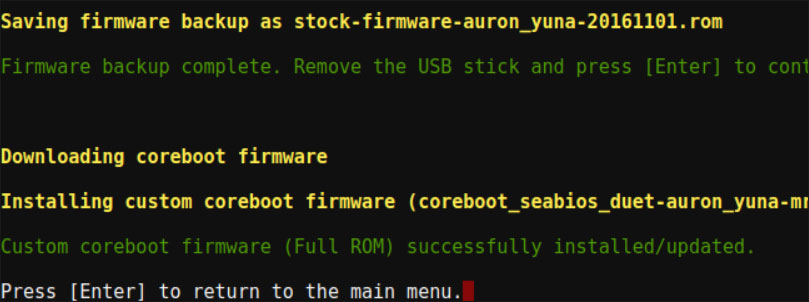
Now the process of modifying the Chromebook’s BIOS comes to an end, and you can reinstall the write protection screw if you want.
Stage Three: Install Windows on Chromebook
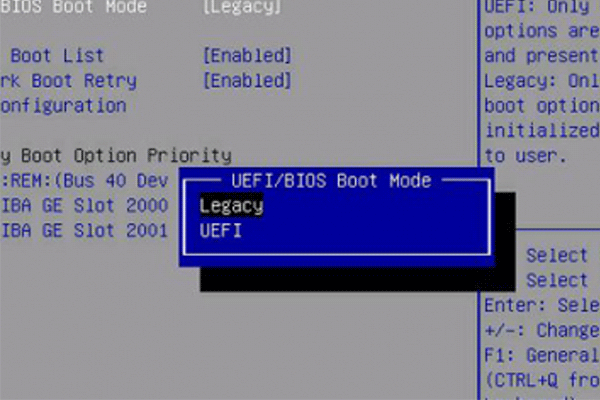
When your Chromebook powers on, you should see the Windows Setup window as the following image screenshot shows if everything goes well. If it does not automatically boot from the Windows installation USB, you can press any key when Select Boot Option shows up on your screen and then choose the USB drive under the Boot Manager option.
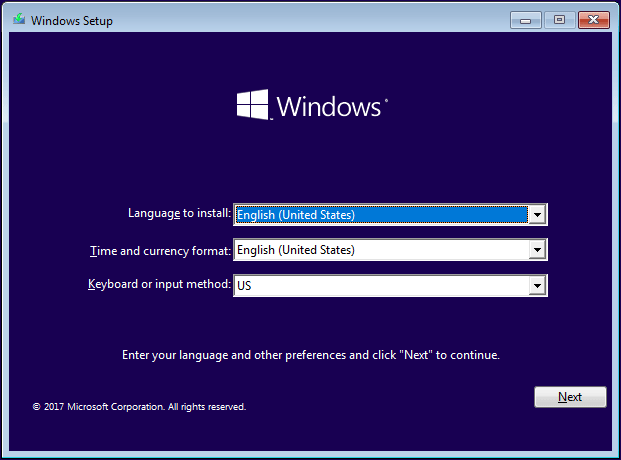
Then, connect the prepared mouse and keyboard to your Chromebook. You can now follow the on-screen instructions to install Windows on Chromebook.
Step 1: Confirm the language, time, and keyboard on the current window and then click Next.
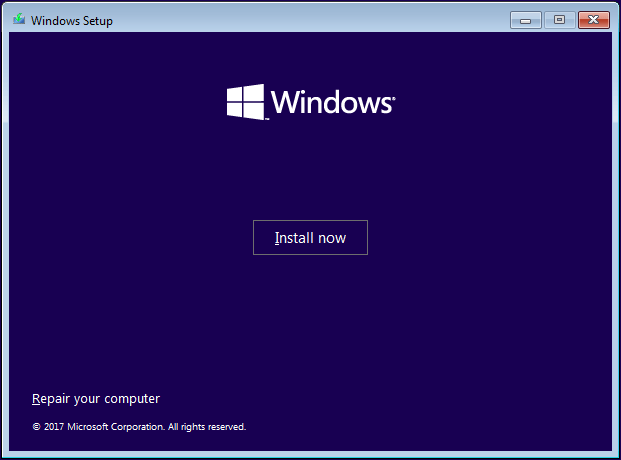
Step 2: Click the Install Now button at the Windows Setup window.
Step 3: You will be asked to enter the license key. If you do not have one, you can choose I don’t have a product key and choose a Windows 10 version you would like to install on your Chromebook.
Step 4: Accept the license and click the Next button to continue.
Step 5: Choose the Custom: Install Windows only (advanced) option.
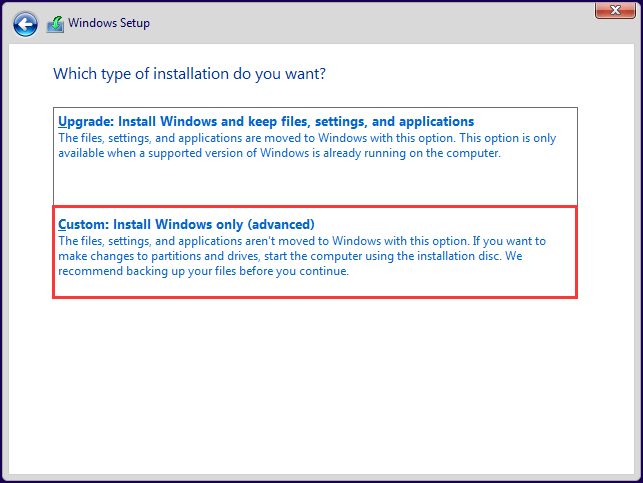
Step 6: Delete all the internal partitions so that you can install Windows on the unallocated space and then click Next.
Step 7: Wait patiently until the installation process comes to an end.
Stage Four: Install Third-party Drives for Hardware
You can now run Windows on Chromebook but you should continue to install third-party drivers for the hardware to take advantage of the hardware of your Chromebook.
Since the drivers are third-party, they are not properly signed and Windows won’t normally allow you to install them. However, you can enable test signing to break the limitation. To enable test signing, you should use the Windows utility Command Prompt.
Step 1: Open Command Prompt as administrator.
- Type Command Prompt in Cortana’s search bar.
- Right-click the result to choose Run as administrator.
Step 2: Run the following command.
bcdedit -set testsigning on
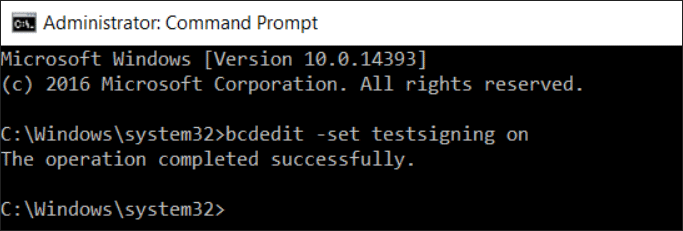
Step 3: Restart your Chromebook after executing the command.
When your Chromebook starts, you can install the third-party drivers according to the second website I mentioned in Can You Run Windows on Your Chromebook. During the installation, Windows will display a security warning and you should agree to install these drivers if you want to continue.
Bonus for Users Who Running Windows on Chromebook
You have already installed Windows on your Chromebook and the necessary drivers are prepared. Then, you can download some useful Windows-based programs. Here I would like to introduce one of them that is MiniTool Partition Wizard.
MiniTool Partition Wizard FreeClick to Download100%Clean & Safe
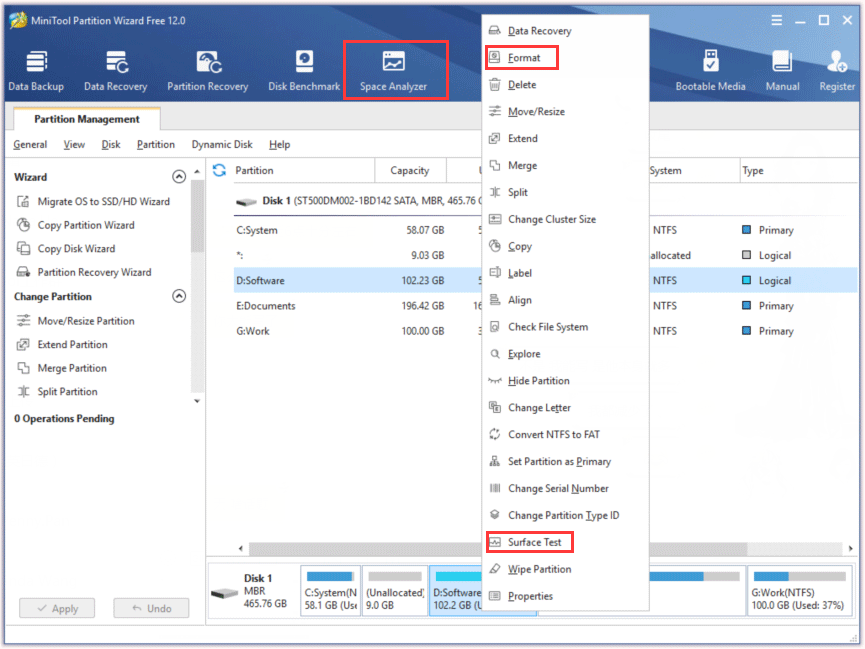
Although this software is not completely free, its free version can help you complete the following things with ease:
Analyze disk space:
As we know, most Chromebooks come with between 16GB and 64GB of internal storage (being eMMC or SSD). The internal storage is small. When space is dying out, you can run MiniTool Partition Wizard to analyze the disk space to figure out what files are covering lots of space.
Format external storage devices:
To expand the limited internal storage of the Chromebook, you can add an external storage device (such as an SD card). Before using it, you need to format it. MiniTool Partition Wizard is one of the excellent SD card formatters that you can use in this situation.
Check the disk health:
SSDs can have some bad sectors. To check whether your Chromebook’s SSD has bad sectors, you can try the Surface Test feature of MiniTool Partition Wizard.
Bottom Line
Have you installed Windows on your Chromebook? Please leave your opinion in the comment zone. Your comments will be useful for other Chromebook users who are seeking a tutorial on installing Windows.
If you have any problems with using MiniTool Partition Wizard, please let us know via [email protected]. We will reply to you ASAP.
Install Windows on Chromebook FAQ
There are main four steps:
- Disable the write protection feature;
- Replace the Chromebook’s BIOS with the UEFI BIOS;
- Install Windows on Chromebook;
- Install third-party drives for hardware.
User Comments :