A great many people don’t know how to make a Minecraft server Java on Windows 10/11. If you are also trying to figure it out, this post of MiniTool is worth reading. It provides a full guide on the Minecraft server setup and explain other related information.
Minecraft is a widely popular video game where you can create a world for an adventure of limitless possibilities. For lots of novices and even experienced users, however, many operations are unfamiliar, such as how to set up Raspberry Pi Minecraft server, how to increase Minecraft FPS, and how to set up a Minecraft server. In this post, we will elucidate an ultimate guide for Minecraft server setup on Windows 10/11.
![Xbox IP Finder | How to Pull IPs on Xbox? [Full Guide]](https://images.minitool.com/partitionwizard.com/images/uploads/2022/08/xbox-ip-finder-thumbnail.jpg)
Can You Set Up a Minecraft Server for Free
Can you make s Minecraft server for free? Of course, the answer is “Yes”. You can create your own private Minecraft server Java using the free server software provided by Mojang. How to create a Minecraft server? The Minecraft server setup is relatively complex and time-consuming, so we write a full guide to explain this process. Let’s keep reading.
Important Things to Know Before the Minecraft Server Setup
Before you start creating a Minecraft server Java version on Windows 10/11, it’s necessary to know something important. Here we summarize them as follows:
Recommended System Requirements for the Minecraft Server Setup:
- Players: 3-5
- CPU: Intel Core-Based CPUs or AMD K8-Based CPUs and better
- RAM: 3GB or more
- Hard Drive: >at least 18 GB free space
- WAN Up/Down: 8 Mbit/s – 4 Mbit/s
If you don’t know how to check your computer specs, you can refer to this post. In addition, you should be familiar with your network configurations, including router configuration, IP, TCP, UDP, DHCP, ports, etc. Once you’re ready, let’s see how to make Minecraft servers on Windows 10/11.
How to Make a Minecraft Server Java on Windows 10/11
Minecraft servers allow players to play online or via a local network with their friends. However, lots of people don’t know how to set up a Minecraft server on Windows 10/11. Don’t worry. Here we will provide a complete guide that includes 7 simple parts.
Note: Settings up a Minecraft server requires to change your home network configurations. So, make sure that you know what you are doing. If you want to purchase a small private server for friends, make sure to check out the Minecraft Realms.
Part 1. Get the Latest Version of Minecraft Java Edition
First of all, you need to install Minecraft Java edition on Windows 10/11. If you have it installed, you can skip this part and proceed to part 2. Don’t know how to download Minecraft Java edition for Windows? This post provides you with detailed steps.
Part 2. Get the Latest Version of Java
How to make a server in Minecraft Java? To set up the Minecraft server on Windows 10/11 smoothly, make sure you have the latest version of Java installed. You can follow the steps below to check Java version first:
Step 1. Type cmd in the Search box, and then right-click the Command Prompt app and select Run as administrator.
Step 2. In the elevated Command Prompt window, type the java -version command in it and hit Enter. Then you can view the installed Java version.
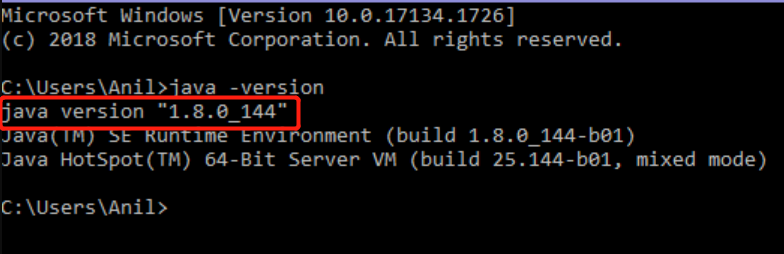
Step 3. If you haven’t the latest Java installed on Windows 10/11, you can refer to the following guides to install it.
- Download, Install, and Update Java 32 Bit & 64 Bit [JDK vs JRE]
- Java Runtime Environment Download and Install for Windows 10/11
Part 3. Get the Latest Version of Minecraft Server
Now, it’s time to download the Minecraft server software on Windows 10/11. Follow the steps below to get the latest version of Minecraft server.jar file.
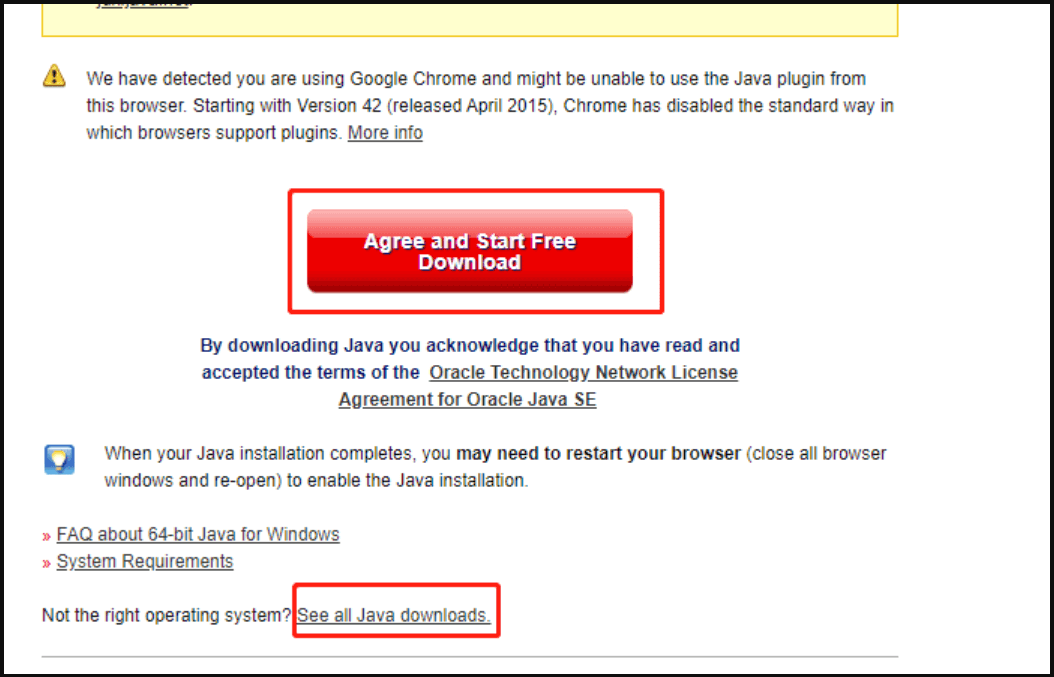
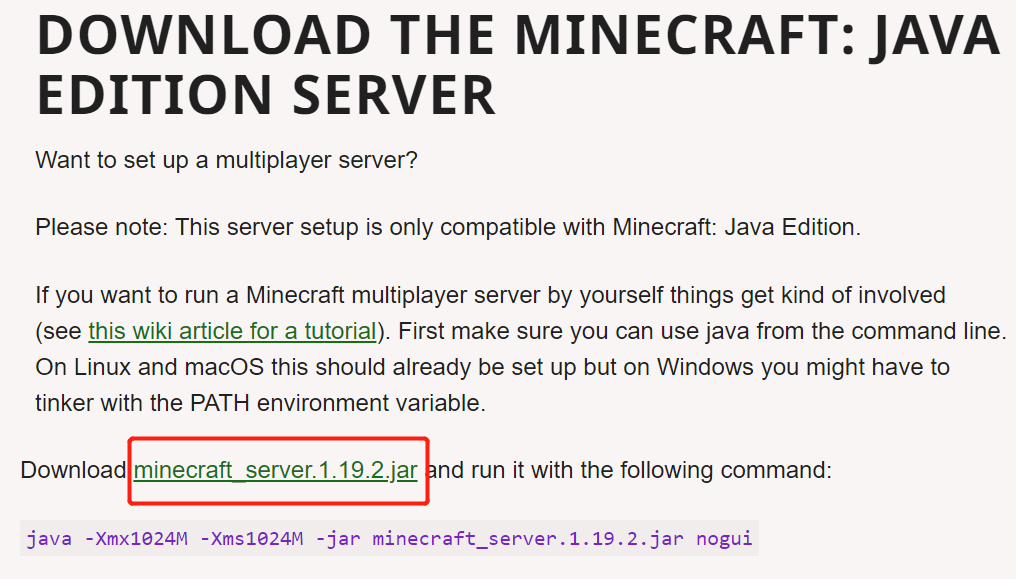
Step 1. Click here to open the Minecraft Server download page and click on the minecraft_server.jar link.
Step 2. Select a location to save Minecraft Server downloaded jar file. If you are prompted with a warning message, click on Keep.
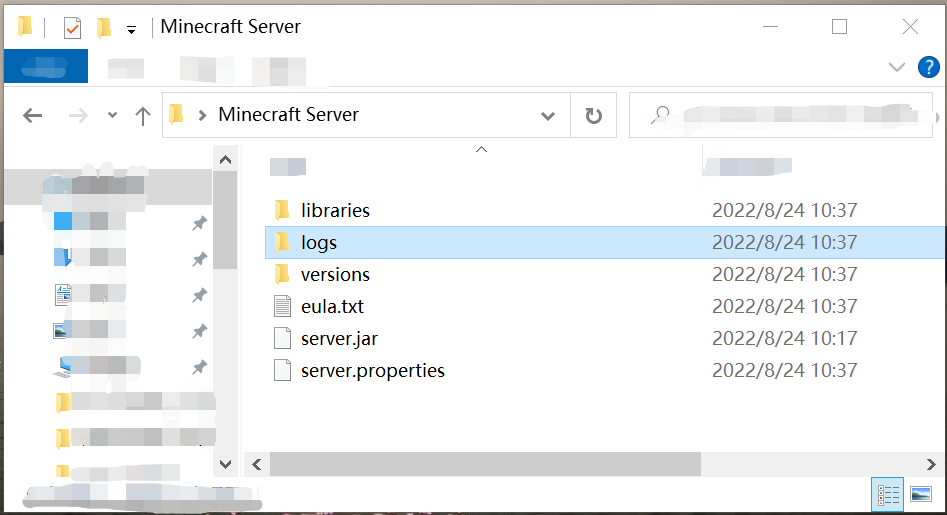
Step 3. Before running this file, you can create a empty folder for it by right-clicking the desktop and selecting New > Folder. Then name the folder like Minecraft Server and move the server.jar file into the folder.
Step 4. Right click the server.jar file and click on Open to tun this software. Then it will create some configuration files for the Minecraft server setup and they will be placed in the newly created folder.
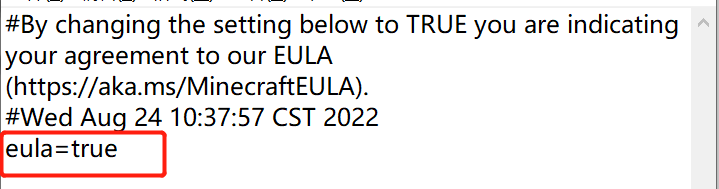
Step 5. You need to accept the EULA agreement for the server. Inside the Minecraft Server folder, right click the eula >file and select Open with notepad.
Step 6. With the EULA file opened in Notepad, change the eula=false to >eula=true and click on Ctrl + S to save it.
Step 7. Inside the Minecraft Server folder, right click the server.jar file and select Open to download more required folders/files. Then you should plenty of new text documents are downloading in the Mincecraft sever window.
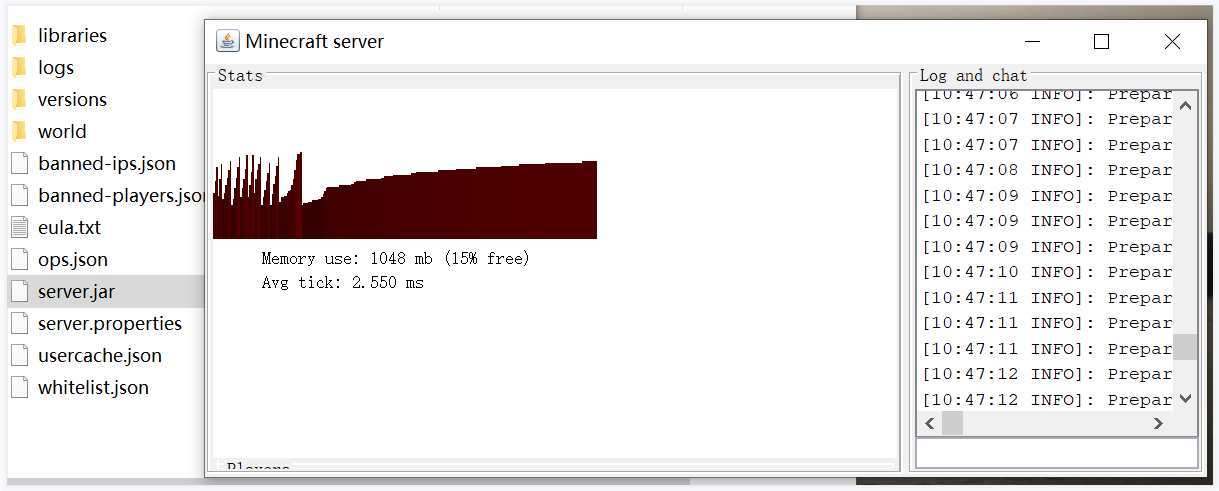
Once done, the Minecraft server should be launched officially and you can find your server name in the Multiplayer tab when your friends are the same internet connection with yours. If you want to let your friends join in the game server from a different internet connection, proceed to the following parts.
Part 4. Create a Batch File for the Minecraft Server
To run the Minecraft server smoothly and prevent as much lag as possible, you can create a batch file. Here’s how:
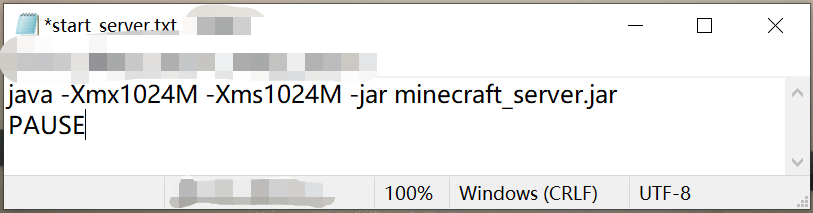
Step 1. Open the Minecraft Server again, right click empty space and select New > Text Document to create a new document, then name it start_server>.
Step 2. Double click the start_server file to open it in Notepad and add the following texts in it. These commands will add more RAM to Minecraft and help the server run smoothly.
Make sure you replace the minecraft_server.jar with the exact name of the .jar file.
ava -Xmx1024M -Xms1024M -jar minecraft_server.jar
PAUSE
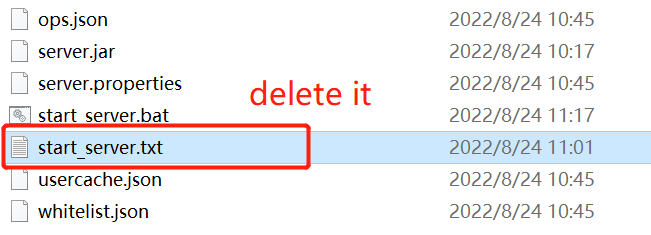
Step 3. Select File > Save as and change the Save as type to All Files, and add .bat at the end of the filename and click on Save. Then you can delete the old start_server file.
Once finished, you can launch the Minecraft server with the start_server.bat file and see if it launches correctly. If not, make sure you have the correct .jar file name that the command prompt need to launch.
Part 5. Set up the Minecraft Server Properties
This part shows you how to customize the kind of Minecraft game you want to play in the server.
Step 1. Inside the Minecraft Server folder, right click the server.properties file and open it with Notepad.
Step 2. In the Notepad window, you will find a lot of properties. Here are the properties that you may mostly want to set up:
- gamemode=creative (let players to build, break, and fly in the game)
- spawn-monsters=false (stop monsters and dangerous enemies from spawning)
- pvp=false (disable the ability of players to damage each other)
- enable-command-block=true(let the command block be used)
- max-players=the amount of players that you want to host in the server
- level-name=the name of your new map
Step 3. After changing these properties, click Ctrl + S to save them.
Part 6. Port Forward the Minecraft Server
To let your friends connect to the server from different internet connections, port forwarding the Minecraft server is required. If you are unclear about the procedure, you can get detailed steps from the post. After port forwarding, you can read this article to see how to add friends to the Minecraft server.
Part 7. Connect to the Minecraft Server
Now, let’s see how to connect the Minecraft server you just created.
Step 1. Open the Minecraft Server folder again and run the start_server.bat file to launch the server.
Step 2. Once the Minecraft is launched, go to the Multiplayer tab on the main menu and click on Add Server.
Step 3. Type your server name under the Server Name section and type your public IP address under the Server IP address section, and press the Done button.
You may need to enter a colon plus and port (25565) after the server address.

Step 3. Back to the Multiplayer tab, then you will see the listed server. Select the server and click Join Server. Now, you should be connected to the server.
How to make a Minecraft server Java version on Windows 10/11? Now, I believe that you already have known the answer. If you have any question or suggestions, leave them in the following comment area.
Further Reading: Do you want to manage your partition and disk on Windows effectively? MiniTool Partition Wizard is a good choice that can help you extend/resize/delete partition, convert a disk to MBR/GPT, migrate OS, etc.
User Comments :