A lot of users complain about the Apps & features taking up huge storage space on Windows 11/10. Are you also troubled by the issue? Don’t worry. This post from Partition Magic shows you how to fix the problem and stop it from occurring again.
Apps & features is a category in Windows Storage settings that lists all the installed applications and services on your computer, along with the estimated storage usage. It enables you to uninstall apps from here and free up disk space.
However, you may encounter Apps & features taking up huge disk space, even hundreds of GBs, like the one from the answers.microsoft.com forum:
Why does Apps & features say it's taking up more storage than all my apps combined? When I go to storage settings, it shows that apps & features takes up 13.9 GB of storage, when the sum of my apps only takes up about 4 GB.https://answers.microsoft.com/en-us/windows/forum/all/why-does-apps-features-say-its-taking-up-more/be722adc-9716-4f7a-931c-269c76985507
Why Are Apps & Features Taking up Huge Storage Space
The main reasons for Apps & features taking up disk storage is that you have too many hogging apps installed on the computer. If you have never cleaned up any temporary cache or data produced by apps, you may encounter the problem. Besides, the issue can be caused by a known bug in the Storage settings.
How to Fix Apps & Features Taking up Huge Storage Space
This part summarizes 3 effective methods to clean up Apps & features storage space on Windows 11/10. Try them one by one, and you should get rid of the trouble.
Solution 1. Check What Is Taking Up Your Disk Space
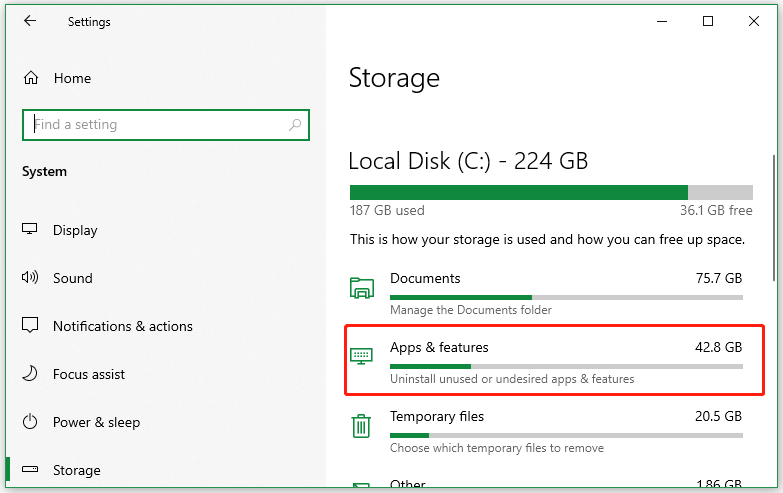
When opening the Storage Settings window, you will find out that the Apps & features categoty is taking up more disk storage than all your apps combined. However, the actual disk usage of each app produced is not visible in the Storage Settings.
Do you want to know what is taking up space on your disk? MiniTool Partition Wizard makes this super easy. It’s an all-in-one partition disk manager that can analyze disk space usage and delete all unnecessary files permanently.
What’s more, this software can partition hard drives, clone hard drives, change cluster size, convert MBR to GPT without data loss, migrate Windows OS to SSD, recover hard drive data, rebuild MBR, and so on. Here’s how to clean up Apps & features storage space using MiniTool Partition Wizard.
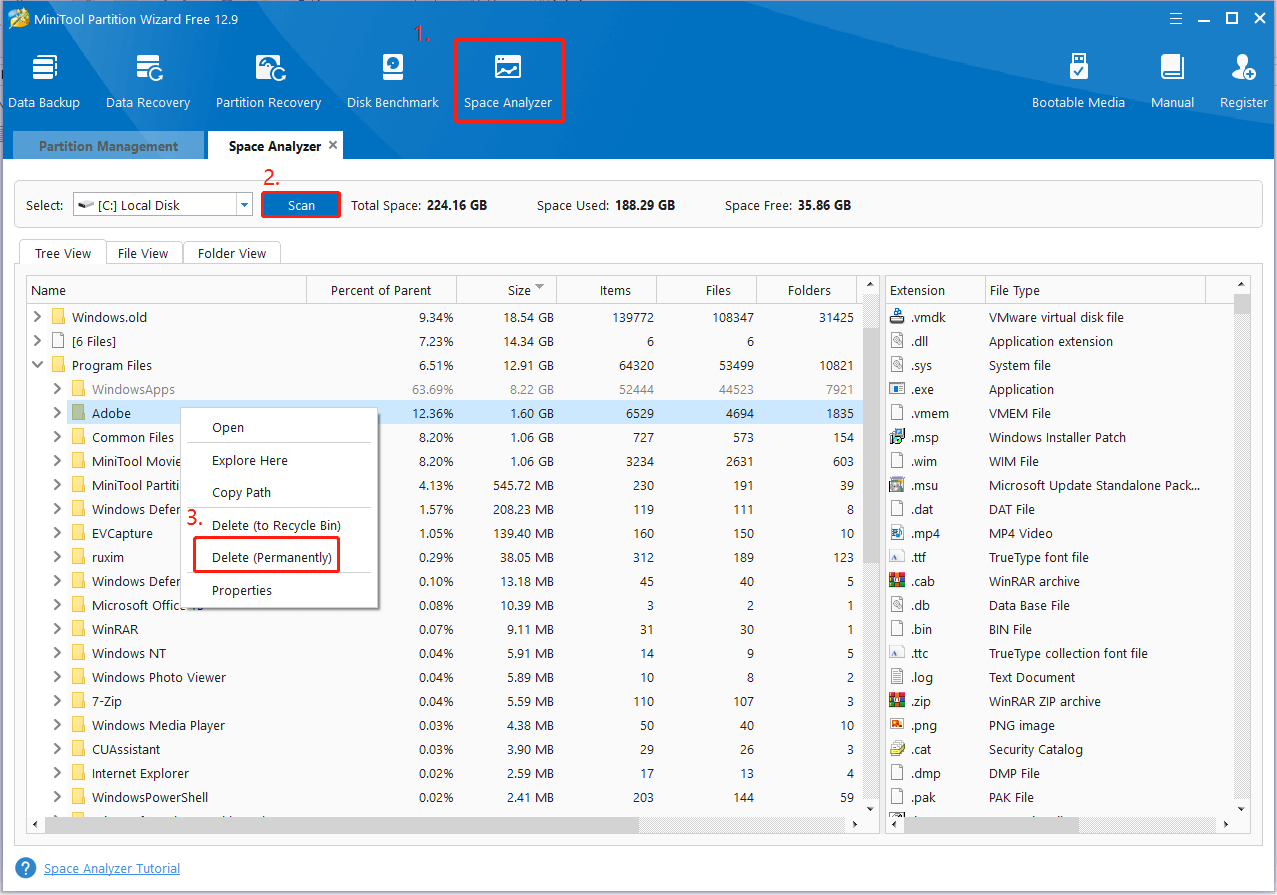
Step 1. Open the software to enter its main interface and click on Space Analyzer from the top ribbon area.
MiniTool Partition Wizard FreeClick to Download100%Clean & Safe
Step 2. Select the C drive or the drive where your apps are installed from the drop-down menu and click on Scan to analyze the drive space immediately.
Step 3. When the scanning process is complete, expand the Programs Files or Programs Files (x86) category in which your apps are stored. Then you will find what apps are taking up your disk space, right-click the unnecessary apps’ file/folder, and select Delete (permanently).
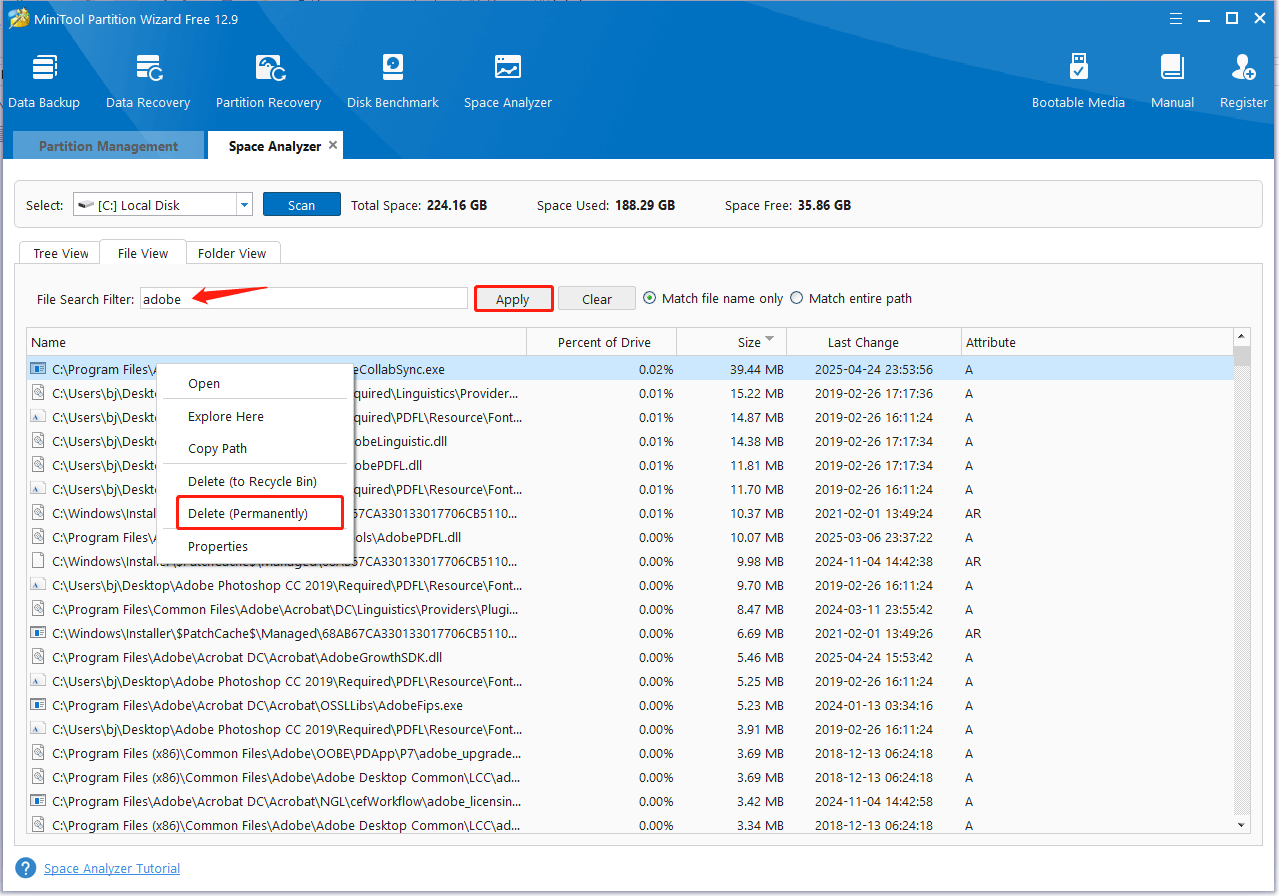
Alternatively, you can navigate to File View or Folder View, type the file name of the app you want to delete in the search box, click on Apply, and you’ll find the disk usage of the relevant file. Right-click the unneeded one and select Delete (permanently).
Solution 2. Uninstall the Disk-Hogging Apps
The simplest and most direct solution for the “Apps & features taking up disk storage” issue is to uninstall the disk-hogging apps. To do that, follow the quick guide below.
Step 1. Press the Win + I keys to open the Settings window and select System.
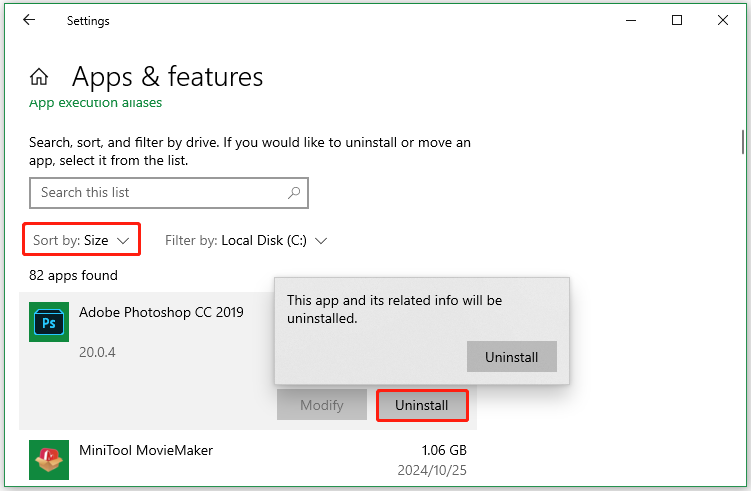
Step 2. Navigate to the Storage section and click on the Apps & features category. Then it will list all installed apps on your PC.
Step 3. Change the Sort by type to Size, which will sort out all apps in disk size order. Select the disk-hogging one and click Uninstall, and then confirm the operation.
Solution 3. Run Disk Cleanup
Disk Cleanup is a Windows built-in utility that can help you clean up Apps & features storage space by deleting unnecessary program files and temporary data. For that:
Step 1. Type cleanup in the Windows search box and select Disk Cleanup.
Step 2. Select the C drive where you installed apps from the drop-down menu and click OK.
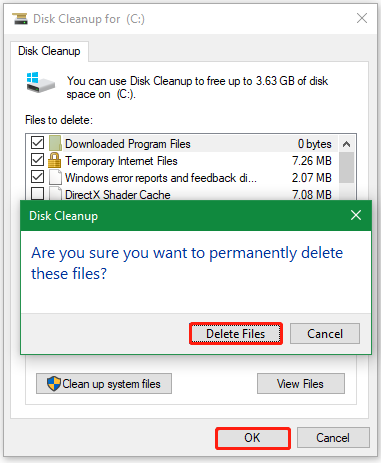
Step 3. Wait for the tool to scan your files, tick the checkboxes next to the unnecessary files, and click OK > Delete Files.
Now, you should solve the problem. If you want to stop Apps & features from taking up so much storage later, keep going on.
How to Stop Apps & Features from Taking up so Much Storage
Here I explore 6 advanced tips to prevent Apps & features from occupying excessive disk space again. Let’s follow them one by one.
Tip 1. Clear Apps Cache or Temp Data Regularly
As discussed above, the apps you installed will produce different types of app data, cache, or other temporary files. To prevent the high disk usage issue, you’d better clear cache data and temp files regularly. Here’s how to clear temp files.
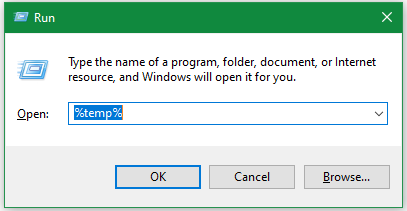
Step 1. Press the Win + R keys to open the Run dialog box, type %temp% in the box, and press Enter.
Step 2. In the pop-up File Explorer window, delete all temporary files or data related to your apps. Alternatively, you can run Disk Cleanup to clear temp files as we showed above.
Tip 2. Move the Apps to a Different Drive
If you are using some disk-hogging apps, like Photoshop or video editors, you may have many large photos, videos, or downloads. In this case, you can move these large apps and their files to an external hard drive or cloud storage.
How to move large files to an external hard drive quickly? I highly recommend that you use MiniTool ShadowMaker. It is a professional backup program that can back up files, folders, partitions, and operating systems to another location. Here’s how to transfer large files to an external hard drive.
MiniTool ShadowMaker TrialClick to Download100%Clean & Safe
Step 1. Insert the external hard drive into your computer.
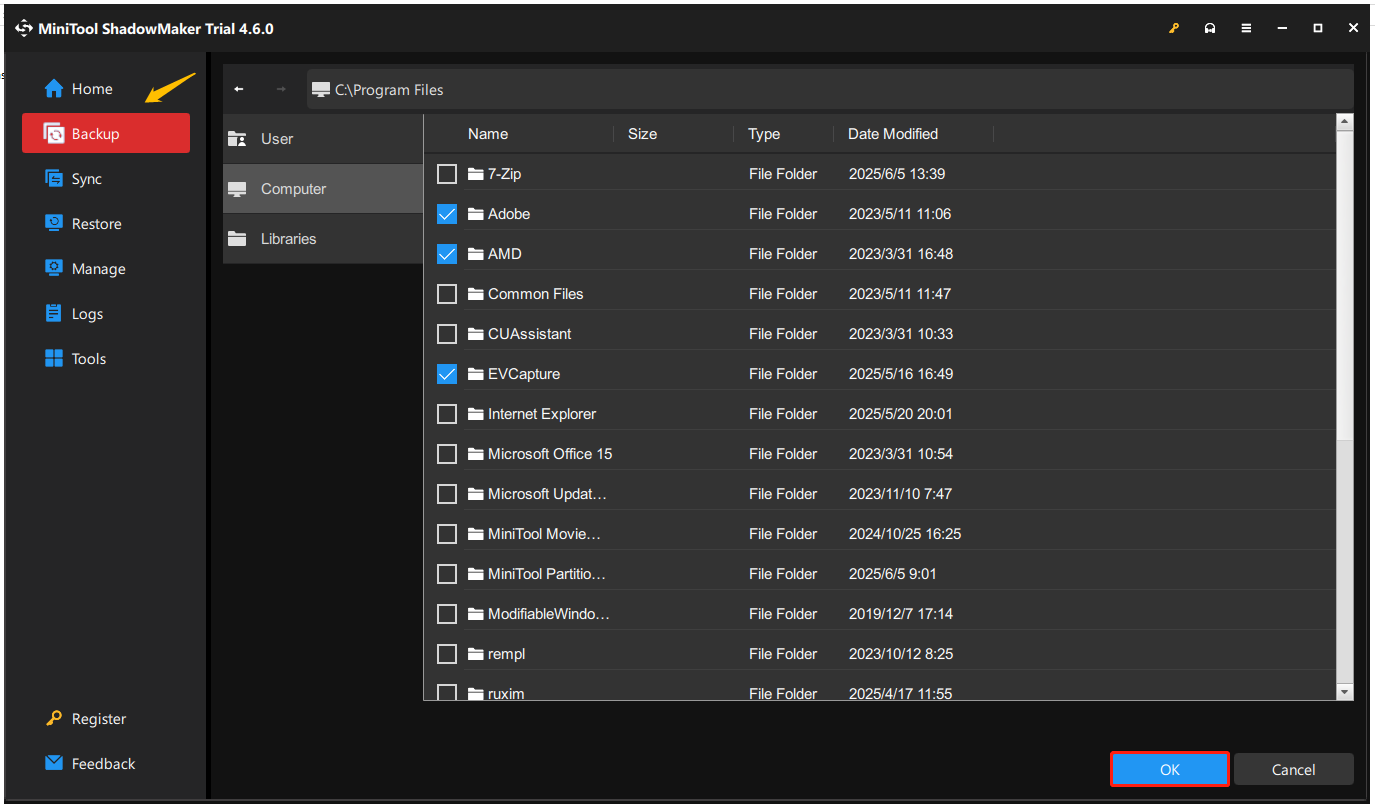
Step 2. Launch the software to get its main interface, navigate to the Backup section, click on the SOURCE tab, and select Folders and Files. Then select the target apps’ files/folders and click OK.
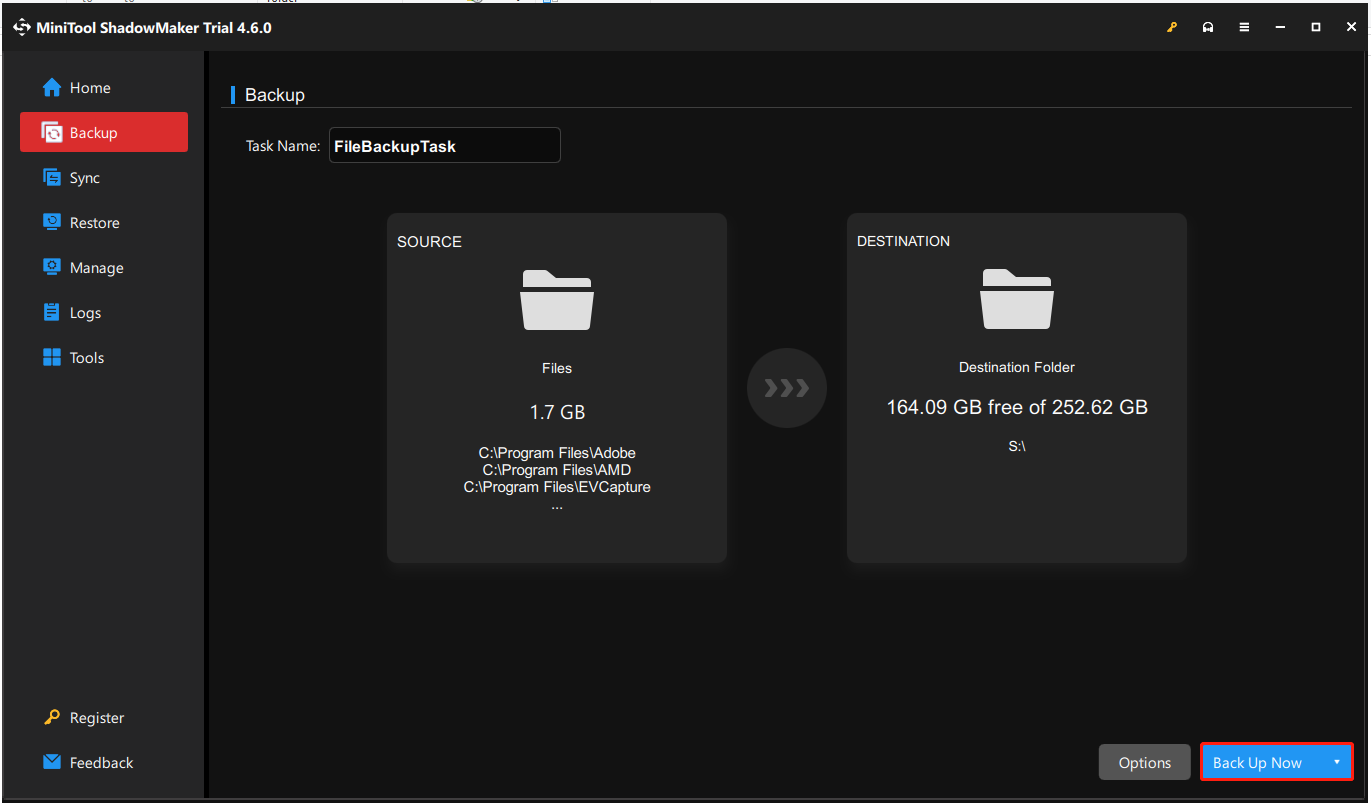
Step 3. Go to the DESTINATION tab, click it, and select your external hard drive as the target drive, then click on OK > Back Up Now. After that, a backup image file will be created on the external drive.
Step 4. Go to the Restore section, click the Restore button next to the image file, and follow the on-screen instructions to complete the restore.
Tip 3. Change the Location Where New Apps Are Installed
According to user reports, the “Apps & features taking up huge disk space” issue mainly occurs on the C drive. To avoid the C drive full issue, you can change the location where new apps are installed. Here’s how:
Step 1. Open the Settings window again and select System >Storage.
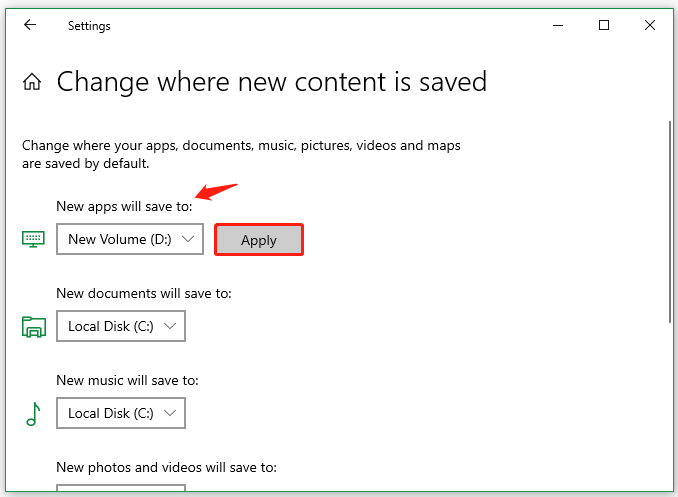
Step 2. Scroll down the right-side bar and click the Change where new content is saved link.
Step 3. Go to the New apps will save to section, select another drive, and click Apply.
Tip 4. Repair or Reset Apps
Sometimes, your apps may get corrupted, which can produce extensive app cache data, triggering the Apps & features taking up huge storage space issue. If you find the app has produced lots of cache data, try repairing or resetting it.
Step 1. Right-click the Start icon and select Apps & Features.
Step 2. Navigate to the problematic app and click Advanced options under the app.
Step 3. Scroll down and click Repair or Reset.

Tip 5. Extend the Drive Where Apps & Features Are Located
If you don’t want to delete any data for the problem, you may consider extending the drive where you install the apps and features. This can keep your data intact. MiniTool Partition Wizard can extend a partition to another drive and even non-contiguous unallocated space/free space. It’s worth having a try.
MiniTool Partition Wizard FreeClick to Download100%Clean & Safe
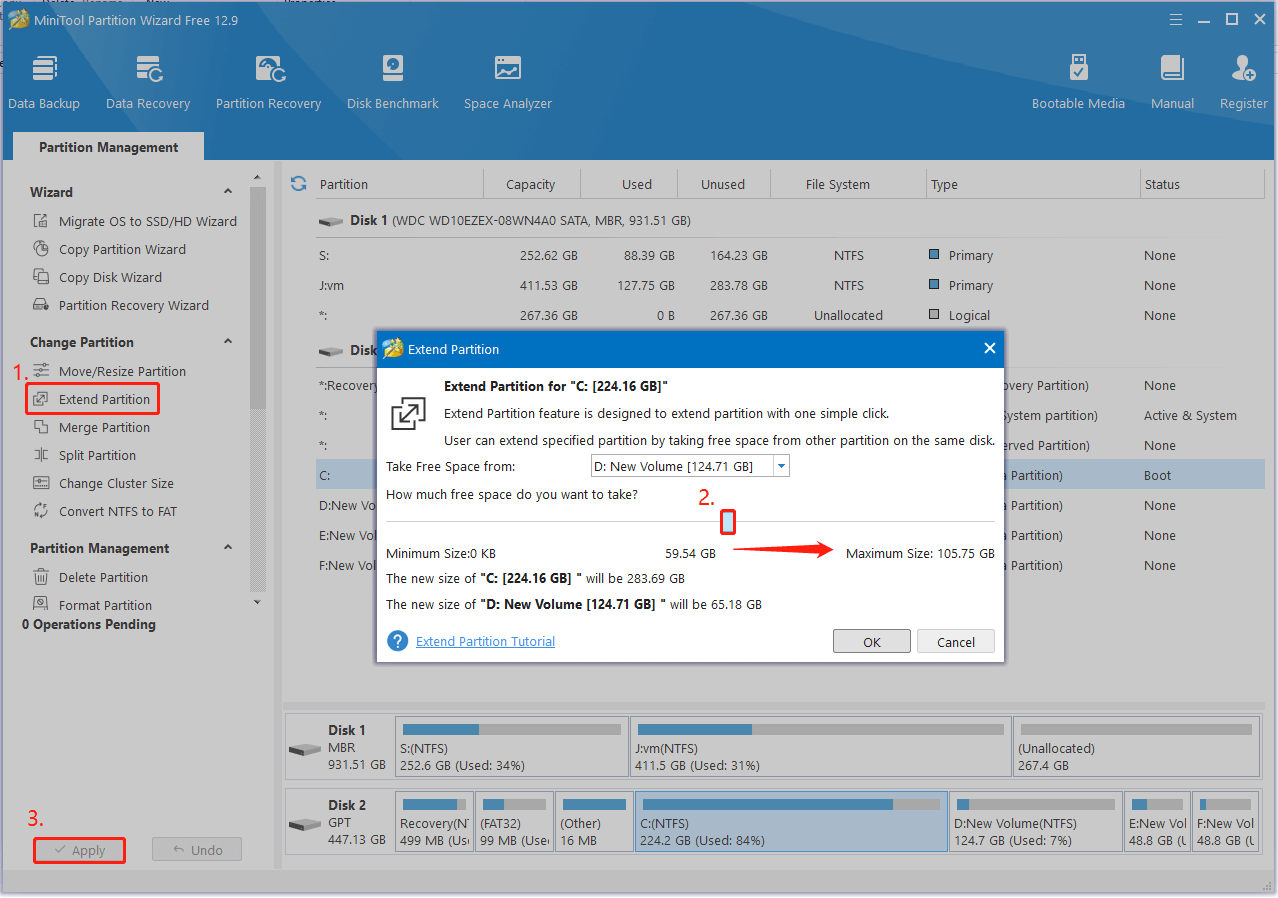
Step 1. In the main interface of the software, select the partition you want to extend, and click on Extend Partition from the left action pane.
Step 2. Select unallocated space or a partition from which you want to take free space from the drop-down menu, drag the sliding bar to occupy the space, and click OK.
Step 3. Click on Apply to execute the process.
Tip 6. Upgrade to a Large Hard Drive
The most fundamental reason for the Apps & features taking up disk storage is insufficient disk space. If you are using a small hard disk, you can try upgrading to a larger one. How to upgrade a hard disk without losing data? Use MiniTool Partition Wizard, which can clone a hard disk or migrate Windows OS to an SSD/HD.
MiniTool Partition Wizard DemoClick to Download100%Clean & Safe
Step 1. Install the larger SSD/HDD on your computer carefully and launch the software.
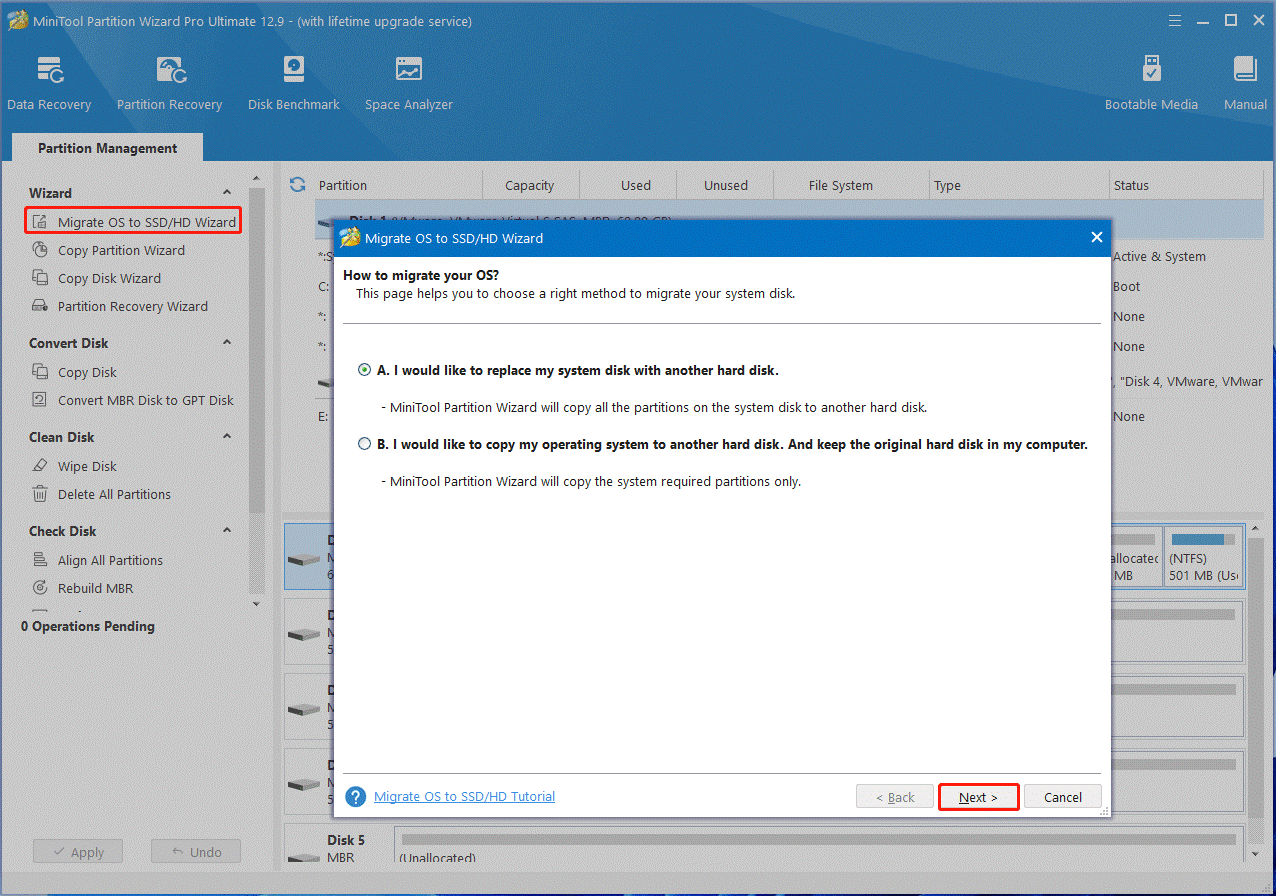
Step 2. Click Migrate OS to SSD/HD Wizard from the left panel, select Option A,and click Next to copy all partitions on the system disk. If you want to copy the system-required partitions only, select Option B.
Step 3. In the pop-up window, select the target SSD and click Next.
Step 4. Select copy options according to your needs and click Next.
Step 5. Read the Note information and click the Finish button in the pop-up window. Finally, click on Apply to execute the migration.
Wrapping Things Up
How to fix Apps & features taking up huge disk space on Windows 10/11? This post provides some effective methods to solve the problem. What’s more, it shares several useful tips to prevent the high disk usage from happening again.
If you have any questions or feedback about the MiniTool program, don’t hesitate to send us an email via [email protected], and we will get back to you as soon as possible.
User Comments :