Some users encounter the “partition disappeared after shrink” issue on Windows 10/11. What causes the issue? How to fix it? This post of MiniTool Partition Wizard will help you recover the disappeared partition and provide several effective ways for this error.
Shrinking volumes is one of the functions of Disk Management. When you activate this feature, all normal files will be automatically relocated on the partition to reduce partition space and create unallocated space. And then you can use it to create a new partition or extend the partition.
However, some users found the partition disappeared after shrinking on Disk Management. Here is a true example from the Microsoft forum:
I have tried to add more space to the system partition due to storage problems (always got full) and I shrank 65GB from D: in which I had more than 100GB free. After this, I restarted the pc and realize that D: disappear. Now I can view my partition in disk management, but can’t add a letter to it.https://answers.microsoft.com/en-us/windows/forum/all/partition-disappeared-after-shrink/
What Causes Partition Disappeared After Shrink
What causes the “partition disappeared after shrink” error? Here we list some common reasons for the error below:
- File system errors: File system errors are usually caused by disk-related errors. If disk partition space disappears, there may be a file system error caused by damaged/broken disk integrity or drive corruption.
- Internal Hard Drive Error: Partition disappear may be caused by the internal errors of the hard drive partition.
- Virus Attack: If your security system is weak, viruses can spread through the disk when the computer is connected to the Internet. And the virus can also enter your hard drive and infect the disk.
- Obsolete hard drive driver: If the hard disk driver gets outdated, it may be incompatible with the current technology of the shrinking partition, triggering the error.
- Missing or corrupted system files: Due to various reasons, your system files may get missing or corrupted, which prevents Windows from performing daily tasks properly. So, it causes the “hard drive space disappeared after shrink” error.
Well, how to fix the “partition disappeared after shrink” error? Keep reading.
How to Fix Partition Disappeared After Shrink
Here we summarize 4 feasible ways to help you fix the “partition disappeared after shrinking” error. You can try them in order until the error gets fixed.
Way 1: Restore the Disappeared Partition
When you encounter the issue, the first thing you want to do is restore the disappeared partition. How to do it? Here we highly recommend you use MiniTool Partition Wizard. It is a professional partition manager that can effectively recover a lost partition caused by virus attack, incorrect partitioning, etc.
What’s more, it is a comprehensive tool that can check and fix file system errors, migrate the Windows operating system, rebuild MBR, convert FAT32 to NTFS (verse vice), and so on.
To recover the disappeared partition, you can follow the given steps below:
MiniTool Partition Wizard DemoClick to Download100%Clean & Safe
Step 1: Download and install MiniTool Partition Wizard on your computer. Then launch it to get its main interface.
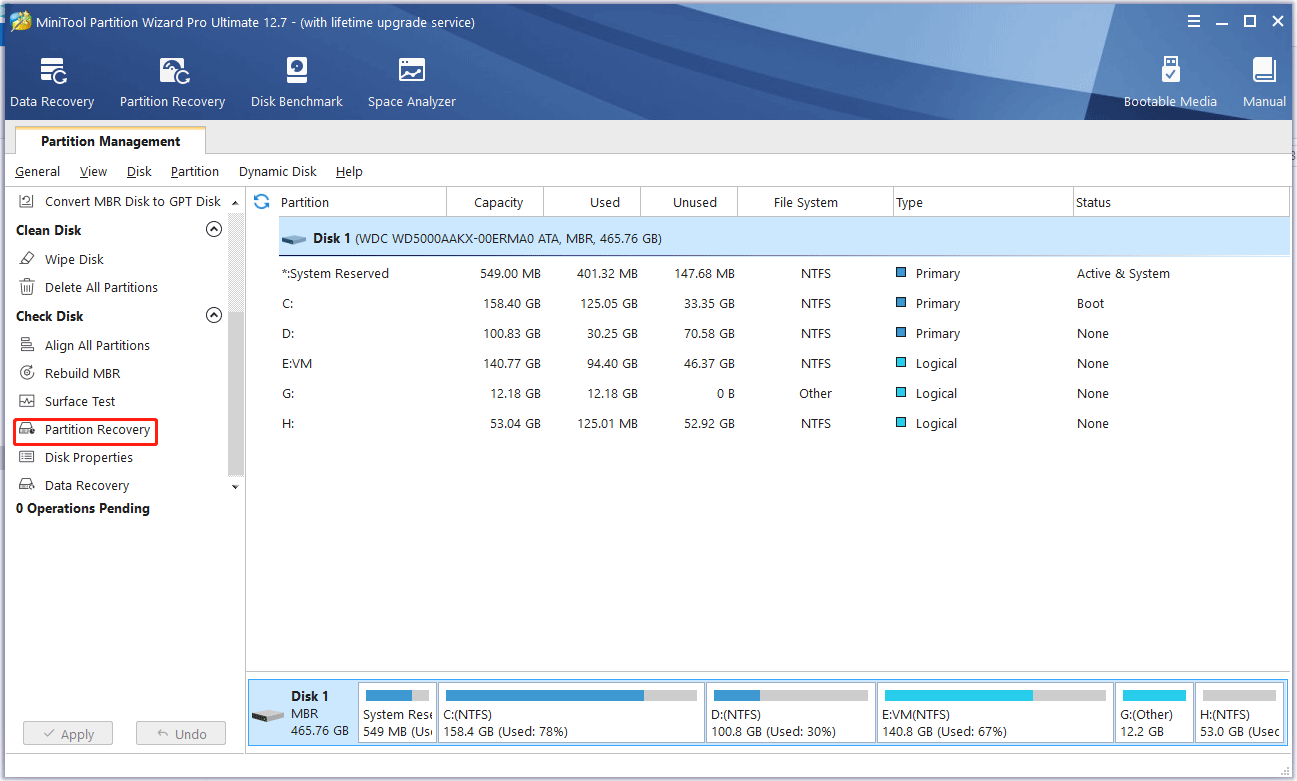
Step 2: Right-click on the disk where the partition disappears and directly choose the Partition Recovery option.
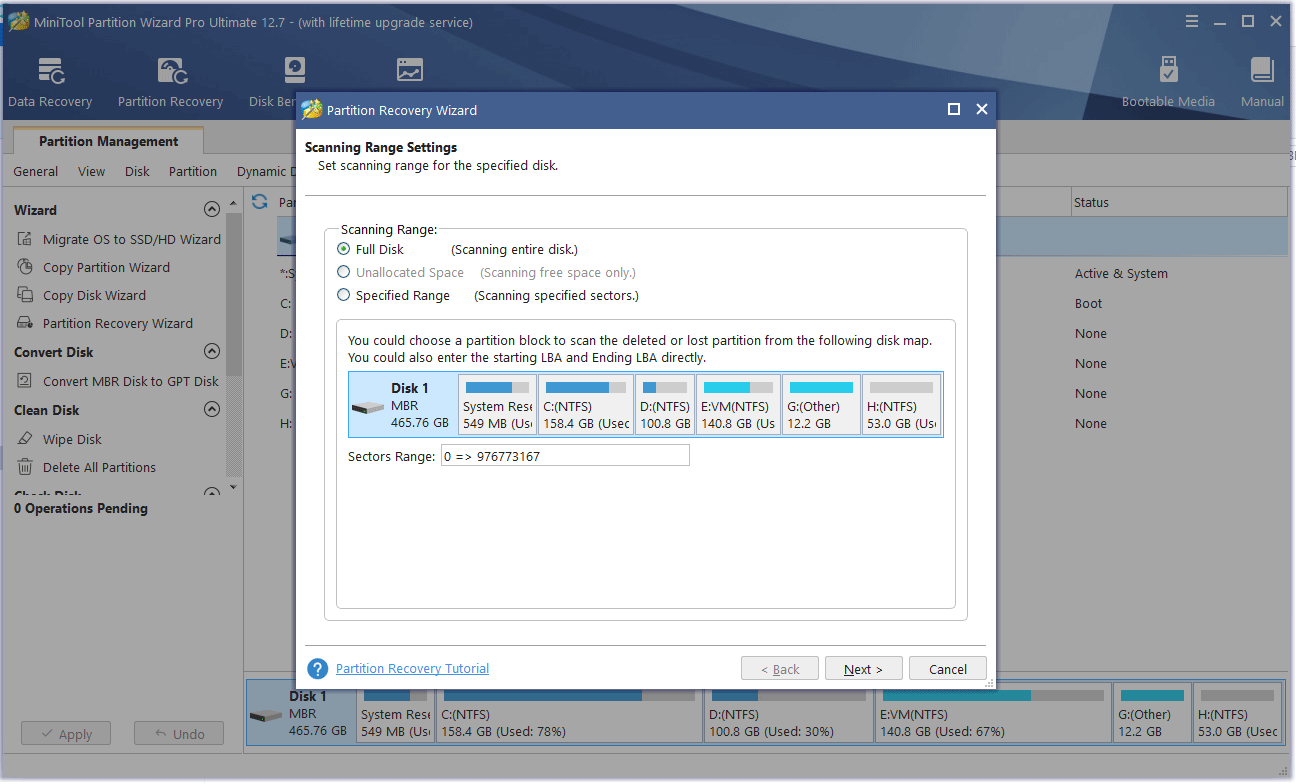
Step 3: Select the scan range from Full Disk, Unallocated Space, and Specified Range, and click the Next button.
- Full Disk: It is recommended when the user does not know where the lost partition is located.
- Unallocated Space: It is recommended to use if the user did not create any new partition after the partition was lost.
- Specified Range: It scans the specified sectors.
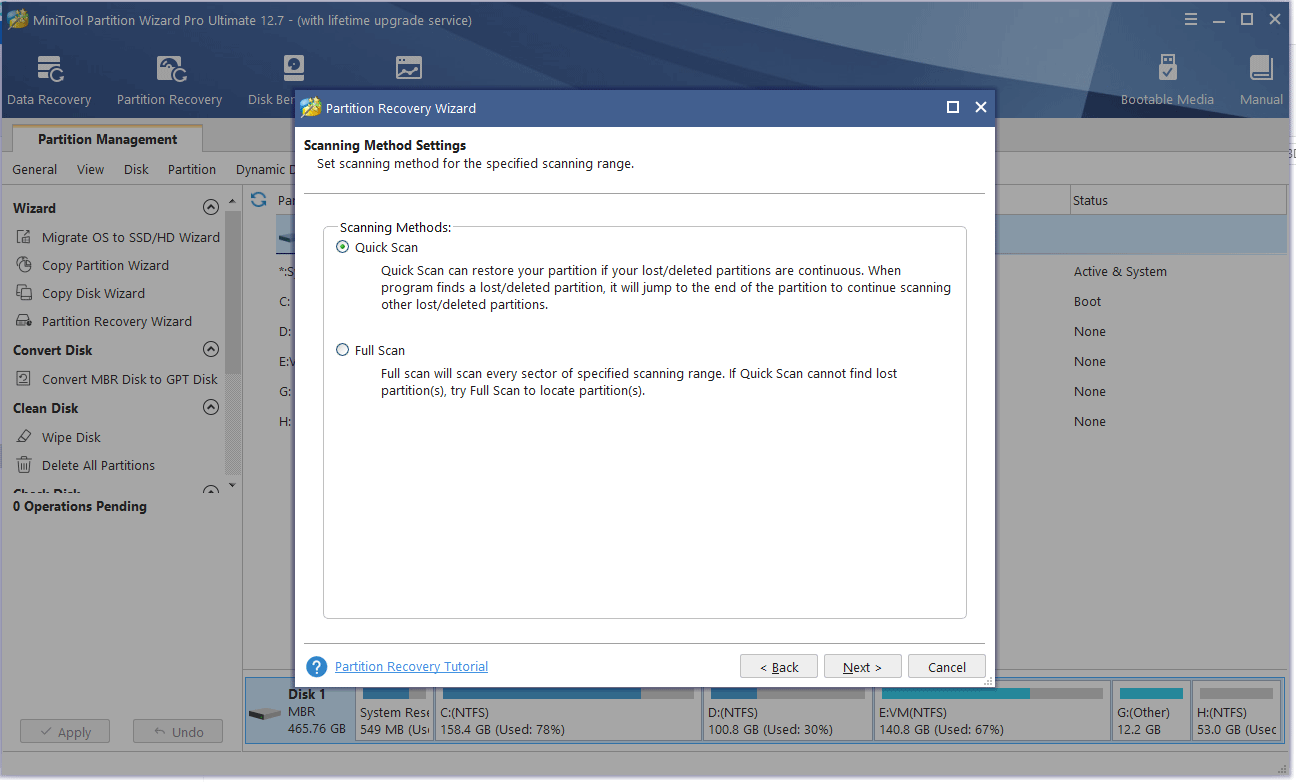
Step 4: Set a scanning method to scan a specified range and click the Next button.
Step 5: Check all needed partitions, including lost/deleted partitions and existing partitions. Then click the Finish button to go back to the main interface.
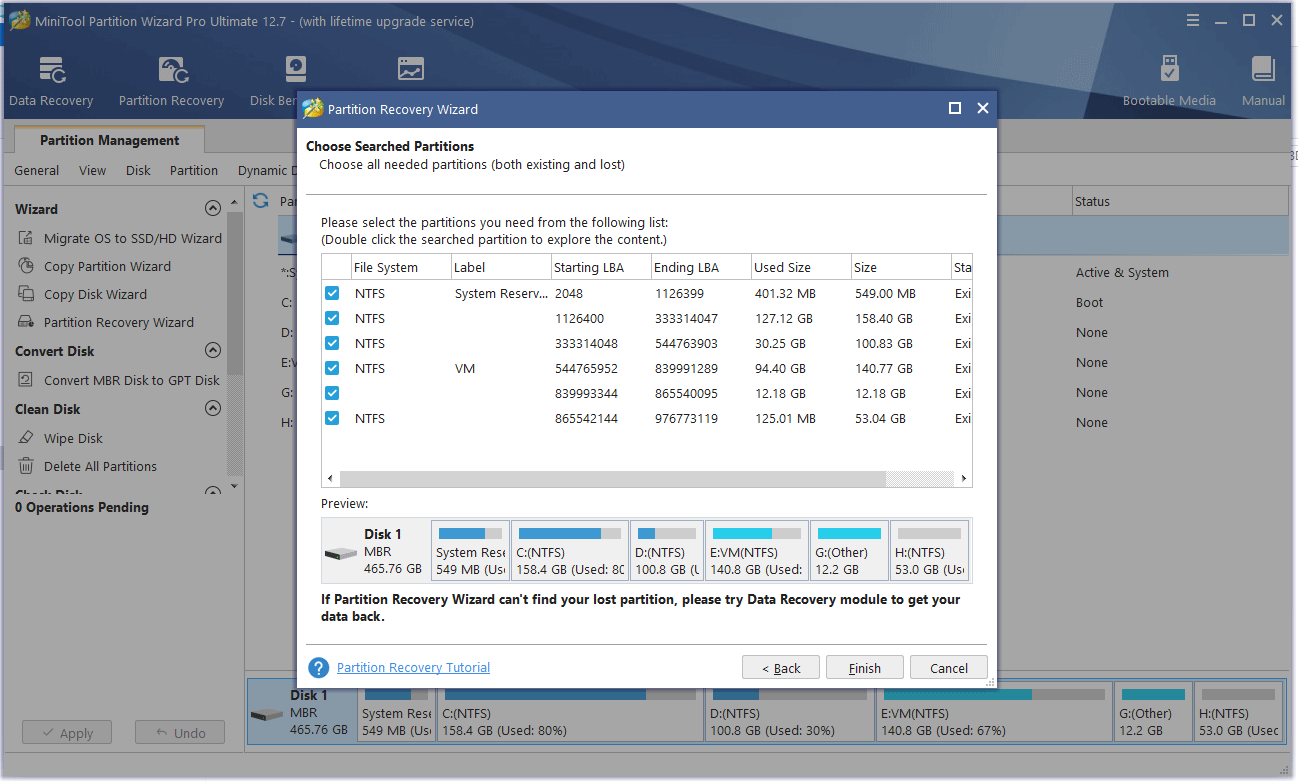
The existing partitions will be checked by default, so you must manually check the lost/deleted partitions.
Way 2: Check Hard Drive for Errors
As mentioned above, the “partition disappeared after shrink” error can be caused by hard drive errors. So, it’s important to check if the hard drive gets faulty. There are 2 methods to check the hard drive for errors. For that:
Method 1: Use CHKDSK
CHKDSK is a disk error checking and repair utility built into Windows. It scans hard drive partitions for internal errors and repairs them at the same time. To use CHKDSK to repair a corrupted hard drive partition, follow these steps:
Step 1: Type cmd in the Search box. Then right-click on Command Prompt and select the Run as administrator option to open Command Prompt as administrator. Then click Yes to get Admin access.
Step 2: In the Command Prompt window, type the chkdsk G: /f command and press Enter.
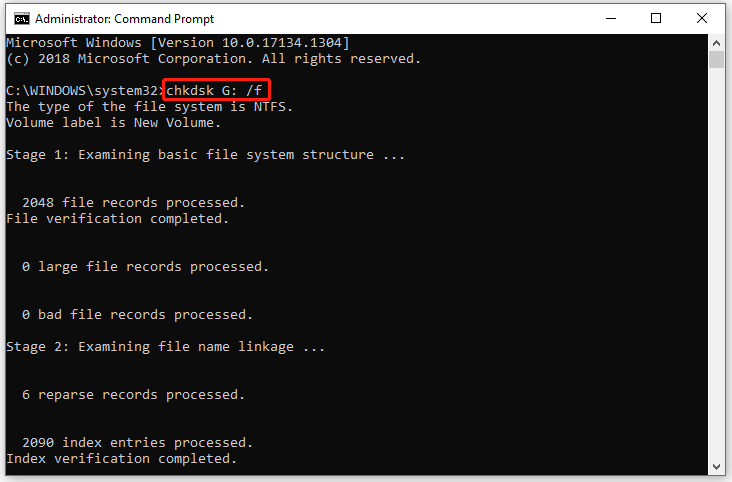
“G” represents the hard drive partition letter.
Method 2: Use MiniTool Partition Wizard
Although CHKDSK can be used to check the hard drive for errors, this tool often runs into various issues like CHKDSK being write-protected, CHKDSK getting stuck, etc. So, it’s highly recommended you use a powerful disk manager – MiniTool Partition Wizard. It can help you check bad sectors but also file system errors easily and quickly.
MiniTool Partition Wizard FreeClick to Download100%Clean & Safe
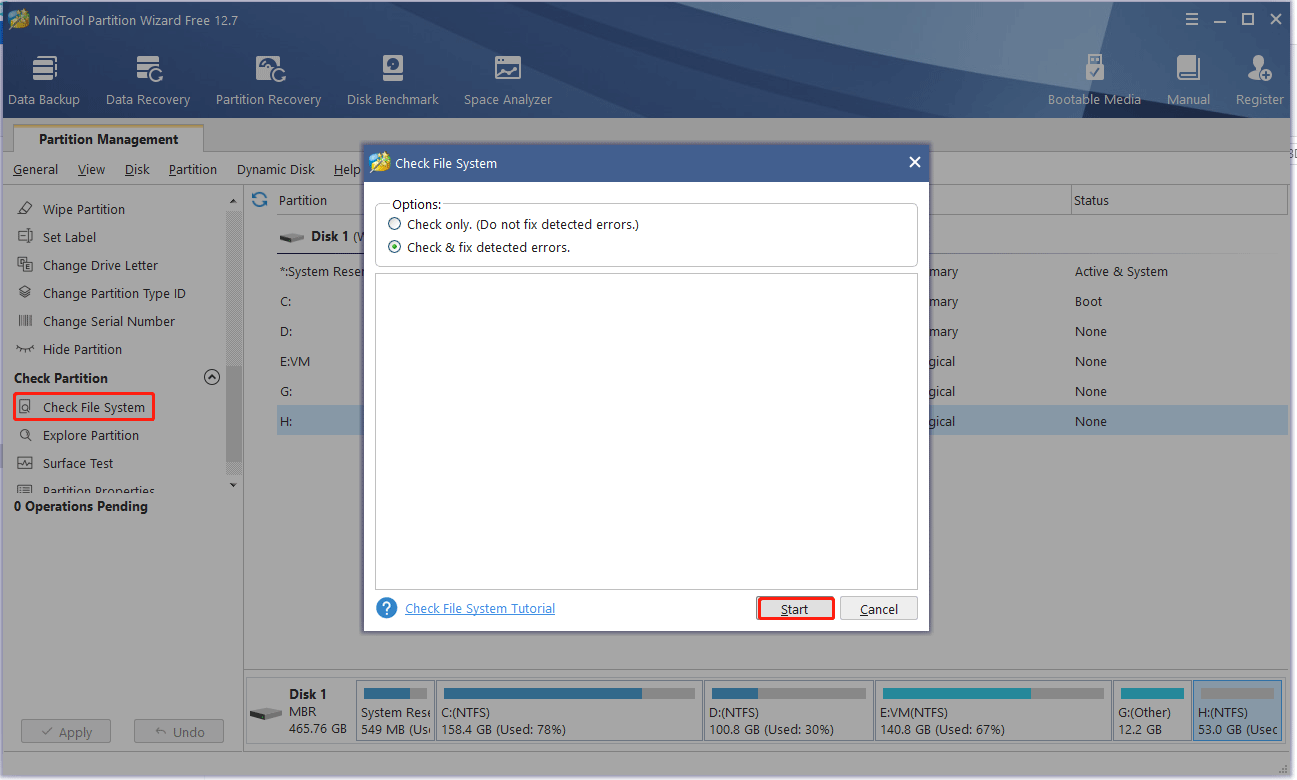
Step 1: Launch the MiniTool software to get its main interface, and then select the target drive and click on Check File System from the left action panel.
Step 2: Select Check & fix detected errors and click on the Start button. This tool will check and repair file system errors immediately.
Step 3: In the main interface, select the drive again and click on Surface Test from the left pane.
Step 4: Click on the Start Now button in the pop-up window. After that, this tool will scan the whole external drive immediately and show you the test result.
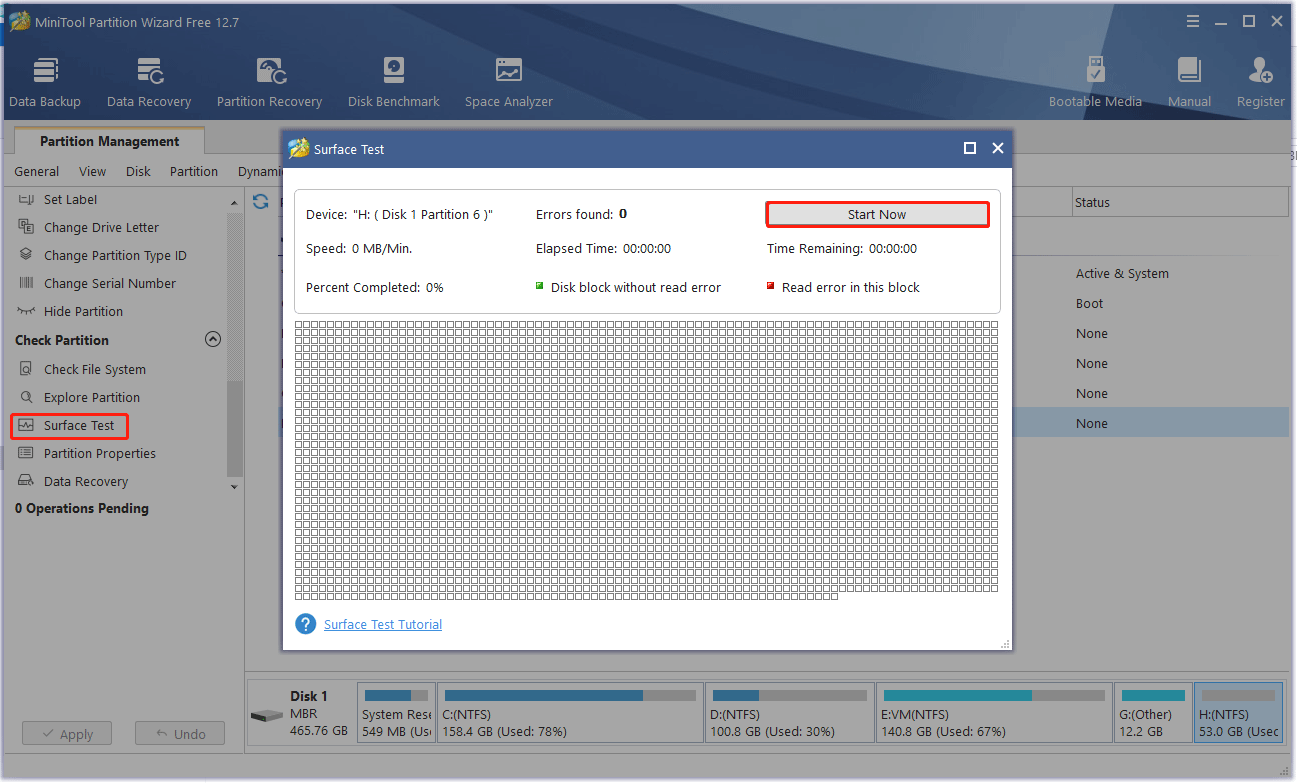
Step 5: When the hard drive error test process is completed, the bad sectors on the hard drive will be marked with red color. In this case, you can either use this bad sector repair guide or consider replacing it with a new one.
Once you checked the hard drive, you can see if the “hard drive space disappeared after shrink” issue gets fixed.
Way 3: Perform SFC and DISM Scan
Sometimes, corrupted or missing system files can cause hard disk partitions or volumes to disappear. To detect and repair damaged or missing system files, Windows provides two utilities. The first tool is SFC (System File Checker), which can detect and restore missing components. Another is the DISM (Deployment Image Servicing and Management) tool, which can fix more complex system errors.
To run an SFC and DISM scan on your system, you can follow the steps below:
Step 1: Open the Command Prompt as administrator.
Step 2: In the Command Prompt window, type the sfc /scannow command and press b.
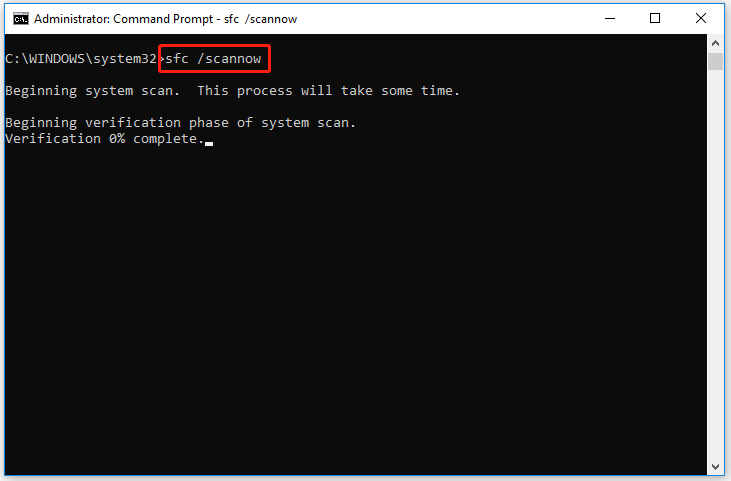
Note: If the SFC scan detects any issues with system files, it may ask for the Windows installation DVD or media to repair corrupt and damaged system files. When repairing damaged files, some files saved on your computer may be deleted. So, please make sure you back up all important data.
Step 3: After its done, type the following command and press Enter:
DISM /Online /Cleanup-Image /RestoreHealth
In case your computer can’t complete the SFC scan, you can read this guide to fix this problem.
Way 4: Format the Partition
There is a user from the Microsoft forum who reported that the “partition disappeared after shrink” error can be resolved by formatting the partition. How to format the partition on Windows quickly? You can use the Windows built-in tool like Diskpart or a professional hard drive formatter like MiniTool Partition Wizard.
Here we recommend you use MiniTool Partition Wizard. Not only because it is easy to use, but because it offers a variety of file systems. Most importantly, a partition between 32GB and 2TB can be successfully formatted as the FAT32 file system, breaking the limitation of Windows.
Before formatting the hard drive, you need to copy all data from the lost partition.
To format the hard drive with MiniTool Partition Wizard, you can follow the steps below:
MiniTool Partition Wizard FreeClick to Download100%Clean & Safe
Step 1: Launch the MiniTool Partition Wizard to enter its main interface.
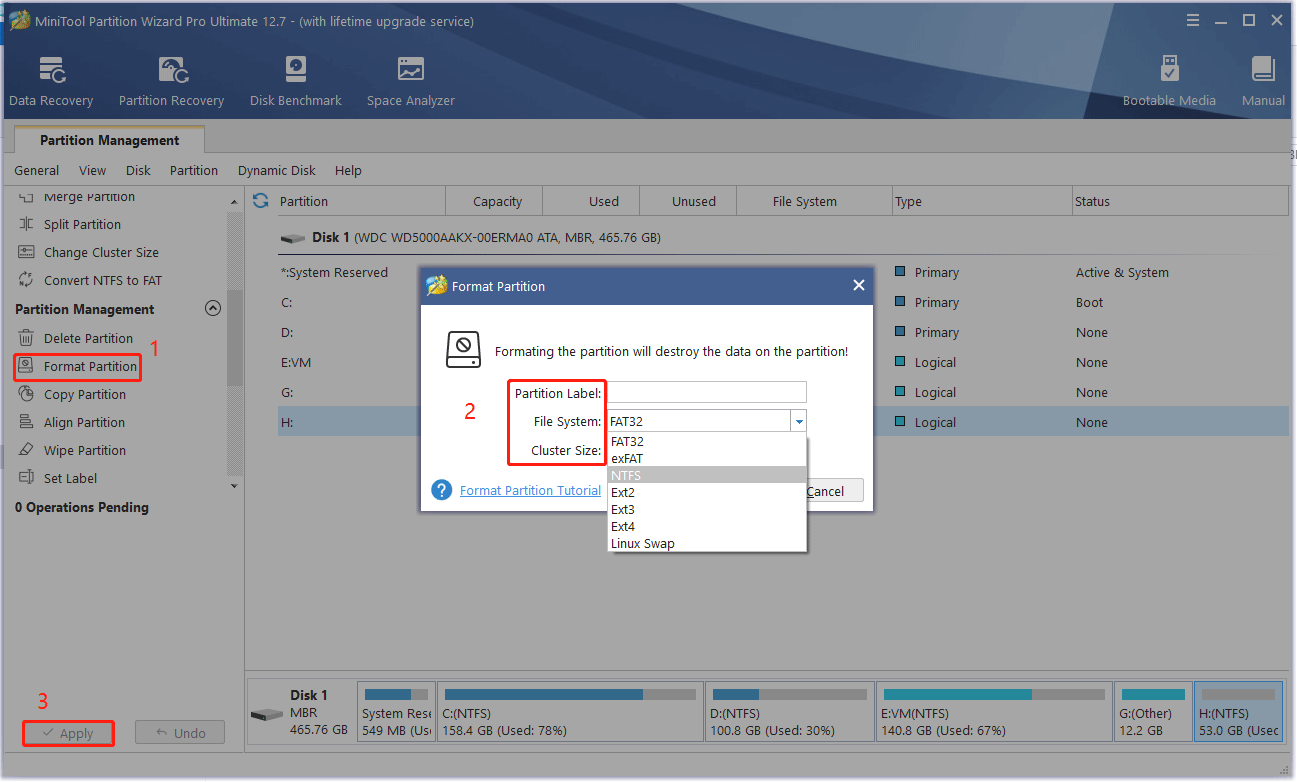
Step 2: Select the target partition and choose Format from the left action panel.
Step 3: Set the Partition Label, File System, and Cluster Size. Then click OK to continue.
Step 4: Click Apply to confirm these changes.
Once you formatted the drive, you should copy back all files to the drive. Then the problem should be solved.
Bonus Tip: Shrink Partition via MiniTool Partition Wizard
After you encounter the “partition disappeared after shrink” issue in Disk Management, you may want to look for a professional shrinking partition tool to avoid this error. Here, we highly recommend MiniTool Partition Wizard. This shrinking tool can shrink any partition that has free space without data loss with the Enhanced Data Protecting Mode enabled.
Plus, it can help you complete many complicated operations, such as extending partitions, converting MBR to GPT without data loss, migrating OS to HD/SSD, and so on.
Let’s see how to shrink a partition in Windows 10/11 using the shrinking tool.
If you want to shrink a system partition, please use MiniTool Partition Wizard Bootable in case of boot issues. And it’s recommended to back up your data before it.
MiniTool Partition Wizard FreeClick to Download100%Clean & Safe
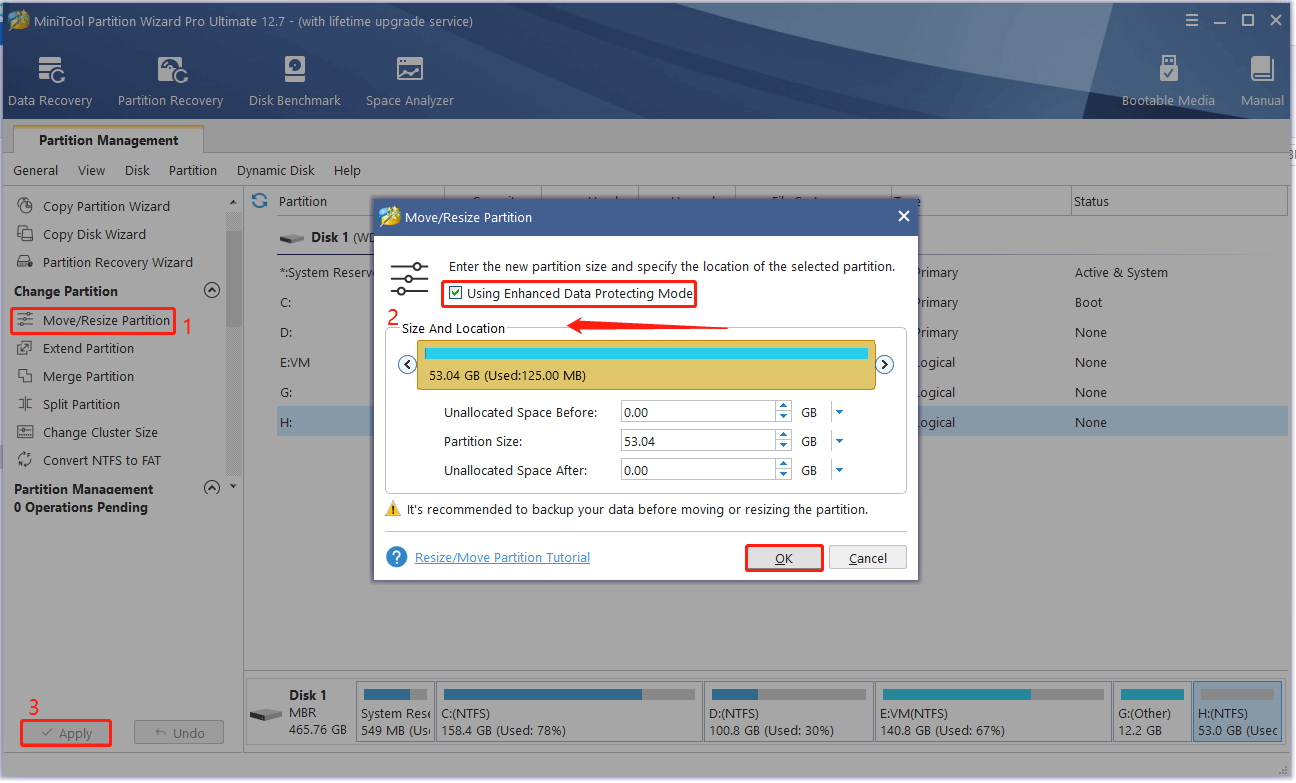
Step 1: Launch MiniTool Partition Wizard to access its main interface. Then select the partition that you want to shrink and choose the Move/Resize Partition feature from the left action panel or choose Move/Resize from the right-click menu.
Step 2: On the Move/Resize Partition window, you should:
- Tick the Using Enhanced Data Protecting Mode
- Move the slide handle to the left and click the OK
In this step, you can adjust the location of the partition and the unallocated space on the hard disk by dragging the entire partition handle.
Step 3: The software returns to the main interface. On the interface, preview the reduced result. If you are satisfied with it, you can click the Apply button to apply the change.
Bottom Line
How to fix the “partition disappeared after shrink” issue on Windows 10/11? This post focuses on the causes of error and provides several feasible ways. If you are one of those who encounter this problem, you can pay attention to this post.
For any other opinions about this error, you can leave a message in our comment area below. If you meet certain issues while using MiniTool Partition Wizard, you can send us an email via [email protected] to get a quick reply.
About The Author

Position: Columnist
Vega enjoys helping people with computer problems, including disk management, data recovery, data backup, and more. She is constantly expanding her knowledge in related fields. And she will continue to bring more easy-to-understand professional articles to help people solve various problems on the PC.
User Comments :