A full hard drive means your computer doesn’t have enough free space to run efficiently or store new files. To fix the “hard drive is full” issue, you can refer to the Partition Magic article for solutions.
Undoubtedly, many users have encountered the issue of insufficient disk space in Windows. Common complaints include the C drive looking maxed out without an obvious cause or the hard drive running out of space unexpectedly.
The following will explain exactly what a full hard drive is, why it happens, and how to resolve the “C drive is full” issue. Read on to learn more.
What Does Disk Full Mean?
“Hard drive full” means your computer’s storage device, such as a hard drive or SSD, has very little or no free space left.
If your computer’s C drive is full, it will likely have the following symptoms:
- Slow performance: An overloaded drive can cause your computer to slow down significantly as it struggles to find free space to store new data and run applications.
- Error messages: You may encounter certain errors when trying to save new files, install software, or even update the operating system.
- Difficulty running tasks: Your system may become unresponsive, and you may experience delays when opening files, running programs, or performing other tasks.
- System instability: In extreme cases, a drive that’s run out of space can cause system instability and crashes.
How to Check Your Available Disk Space
Here’s how to check your available disk space.
- Press the Windows + E to open File Explorer.
- Click This PC in the left sidebar.
- Check your C: drive to see how much free space is available.
- For more information, right-click the drive and select Properties.
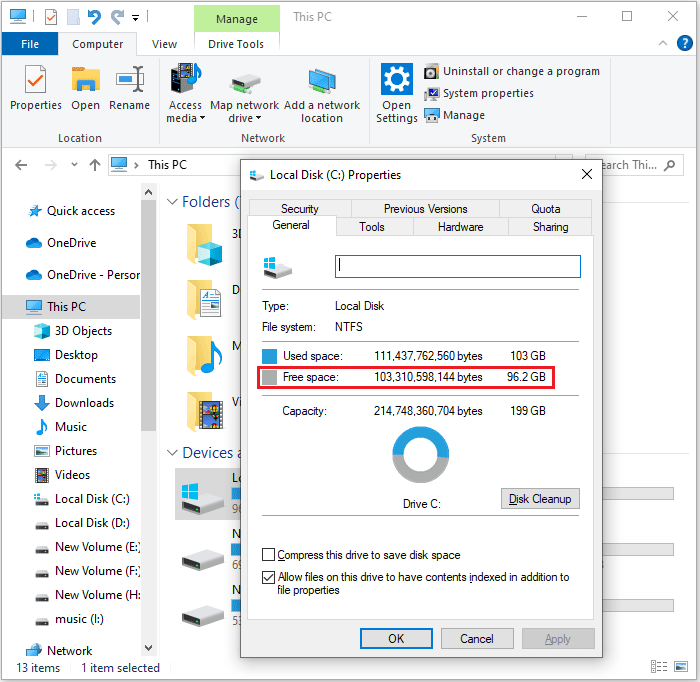
So, you might be wondering: What exactly causes my Windows hard drive to fill up? Don’t worry, the following section offers a comprehensive explanation.
Why Is My Hard Disk Full?
A full hard drive can be caused by a variety of factors, including accumulated temporary files, numerous downloaded or unused applications, and file system errors.
I’ll explain each point below.
#1. File Accumulation
- Temporary Files: Applications and the operating system generate temporary files to store data during use. These files are usually not deleted automatically and can accumulate over time.
- Large Files: Downloading or creating large files can quickly fill up your hard drive.
- Unused Programs: Programs you no longer use take up some hard drive space.
- Hidden Files: Some files are hidden by default, but they still take up disk space.
#2. System-Related Issues
- File System Errors: Errors in the file system can lead to inaccurate disk space calculations, making the drive appear maxed out.
- Malware: Some malicious programs can secretly write large files, taking up disk space.
- Page File, Hibernation File: These system files can take up a significant amount of space.
#3. Other Factors
- When files are deleted, they are moved to the Recycle Bin, which still occupies space on the hard drive.
- Restore points or backup files automatically created by the system can take up tens of gigabytes of space.
- Many programs, especially large ones, are installed on the system drive (C: drive) by default, which can quickly consume a significant amount of space.
To fix the “hard drive is full for no reason” problem, check out the solutions in the following sections.

How to Solve Hard Disk Is Full?
Is your hard drive running out of space in Windows? Here are several methods for you.
- Delete Unnecessary Files
- Uninstall Unused Programs
- Utilize Disk Cleanup
- Move Files to External Storage or Cloud
- Manage System Restore
- Other Tips
Delete Unnecessary Files
1. Empty the Recycle Bin
When you delete files and folders, they usually go to the Recycle Bin instead of being permanently removed from your PC. Over time, these files can accumulate and take up valuable space. You can empty the Recycle Bin to permanently remove them and free up space.
You can empty the Recycle Bin on your desktop to free up space.
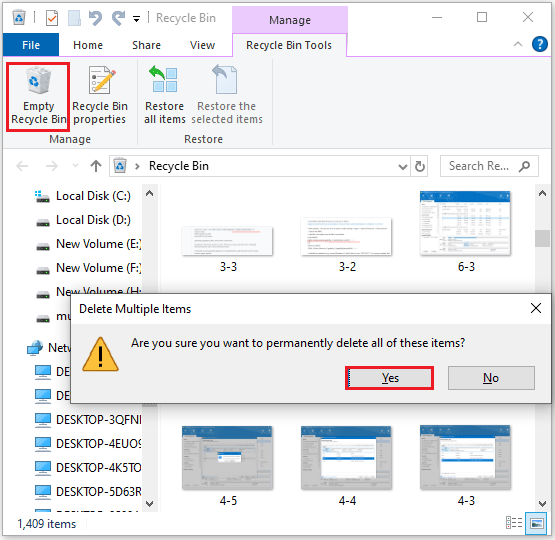
Step 1: Double-click on the Recycle Bin icon to open it.
Step 2: Click Empty Recycle Bin at the top.
Step 3: Select Yes after you receive the following message.
2. Delete Large or Unused Files
Use File Explorer to find and delete files you no longer need, such as outdated documents, videos, or items in your Downloads folder.
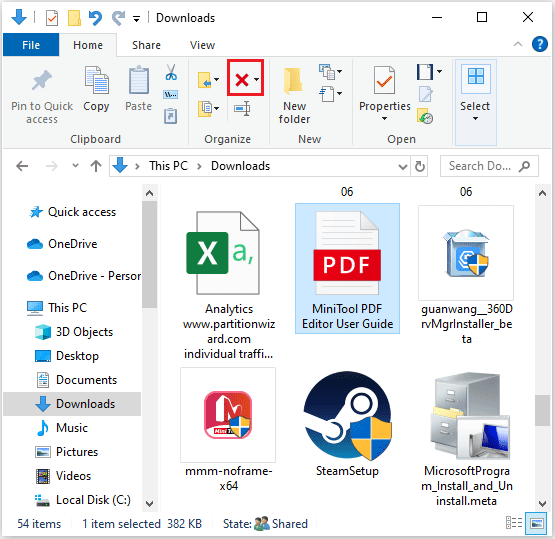
Step 1: Press Windows + E to open File Explorer.
Step 2: Then click Downloads, Music, Pictures, or Videos from the left panel.
Step 3: Filter the files you don’t need and then click on the Delete icon above.
3. Delete Temporary Files
If you encounter low disk space warnings on your system drive, you will need to delete temporary files.
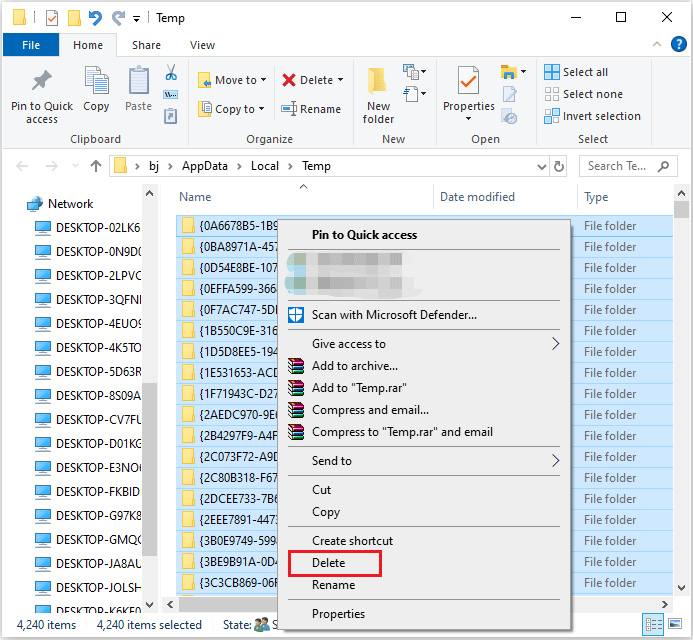
Step 1: Press Windows + R to open the Run window.
Step 2: Type %temp% in the search bar and click OK.
Step 3: Press Ctrl + A to select all the accessible temporary files and right-click on them. Then, click Delete.
4. Delete Duplicate Files
If your computer is filled with duplicate files, you will need to delete these duplicate files. MiniTool Partition Wizard can help you do that.
MiniTool Partition Wizard FreeClick to Download100%Clean & Safe
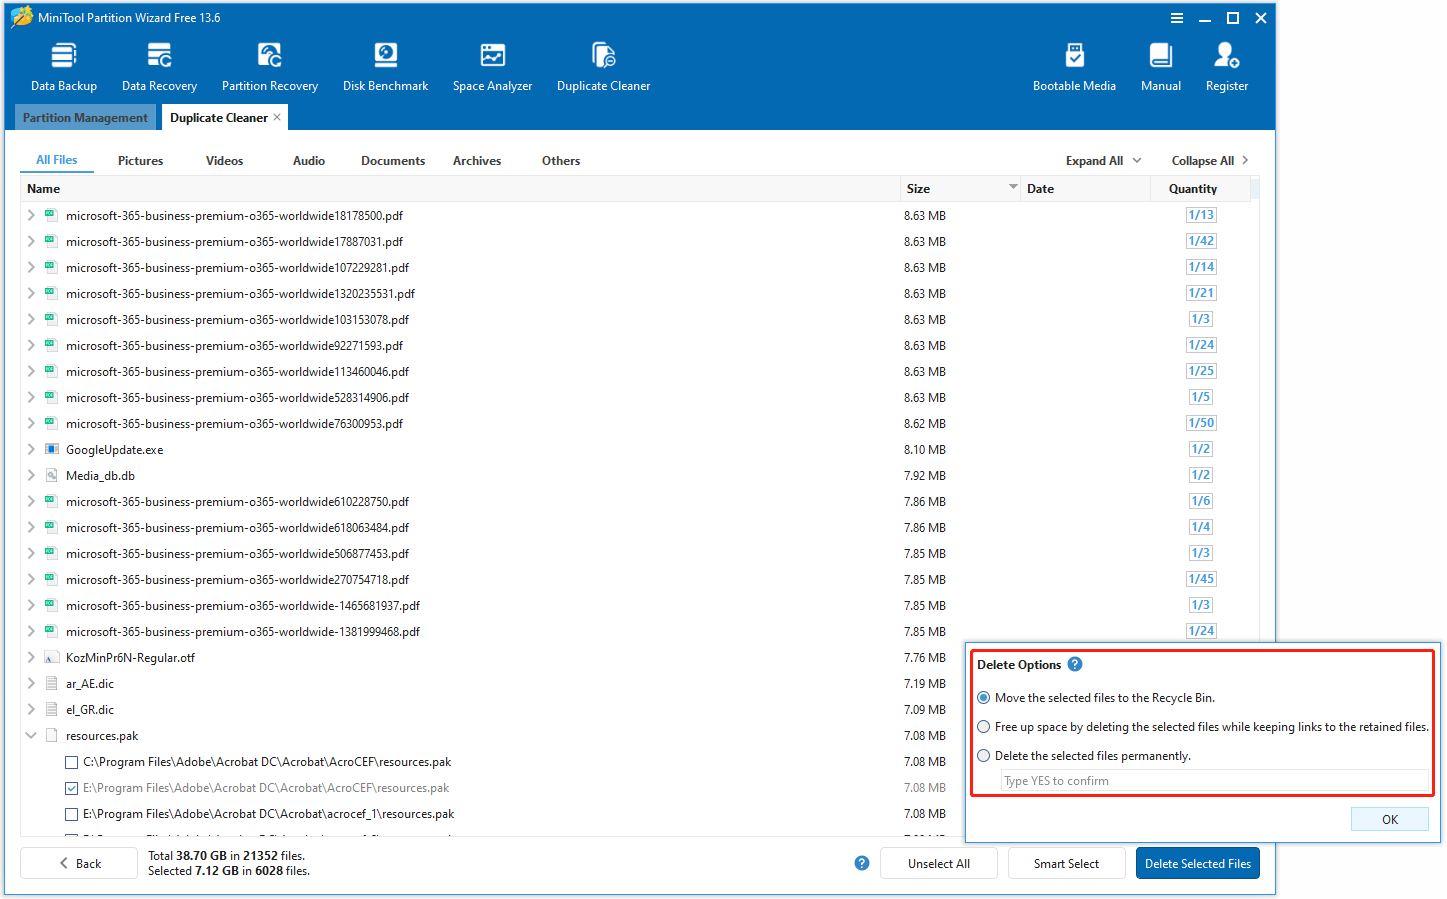
Step 1. Download and install MiniTool Partition Wizard on your computer. Then launch it, and click Duplicate Cleaner.
Step 2. Configure the scan settings, including location and file type. Then click Scan Now.
Step 3. After the results display, select the duplicate files that you don’t need.
Step 4. Click Delete Selected Files to choose different deletion options. Then click OK.
Further Reading
When your hard drive reaches its storage limit, you can use the Space Analyzer feature in MiniTool Partition Wizard to identify which files are taking up a lot of space and delete them.
MiniTool Partition Wizard FreeClick to Download100%Clean & Safe
Step 1: Launch MiniTool Partition Wizard to its main interface. Then, click Space Analyzer from the top side.
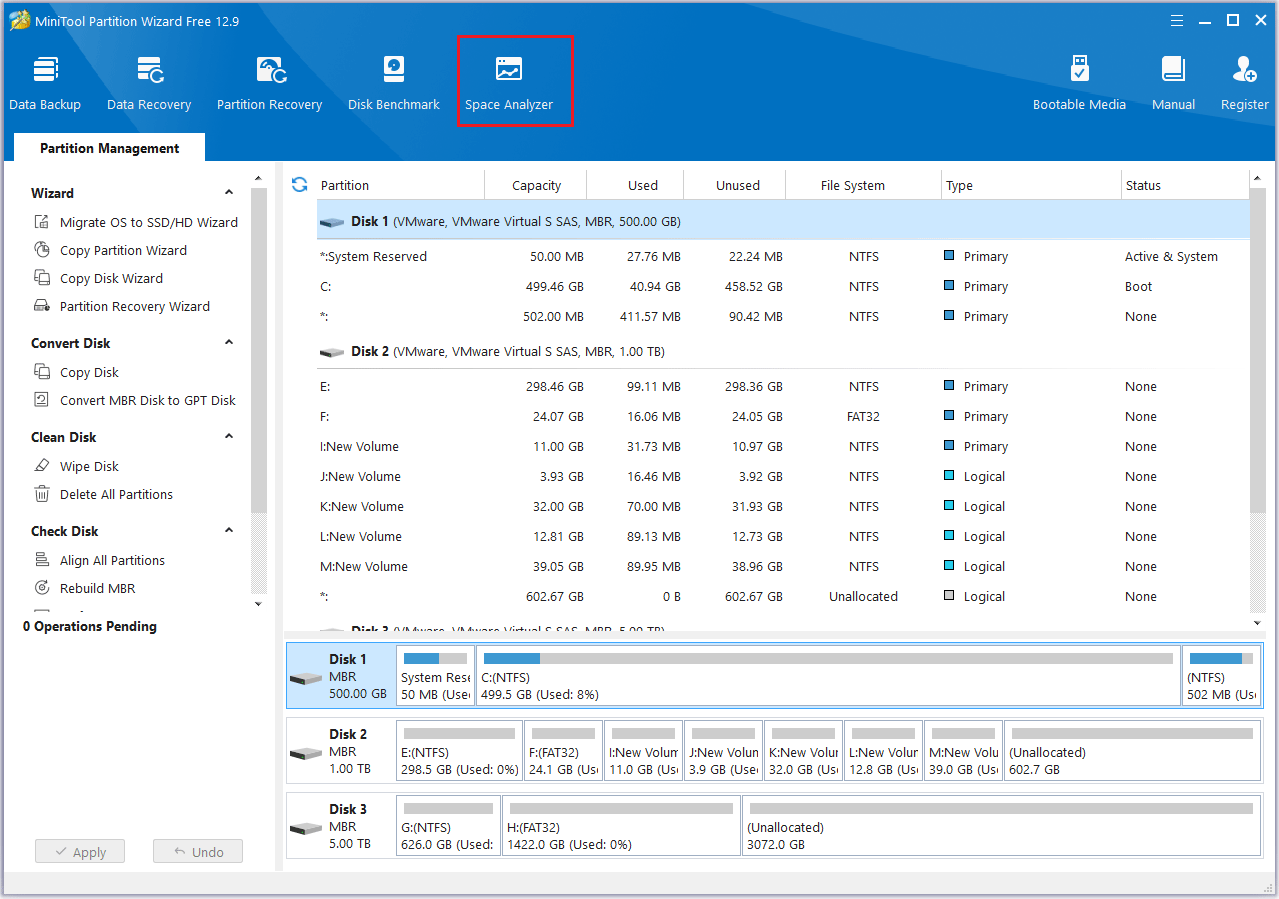
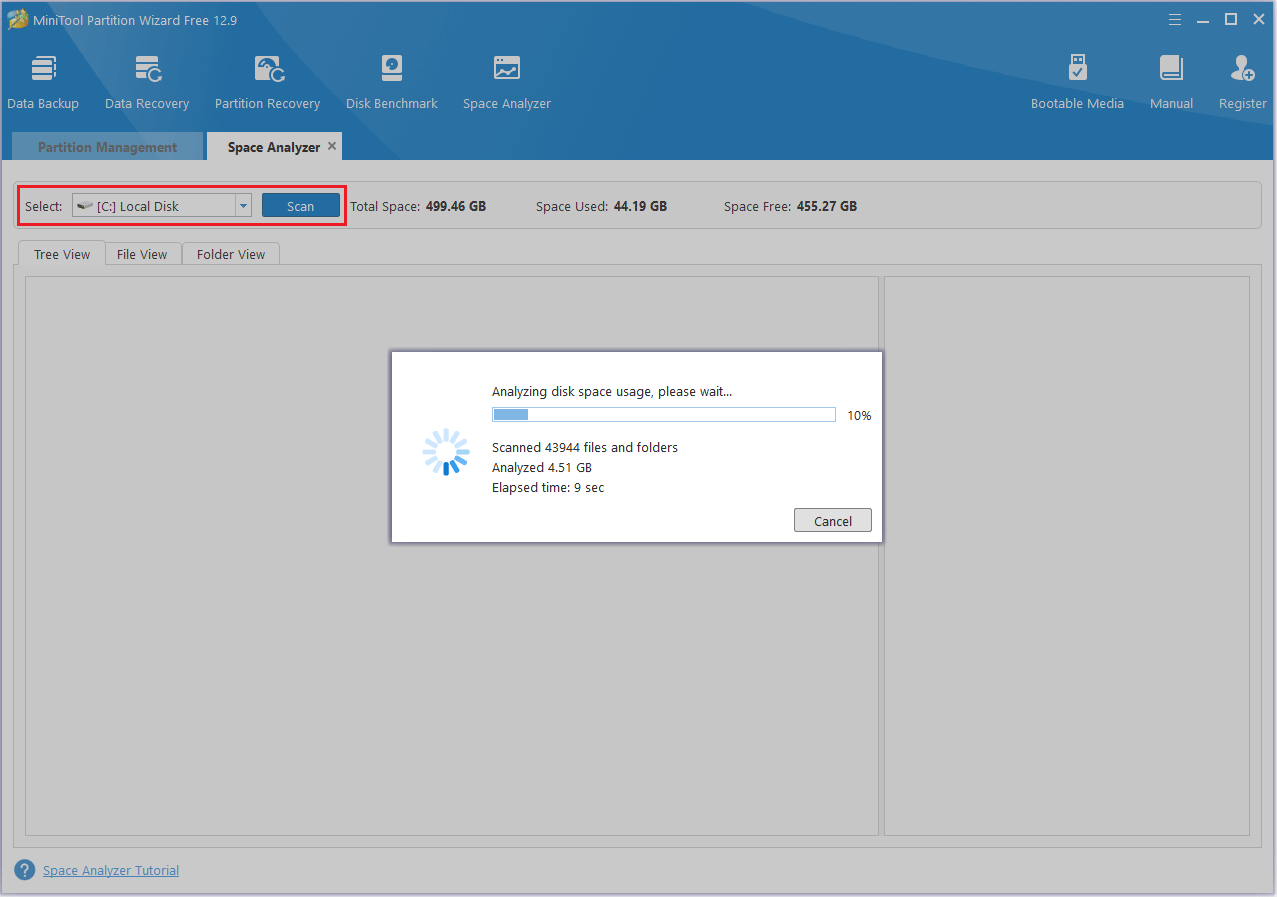
Step 2: Choose a disk or a partition and click Scan to scan this drive.
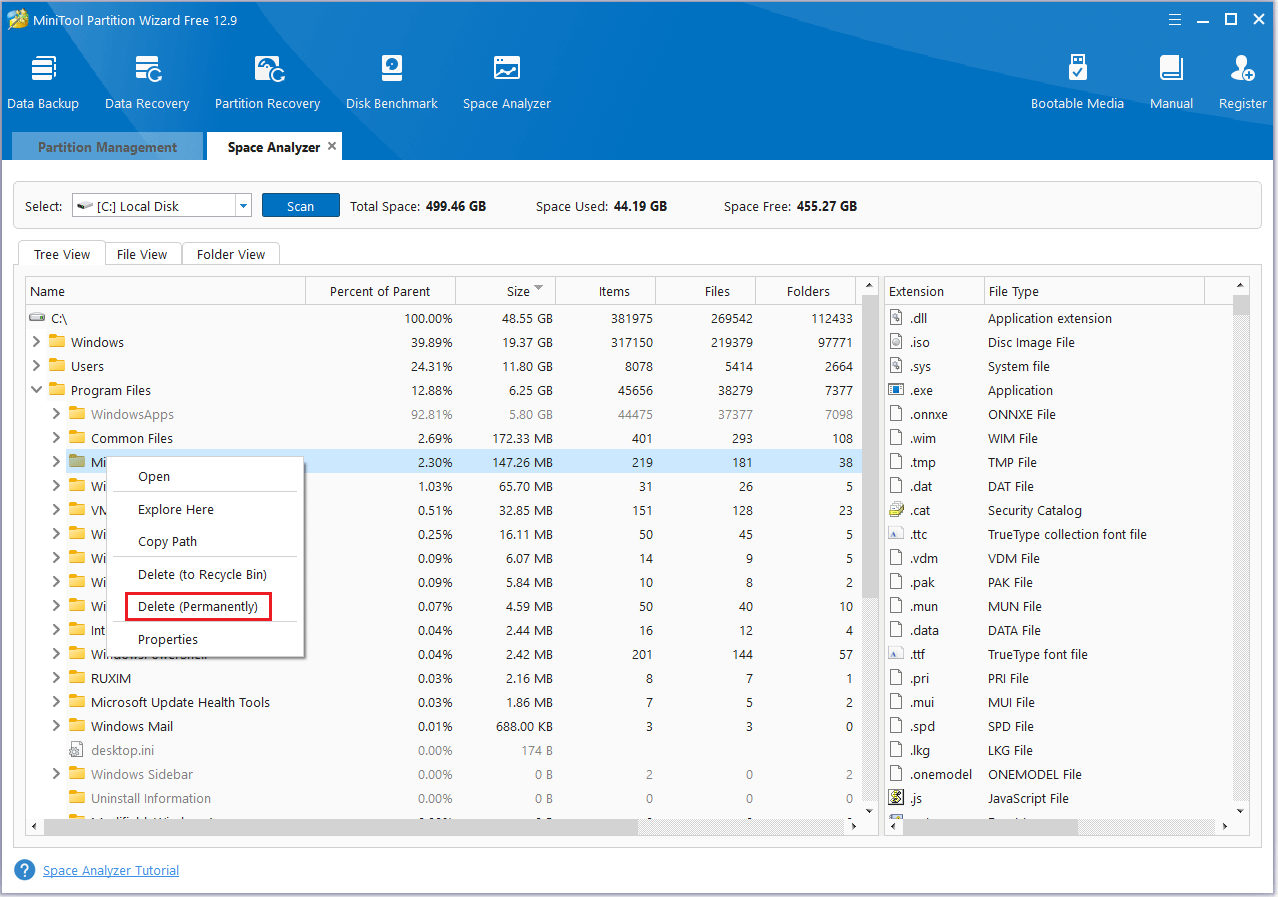
Step 3: By default, it displays the scanning result in Tree View. You can also navigate to File View and Folder View to directly find out the largest files/folders saved in the drive instead of going through each parent folder.
Step 4: Right-click on an unnecessary file or folder and choose Delete (Permanently).
Uninstall Unused Programs
1. Uninstall Programs
Uninstalling unused programs not only helps keep your system clean and tidy but also frees up disk space and reduces background resource usage.
Here are the steps to uninstall unused programs:
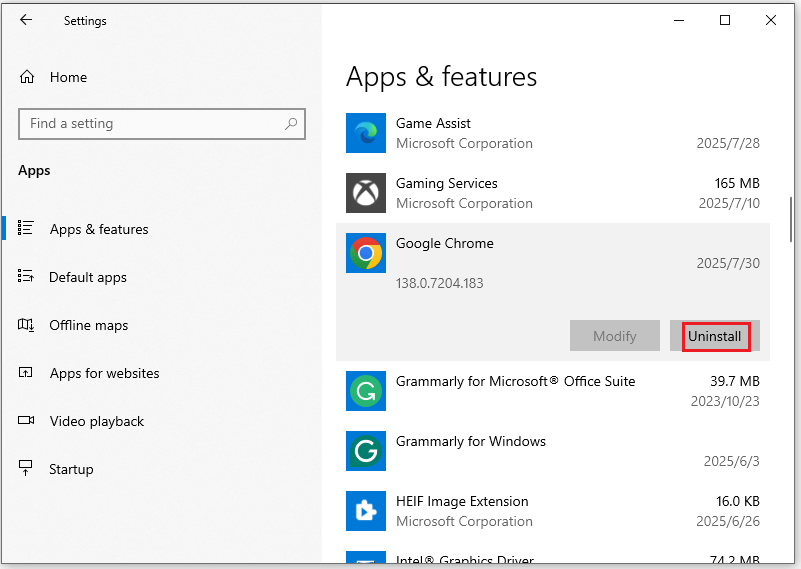
Step 1: Press Windows + I to open the Windows Settings window.
Step 2: Click Apps, in the Apps & features section on the right, find the program you don’t use, click it, and select Uninstall. After confirming the Uninstall option, the programs will be uninstalled from your computer immediately.
2. Uninstall Games
Uninstalling games and programs is essentially the same. You can uninstall games using the steps above. However, sometimes you’ll need to uninstall through the gaming platform.
Here’s an example of removing a game from the Steam library:
Step 1: Log in to your Steam account and open its client.
Step 2: In the new window, navigate to the LIBRARY tab at the top of the menu.
Step 3: In the list of games, go to the game that you want to remove from your Steam library. Then right-click the game and select Uninstall from the drop-down menu.
Step 4: Then you will be asked whether you want to completely delete the game. If yes, click the Delete button.
Once you’ve removed a game from your Steam library, the game’s title will be greyed out in the Steam games list.
Utilize Disk Cleanup
Windows Disk Cleanup is a tool that’s often used to clean up hard drives and delete unnecessary files. To use the Disk Cleanup utility in Windows 10, follow these steps:
Step 1: Type disk cleanup in the Windows search box and click Open on the right side.
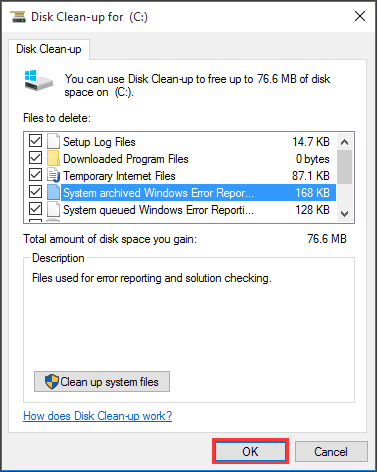
Step 2: In the pop-up window, the system drive is selected by default. Usually, only the C drive contains the unnecessary files. Click OK to continue.
Step 3: After a few minutes of processing, a new window will appear showing a list of files that can be cleaned, along with the amount of space each type occupies.
Here are some examples:
- Setup Log Files
- Downloaded Program Files
- Temporary Internet Files
- System archived/queued Windows Error Reporting
- Delivery Optimization Files
- Recycle Bin
- …
Select the file types you want to remove and click OK.
Move Files to External Storage or Cloud
To address the “hard drive is full for no reason” problem, you can move large, space-consuming files to an external storage device (such as a USB drive or external hard drive) or upload them to a cloud storage service (such as OneDrive or Google Drive).
1. Use External Storage Device
To transfer files from your PC to an external storage device, you can use File Explorer to either copy or cut the files, then paste them onto the external drive.
- Plug in the external drive and make sure your computer recognizes it.
- Navigate to the files you want to move in File Explorer.
- Right-click the selected files and click Copy or Cut.
- Open the external drive in File Explorer and paste the files.
- Safely eject the external drive and then unplug it.
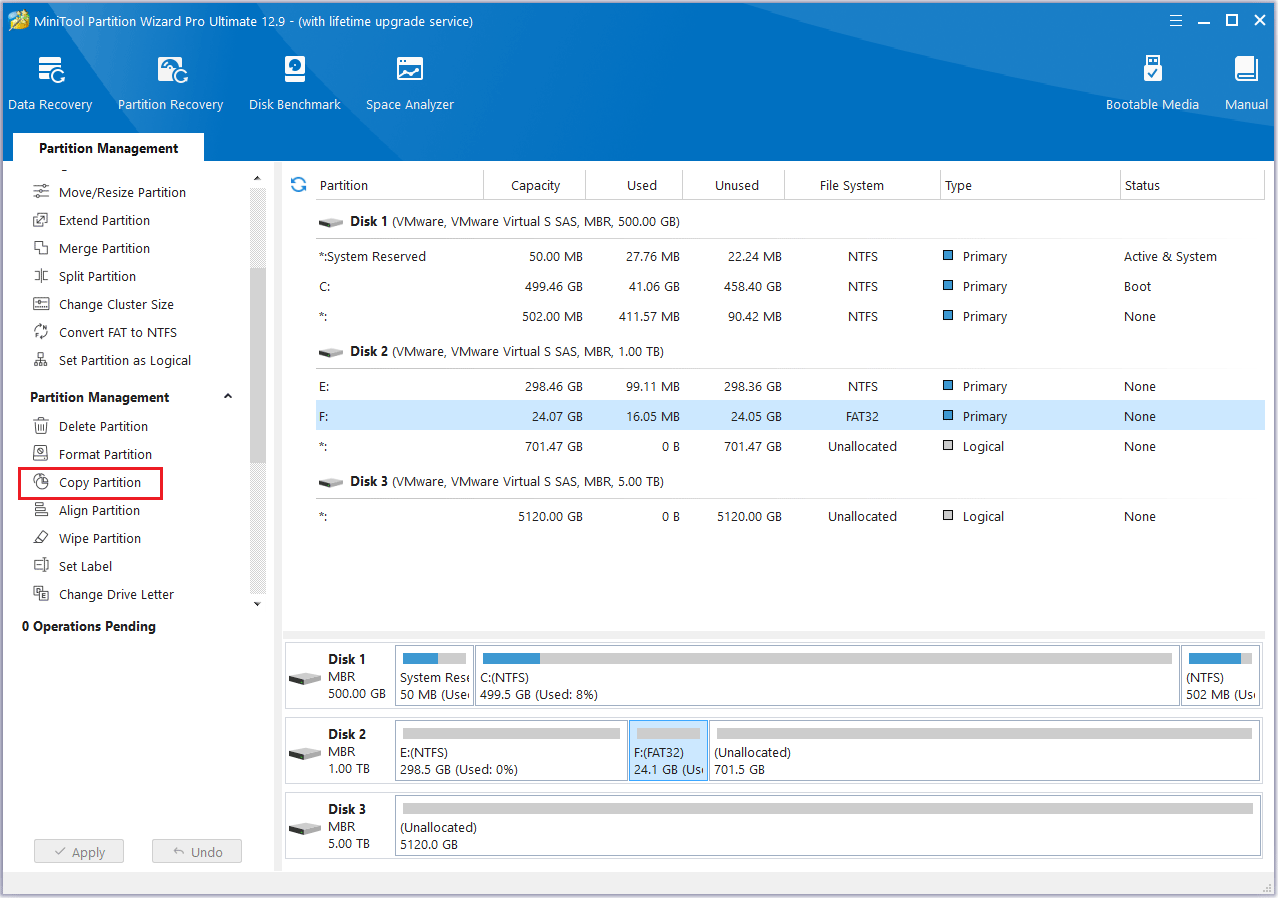
At the same time, you can also use the Copy Partition function of MiniTool Partition Wizard to migrate files of the entire partition.
Step 1: Open MiniTool Partition Wizard. Then click the disk you want to copy and choose the Copy Partition in the left action panel.
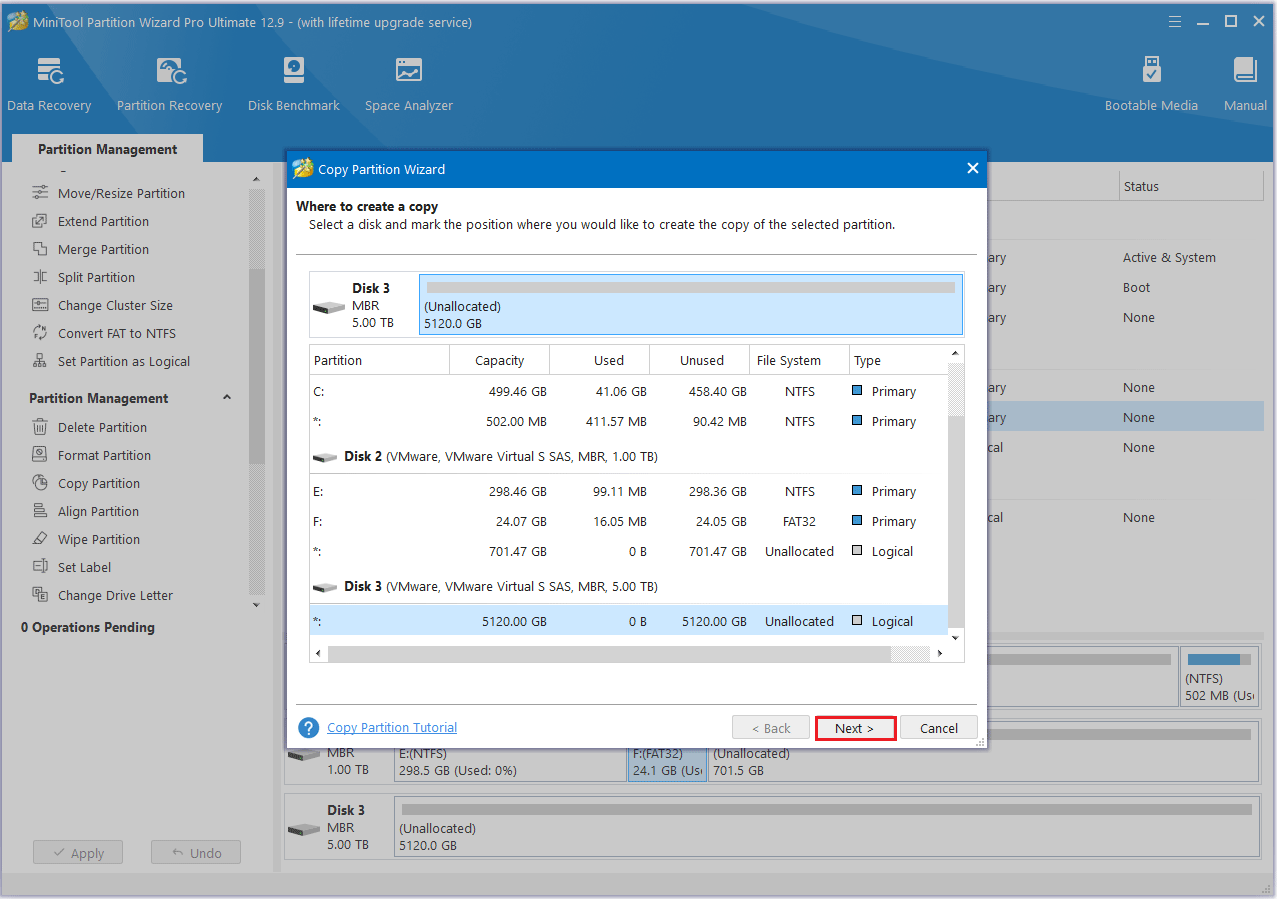
Step 2: Select an unallocated space from the partition list and click Next.
Step 3: Move the handle to enlarge or shrink the new partition. Alternatively, you can type the exact partition size in MB. Then, click Finish.
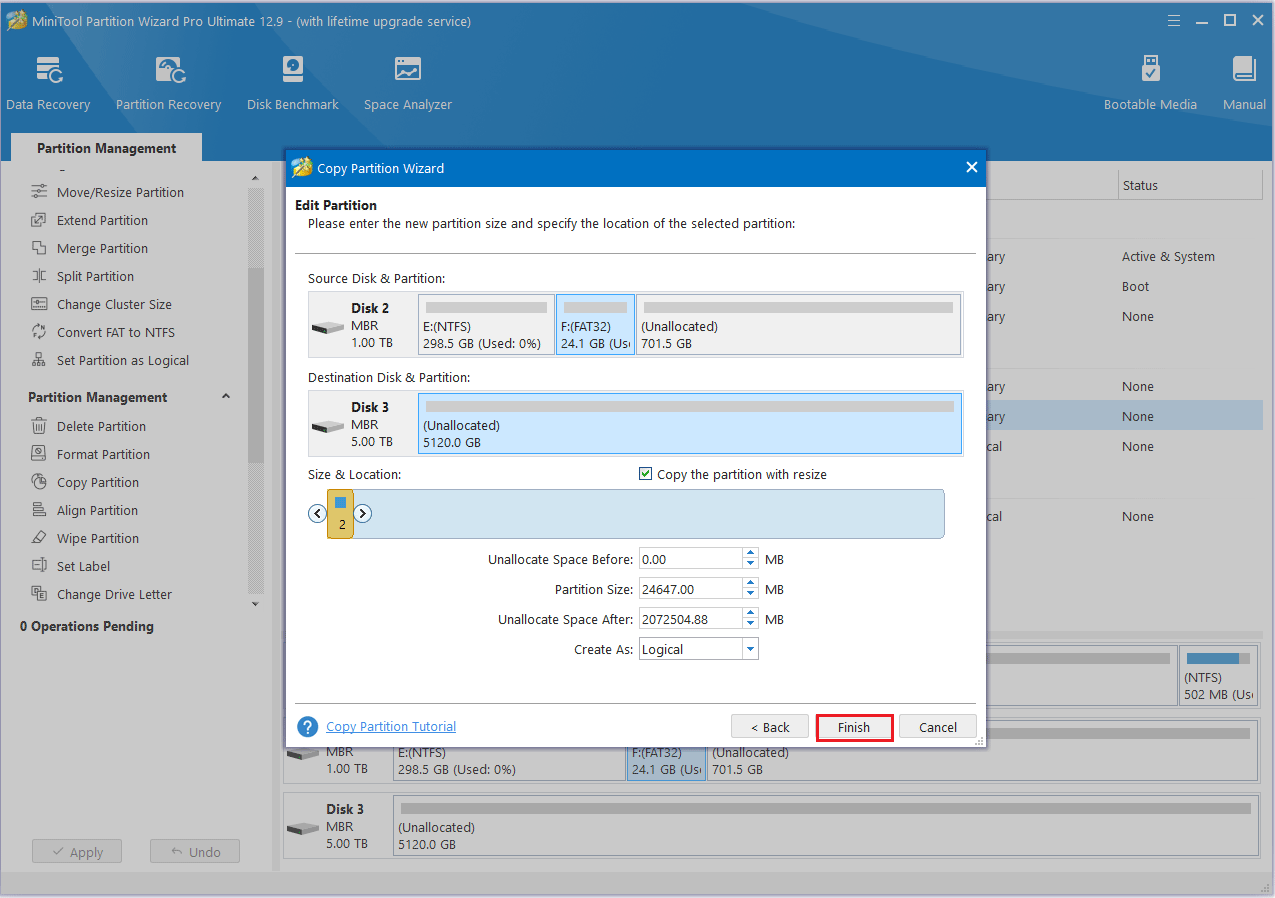
Step 4: Click the Apply button to finish the process.
2. Use Cloud Storage
- Choose a service that suits your needs (e.g., Google Drive, OneDrive, iCloud, etc.).
- Create an account and install your chosen cloud storage app on your computer.
- First, create different folders in your cloud storage to manage your uploaded files. Then, upload the files you need to move to the cloud.
- Once you’ve confirmed that the files are securely uploaded to the cloud, you can delete them from your hard drive to free up space.
Manage System Restore
System restore points are a feature of the Windows operating system. They capture the system’s state at a specific moment, allowing you to restore it if a problem occurs.
However, restore points can gradually consume a significant amount of disk space. Properly managing them can help free up valuable storage.
Step 1: Type Create a restore point in the Windows search bar and select Open from the right panel.
Step 2: In the System Properties window, click on the System Protection tab.
Step 3: Select your system drive and click Configure.
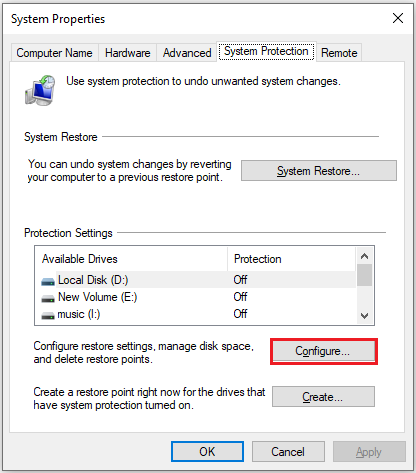
Step 4: You can delete old restore points to free up disk space.
Other Tips
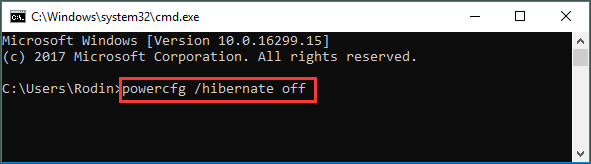
1. Disable Hibernation
Hibernation creates a large file. If you don’t need this feature, you can disable it.
To free up disk space taken by this file, you can take the following steps:
Step 1: Search for Command Prompt and select Run as administrator on the right panel.
Step 2: Type the following command to turn off Hibernation and press Enter:
powercfg /hibernate off
2. Enable Storage Sense
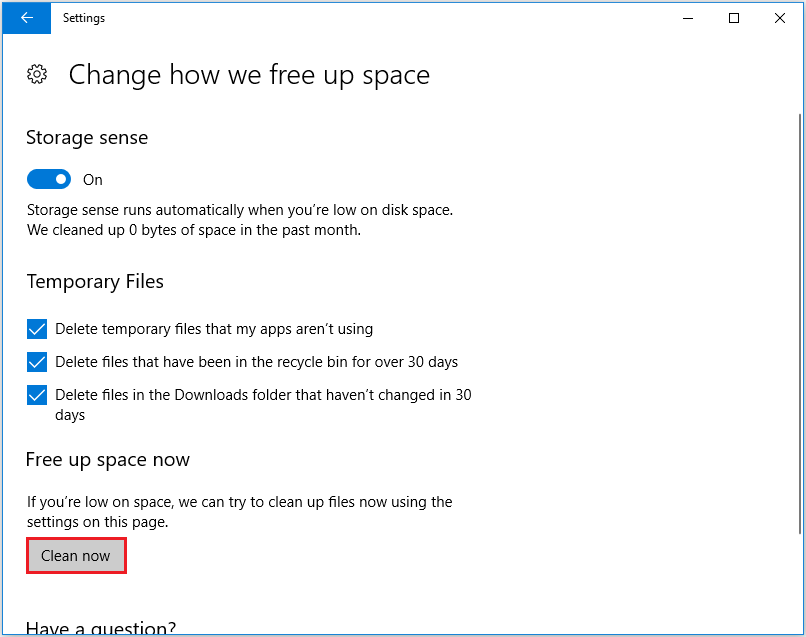
Storage Sense is a built-in Windows feature that deletes temporary files, files in the Recycle Bin older than 30 days, and more. If your hard drive is full for no reason, enabling Storage Sense can help free up disk space.
Follow these steps to configure Storage Sense:
Step 1: Open Settings > System > Storage.
Step 2: Locate the Storage Sense section and toggle the switch to the On position.
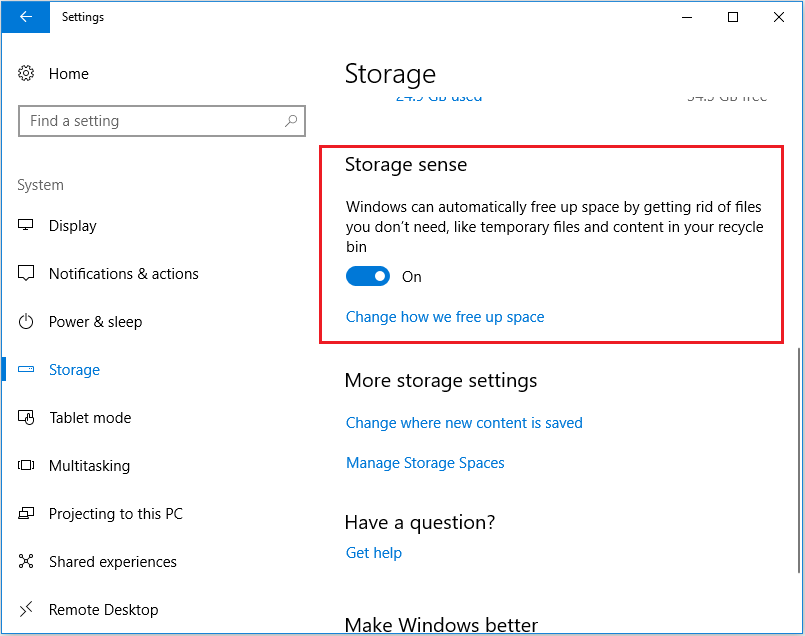
Step 3: Under Temporary Files, check the files you want to delete. Finally, click Clean now.
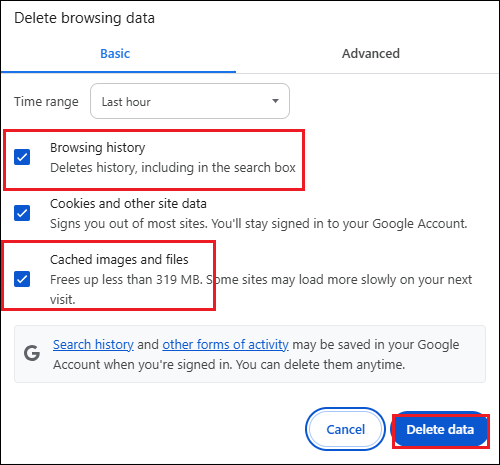
3. Clear Browser Cache
Browser cache can accumulate and take up significant disk space if not cleared regularly.
Below, I’ll use Chrome as an example to show you how to clear your browser cache.
Step 1: Click the three-dot icon at the top right of the Chrome Window and choose Settings.
Step 2: Choose Privacy and security from the left panel and click Delete browsing data.
Step 3: Checkmark the Browsing history and Cached images and files. Then, hit Delete data.
4. Extend C Drive
To safely extend the C drive in Windows 10 without causing boot issues, it’s advisable to create a bootable media using MiniTool Partition Wizard. Then, start your computer from this media and extend the system partition in boot mode. The steps below explain the process in detail:
Note: In the bootable version of MiniTool Partition Wizard, the system partition may not be assigned C. Therefore, make sure to select the correct partition.
Use the Extend Partition Feature
Step 1: In the main interface of MiniTool Partition Wizard, select the system partition and click Extend Partition.
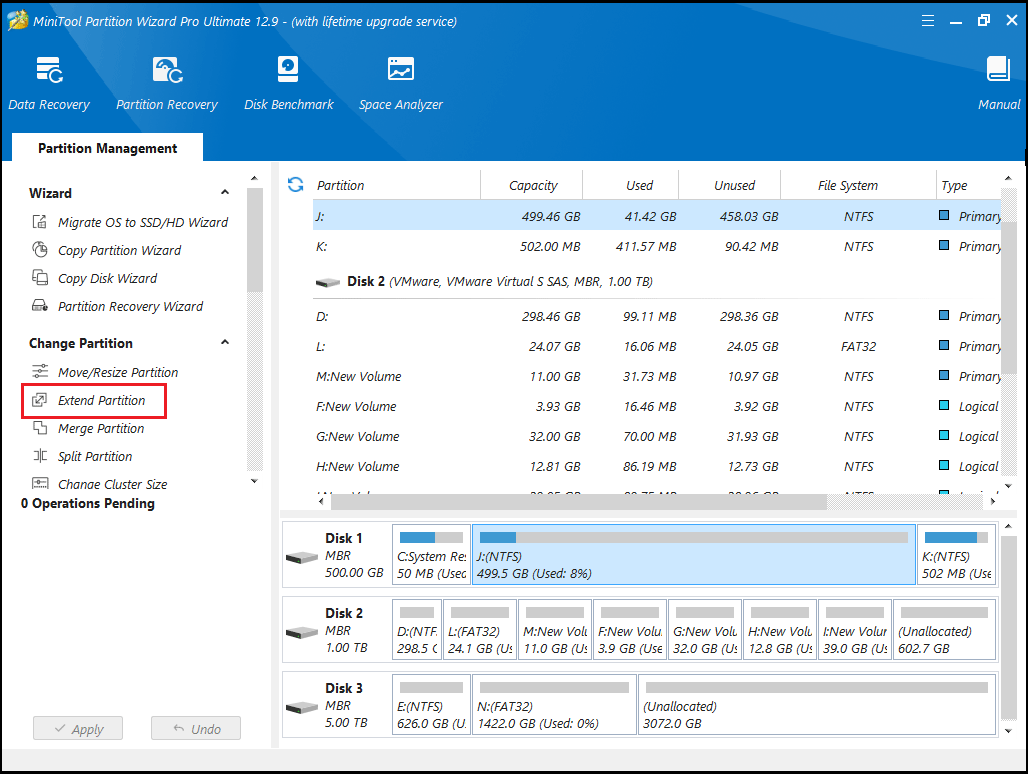
Step 2: Click the down arrow from “Take Free Space From” and choose a partition or unallocated space. You can drag the sliding handle leftwards or rightwards to decide how much of the available space it takes up. After that, click OK to go back to the main interface.
Step 3: Click the Apply button to execute all changes.
![[Full Guide] How to Extend Partition Windows 10](https://images.minitool.com/partitionwizard.com/images/uploads/2024/07/extend-windows-10-partition-thumbnail.png)
5. Add Extra Storage Space
What can you do if your current hard drive is running low on space and you want to replace it with a larger one without reinstalling your operating system?
Fortunately, professional disk cloning software, MiniTool Partition Wizard, can help you transfer all your data (including the operating system) to the new drive without affecting the original data.
MiniTool Partition Wizard DemoClick to Download100%Clean & Safe
Step 1: Attach the new SSD to your computer, then launch MiniTool Partition Wizard to access its main interface.
Step 2: Right-click the hard drive that you want to clone and then select Copy from the menu. Alternatively, you can select Copy Disk from the action panel on the left.
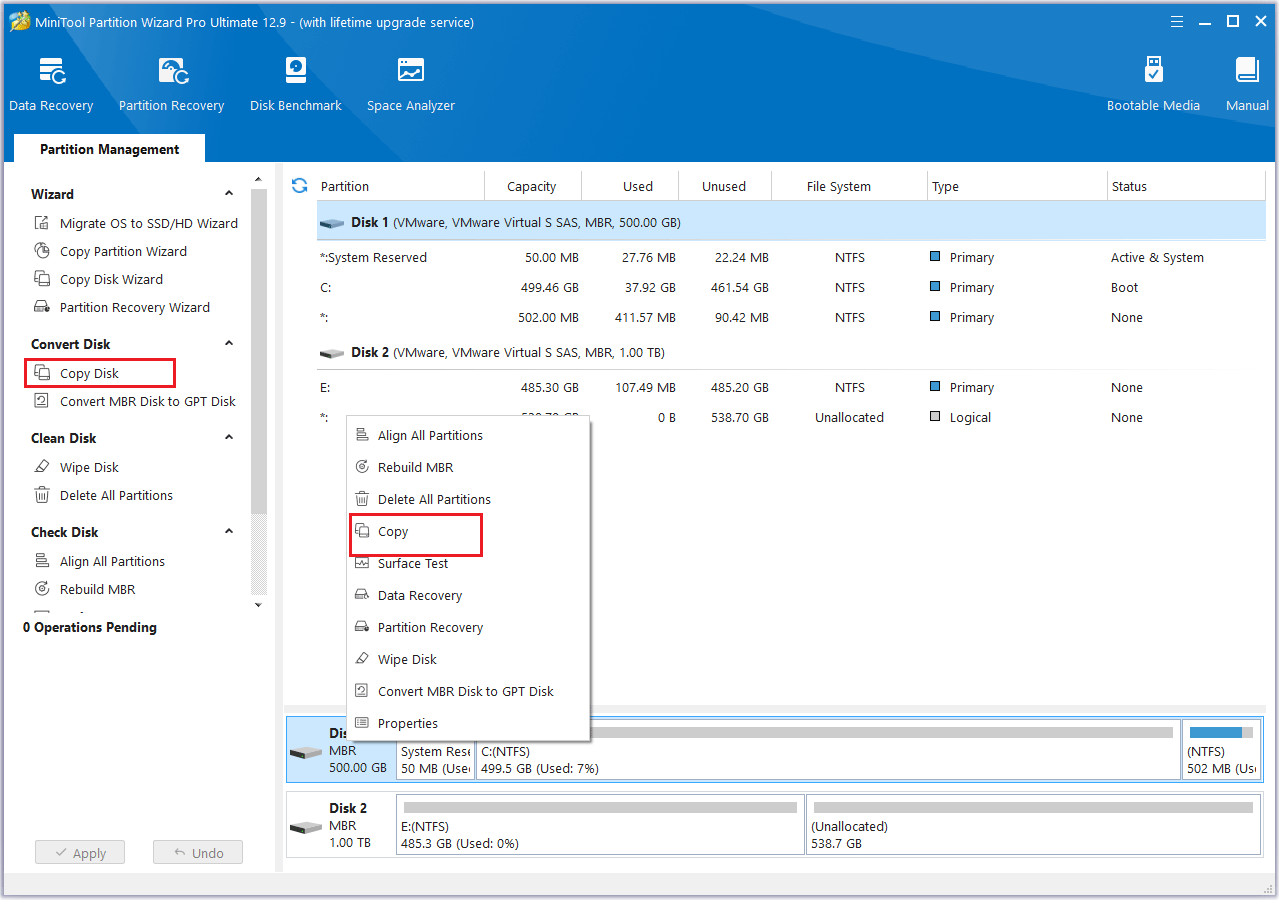
Step 3: In the pop-up window, choose the new SSD as the destination drive, then click Next. When a confirmation message appears, click OK to continue.
Step 4: Check the Copy Options and the Target Disk Layout. If everything looks correct, click Next.
- The options “Fit partitions to entire disk” and “Align partitions to 1 MB” are selected by default. The former adjusts partition sizes proportionally to utilize the full capacity of the new SSD, and the latter option will apply 4K alignment to the SSD.
- If the original hard drive is an MBR disk, but you want the cloned SSD to be a GPT disk, you can choose the Use GUID partition table for the target disk option.
- Under the Change Selected Partition section, you can resize or move the partition according to your needs.
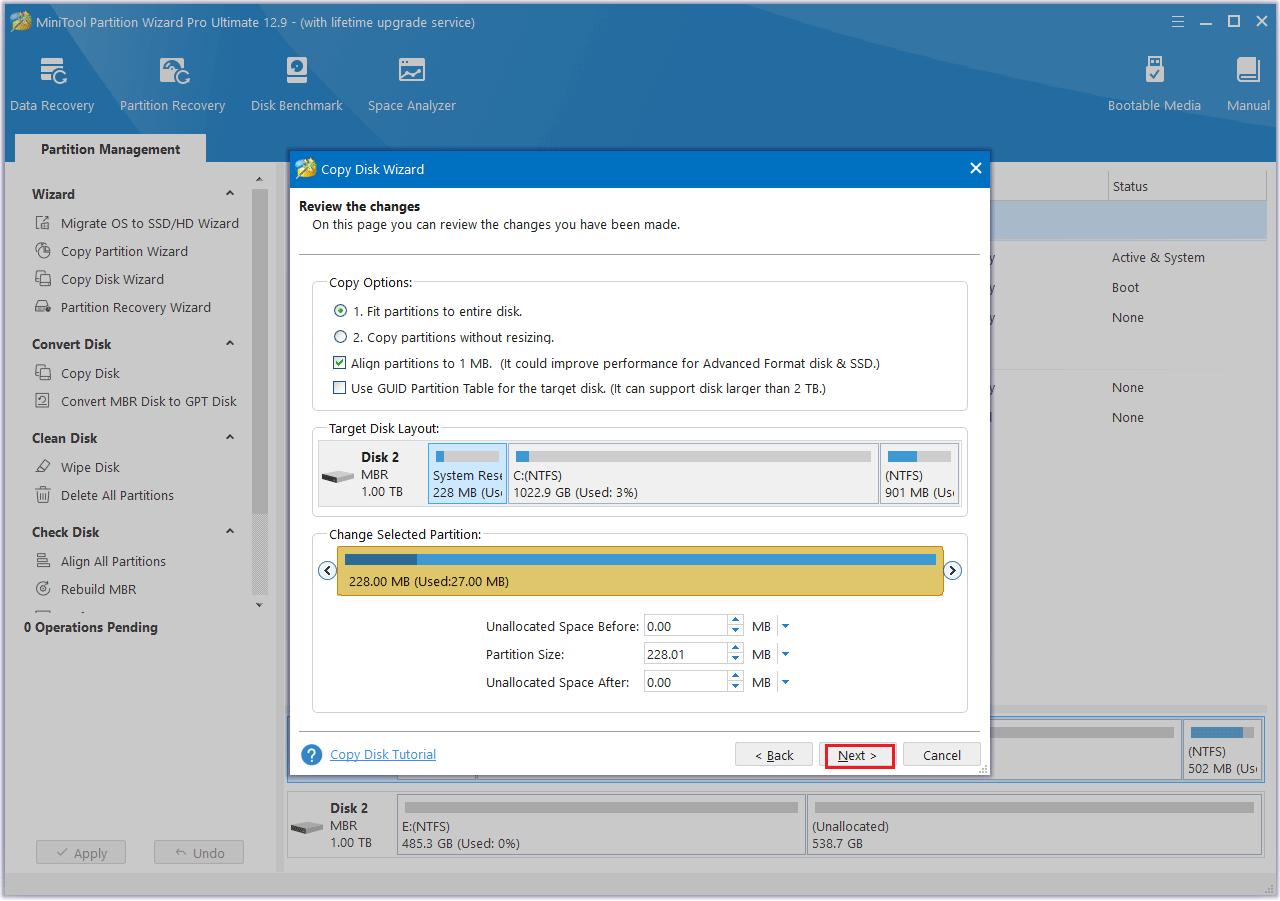
Step 5: Read the note carefully, then select Finish. Next, click Apply to begin the process and wait for the cloning to complete.
6. Run Virus & Threat Protection to Check for Malware
As mentioned earlier, some malicious programs may silently write a large number of files, causing the hard drive to reach its capacity.
Therefore, you can run Windows Virus & Threat Protection to check for and remove detected malware.
Step 1: Please press Win + I to open Windows Settings.
Step 2: Select Update & Security > Windows security > Virus & threat protection.
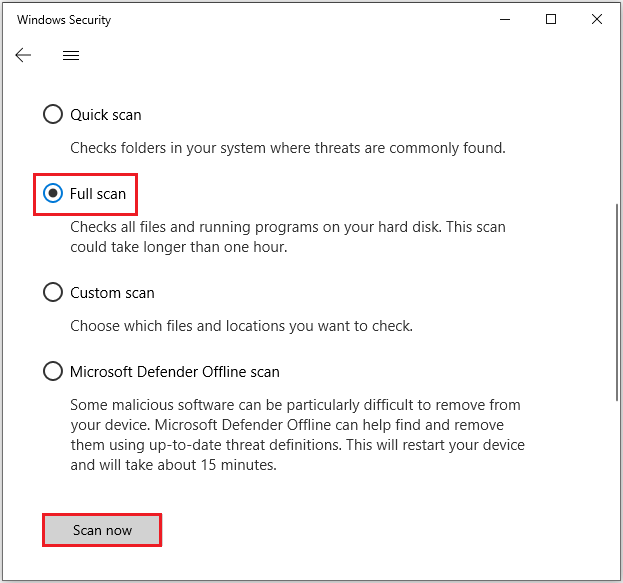
Step 3: Under the Virus & threat protection section, click Scan options.
Step 4: Select Full scan > Scan now. After scanning, restart your PC and reconfirm whether there’s still limited space on your hard drive.
Bottom Line
Have you ever run out of disk space? This article explains how to fix the “hard disk full” issue in Windows. We hope you’ll find these solutions useful and reliable.
It also introduces a secure disk cloning tool (MiniTool Partition Wizard), which can help you migrate data from a smaller disk to a larger one.
If you have any questions or suggestions while using MiniTool Partition Wizard, you can contact us via [email protected] to get a quick reply.
Hard Drive Is Full FAQ
About The Author

Position: Columnist
Vega enjoys helping people with computer problems, including disk management, data recovery, data backup, and more. She is constantly expanding her knowledge in related fields. And she will continue to bring more easy-to-understand professional articles to help people solve various problems on the PC.
User Comments :