Are You Sure to Convert MBR to GPT During Windows Installation?
Before showing the 2 methods about how to convert MBR to GPT during Windows installation, I would like to make a simple introduction to the two partition styles at first. Please spend your minutes reading this part as it may help you figure out you really need to make this conversion or not.
What is MBR? What advantages or disadvantages does it have?
A master boot record (MBR) is a special type of boot sector at the very beginning of partitioned computer mass storage devices intended for use with IBM PC-compatible system and beyond. It records the information that how the logical partitions, containing file systems, are organized on that medium.
Keep using MBR disk, you have the following reasons:
- MBR produces a high quality;
- Your computer only supports Legacy BIOS mode.
However, this partition style only supports at most four primary partitions or three primary partitions and one extended partition containing many logical partitions (If you have some questions about how to create more partitions on an MBR disk, you can read the post: How to Create More Than 4 Partitions on MBR Disk in Windows 10).
Furthermore, this partition style only supports a single partition no more than 2TB. It means that you should set the disk more than 2TB as a GPT disk or you will run into a problem like 3TB hard Drive only using 2TB.
What is GPT? What advantages does it have?
Standing for GUID Partition Table, GPT is a new standard with many advantages. Why is it called GUID Partition Table? The reason is that every partition on your drive has a “globally unique identifier”.
Converting to GPT disk, you have the following reasons:
- The hard disk is larger than 2TB;
- To create more than 4 primary partitions on the disk (In theory, this type of hard disk drive can support 128 primary partitions);
- Your computer supports UEFI mode and this mode is enabled.
The above content just shows a short comparison of these two partition styles. If you want to learn about more information about MBR vs GPT, please click MBR vs. GPT Guide: What’s The Difference and Which One Is Better.
After seeing the comparison, you may draw a conclusion that GPT disk is much better than MBR disk in terms of some aspects, and you may want to convert MBR disk to GPT disk when you have got a new disk for Windows installation. How to achieve this conversion?
To do that, you should make sure that your computer does support UEFI by entering BIOS.
If it doesn’t, you may get this information “Windows Cannot Be Installed to This Disk. The Selected Disk Is of the GPT Partition Style.” when you install Windows on GPT disk. Once you get this information, you can read the MiniTool’s post: Windows Cannot Be Installed to a Disk? Here Are Solutions.
If your computer does support UEFI mode and this mode is enabled, let’s see how to convert MBR to GPT during Windows installation.
Method 1: Convert MBR to GPT During Windows Installation with DiskPart Commands
As we know, DiskPart commands can help us manage our PC’s drive. But do you know it can also help us convert MBR to GPT during Windows installation?
Using this utility to finish this conversion, you should note that you must select an object to give it focus before making any changes with those commands.
Furthermore, this utility is available in the following operating systems: Windows 10/8/7 and Windows Server 2019/2016/2012/2008.
If you are using one of the above Windows operating systems, please keep reading to finish the conversion by using Command Prompt. If not, you can try Method 2.
Here is the tutorial on MBR to GPT during Windows installation via DiskPart commands.
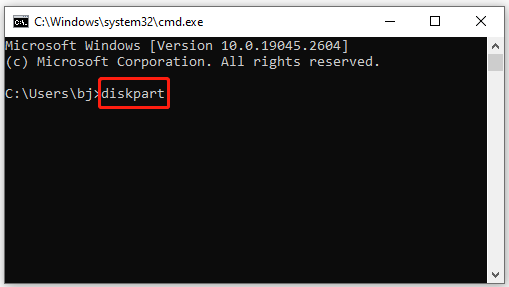
Step 1: During Windows installation, please press F8 key on the keyboard to access Command Prompt.
Step 2: After getting a cmd.exe window, please input diskpart and hit Enter key on the keyboard.
Step 3: After getting a newly popping-up window, please input the following commands in order, and then hit Enter key on the keyboard after inputting each command.
- list disk
- select disk 1
- clean
- convert gpt
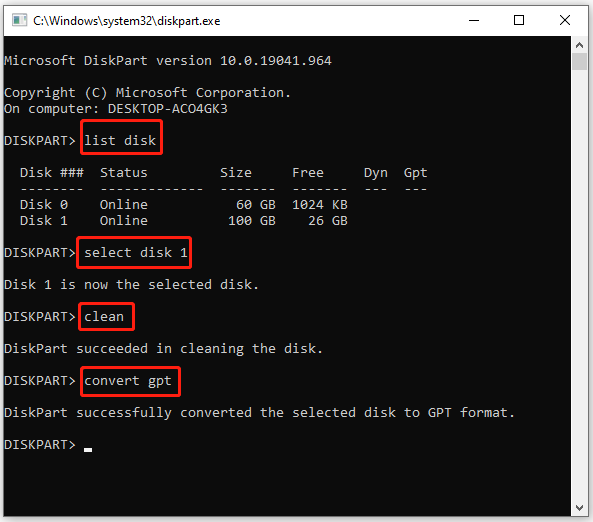
When you see “DiskPart successfully converted the selected disk to GPT format”, the conversion completes.
As you see, this method can help you convert MBR to GPT during Windows installation with few steps. But it can also clean your data stored in the selected disk. If you don’t want to lose any data and complete this conversion, you can move to the following method.
Method 2: Convert MBR to GPT During Windows Installation Using Partition Manager – No Data Loss
To avoid data loss when converting MBR to GPT during Windows installation, it is highly recommended that you use the third-party software – MiniTool Partition Wizard.
It is a really useful partition manager that can help you upgrade to a larger hard disk without reinstalling OS, back up data to secure your data security, check your disk health, and so on. It can also help you convert MBR to GPT during Windows installation without losing data.
How to convert MBR to GPT during Windows installation via MiniTool Partition Wizard? To do that, you should complete two steps, namely making a USB boot disk and converting MBR to GPT.
Make a USB Boot Disk with MiniTool Partition Wizard
Since no running OS is installed on your computer, you need to create a USB boot disk on another normally running computer at first. To do that, you should pay some money for the bootable edition of MiniTool Partition Wizard.
How to create a USB boot disk? Please refer to the following tutorial.
Step 1: Prepare a normally running computer and a USB (CD/DVD is also allowed) in advance.
Step 2: Connect the prepared USB flash drive with the normally running computer and then power on it.
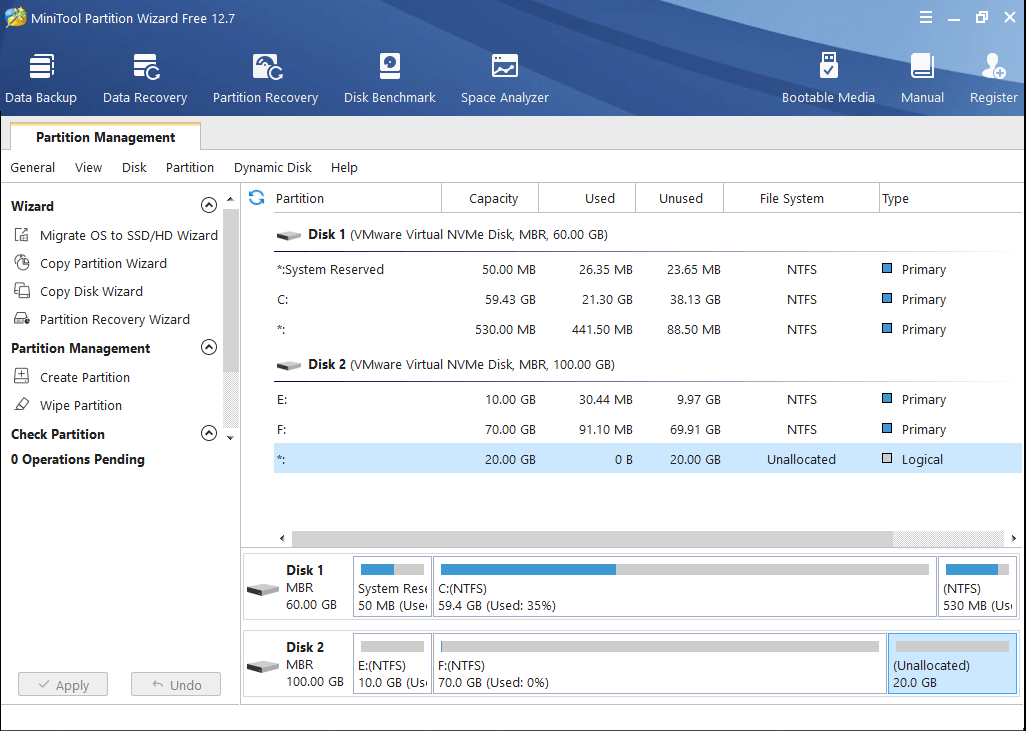
Step 3: Buy MiniTool Partition Wizard Pro by clicking the following button and then launch it to get its main interface showing like the following image.
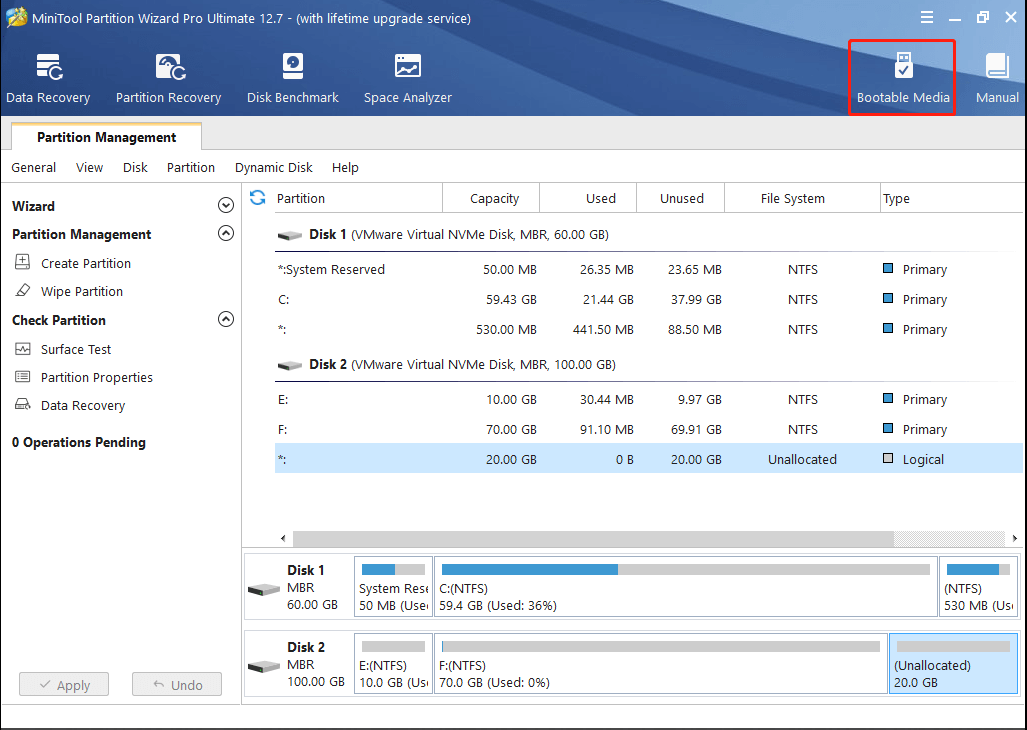
Step 4: Click Bootable Media feature in the toolbar. This feature can help you create a bootable disk easily.
Step 5: When you get a new pop-up window like the following image shows, please click WinPE based media with MiniTool plug-in.

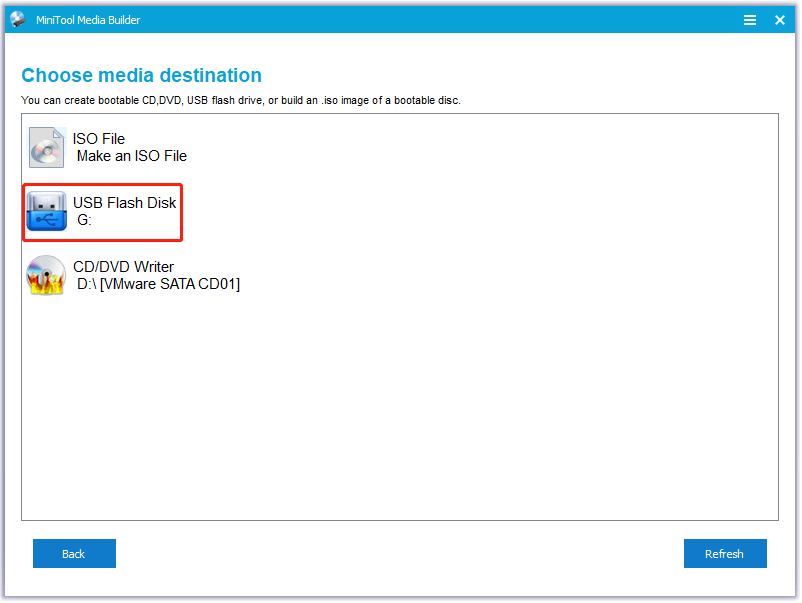
Step 6: Click the USB Flash Disk option to make a bootable USB flash drive. (You can also click CD/DVD Writer if you want to make a bootable CD/DVD).
Step 7: When you get the message “The data on the USB disk will be destroyed. Are you sure you want to build a USB boot disk?”, click Yes if all the important data has been backed up and all data stored in the USB flash drive will be cleaned.
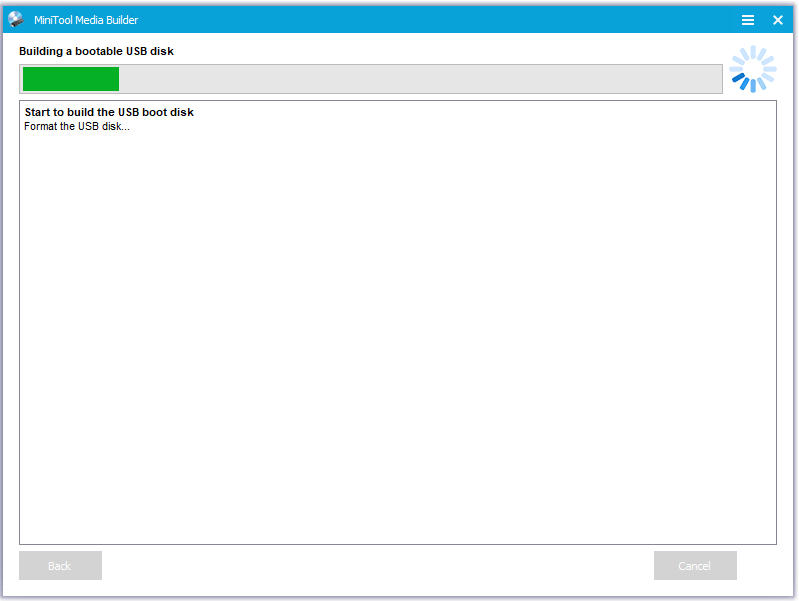
Step 8: After you confirm the change, the feature works to build a USB bootable disk for you. Please wait patiently.
Step 9: Click Finish after the building process comes to an end.
Now, you get a USB bootable disk. All preparations have been accomplished. Therefore, let’s keep reading on how to convert MBR to GPT with MiniTool Partition Pro during Windows installation without losing data.
Convert MBR to GPT via MiniTool Partition Wizard
In this part, you will get detailed instructions about converting MBR to GPT with MiniTool Partition Wizard.
Step 1: Connect the USB boot disk with the computer where Windows is installing.
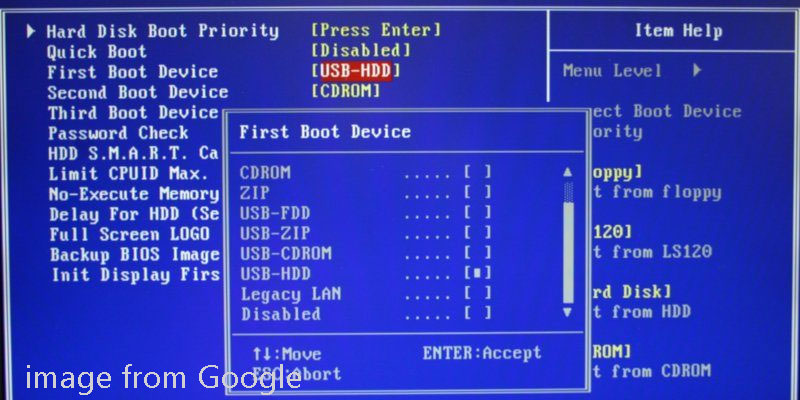
Step 2: Enter BIOS by pressing F8 key on the keyboard.
Step 3: Set USB as the First Boot Device and save configuration changes and exit from BIOS.
Step 4: Enter the interface of the bootable edition of MiniTool Partition Wizard Pro.
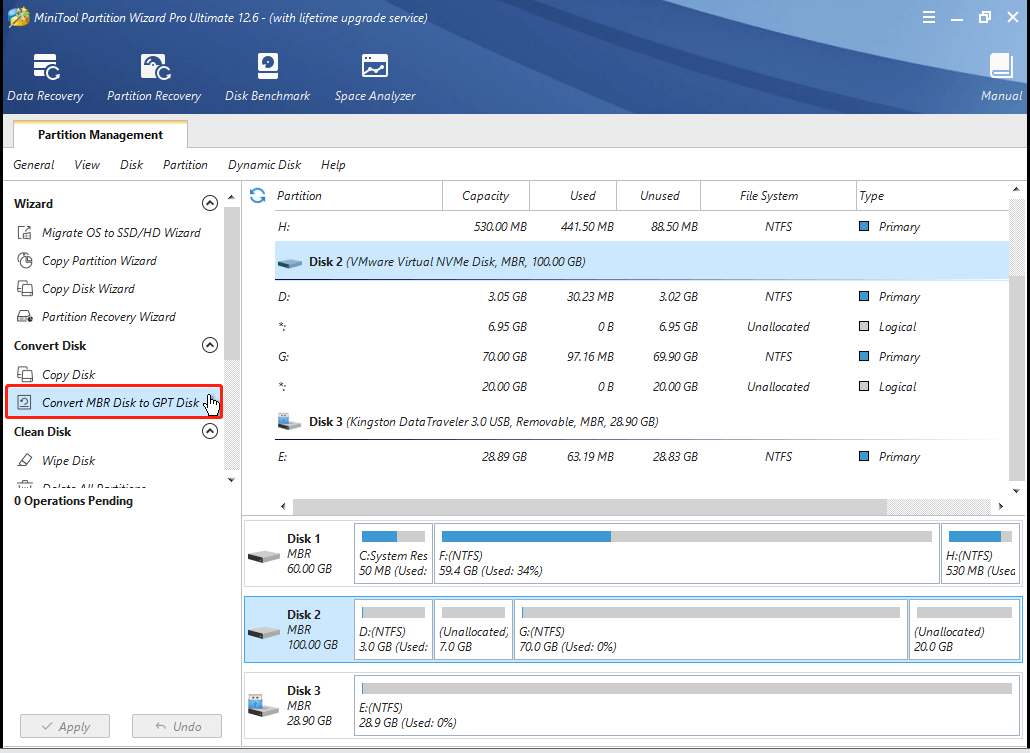
Step 5: Make sure which MBR disk showing in the Disk Map needs to be converted to GPT disk, right-click the disk, and Choose Convert MBR Disk to GPT Disk among the options. Or you can also activate the Convert MBR to GPT Disk feature from the left panel after choosing the disk. (Here take Disk 1 for an example)
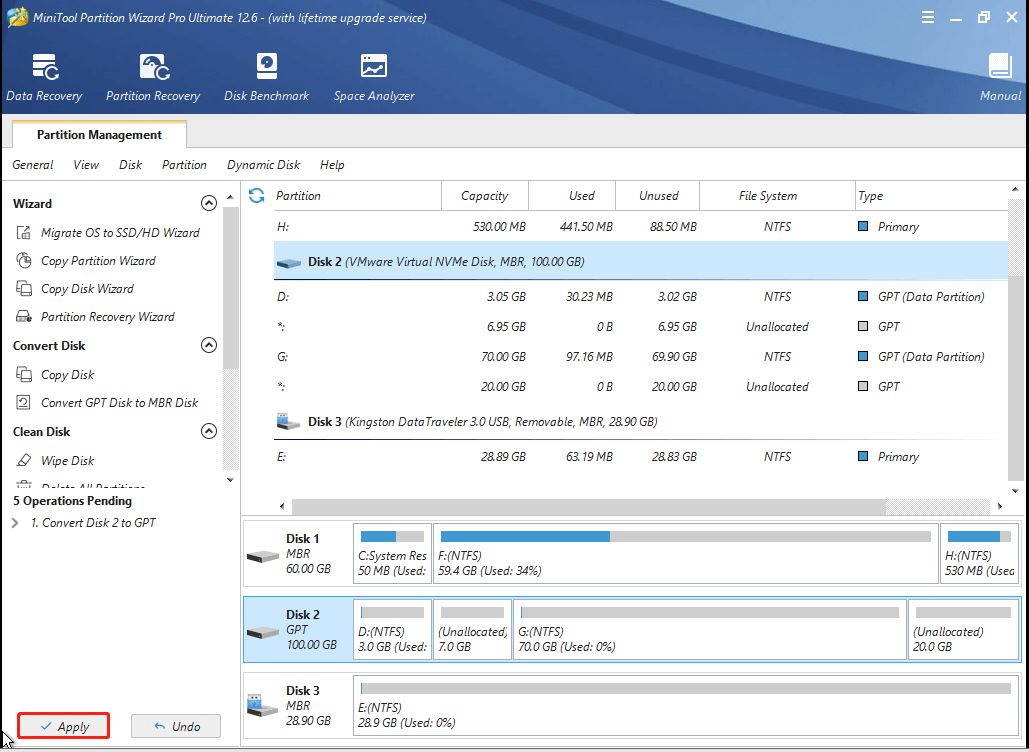
Step 6: Click the Apply button in order to carry out pending operations.
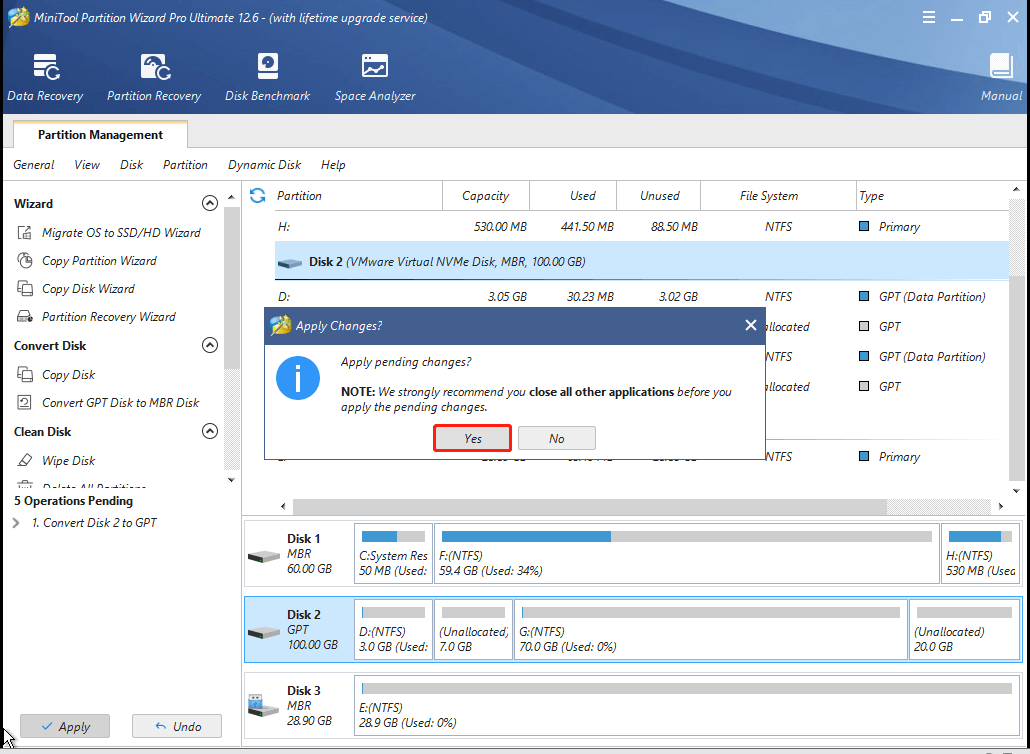
Step 7: Click Yes in the pop-up prompt windows to start converting MBR disk to GPT disk.
Step 8: Click the OK button when the converting process comes to an end.
Bottom Line
The 2 methods about how to convert MBR to GPT during Windows Installation have been displayed in this post. And here I would like to emphasize one thing again that is Method 1 will cause loss and Method 2 will not.
If you fail to achieve this conversion or there are still some questions relevant to the two methods wrapping you around, please don’t hesitate to contact us via [email protected] or leave a message in the following comment zone. We will replay to you as soon as possible.
Convert MBR to GPT During Windows Installation FAQ
To convert MBR to GPT after installing Windows, you can try the following 3 tools.
- Use MiniTool Partition Wizard. You can complete this conversion by following the tutorial in the part ‘Convert MBR to GPT via MiniTool Partition Wizard’ in this post. This will not cause data loss.
- Use Disk Management or Diskpart. Both two tools require you delete all the partitions on the hard drive and then convert it from MBR to GPT. Therefore, it is highly recommended that you try MiniTool Partition Wizard.
Certainly, you can install Windows 10 on MBR partition. Windows 10 supports two installation methods:
- The system can be installed on the hard disk of MBR partition table when the boot record method is set to Legacy in BIOS.
- The system can be installed on the hard disk of GPT partition table when the boot record method is set to UEFI in BIOS.
To know the layout of the MBR and GPT partition tables, you can read What Are the Two Different Methods for Partitioning Hard Drives.
To convert partition style from GPT to MBR, you can also try the following three tools.
- Use MiniTool Partition Wizard to do the GPT to MBR conversion without data loss.
- Use Disk Management or Diskpart with data loss during the conversion.
To ensure which partition style you should use, please take the following principles into consideration.
- hard disk capacity: use GPT if the disk space is more than 2TB.
- boot recode method: use MBR if your computer only supports the Legacy mode.
- partition numbers: use GPT if you create more primary partitions (more than 4).
User Comments :