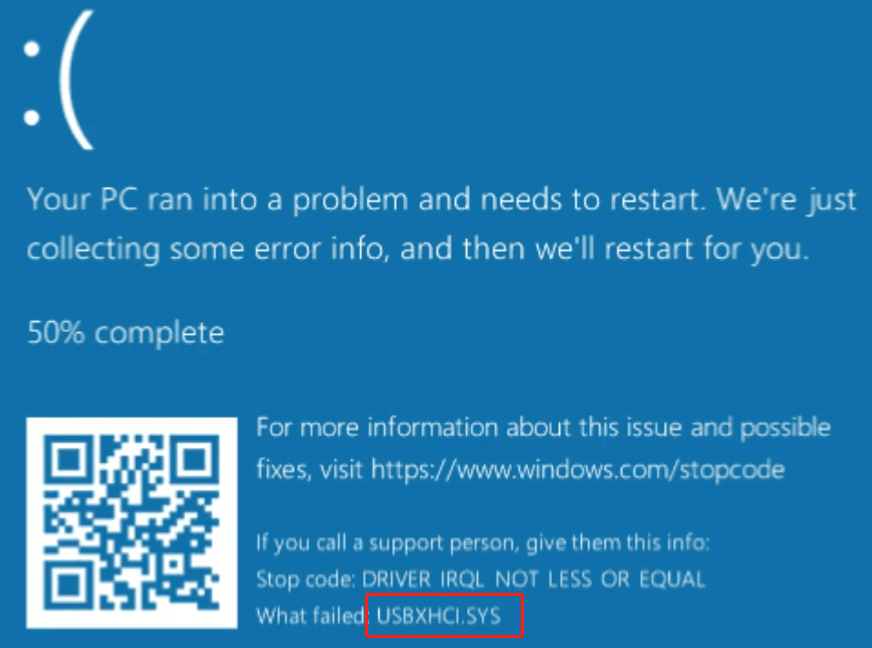
Error: usbxhci.sys Blue Screen on PC. Whenever I try to use one of my USH 3.0 ports, I get a BSOD error. If I start the computer with a plugged-in device, it goes straight to BSOD. If I start the computer without anything plugged into that port and then plug something in, it immediately crashes. Any advice would be appreciated.https://answers.microsoft.com/en-us/windows/forum/all/error-usbxhcisys-blue-screen-on-pc/f30e5d99-4233-476f-be4f-1f88aa1d27f1
What Causes the USBXHCI.sys Blue Screen Error
According to user reports, the USBXHCI.sys BSOD error often occurs when using one of USB ports on Windows 10/11. This error always triggers an immediate system crash and even causes data loss. The most common factor for the blue screen USBXHCI.sys is related to corrupted or outdated USB drivers. Besides, the error can be caused by corrupted system files or faulty hardware.
Before You Do
Lots of users reported that the BSOD error USBXHCI.sys can lead to system crashes and data loss. To avoid any unexpected loss due to the error, we highly recommend you back up all important data, including OS, before proceeding.
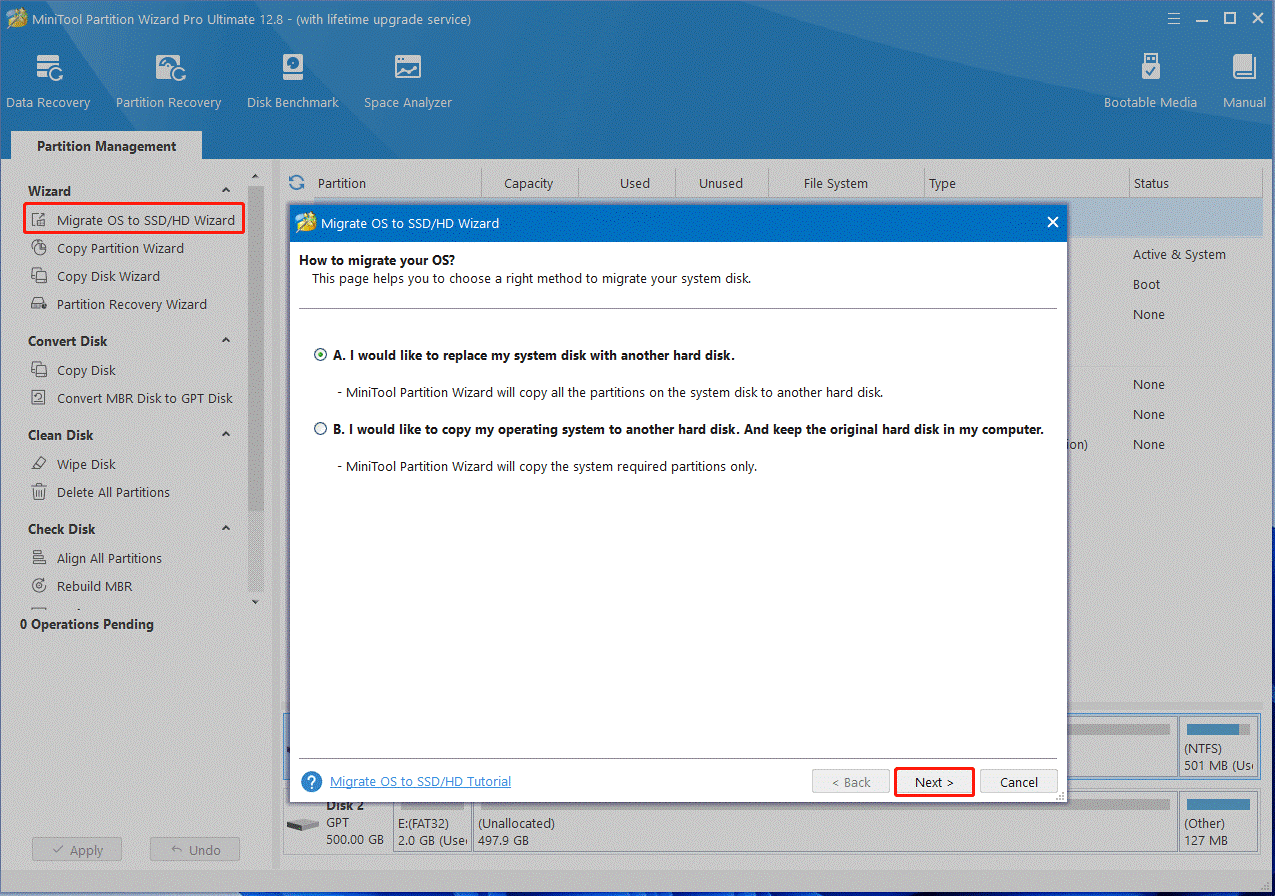
MiniTool Partition Wizard is a powerful data backup utility that can clone hard drive, migrate OS to SSD/HD, and copy a partition to another drive. Moreover, it can convert MBR to GPT without data loss, rebuild MBR, extend/resize/move partitions, change cluster size, and more.
MiniTool Partition Wizard DemoClick to Download100%Clean & Safe
How to Fix USBXHCI.sys Blue Screen on Windows 10/11
Now, you can start fixing the blue screen USBXHCI.sys with the following 4 methods.
# 1. Update or Reinstall the USB Driver
As discussed above, the main reason for USBXHCI.sys BSOD error is corrupted or outdated USB driver. Here you can follow the guide below to update or reinstall the USB hub drivers on Windows 10/11.
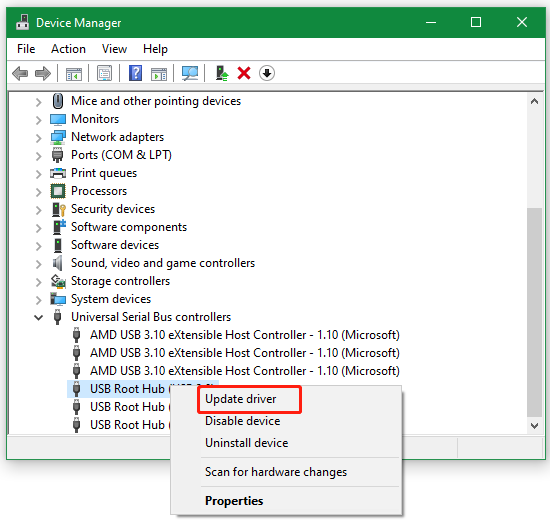
Step 1. Right-click the Start menu and select Device Manager from the context menu.
Step 2. Expand the Universal Serial Bus Controllers category, and then right-click the USB Root Hub driver and select Update driver.
Step 3. Select the Search automatically for drivers option and wait for the system to find an updated USB driver, and follow the on-screen prompts to complete this update.
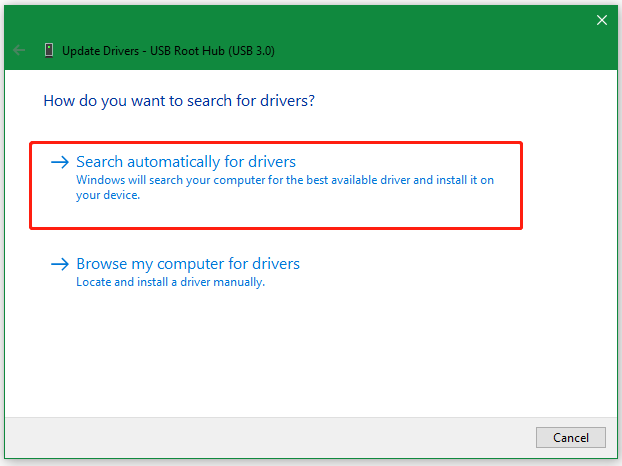
Once updated, restart the computer and plug the USB port again to see if the USBXHCI.sys error disappears. If not, continue to reinstall the USB driver.
Step 1. Select the Uninstall device option like Step 2 as we just showed above.
Step 2. Tick the checkbox next to “Delete the driver software for this device” and click on Uninstall.
Step 3. Restart your PC and the default USB driver will install back automatically.
# 2. Repair the System Files
If some system files related to the USB driver get corrupted, you may encounter the BSOD USBXHCI.sys error. In this case, you can run an SFC or DISM scan to repair them.
Step 1. Type cmd in the search box, and then right-click Command Prompt and select Run as administrator option.
Step 2. Type the sfc /scannow command in the elevated command prompt and hit Enter. Then wait for the SFC scan to complete.
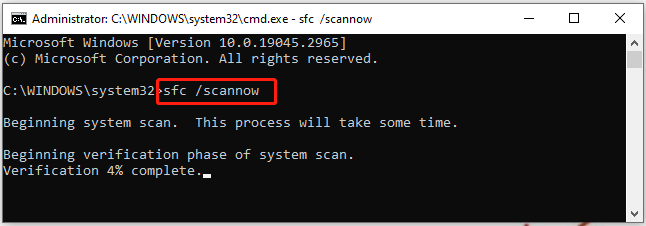
Step 3. If no corrupted system files were found, you can try running the DISM.exe /Online /Cleanup-image /Scanhealth and DISM.exe /Online /Cleanup-image /Restorehealth commands to go on the repair.
# 3. Perform a System Restore
Some users reported that they got rid of the USBXHCI.sys blue screen by performing a system restore. This will undo the recently changed settings and restore your system to an earlier state where the error doesn’t occur.
Step 1. Press the Win + R keys to open the Run dialog box, and then type rstrui.exe in it and press Enter.
Step 2. The System Restores window will pop up and click Next to continue.
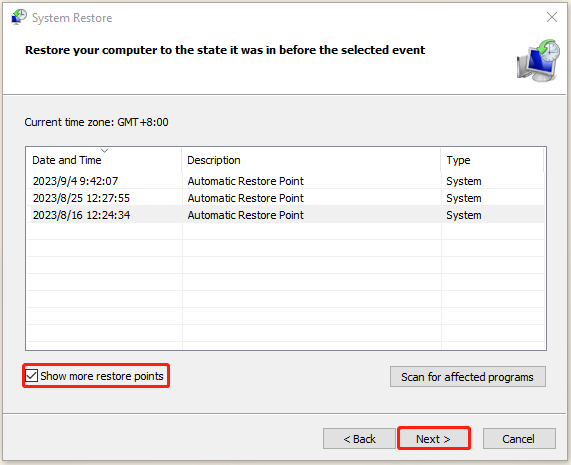
Step 3. In the list of all system restore points, select the Restore point that you want to use and click the Next button. Here you can tick the checkbox next to Show more restore points.
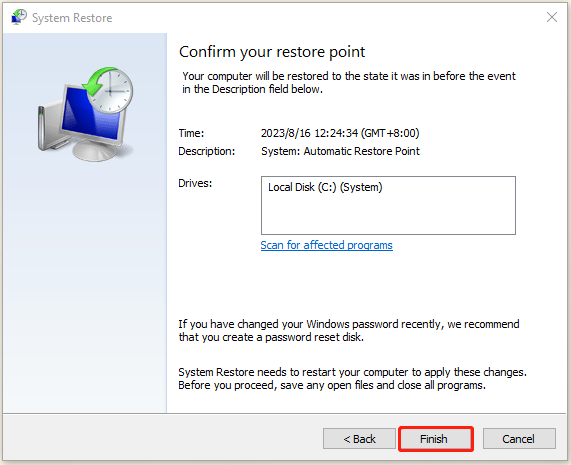
Step 4. Then confirm your restore point by clicking the Finish button. After that, your computer should be restored to an earlier state, and the blue screen error should be fixed.
# 4. Reset Your PC
If none of the above methods can fix the USBXHCI.sys BSOD error, you may consider resetting this PC to its default settings. But this will delete everything on your hard disk. So, make sure to back up all necessary files beforehand. Then you can refer to this post “How to Reset Windows 11” to reset your PC.
User Comments :