As you know, the system restore feature can help you restore operating system to an earlier working state. Besides, you can use this feature when some ransomware attacks your computer and damage the system files.
So, when you encounter the ransomware attacks, you may need to restore system. However, performing a system restore is not an easy operation. This is because, as you know, the fake antivirus programs and ransomware infections may block the Safe Mode of your operating system.
At this time, you have to run system restore from command prompt. Now, let’s see how to perform sys restore command on Windows 10 and Windows 7.
How to Perform a System Restore from Command Prompt Windows 7
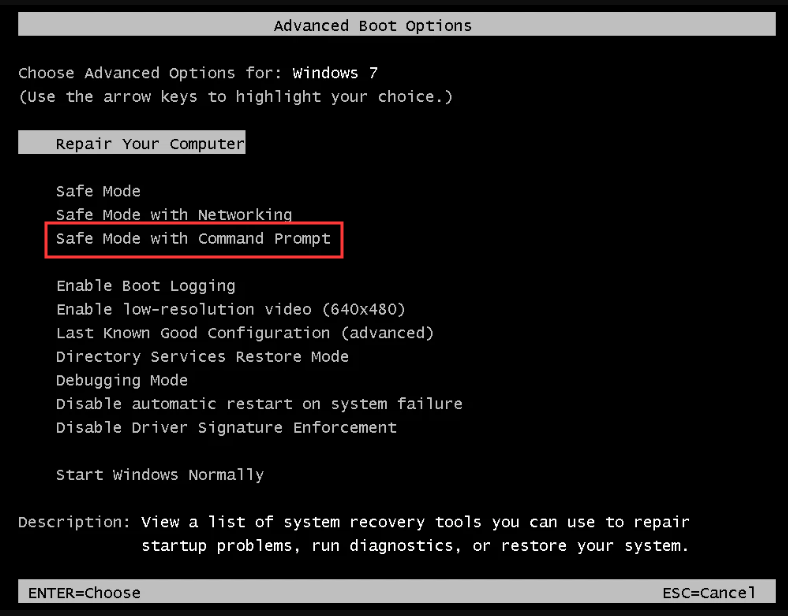
Step 1. Press the Power button to turn on your PC. During the start process, press F8 key to open the Advanced Boot Options screen.
Step 2. Select the Safe Mode with Command Prompt by pressing the arrow keys. After that, press Enter.
Step 3. In the command prompt, type cd restore command ad hit Enter.

Step 4. Then type rstrui.exe command and hit Enter

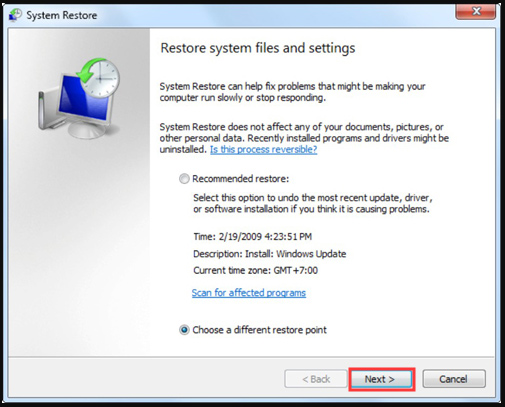
Step 5. Now, a System Restore window pops up. Click Next to continue.
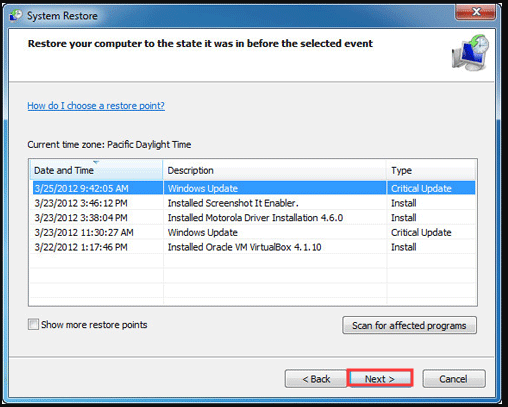
Step 6. In the list of restore points, select a restore point that you want to restore and click Next.
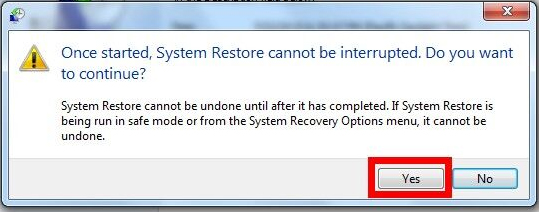
Step 7. Then you will receive a confirmation message: Once started, System Restore cannot be interrupted. Do you want to continue? Just click Yes.
Now, your system should be restored to an earlier working state. Next. Let’s see how to perform a Windows 10 system restore from command prompt.
How to Perform System Restore from Command Prompt Windows 10
This process is similar to do on Windows 7. Before you do, you can read this post to boot your Windows 10 PC from Safe Mode. After that, you can follow the steps below to perform the Windows 10 system restore from command prompt.
Step 1. Press Win + R keys to open the Run dialog box, and then type cmd in it and press Ctrl + Shift + Enter keys to open the elevated command prompt that will grant you an administrator privilege.
Step 2. In the pop-up window, type rstrui.exe command and hit Enter.

Step 3. The system restores window will pop up immediately, click Next to continue.
Step 4. In the list of all system restore points, select the Restore point that you prefer to and click the Next button.
Step 5. Then confirm your restore point by clicking the Finish button. After that, your computer should be restored to an earlier state and fix this issue.
Now, I believe you already have known how to perform a system restore from command prompt Windows 10/7.
Tips & Tricks for the Problems When Performing System Restore from Command Prompt
In addition to the above question, many users encounter new problems when running system restore from command prompt. For example, a user received the error message “not enough memory resources are available to process this command”. For this problem, you can try freeing up your PC’s storage space.
There are some users complained that their PC won’t boot and cannot access the Safe Mode. Don’t be alarmed. You can read this post, in which we provide detailed steps for entering Safe Mode when your PC won’t boot.


User Comments :