This post explains Lenovo SYSTEM_DRV partition and lists some common Lenovo SYSTEM_DRV partition issues and their fixes. To obtain detailed information, explore the content with Partition Magic now!
What Is Lenovo SYSTEM_DRV Partition
The SYSTEM_DRV partition is a small partition on Lenovo PCs. It is available in Windows XP, Windows 7, Windows 8/8.1, and Windows 10. It contains the Rescue & Recovery environment and some necessary system files like boot loader to boot the Windows system.
Therefore, you’d better not delete this partition. Otherwise, you can receive errors like Lenovo PC not booting. Generally speaking, the Lenovo SYSTEM_DRV partition has no drive letter, so it is not visible in File Explorer. It only appears in Disk Management.
Further reading:
In addition to the Lenovo SYSTEM_DRV partition, there are some other hard drive partitions on Lenovo PCs you should know.
For Windows 7, Lenovo created the Q partition that enables you to recover the initial operating system and software on the computer to the state they were in before the computer was activated. Under certain conditions, the Q partition can be deleted to free up hard drive space.
As for Windows 8 (which requires three partitions), Lenovo created the Recovery Partition to allow the recovery of the initial operating system and software on the device to the state they were in before the PC was activated. Similarly, the Recovery Partition can be removed in certain cases to increase free disk space.
Lenovo SYSTEM_DRV Partition Issues
As you see, the Lenovo SYSTEM_DRV partition is essential to the Lenovo computer. However, some errors related to it sometimes can appear. In this section, common Lenovo SYSTEM_DRV partition issues are discussed. Besides, corresponding solutions are offered too.
#1: SYSTEM_DRV Partition Appears in File Explorer
Sometimes, SYSTEM_DRV partition appears in File Explorer because you have assigned a drive letter for it. To solve the issue, remove the assigned drive letter in Disk Management with the steps below.
- Open Disk Management by right-clicking the Windows icon and hitting the Disk Management option in the Start menu.
- Right-click on the SYSTEM_DRV partition and and click Change drive letter and paths.
- Click the Remove button.
- In the prompted warning window, click Yes to confirm the operation.
MiniTool Partition Wizard FreeClick to Download100%Clean & Safe
#2: Lenovo SYSTEM-DRV Partition Is Deleted by Accident
What to do if you delete the Lenovo SYSTEM-DRV partition by mistake? An effective way is to undelete the partition by using professional recovery software. MiniTool Partition Wizard is such a utility that allows you to perform D drive data recovery, USB data recovery, hard drive recovery, NVMe data recovery, SSD file recovery, and so on.
Here, you can install it on your PC and then use it to recover the Lenovo SYSTEM-DRV partition.
Step 1: Click the button below to download and install MiniTool Partition Wizard.
MiniTool Partition Wizard DemoClick to Download100%Clean & Safe
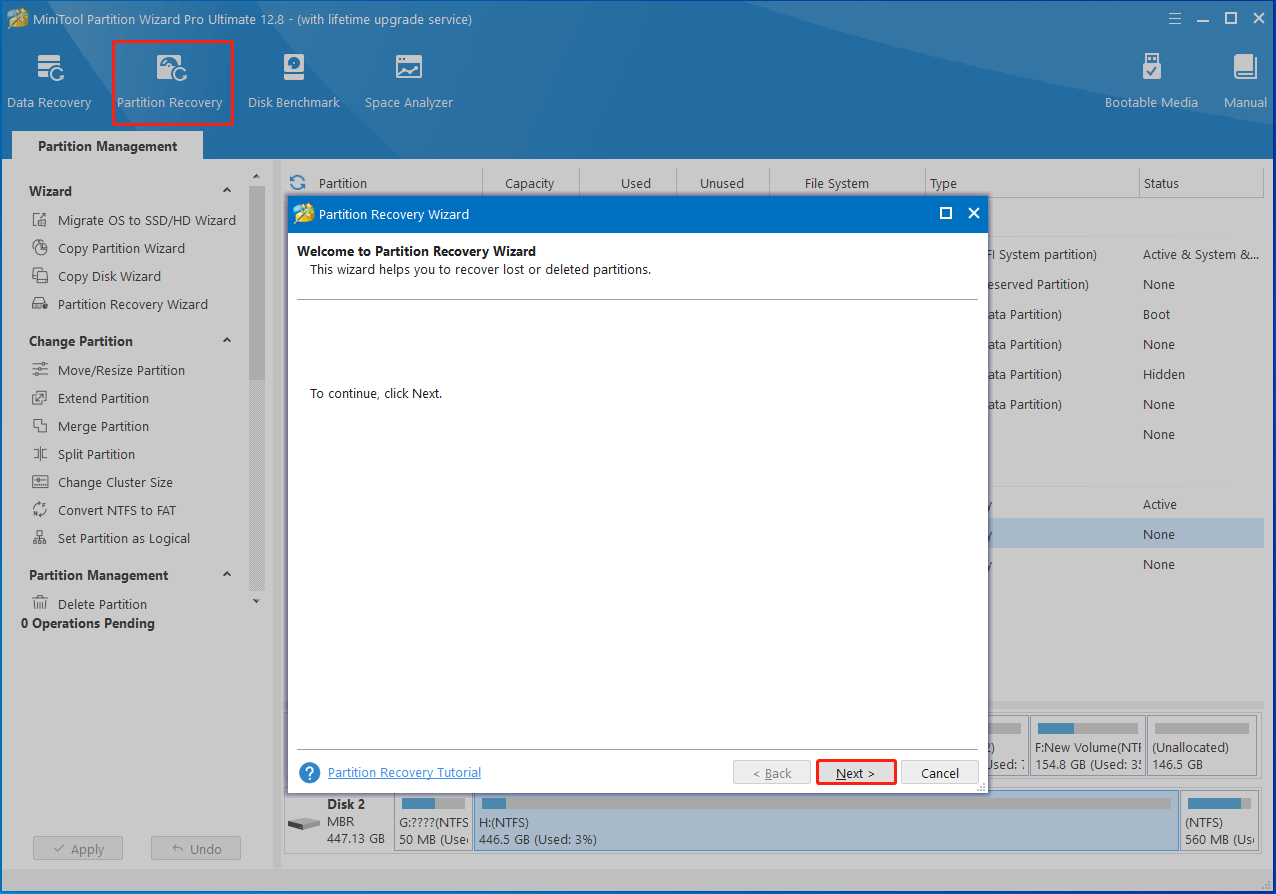
Step 2: Launch the software and click Partition Recovery. Then click Next in the pop-up window to continue.
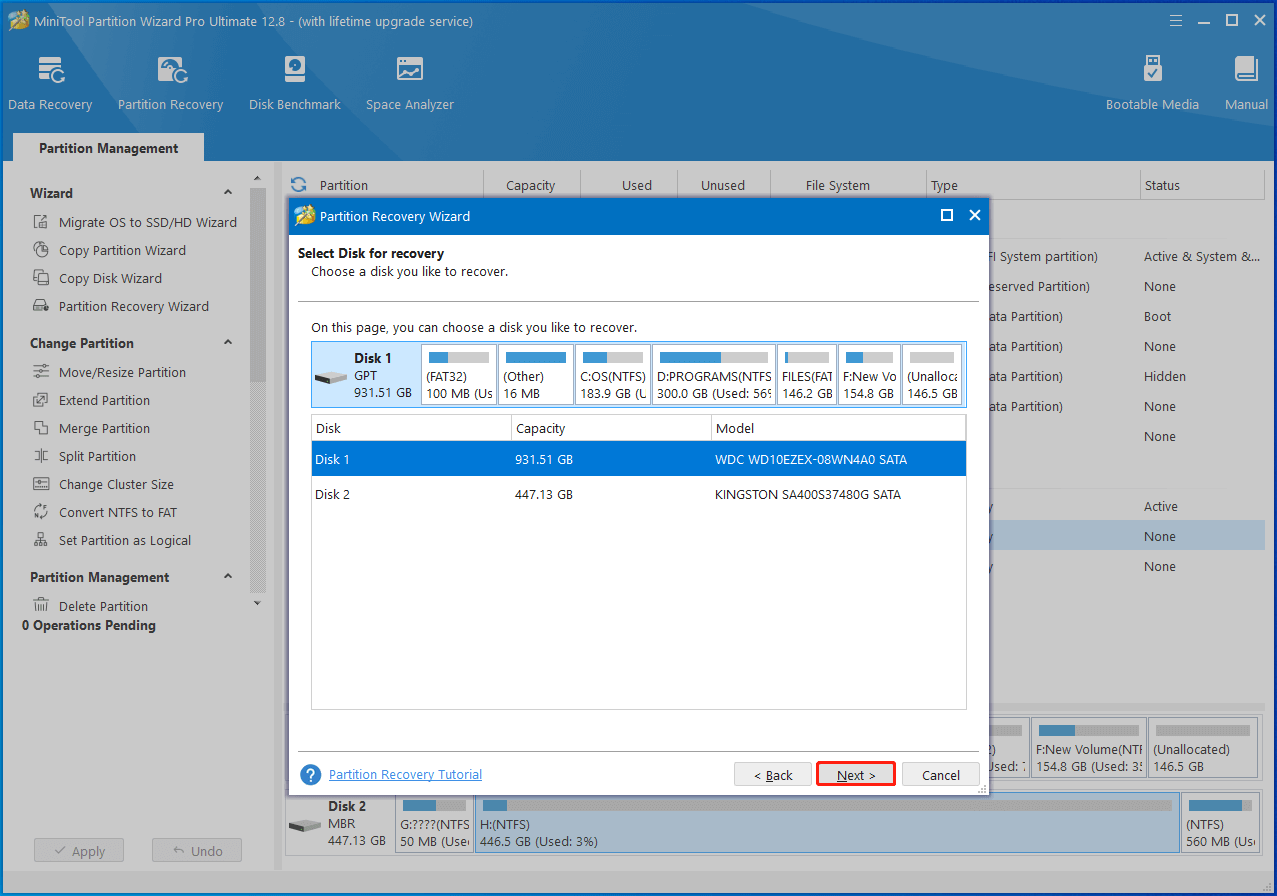
Step 3: Choose the disk for recovery and click Next. You should select the disk where the Lenovo SYSTEM_DRV partition is located.
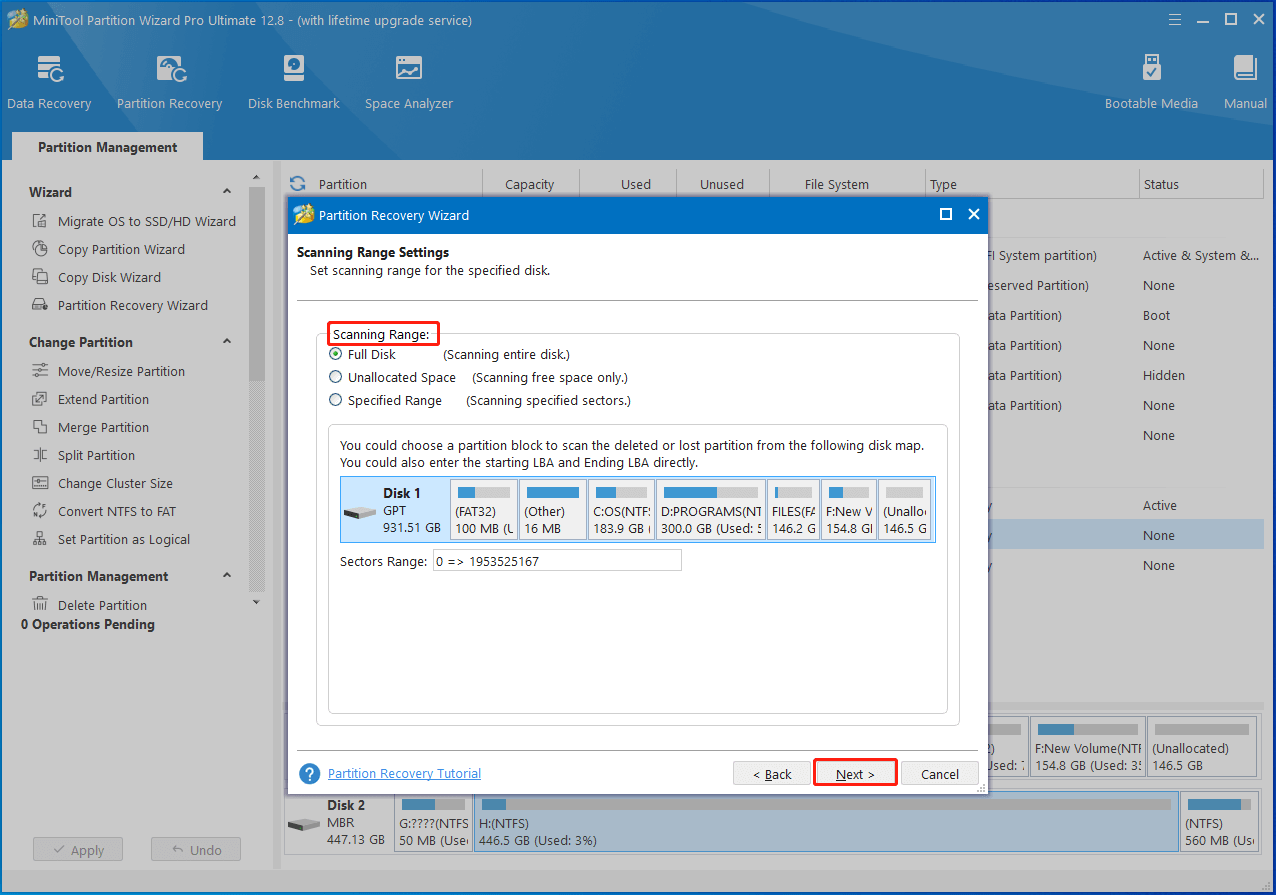
Step 4: Choose a scanning range from the given options and then click Next to continue. If you don’t know the specific location of the SYSTEM_DRV partition, directly scan the full disk.
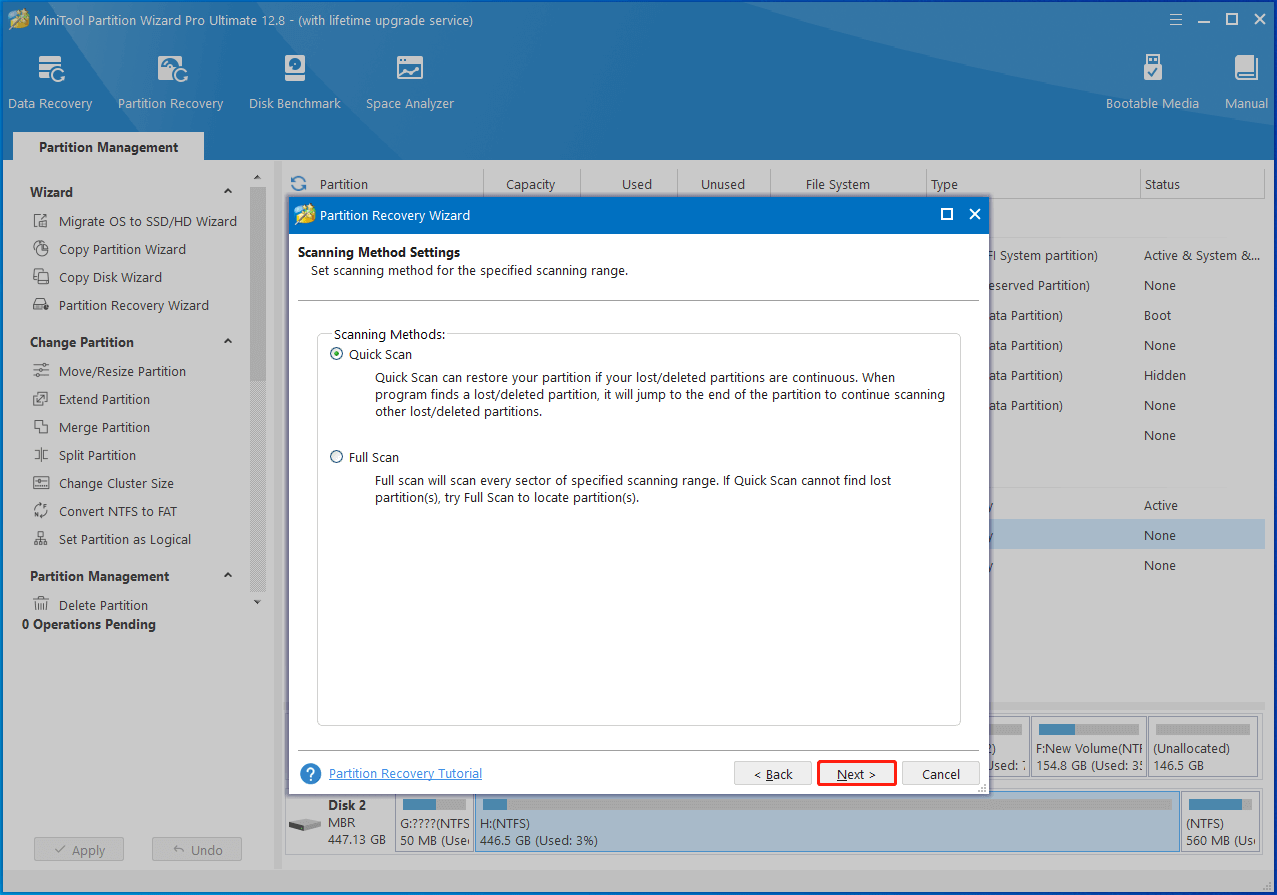
Step 5: Pick a scanning method based on your demands. Then click Next.
Step 6: Wait until the process ends. Check all the needed partitions (including existing partitions and deleted/lost partitions) and click the Finish button. Generally speaking, you need to assign a drive letter for the recovered partition to make it visible in Explorer. However, you don’t have to do that for the Lenovo SYSTEM_DRV partition.
Conclusion
This post offers a brief introduction to the Lenovo SYSTEM_DRV partition and solutions to common Lenovo SYSTEM_DRV partition issues. If you receive the discussed errors in the post, you can refer to the given fixes.
User Comments :