You may encounter an I/O device error when reading or writing data to a disk. This post lists 3 common cases where the error will occur and offers 5 solutions to it. In addition, it also shows you how to check for bad sectors and recover data using MiniTool Partition Wizard.
What Is an I/O Device Error?
An I/O device error usually occurs when your computer fails to communicate with a storage drive (like a hard drive, SSD, external drive, or USB). The full error message is usually as follows: The request could not be performed because of an I/O device error.
Specifically, this I/O device error mainly occurs when you fail to perform the following operations.
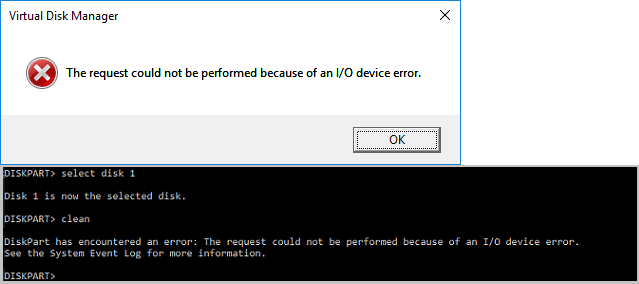
#1. Initialize/Clean a Disk or Format/Delete/Create a Partition Using Disk Management or DiskPart.
#2. Access a Directory or File in File Explorer.
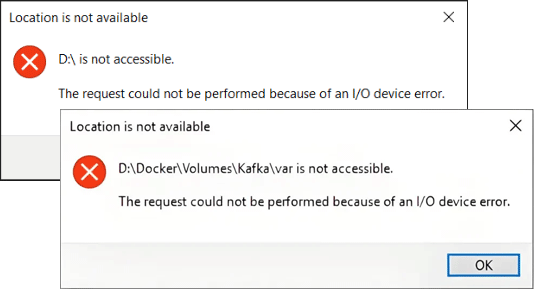
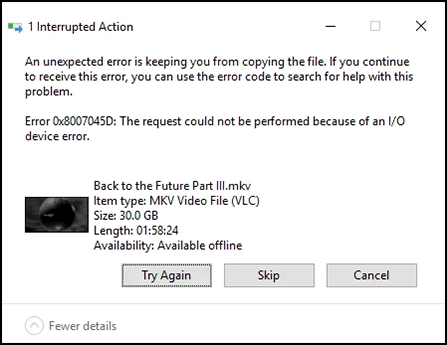
#3. Copy/Move a File to a Partition, Delete a File From a Partition, or Create a Folder in a Partition.
![[Fixed] An Unexpected Error Is Keeping You from Copying the File?](https://images.minitool.com/partitionwizard.com/images/uploads/2023/07/unexpected-error-keeping-you-from-copying-the-file-thumbnail.png)
Apparently, this error prevents you from reading and writing data to a disk. How to solve this issue? You can try the following solutions.
Protect Data Before Trying Solutions
Some solutions may cause data loss. Therefore, it’s recommended to back up or recover data in advance.
If you need to recover data, MiniTool Partition Wizard can help you. Here is the guide:
MiniTool Partition Wizard DemoClick to Download100%Clean & Safe
Step 1: Launch MiniTool Partition Wizard and click Data Recovery on the toolbar.

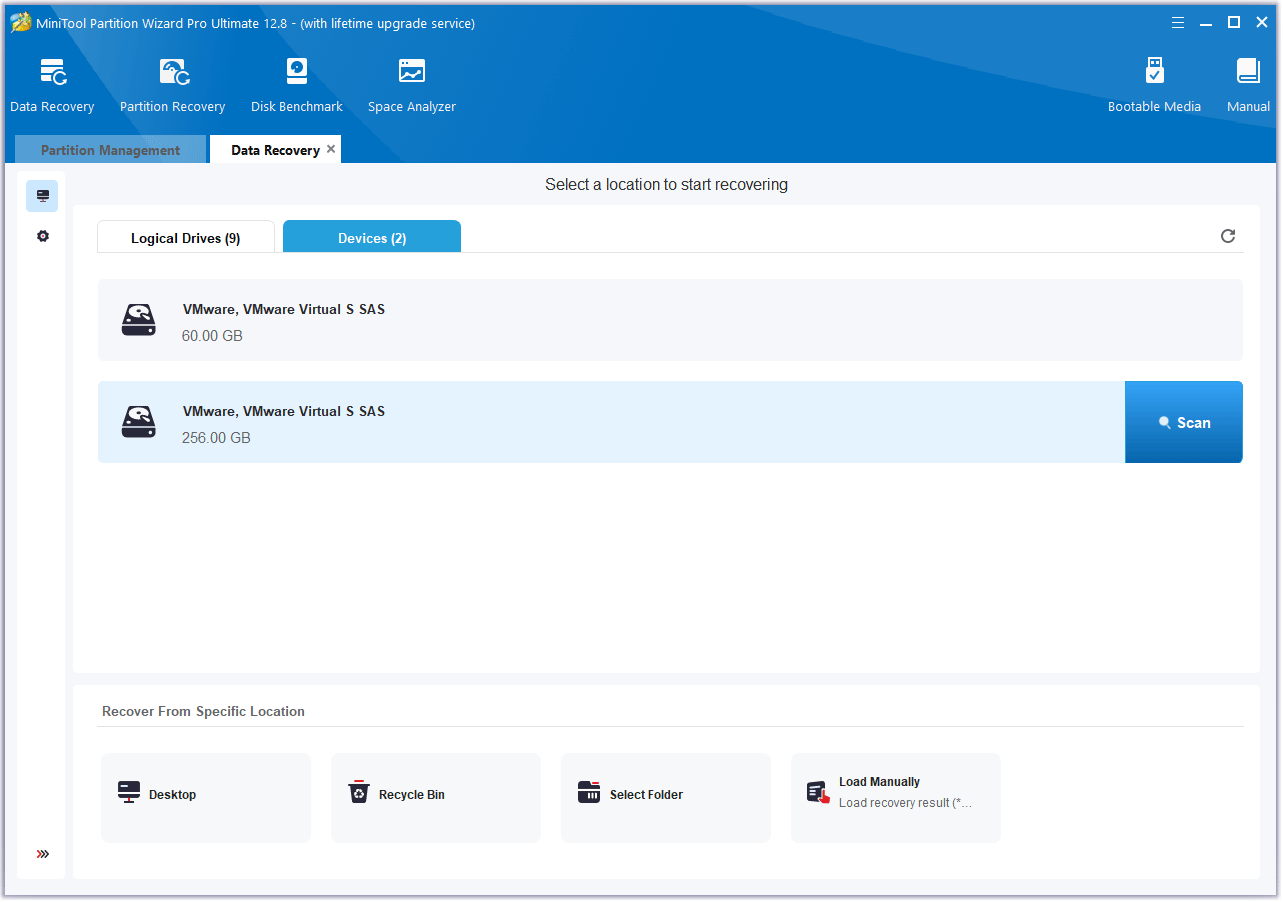
Step 2: Hover the cursor over the partition where data is lost and click Scan. RAW partitions will be marked as Unidentified. Deleted or lost partitions will be marked Lost Partition.
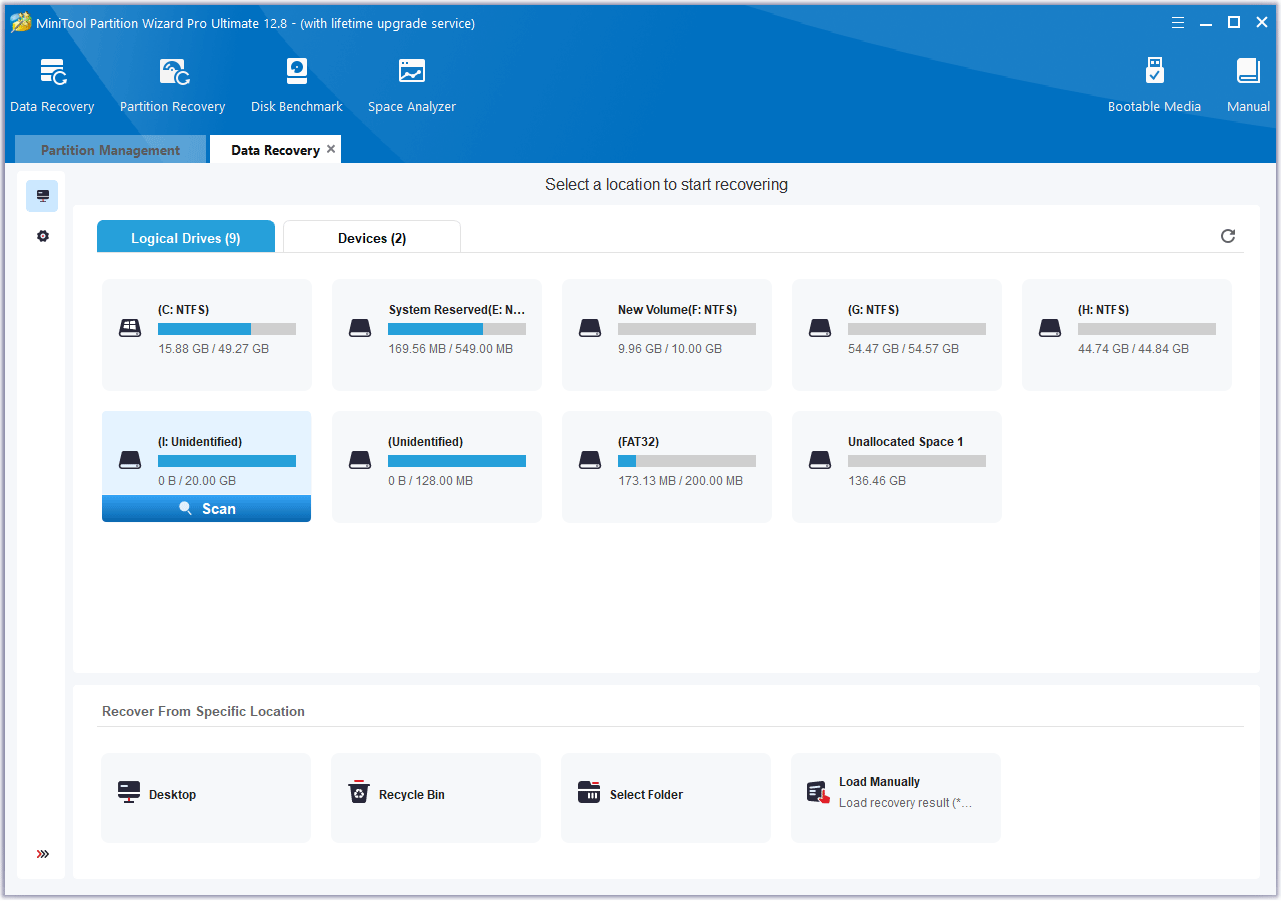
If the whole disk prompts the I/O device error, you can also go to the Devices tab and select the entire disk to scan.
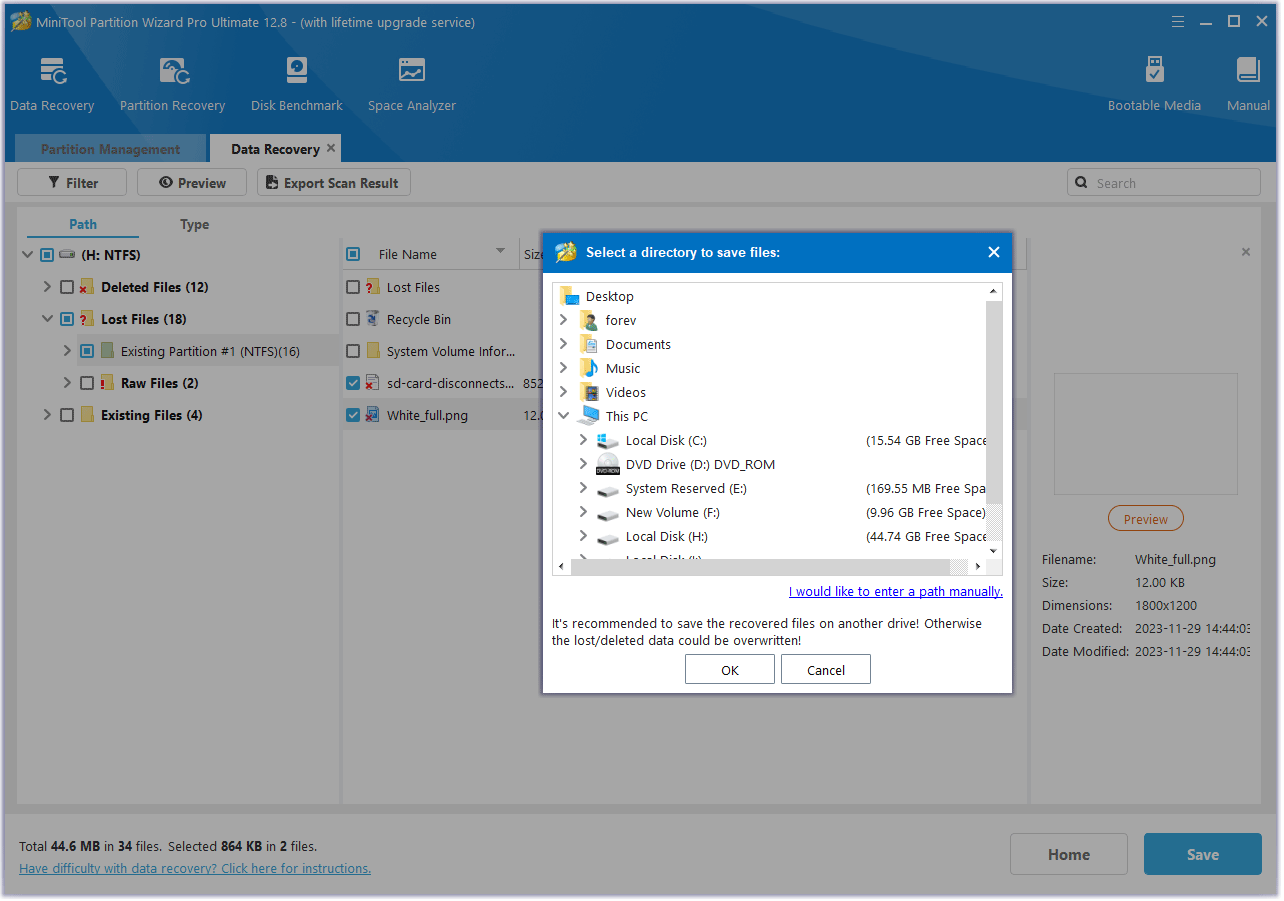
Step 3: After the scanning process, find and tick the files to be recovered under Path and Type. Then, click Save and select a safe location to put these files. Finally, click OK.
Solution 1. Check Physical Connections
Replug the storage device and check if the issue disappears. If not, you need to try a different cable or port.
For external drives, change the USB cable and port. For internal drives, change the SATA cable or SATA/M.2 port.
If necessary, you can test the drive on another PC.
Solution 2. Ensure Enough Power Supply
Insufficient power supply to the disk can also cause the I/O device error. To solve this issue, take the following measures.
- For External Drives: Plug it into the rear USB port, or use a two-ended cable/external power supply。
- For Internal Drives: If your lights, fans, and controller are taking too much power and delivering this I/O device error, unplug them or upgrade the PSU.
Solution 3. Update the Uninstall the Storage Device Driver
Sometimes, the reason why computers and devices cannot communicate properly is due to inappropriate drivers. Then, updating or uninstalling the driver may solve the issue. Here are the steps.
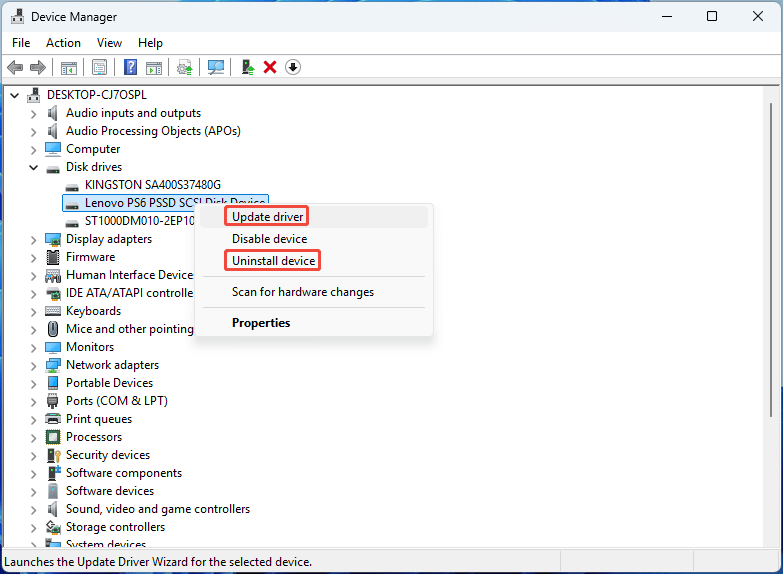
- Press Win + X and choose Device Manager to open it.
- For HDD, SSD, or external hard drive I/O device errors, expand Disk drives, right-click the disk, and then choose either Update driver or Uninstall device.
- For USB flash drive I/O device errors, expand Universal Serial Bus controllers, right-click the device (usually USB Mass Storage Device) that appears when plugging the USB drives, and then update or uninstall it.
- Restart the PC.
Solution 4. Delete Partition or Clean Disk in Certain Situations
If the I/O device error occurs when you access, copy, move, or delete a file, you may be able to delete the partition. Then, create the partition again and see if the issue can be solved.
If the I/O device error occurs when you format or delete a partition, then DiskPart clean may still work normally. Clean and initialize the disk. Then, check if the issue has been solved.
To DiskPart clean a disk, open DiskPart from Windows Search, and then use the following commands:
- List disk
- Select disk * (* is the disk number of the hard drive to be cleaned)
- Clean
Solution 5. Check for Bad Sectors
In most cases, the I/O device errors indicate bad sectors. If the drive still has the drive letter, you can run the chkdsk /r command to locate bad sectors and recover readable information.
To do that, open Command Prompt as administrator. Then, type “chkdsk #: /r” and press Enter. # is the letter of the drive where the I/O device error occurs.
If the drive doesn’t have a letter or the CHKDSK command fails, try using MiniTool Partition Wizard to check for bad sectors.
MiniTool Partition Wizard FreeClick to Download100%Clean & Safe
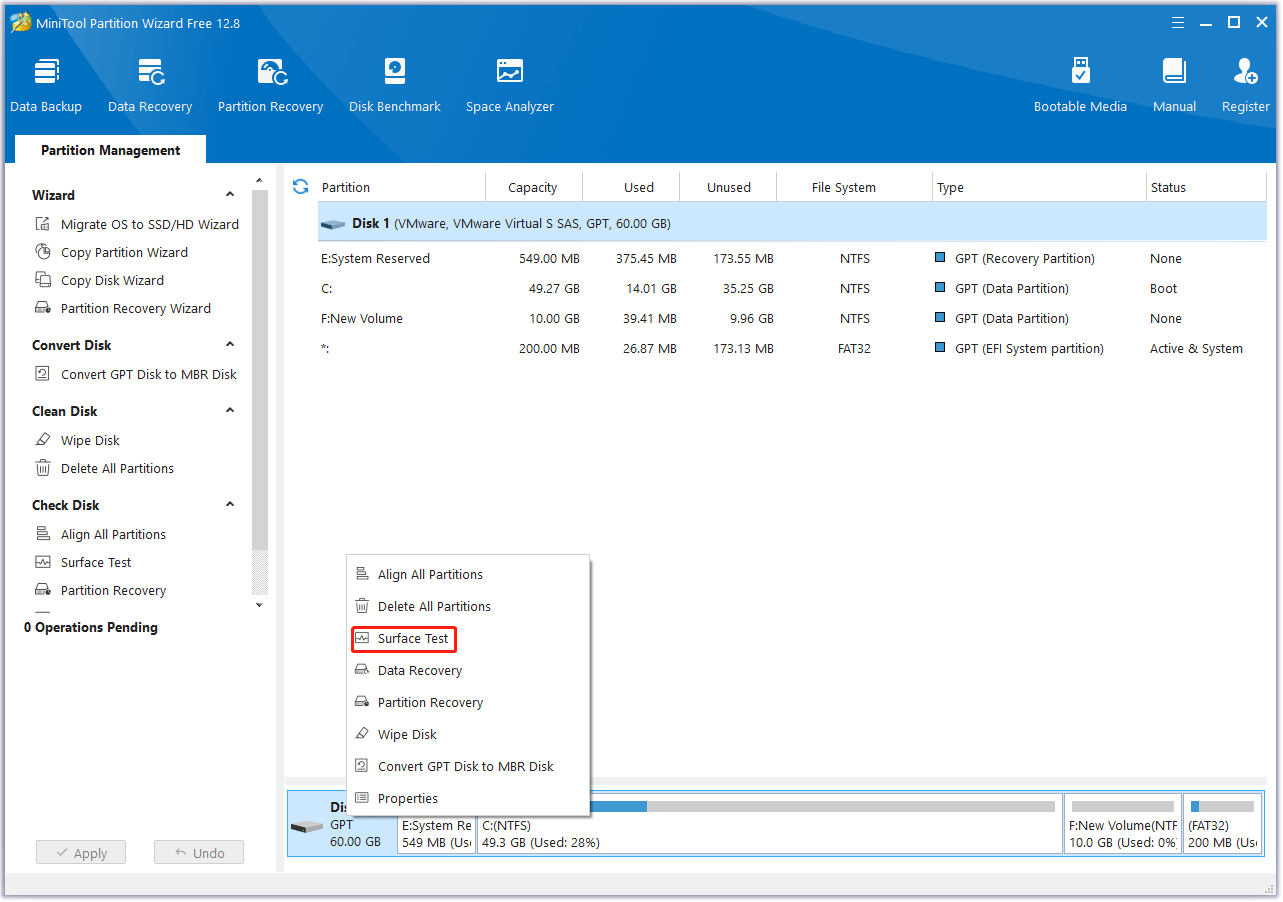
Step 1: Launch MiniTool Partition Wizard. Right-click the disk or partition where the I/O device error occurs and choose Surface Test.
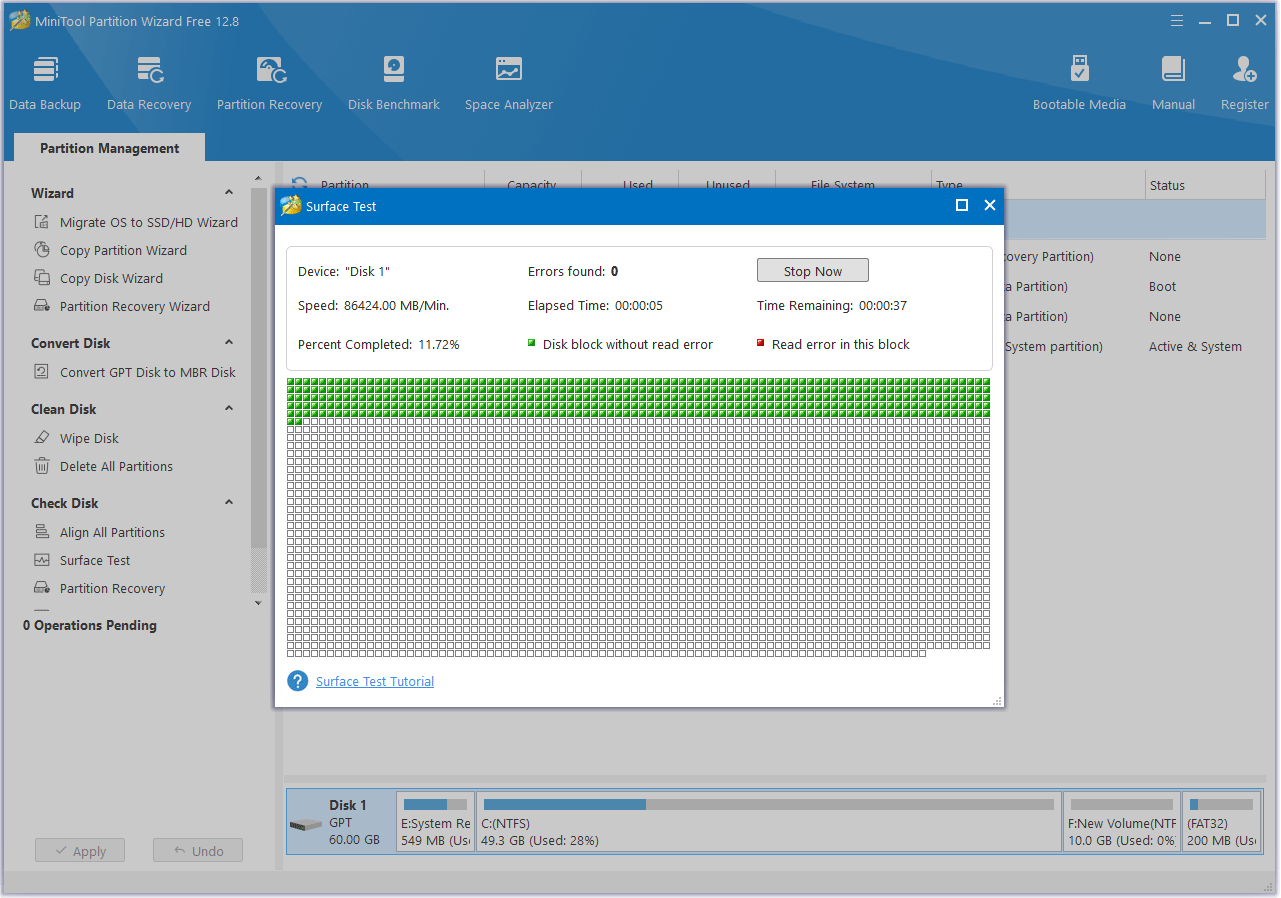
Step 2: On the pop-up window, click Start Now to scan the disk for bad sectors. If bad sectors/blocks are found, they will be marked with red colors. If there are too many bad sectors, replace the hard drive.
Bottom Line
The I/O device error may occur due to a loose connection, faulty cable or port, insufficient power supply, inappropriate device driver, or bad sectors. This post offers the corresponding solutions.
In addition, if you encounter problems when using MiniTool Partition Wizard, please feel free to contact us via [email protected]. We will get back to you as soon as possible.
About The Author

Position: Columnist
Linda has been an editor at MiniTool for seven years. She continuously learns about computers and puts her knowledge into practice. Moreover, she is particularly knowledgeable in disk management, data recovery, system installation, and PDF editing. Her articles typically reference multiple examples or are based on her own experience, providing users with the most suitable solutions.
User Comments :