Want to get the solutions for the data error (cyclic redundancy check)? You are in the right place. Here, MiniTool Partition Wizard provides a full guide for it. You will find out everything about data error cyclic redundancy check, including its reasons and solutions.
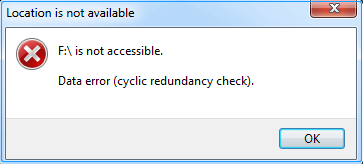
Many people complained that they encountered a data error (cyclic redundancy check) on their hard drive and they were unable to access the hard drive. When they encounter the error, a window with an error message similar to the following picture always pops up.
What Causes the Data Error Cyclic Redundancy Check?
After investigating extensive user reports and posts, I find that the error can be triggered by these reasons:
- A corrupted file system on storage devices
- Interrupted file transferring process
- Misconfiguration in files and storage devices
- Misconfigured system files
- Virus or malware Infection
How to Fix Data Error Cyclic Redundancy Check?
How to fix data error cyclic redundancy check? Here, I summarize 9 useful methods to help you get rid of this error. You can try these methods one by one until the error gets fixed.
Do a Preparation
When you encounter data error (cyclic redundancy check) on your PC, the first thing you need to do is to recover data from the storage device that has the error. Otherwise, you may lose all your data easily. How to recover data from a drive with CRC error? MiniTool Partition Wizard can help you.
It is a professional data recovery tool that can help you do data recovery with ease. In addition, this feature-rich disk manager can also help you check for disk errors, partition hard drive, convert MBR to GPT, migrate OS to SSD without reinstalling OS, format USB to FAT32, rebuild MBR, and more.
Here’s how to use MiniTool Partition Wizard to recover files:
Step 1. Click the Download button to get the MiniTool Partition Wizard installation package. Then follow the on-screen instructions to install it on your PC.
MiniTool Partition Wizard DemoClick to Download100%Clean & Safe
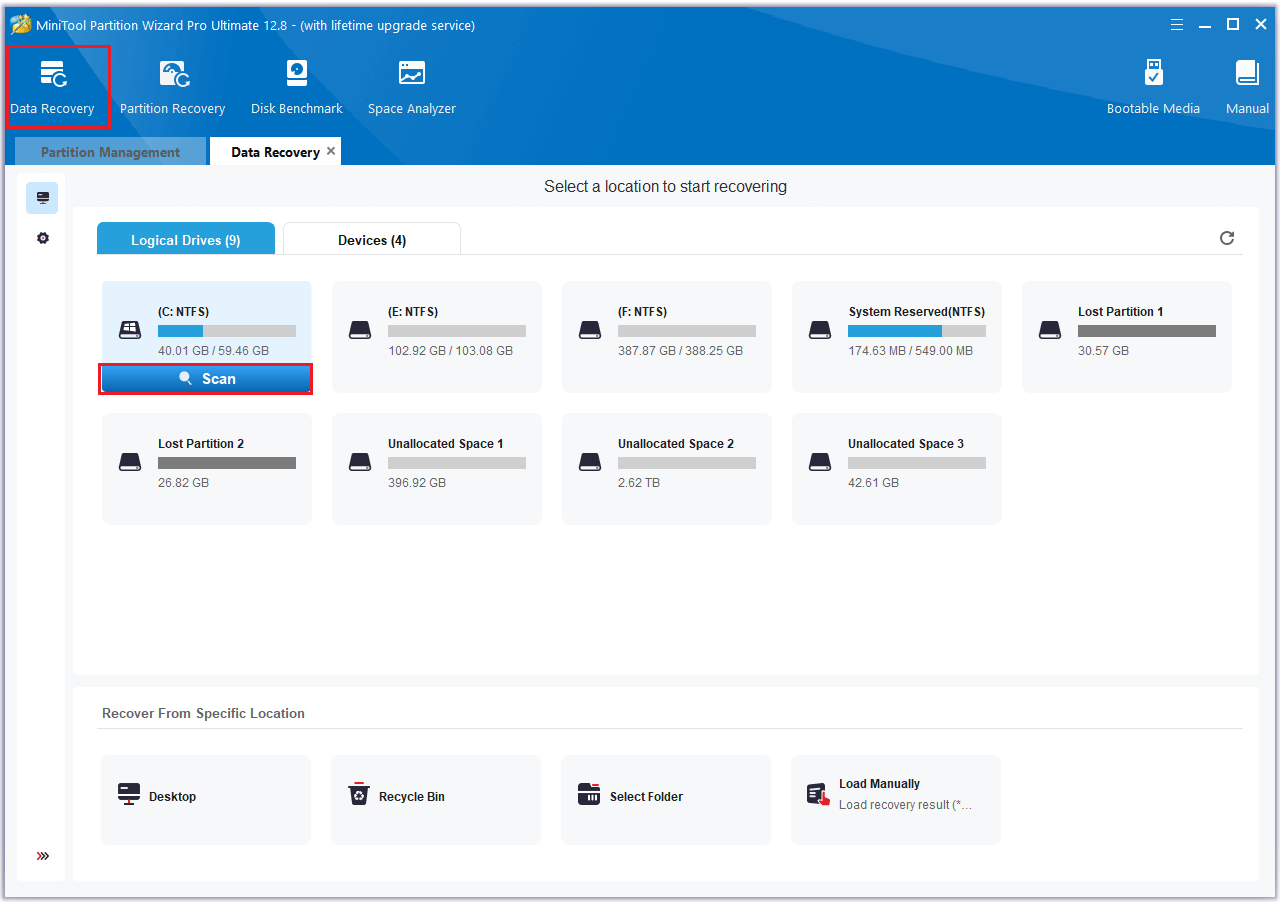
Step 2. Launch it into its main interface and click the Data Recovery option from the top toolbar. Next, select the partition where your files were stored previously, and then click Scan.
Step 3. While the program scans your disk, you can preview the files and click pause or stop when you find what you need. Here are some of the tools that can assist you:
- Path: All lost files in this tab are listed in the order of directory structure.
- Type: All lost files in this tab are classified by types.
- Search: You can find files by their names.
- Filter: You can filter the files by File Type, Date Modified, File Size, and File Category.
- Preview: You can preview up to 70 kinds of files, but you need to install a package first.
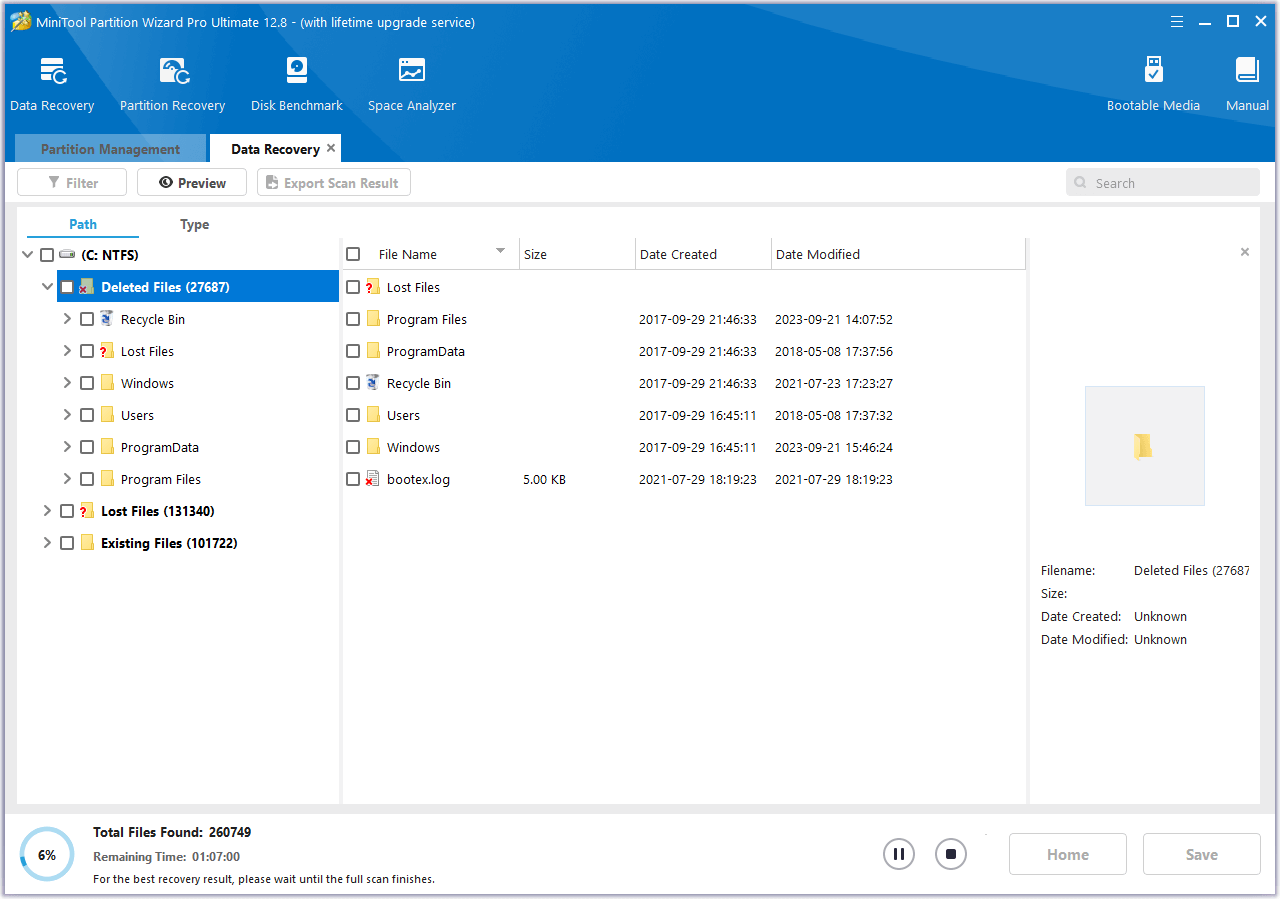
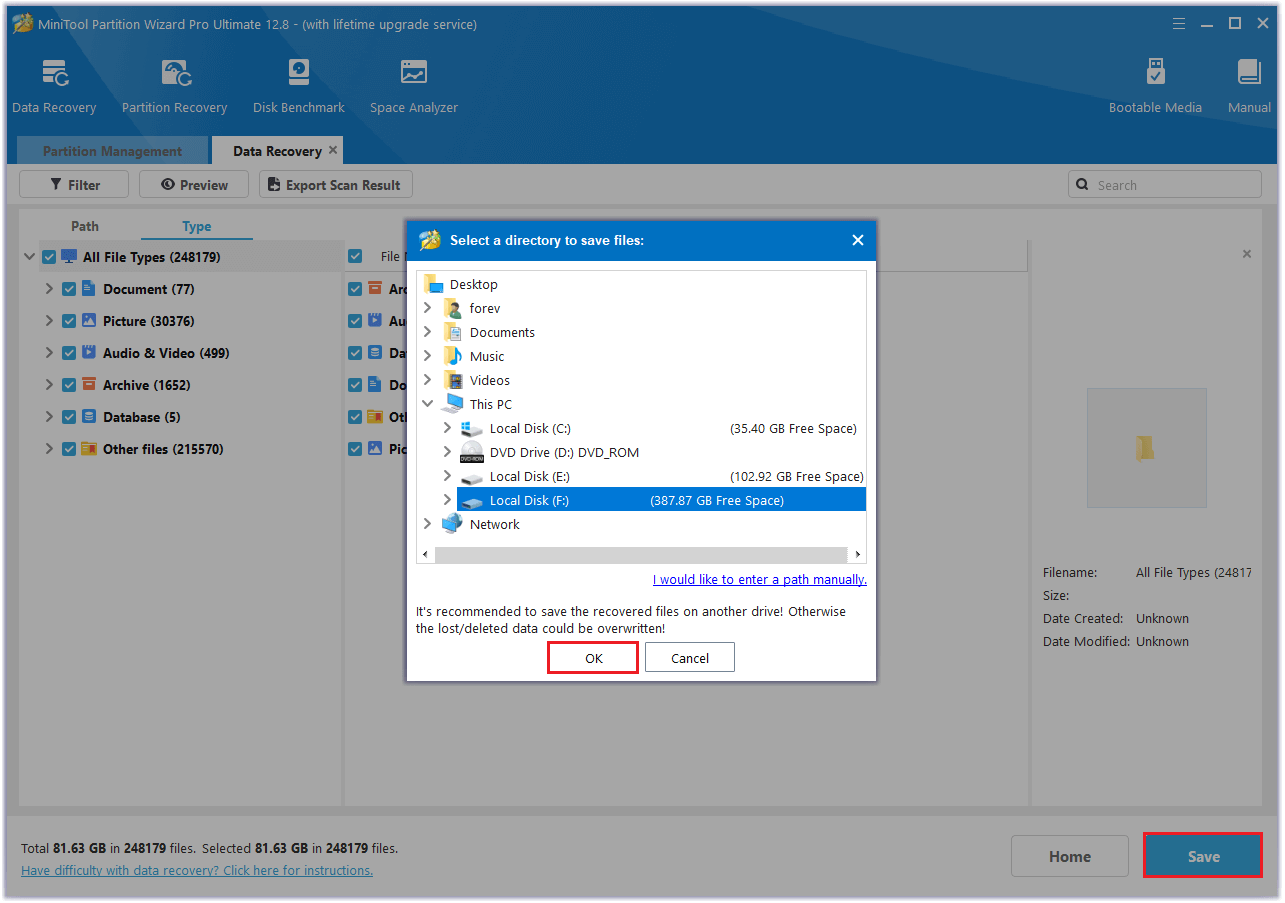
Step 4. Once done, tick the files you want to recover and click Save. Choose a safe location to save the recovered files and click OK.
Once you recover data from a drive with CRC error, you can use the feasible solutions provided in this post to fix data error (cyclic redundancy check).
Method 1. Check the Connection
Loosen/corrupt cable or corrupt connector port can also cause your computer unable to read the hard drive correctly and then result in data error (cyclic redundancy check). To avoid this, you can go to check the connection between the hard drive and the PC first. Here is what you should check:
- Check if the connection between the hard drive and the PC is loose.
- Check if there are any signs of damage on the SATA/USB cable or port.
- Check if the power cable of the hard disk is loose or corrupt.
Method 2. Update the Drivers and Disk Firmware
Outdated drivers and firmware could also cause data error cyclic redundancy check. In this case, you can try updating them to fix the error. To update drivers, you can refer to this post: How to Update Device Drivers Windows 10 (2 Ways).
Method 3. Clean Your Temporary Files
The cyclic redundancy check error may be caused by excessive temporary files taking up drive space. In this situation, you can try removing temporary files to fix it:
- Press the Win + R to open the Run window.
- Type “%temp%” and press Enter.
- Press Ctrl + A to select all the files and folders in the pop-up window.
- Then, press the Delete key on your keyboard to clean all the temporary files and folders.
- Once done, check if the CRC error has been resolved.
Method 4. Check Disk Errors
Disk errors are also responsible for data error cyclic redundancy check. So, you can try running a disk check to fix the error. To do that, you can do as follows:
Step 1. Press the Win + E to open the File Explorer window. Then, right-click the target hard drive to select Properties.
Step 2. In this pop-up window, go to the Tools tab, and then click the Check button under Error checking.
Step 3. Wait for the scanning process to complete. If this way doesn’t work, you can also use the CHKDSK command to check and fix the disk errors. Here are the detailed steps:
- Open the Run window.
- Type “cmd” and press Ctrl + Shift +Enter to run Command Prompt as administrator.
- In the elevated Command Prompt window, type “chkdsk E: /f” (Replace “E” with your target drive letter) and press Enter.
- Follow the on-screen instructions to complete the process.
If you encounter errors when running both Error checking and CHKDSK, you can also use MiniTool Partition Wizard as an alternative to check and fix the disk errors. It provides the Check File System feature to check and fix disk errors and the Surface Test future to scan and mark bad sectors with red color.
Here’s the guide:
Step 1. Download and install MiniTool Partition Wizard, and then launch into its main interface.
MiniTool Partition Wizard FreeClick to Download100%Clean & Safe
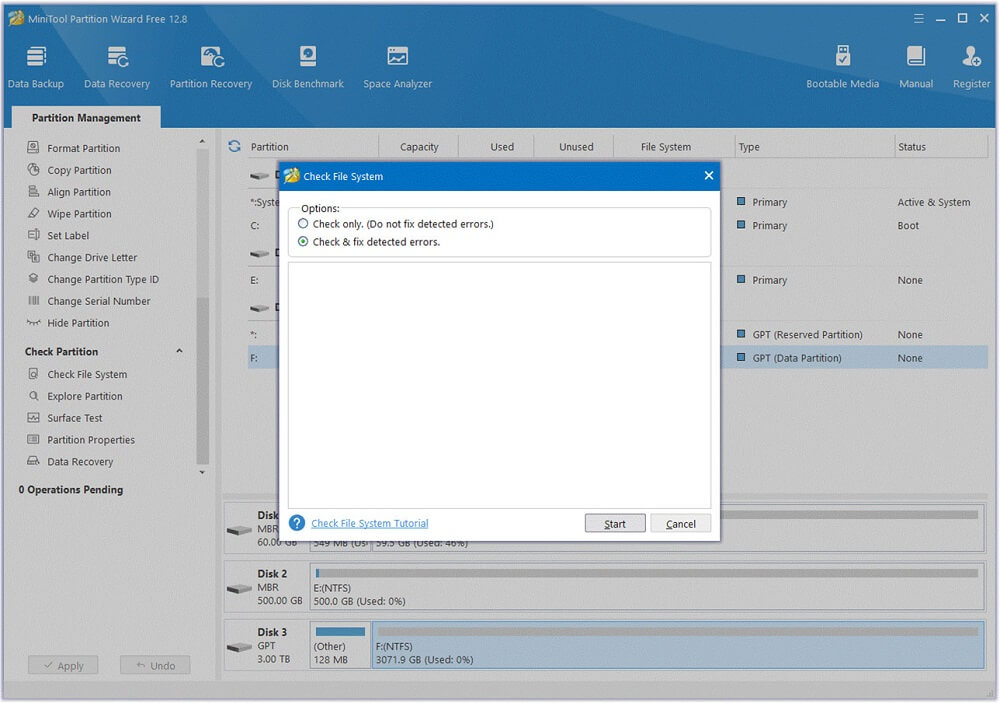
Step 2. If you want to check and fix disk errors, you can do as follows:
- Select the partition you want to check from the disk map.
- Select the Check File System feature from the left pane.
- In the Check File System window, select Check & fix detected errors.
- Then, click the Start button.
- Then it will start to scan and fix disk errors.
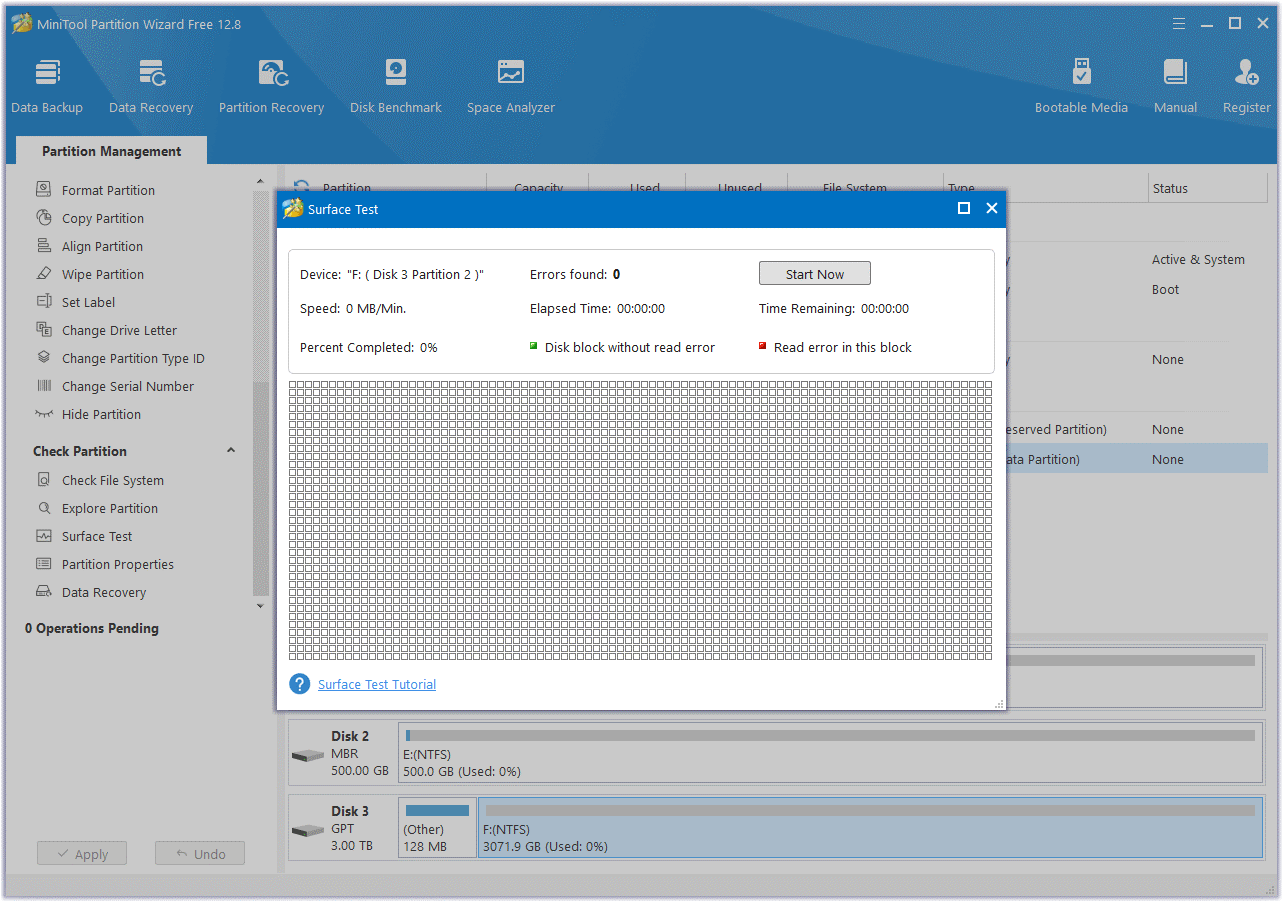
Step 3. If you want to check bad sectors, please do the following steps:
- Select the partition you want to check from the disk map.
- Select the Surface Test feature from the left pane.
- Click the Start Now button in the Surface Test window.
- After scanning, bad sectors will be marked with red color.
Method 5. Run SFC and DISM
Corrupted system files can also cause the CRC error. In this case, you need to run DISM and SFC to repair the corrupted system files. Here’s how to do it:
- Run Command Prompt as administrator.
- Type “DISM.exe /Online /Cleanup-image /Restorehealth” and press Enter to make a Windows image to protect your data.
- Next, type “sfc /scannow” and press Enter.
- Wait for the process to complete.
- Once done, restart your computer and check if the error has been resolved.
Method 6. Change the Drive Letter
If you encounter the data error (cyclic redundancy check) after you change the drive letter, you can try changing the drive letter back to the previous one to fix it. Here’s how to do it:
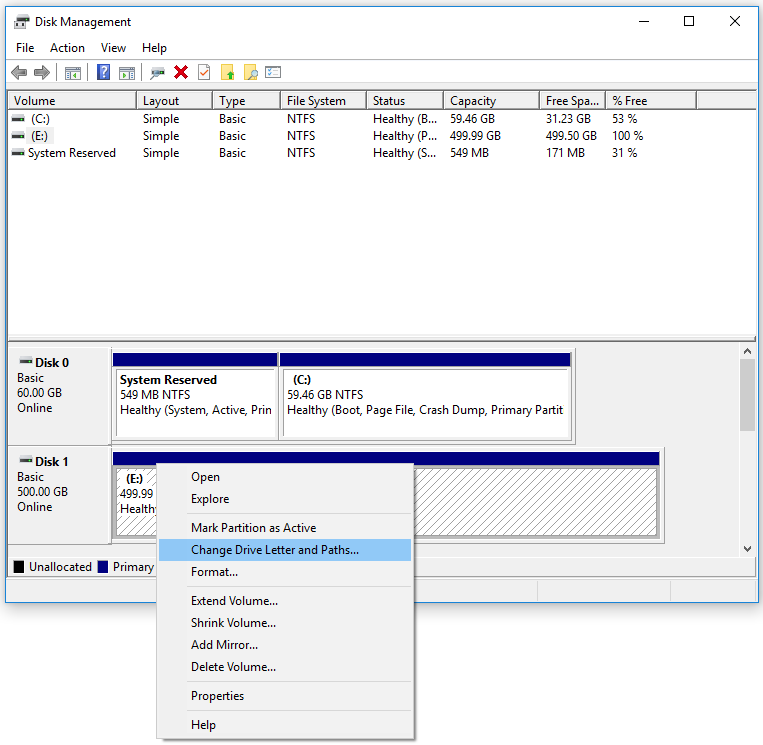
- Open the Quick Link Menu and select Disk Management from the menu.
- Find your external hard drive and right-click it by choosing Change Drive Letter and Path.
- Assign the drive a new letter that doesn’t exist on your PC and mark the partition as Active.
- Next, click OK.
- Restart your PC and check if the CRC error is fixed.
Method 7. Use Diskpart
The diskpart command can help you manage your computer’s drive, including disks, partitions, or virtual hard disks. Some people report that they fixed the CRC error with the command. You can also have a try. Here’s the tutorial:
Step 1. Open the Run window, type “diskpart” and press Ctrl + Shift + Enter to run Diskpart as administrator.
Step 2. Enter “rescan” to identify newly added disks. Type “list disk” and press Enter to identify all the available devices
Step 3. Type “select disk X” (replace X with the volume number assigned to the device) and press Enter to select the problematic drive.
Step 4. Type “clean” and press Enter to clean the drive.
Step 5. Once done, you can see “Diskpart succeeded in cleaning the disk“. Proceed to format and reinitialize your drive, then ascertain if the CRC error persists.
Method 8. Format Hard Drive
If you are still unable to fix data error cyclic redundancy check, the last approach you can take is formatting the disk drive. To format the drive, MiniTool Partition Wizard’s Format Partition feature is what you need. Here’s the tutorial:
MiniTool Partition Wizard FreeClick to Download100%Clean & Safe
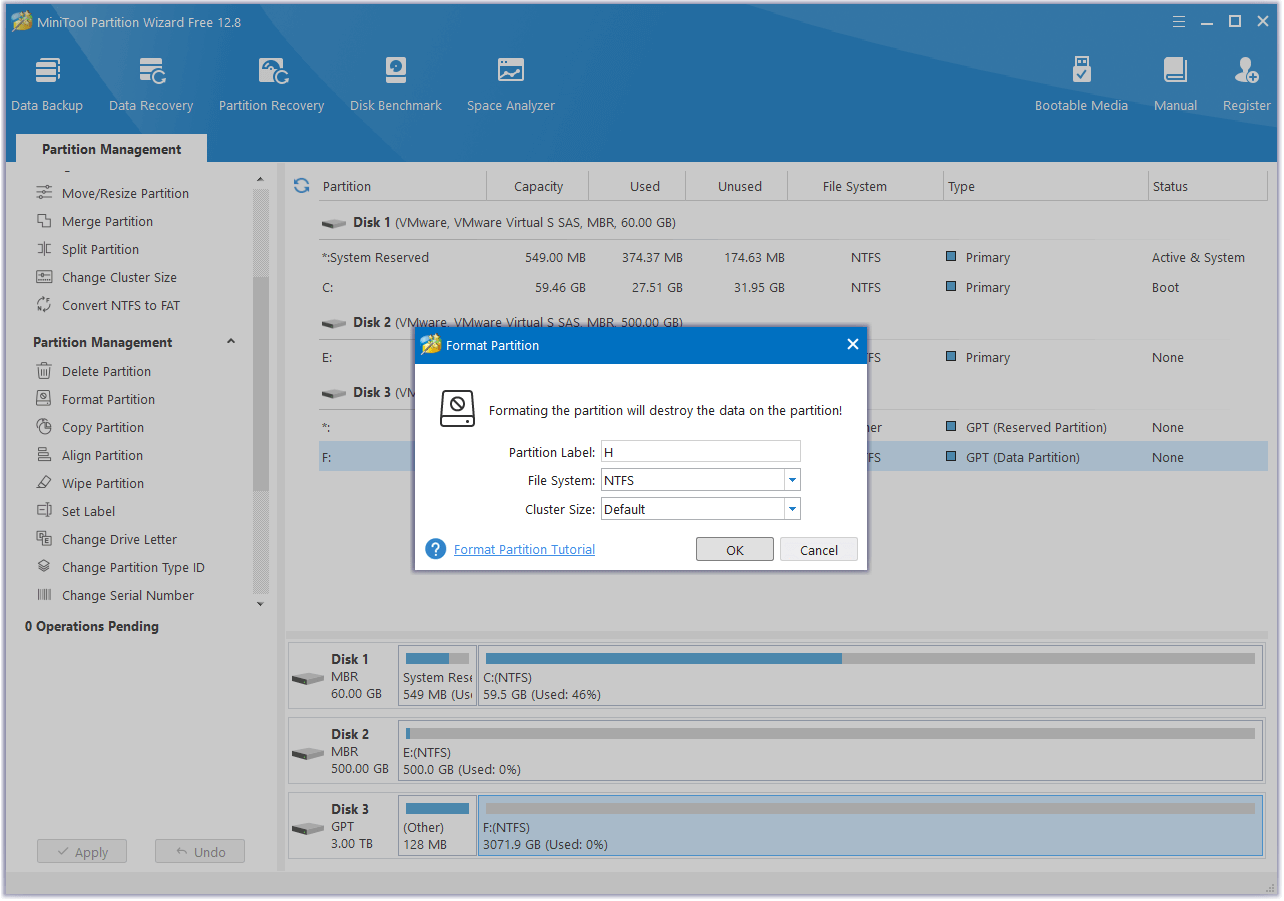
- Download and install MiniTool Partition Wizard to your computer.
- Launch into its main interface, and select the affected disk drive.
- Click the Format Partition option from the left pane. Then, set partition label, file system and cluster size for the selected partition and click OK.
- Now, you can preview the formatted partition. If it is satisfying, please click the Apply and Yes button to apply the change.
Method 9. Contact the Manufacturer
If none of the above solutions can help you fix data error (cyclic redundancy check), you can try contacting the manufacturer to fix the error. They may give you professional advice pointing to this hard drive or ask you to bring it to the official maintenance store.
Bottom Line
How to fix data error (cyclic redundancy check)? Now, I believe that you already have known the answer. If you have better solutions to the problem, please share them with us in the following comment zone. Of course, you can send an email to [email protected] when you have difficulty using the MiniTool software.
About The Author

Position: Columnist
Charlotte is a technology columnist with a strong focus on the Windows operating system, specializing in disk management, backup, and data recovery. She is passionate about analyzing computer errors, identifying root causes, and delivering practical solutions. In her free time, she stays updated on the latest developments in computer systems and hardware while continuously learning new technologies to broaden her expertise. Her writing style is clear and easy to understand, making complex technical topics accessible even to users with limited computer knowledge.
User Comments :