Some Windows users may encounter the Defraggler slow issue when they use the Defraggler program to defrag their computer. Why is Defraggler so slow when defragging the computer, and how to speed up Defraggler? Well, this post from MiniTool Partition Wizard will tell you all.
Programs were opening super slow so I scanned my HDD with Windows Defrag and the result showed 0% fragmentation. I knew it was false since I recently removed a bunch of files and old games. I installed Defraggler and started the Defrag. It came out to be 45% fragmentation (670GB of Fragmentation). It takes an unbelievably long time for any progress to take place. It took it 3h to go from (670GB to 669.5GB).https://community.ccleaner.com/
Before trying to fix the Defraggler slow issue, you need to know that Defraggler only runs on computers with Microsoft Windows operating systems. If you are using one of the following operating systems, you can run the Defraggler program.
- Windows 10 (all editions, including 64-bit)
- Windows 8 & 8.1 (all editions, including 64-bit)
- Windows 7 (all editions, including 64-bit)
- Windows Vista (all editions, including 64-bit)
- Windows XP (Home, Professional, Media Center, Tablet Edition, 64-bit)
- Windows 2003 and 2008 Server (all editions)
Why Does Defraggler Take So Long to Defrag?
Defraggler is a utility developed by Piriform that lets you defrag hard drives on your system. But why is Defraggler so slow? In fact, the amount of time that Defraggler takes to defrag depends on the following factors:
- The read/write speed of the drive
- The amount of free disk space that is available
In addition to the above factors, other factors (such as the size of the drive, the number of fragmented files, the number of times each file is fragmented, and so on) can also influence the amount of time Defraggler takes to defrag the computer.
Generally speaking, if there are few fragmented files on the drive or the size of the drive is small, it won’t take a long time to defrag your computer. By contrast, if there are many fragmented files or the size of the drive is large, it will take a long time to do that, and in this case, you need to be patient to wait for the defragmentation process.
How to Speed up Defraggler?
Now you know the reasons for the Defraggler slow issue, so how to speed up Defraggler? There are several methods to help you do that. Scroll down to know the detail.
Method 1: Run a Quick Defrag
To fix the Defraggler slow issue, the simplest and easiest way is to run a quick defrag. Although running a quick defrag is not as thorough as a full defrag, it is a quick way to boost your computer’s performance. Follow the steps below to do that:
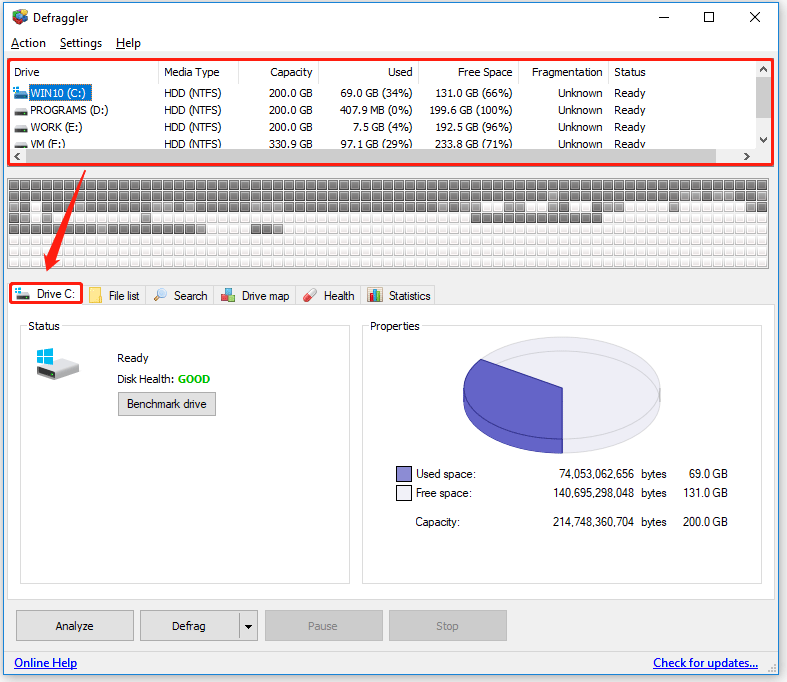
Step 1: Launch Defraggler to its main interface, choose the drive that you want to defragment at the top of the window. (You can also choose multiple drives using the CTRL key on the keyboard.)
Step 2: Then, click the down arrow on the Defrag button, and then click Quick Defrag. Then, Defraggler will defragment the selected drive.
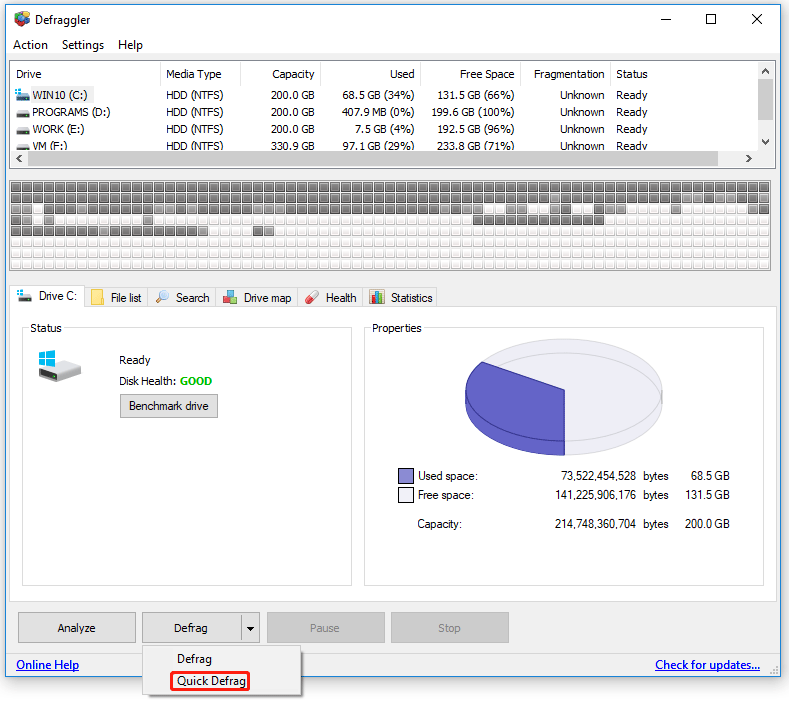
Step 3: In the defragment process, you can click the Pause or Stop button to pause or stop the process at any time.
Once the defragmentation process is complete, Defraggler will display the results.
Method 2: Stop VSS When Defragmenting Your Drive
The second method to fix the Defraggler slow issue is to stop VSS (Volume Shadow Copy Service) when defragmenting your drive. This ensures that you don’t create unneeded restore points when performing a defrag. How to do that? Here is the guide:
VSS is a technology included in Microsoft Windows that can create backup copies or snapshots of computer files or volumes, even when they are in use. It is implemented as a Windows service called the Volume Shadow Copy service. A software VSS provider service is also included as part of Windows to be used by Windows applications.https://en.wikipedia.org/wiki/Shadow_Copy
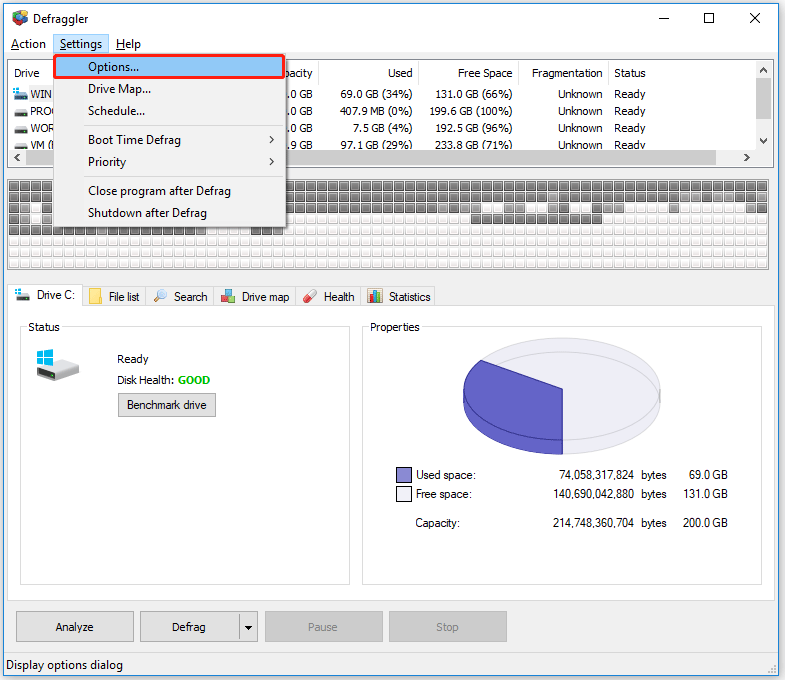
Step 1: Open Defraggler. Click the Settings tab and then choose Options.
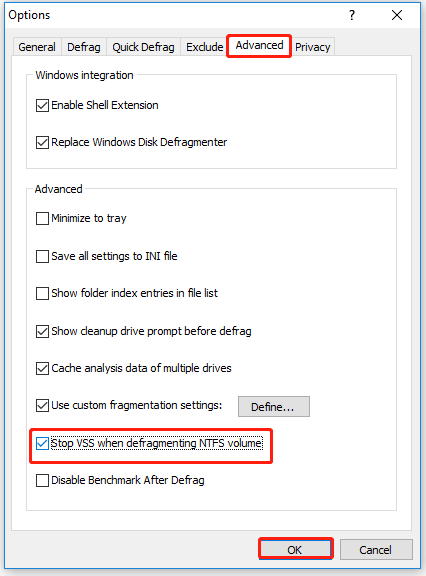
Step 2: Under the Advanced tab, tick the Stop VSS when defragmenting NTFS volume option, and then click OK.
Method 3: Increase the Read/Write Speed of Your Drive
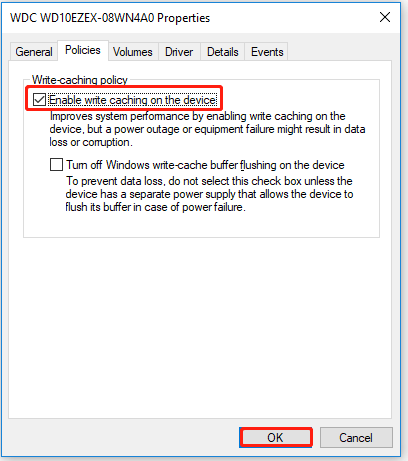
If the read/write speed of the hard drive is very slow, you may also encounter the Defraggler slow issue. In this case, you can try to enable write caching on the device to increase the read/write speed of the hard drive via Device Manager. Here is how to do that:
Step 1: Press Win + R on the keyboard, type devmgmt.msc in the Run box, and then press Enter to open Device Manager.
Step 2: Expand the Disk drives directory. Then, right-click the drive that you want to change, and choose Properties.

Step 3: Under the Policies tab, tick the Enable write caching on the device option and click OK.
After that, you can use the Defraggler program to defrag your computer again to see if the issue is fixed.
Method 4: Free up Disk Space
If none of the above methods work, you have to consider whether the amount of free disk space is enough or not. If the free disk space is not enough for Defraggler to defrag the computer, you may encounter the Defraggler slow issue.
In this case, you can free up the disk space to fix the Defraggler slow issue. How to do that? This post “10 Ways to Free up Disk Space in Windows 10/11” may give you some advice. After that, you will get more free space on the disk, which allows Defraggler to organize files into a contiguous block of space more efficiently.
Method 5: Extend the Target Partition
After freeing up the disk space, if there is not enough space still to defrag the computer, in this case, extending the target partition may fix this issue. There are two ways to do that. Scroll down to know the detail.
1. Extend Partition via Disk Management
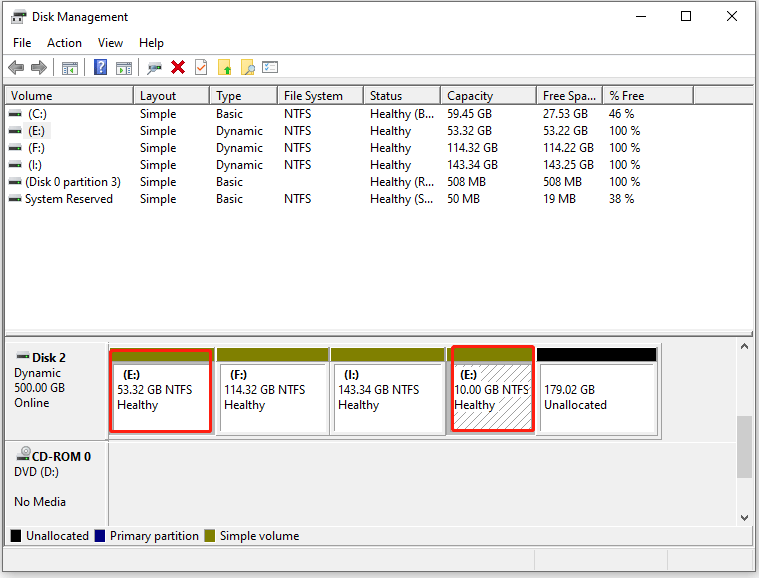
If there is unallocated space next to the partition, you can extend the partition with the steps below:
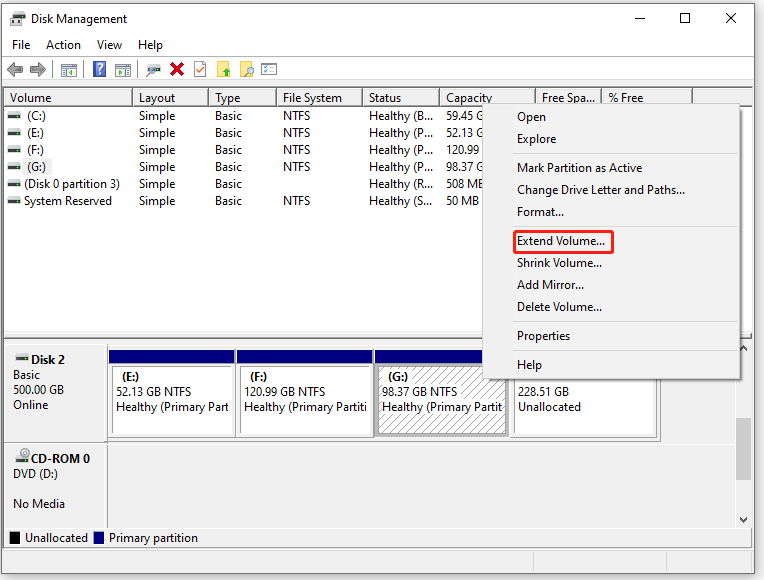
Step 1: Press Win + R on the keyboard, enter diskmgmt.msc in the search box, and press the Enter key to open Disk Management.
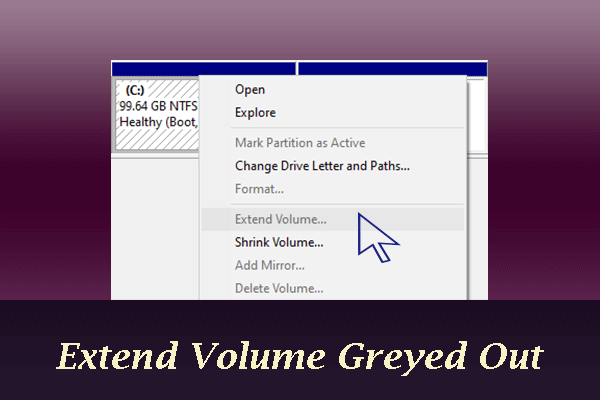
Step 2: Right-click the target partition (that is adjacent to the unallocated space) you want to extend and choose the Extend Volume option. Then, click Next to continue.
Step 3: Type a number that you want to add to the partition into the Select the amount of space in MB box and click Next. Then, click the Finish button.
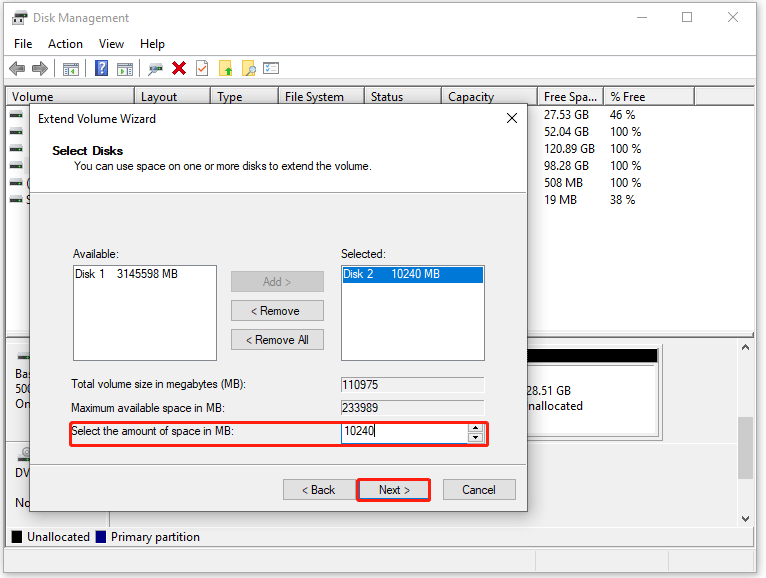
After that, you can see the target partition is enlarged.
2. Extend Partition with MiniTool Partition Wizard
In addition to using Disk Management to extend partition, you can also use professional and reliable software like MiniTool Partition Wizard to do that. This software can not only extend a partition from the unallocated space but also take free space from other existing partitions.
Besides, MiniTool Partition Wizard can also help you migrate OS to SSD/HD, convert MBR to GPT without data loss, format/copy/wipe disk, check file system, perform disk surface test, etc. Therefore, I recommend you use MiniTool Partition Wizard to extend the target partition.
The way to use the MiniTool Partition Wizard software is simple and easy. Get MiniTool Partition Wizard and launch it to access its interface. Follow the on-screen instructions to install it on your computer.
MiniTool Partition Wizard FreeClick to Download100%Clean & Safe
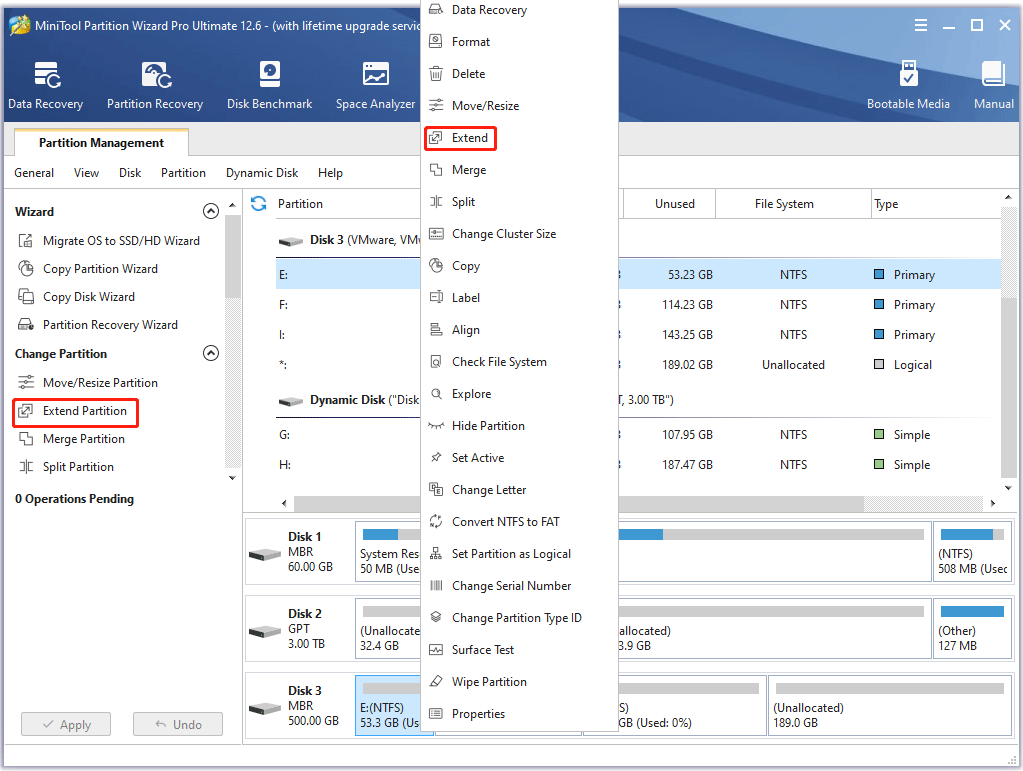
Step 1: Launch MiniTool Partition Wizard to its main interface. Choose one of the following ways to activate the Extend function:
- Click the Extend Partition option from the left action panel after selecting the target partition.
- Right-click on the target partition, and then select Extend in the pop-up menu.
Step 2: Then, a new window pops up and you can open the drop-down list of Take Free Space from and choose the unallocated space or a partition that has free space. Then, drag the sliding handle to the left or right to determine how much space to take, and finally click OK.
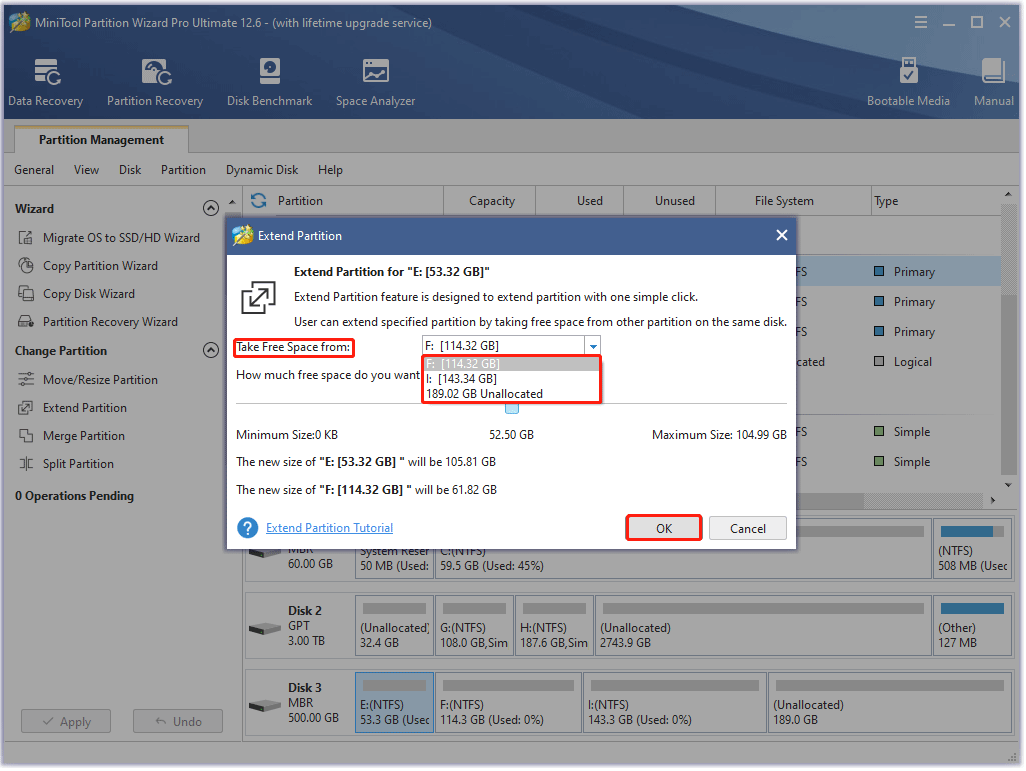
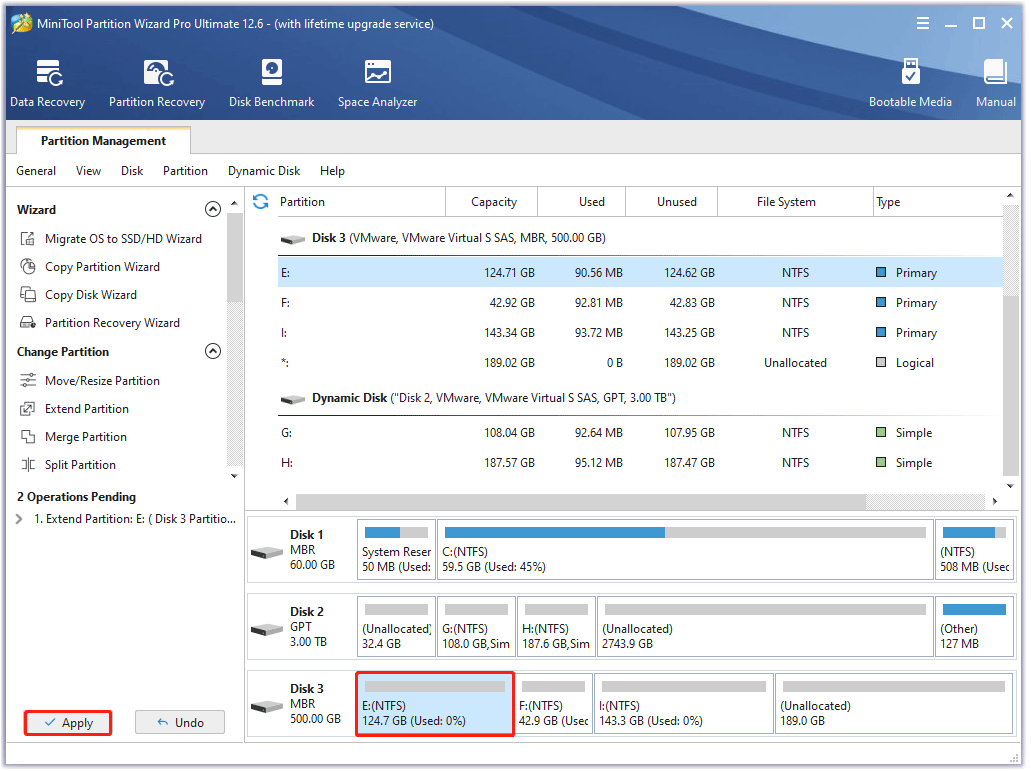
Step 3: After that, you can preview the extended partition in the main interface. Then, please click the Apply button to apply changes.
![How to Turn off Low Disk Space Warning Windows 10 [Full Guide]](https://images.minitool.com/partitionwizard.com/images/uploads/2021/08/how-to-turn-off-low-disk-space-warning-win10-thumbnail.jpg)
Bottom Line
After reading this post, now you know how to speed up Defraggler. You can try these methods when you encounter the Defraggler slow issue. If the amount of free disk space is not available, you can extend the partition where you want to defrag your computer using MiniTool Partition Wizard.
In addition, if you have any questions about how to fix the Defraggler slow issue, please leave them in the comment zone and we will try our best to answer them. If you need any help when using MiniTool Partition Wizard software, you can contact us via [email protected].
User Comments :