Over time, your Windows 10 computer can become slow when booting or loading. To speed up Windows 10 computer, you can free up disk space, optimize disk performance, add more Random Access Memory (RAM), or use MiniTool Partition Wizard to upgrade the disk.
Over time, Windows 10 PCs can slow down. For example, boot times may increase, applications may lag, and multitasking may become impossible.
This performance degradation is often caused by a combination of factors, including:
- Too many background programs
- Insufficient memory
- Insufficient disk space
- Outdated software or drivers
- Malware or viruses
- Hard drive fragmentation
- Still using a traditional hard disk (HDD)
How to speed up Windows 10 computer? This guide will walk you through practical solutions to speed up Windows 10 computer, from software and settings optimization to hardware upgrades.
Optimize Your Software and Settings
To speed up Windows 10 computer, you can try optimizing your software and settings. In the following part, we offer effective and easy-to-perform methods.
Method 1. Update Windows 10 and Drivers
Microsoft releases Windows updates containing performance improvements, security patches, and bug fixes that can address slowdowns.
Outdated device drivers, especially for components like graphics cards and network adapters, are another common culprit, as they can cause compatibility issues.
So, you should update Windows 10 and drivers regularly. Here’s how to update them:
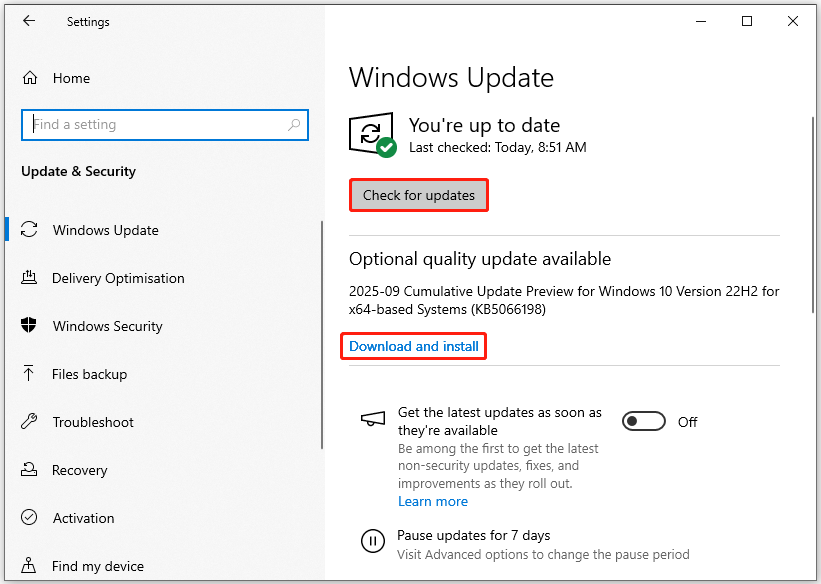
Update Windows
- Press Windows key + I to open Settings, and then click Update & Security > Windows Update.
- Click Check for updates. If updates are available, click Download & install.
- After installation, restart your PC to apply the updates fully.
Update display drivers
- Press Windows key + X, and then select Device Manager.
- Expand categories like Network adapters or Display adapters, right-click the related driver, and select Update driver.
- Choose Search automatically for drivers and follow the on-screen instructions.

Method 2. Disable Unnecessary Startup and Background Programs
One of the primary causes of slow boot times and laggy performance is the excessive number of programs launching at startup and running in the background. Each of these apps consumes CPU, memory, and disk resources, even if you never use them.
It’s better to disable them to release more resources. Here is the guide:
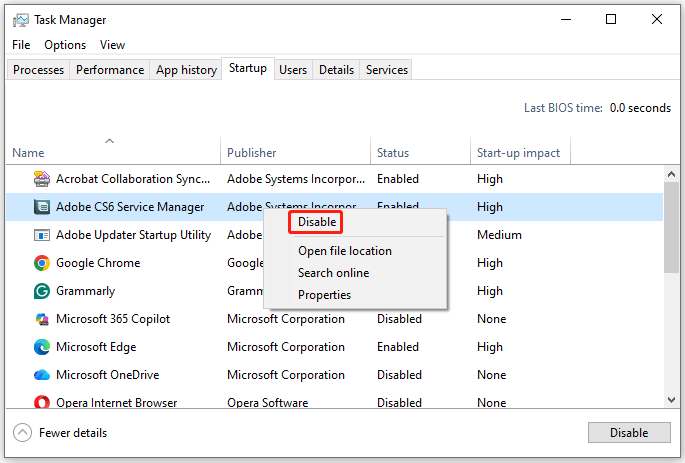
Disable Startup Programs
- Right-click the blank space of the Taskbar and select Task Manager, or press Ctrl + Shift + Esc.
- Go to the Startup tab. If you don’t see it, click More details.
- Each app has a “Start-up impact” rating (Low, Medium, High) indicating how much it slows down boot time. Right-click apps you don’t need and select Disable.
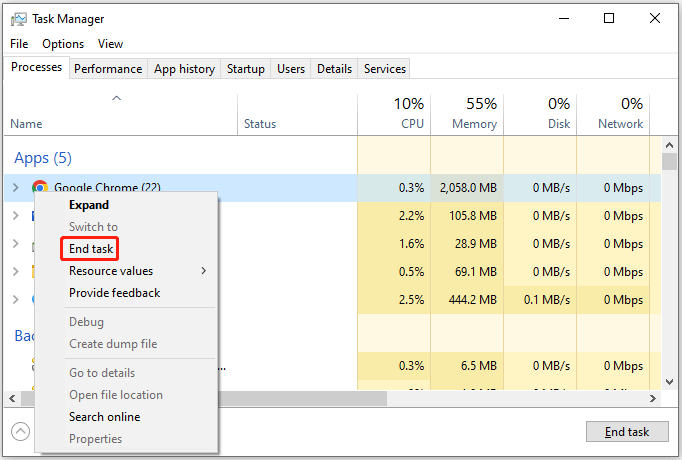
Close Unnecessary Background Apps
- Open Task Manager.
- Go to the Processes tab, right-click the unnecessary apps, and select End task.
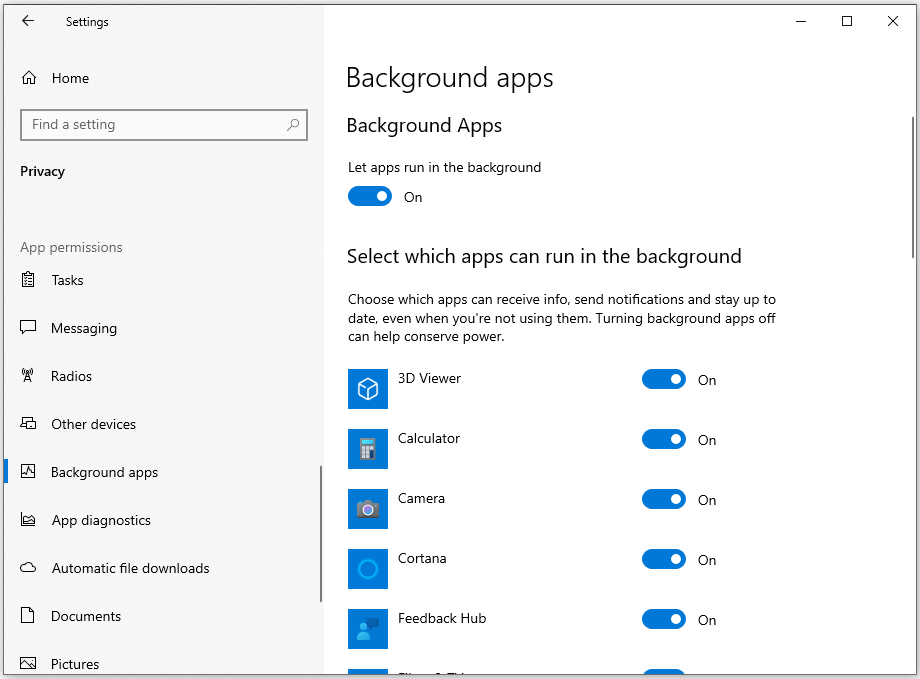
Many apps continue running in the background to send notifications or sync data, even when closed. To stop them:
- Open Settings > Privacy > Background apps.
- Toggle off the switch for any app you don’t want running in the background.
Disable Unnecessary Windows Services
Windows runs many background services, many of which you don’t need. To disable them:
- Press Windows key + R, type services.msc, and press Enter.
- Right-click a service to see its properties. For non-essential services, set Startup type to Manual (runs only when needed) or Disabled (never runs).
- Click Apply and OK to save the changes.
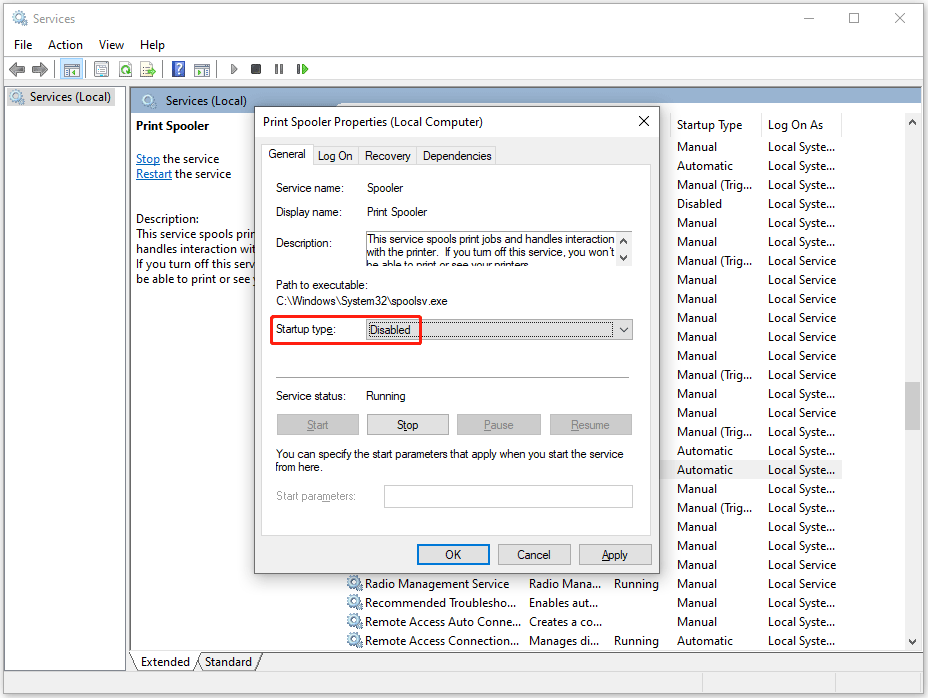
Here are some services that are safe to disable for most users:
- Windows Search: Disables file indexing (slows search but speeds up disk usage).
- Remote Desktop Services: Only needed if you access your PC remotely.
- Print Spooler: Disabled if you don’t have a printer.
Method 3. Free up Disk Space
Windows 10 requires at least 15-20GB of free space on the system drive (usually C:) to function smoothly. When disk space is low, the operating system (OS) struggles with virtual memory, temporary files, and update installations, all of which slow down performance.
To free up disk space, you can try the following approaches:
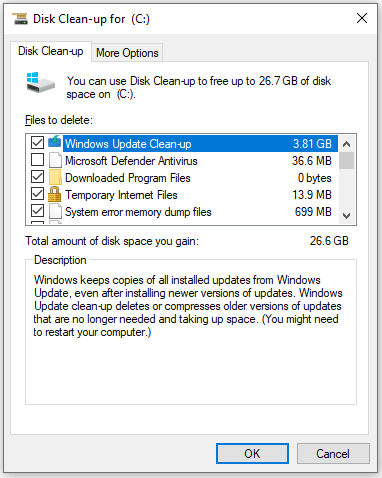
#1. Use Disk Cleanup
Disk Cleanup is a built-in tool that removes unnecessary files safely:
- Press Windows key + R, type cleanmgr, and press Enter.
- Select your system drive (C:) and click OK.
- After scanning, click Clean up system files for a deeper scan, which includes older Windows installations.
- Check boxes for files to delete and click OK: Temporary Internet Files, Recycle Bin, Windows Update Cleanup, and System error memory dump files.
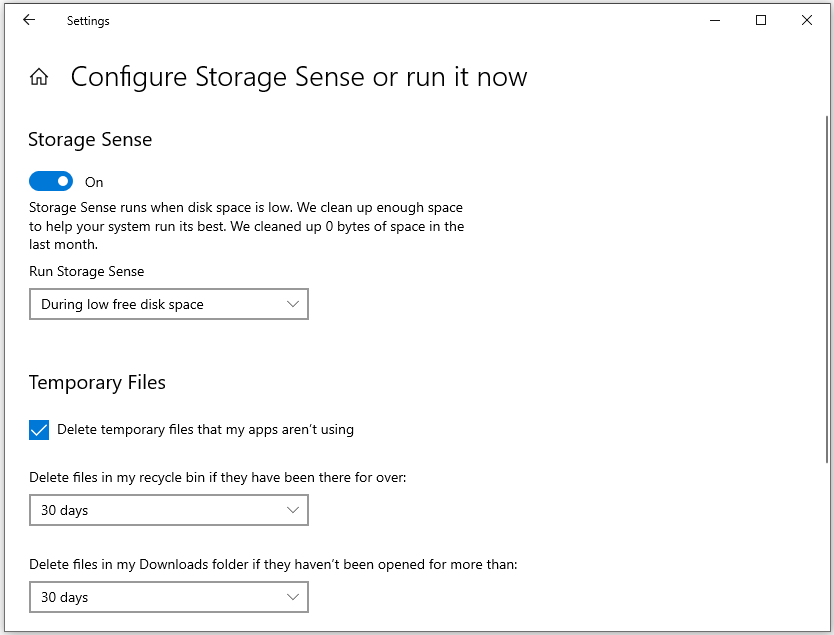
#2. Enable Storage Sense
Storage Sense automatically cleans up temporary files and contents in the Recycle Bin.
- Go to Settings > System > Storage.
- Toggle Storage Sense to On.
- Click Configure Storage Sense or run it now to set preferences (e.g., delete files in Downloads older than 30 days, empty Recycle Bin monthly).
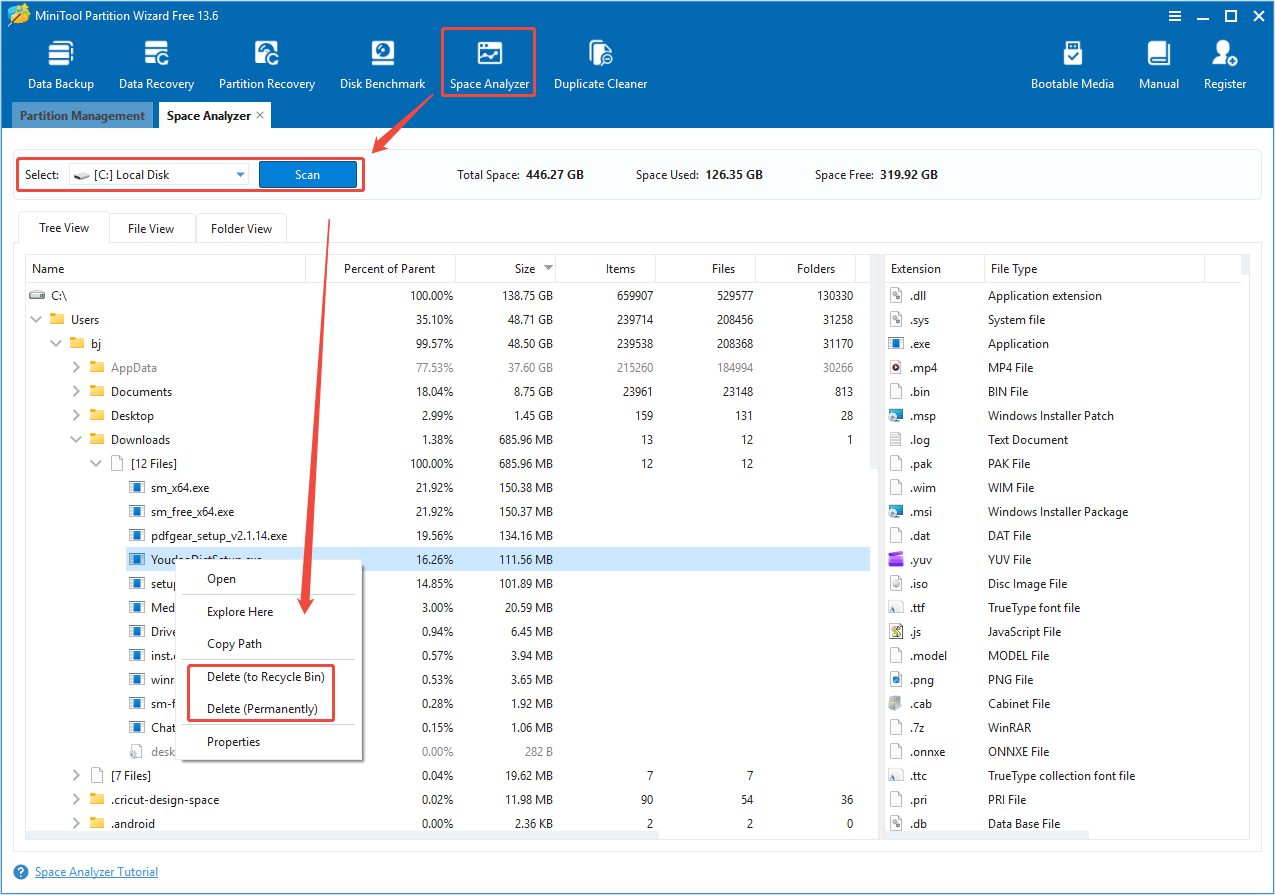
#3. Find and Delete Hidden Files
Some large files are hidden in Windows 10. Use tools like MiniTool Partition Wizard to visualize disk usage and show all hidden files.
Its Space Analyzer feature can help you find what’s taking up your hard drive space and delete these useless files.
MiniTool Partition Wizard FreeClick to Download100%Clean & Safe
- Download, install, and launch this free partition manager.
- On its main interface, click the Space Analyzer feature on the top toolbar.
- From the drop-down menu, select the system drive, then click Scan.
- Wait for the process to complete. After that, this tool displays scan results in Tree View, File View, and Folder View. The result also includes hidden files.
- To find unused files and select Delete (to Recycle Bin) or Delete (Permanently).
This software is more than just a Space Analyzer. It can be used as a partition manager that enables you to partition hard drives, clone hard drives, format a hard drive, convert MBR to GPT without data loss, migrate OS to SSD, recover hard drive data, and so on.
#4. Delete Duplicate Files
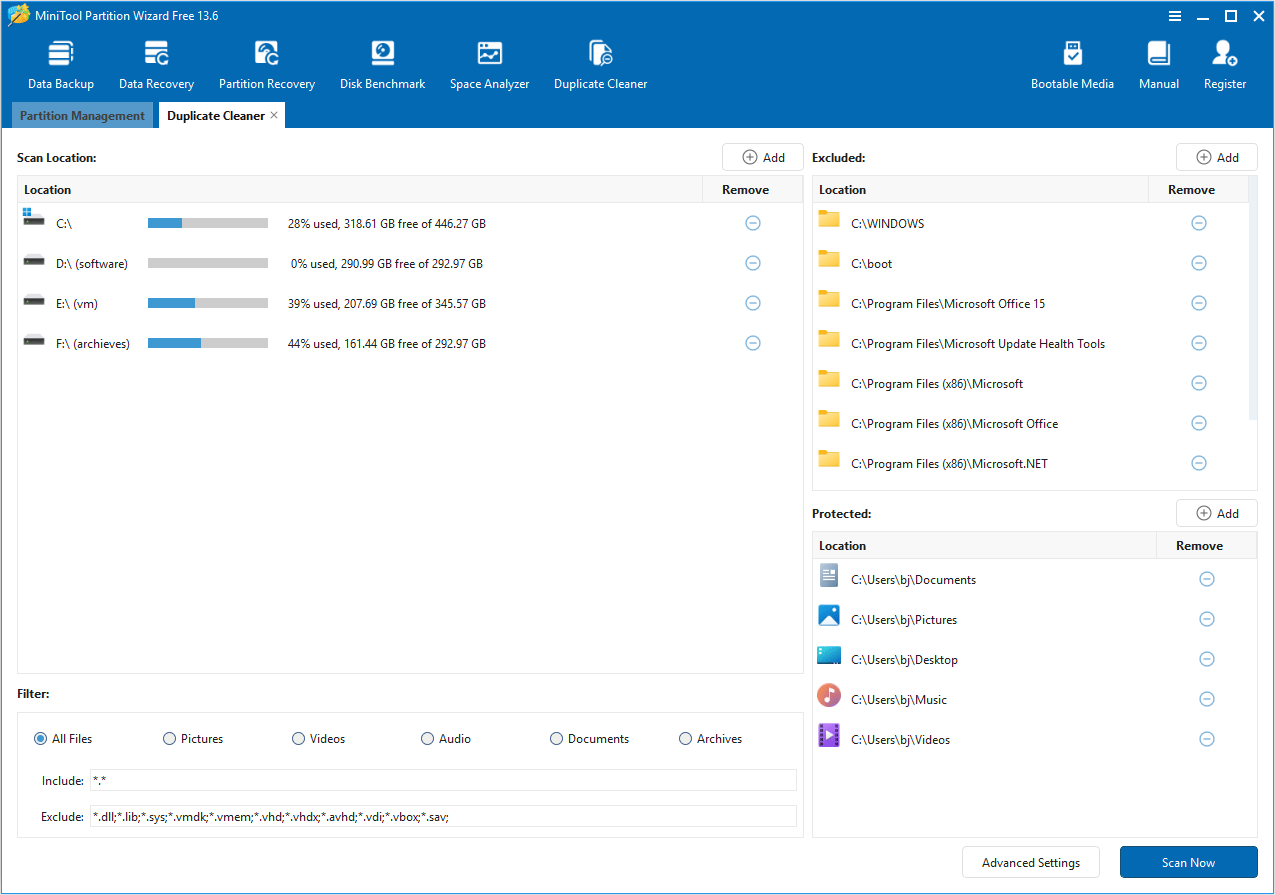
MiniTool Partition Wizard can also delete duplicate files to free up the disk space. Here is the guide:
Step 1: Click Duplicate Cleaner. Keep the default options and then click Scan Now.
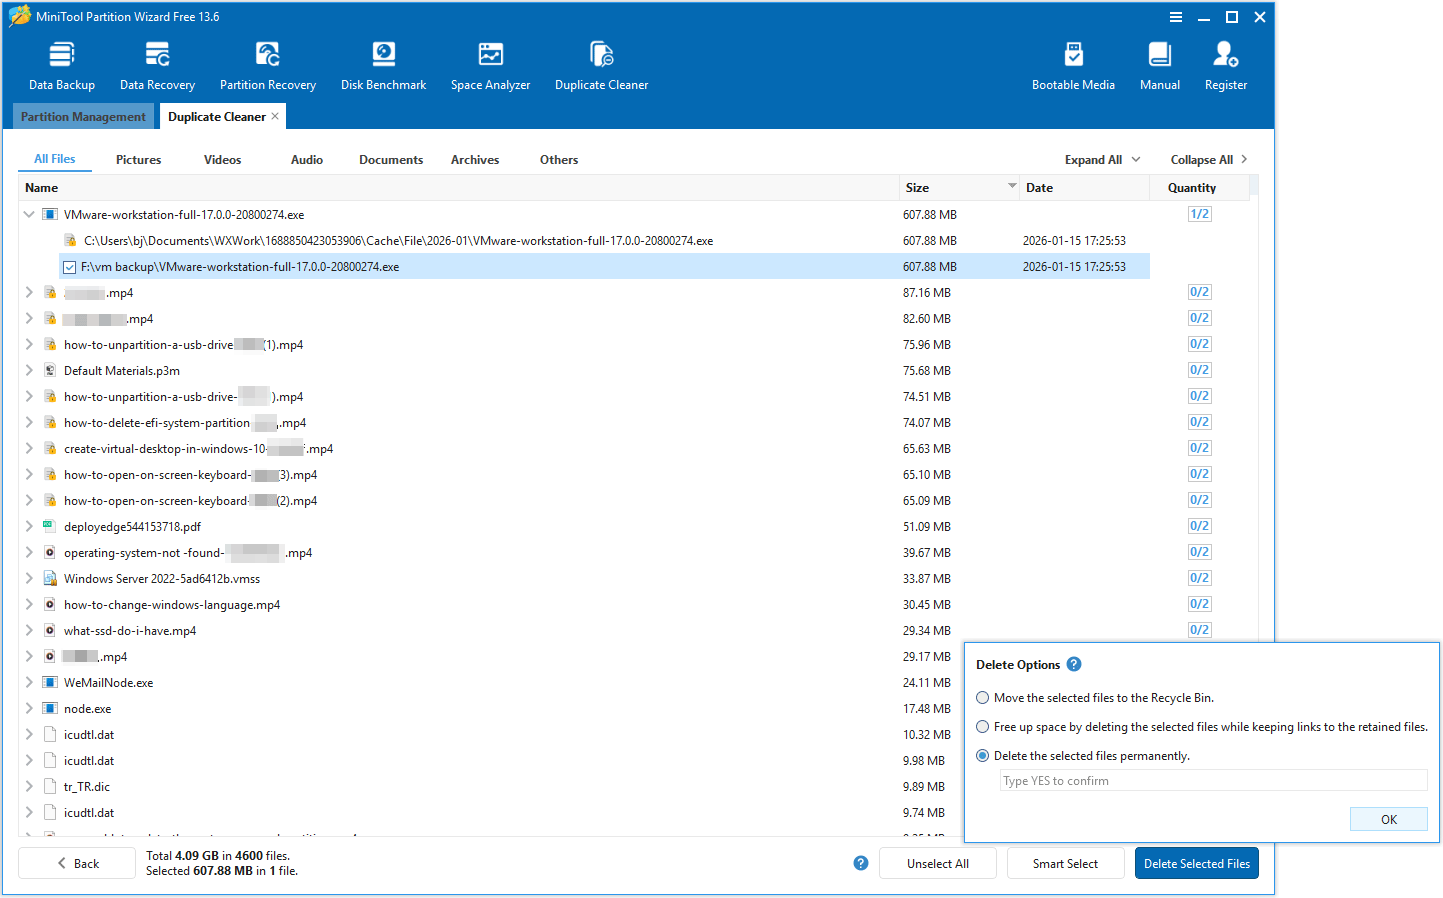
Step 2: All duplicate files in the computer will be listed. Expand each directory and select the duplicate files. Then, click Delete Selected Files and choose the Delete the selected files permanently option. After that, click OK to delete them.
#5. Uninstall Unused Apps
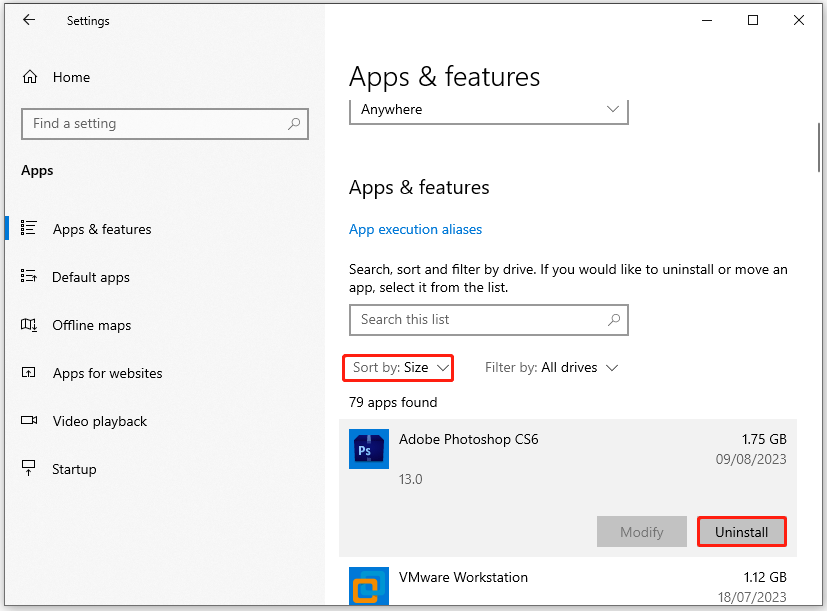
Unused programs consume a significant amount of space and may run background processes. To uninstall them:
- Open Settings > Apps > Apps & features.
- Sort apps by Size to identify large, unused programs.
- Click the unused app and select Uninstall.
Method 4. Optimize Disk Performance
Slow disk speeds or disk fragmentation impact performance. The solution depends on whether you are using a traditional hard disk drive (HDD) or a solid-state drive (SSD).
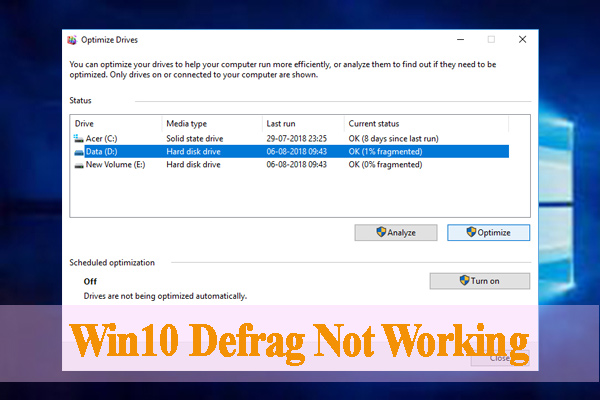
Perform Defragment on HDD
HDDs store data in physical sectors. Over time, files become fragmented, forcing the drive’s read/write head to move more, slowing down access times.
Disk defragmentation can rearrange data and extract all fragments from each file, storing them in a unified location.
You can do that via the Windows built-in program or professional third-party disk defragmentation software. Here are the steps with the Windows embedded utility.
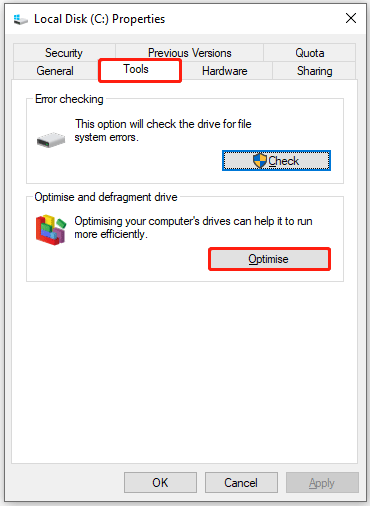
- In File Explorer, right-click the hard drive and select Properties.
- Go to the Tools tab, click Optimize.
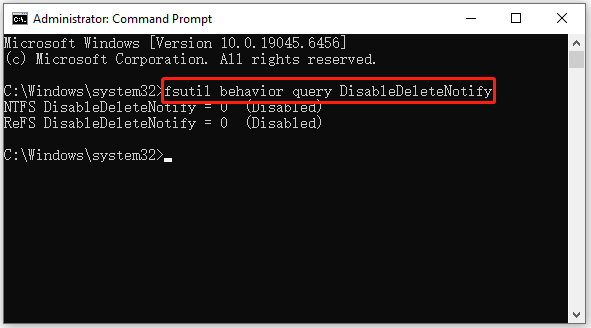
Enable TRIM on SSD
An SSD uses flash memory, and defragmenting it wastes write cycles and shortens its lifespan. Therefore, it doesn’t need defragmentation. Instead, it uses TRIM for optimization.
To enable TRIM on SSD, here are the steps:
- Type CMD in the search bar, right-click Command Prompt, and choose Run as administrator.
- In the Command Prompt window, type fsutil behavior query DisableDeleteNotify and press Enter.
- If the output is 0, TRIM is already enabled. If it is 1, type fsutil behavior set DisableDeleteNotify 0 to enable it.
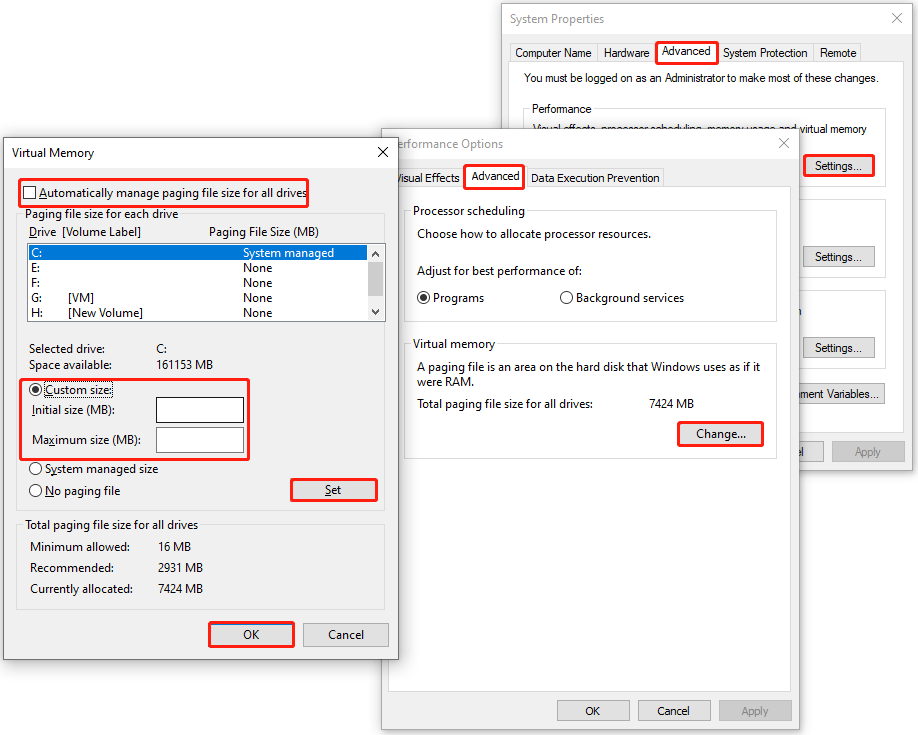
Optimize Virtual Memory
Virtual memory (also known as the pagefile.sys file) acts as an extension for RAM. If RAM is full, Windows moves less frequently data from RAM to the file on the hard drive. It can slightly speed up Windows 10.
- Open Settings > System > Advanced system settings.
- In the Advanced tab of System Properties, click Settings under Performance.
- In the Performance Options window, go to the Advanced tab, click Change under Virtual memory.
- Uncheck Automatically manage paging file size for all drives.
- Select your system drive, choose Custom size, and set the initial size to 1.5 times your RAM (e.g., 12GB for 8GB RAM) and maximum size to 3 times your RAM.
- Click Set > OK and restart your PC.
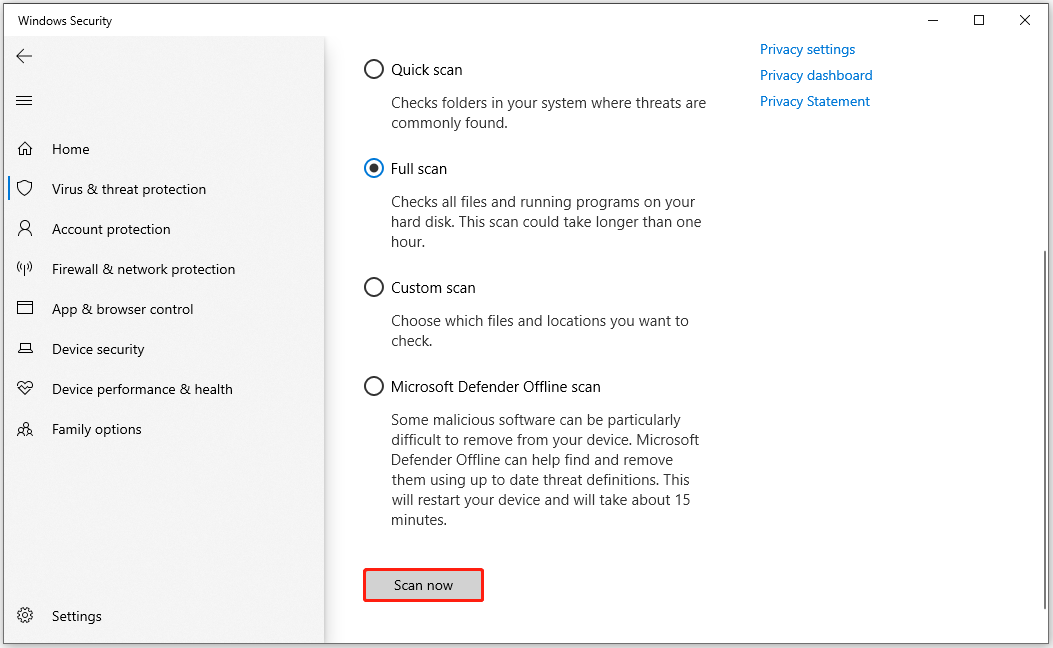
Method 5. Scan for Malware and Viruses
Malware (e.g., viruses, spyware, ransomware) often runs in the background, stealing resources and slowing down your PC. Even if you have antivirus software, regular scans are essential.
You can use Windows 10’s built-in antivirus, Windows Defender, to scan for malware and viruses. It is powerful enough for most users:
- Open Settings > Update & Security > Windows Security > Virus & threat protection.
- Click Scan options and select Full scan. It scans all files and programs.
- Click Scan now and follow prompts to remove detected threats.
You can also use third-party antivirus software such as Norton or McAfee.
Method 6. Adjust Visual and Power Settings
Windows 10 includes many visual effects, like animations and drop shadows, that use system resources.
Similarly, power settings optimized for battery life can limit performance.
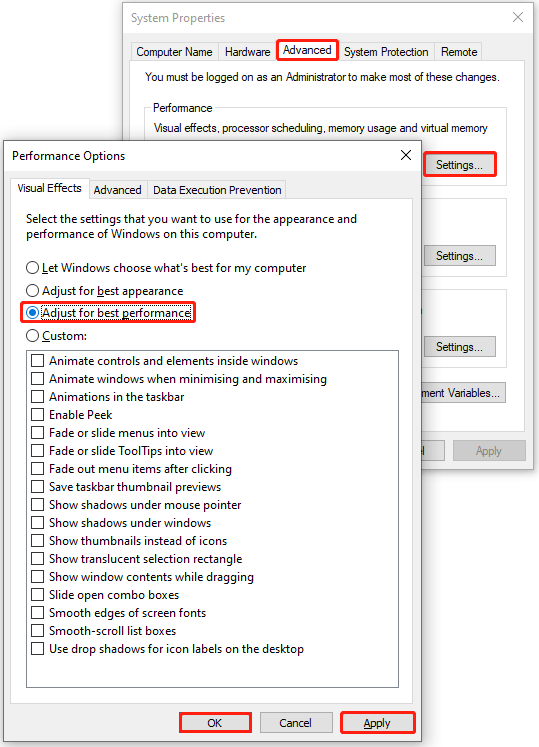
Optimize Visual Effects
- Search for the Control Panel to open it.
- Select System > Advanced system settings.
- In the System Properties window, go to the Advanced tab, click Settings under Performance.
- Select Adjust for best performance to disable all visual effects.
- Click Apply and OK to save the changes.
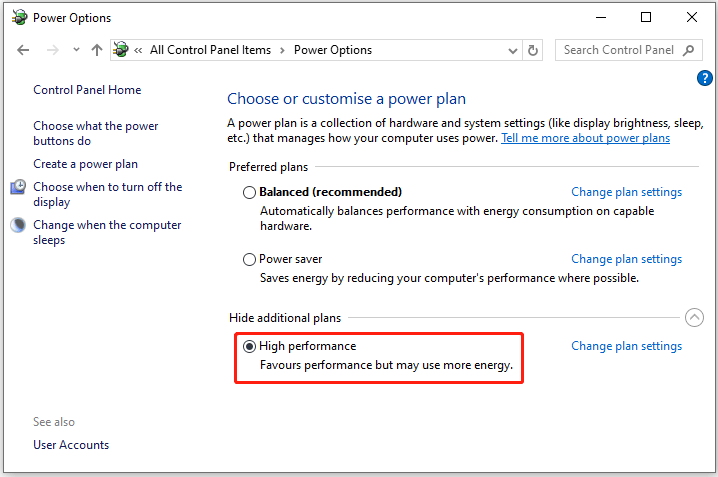
Use High Performance Power Plan
Power plan controls how your PC uses energy. The “Balanced” plan saves power but limits performance, while the “High performance” plan maximizes speed.
- In the Control Panel window, go to Power Options.
- Select High performance.
Upgrade Your Hardware
If you’ve tried all the above methods and your Windows 10 PC is still slow, the problem may be low-end hardware.
For that, you should upgrade your hardware, like the hard disk, RAM, and CPU/GPU. Here are the detailed steps.
Method 1. Upgrade to an SSD
If your computer still uses a traditional hard disk drive, upgrading to an SSD is the most effective way to improve performance.
SSDs use flash memory, which has no moving parts, making them much faster than HDDs. This can significantly improve boot times, application loading speeds, and overall system responsiveness.
Furthermore, SSDs generate less heat, consume less power, and can extend the lifespan of your laptop’s battery.
To upgrade to an SSD on Windows 10 without reinstalling everything from scratch, you can use MiniTool Partition Wizard. It can help you migrate the system and other data to the new SSD.
How to clone the HDD to an SSD with this software? Here is the guide. Before that, connect the SSD to your computer with an NVMe/SATA to USB adapter.
MiniTool Partition Wizard DemoClick to Download100%Clean & Safe
Step 1. Start the migration.
- Open MiniTool Partition Wizard.
- Select the Migrate OS to SSD/HD Wizard feature from the left action panel.

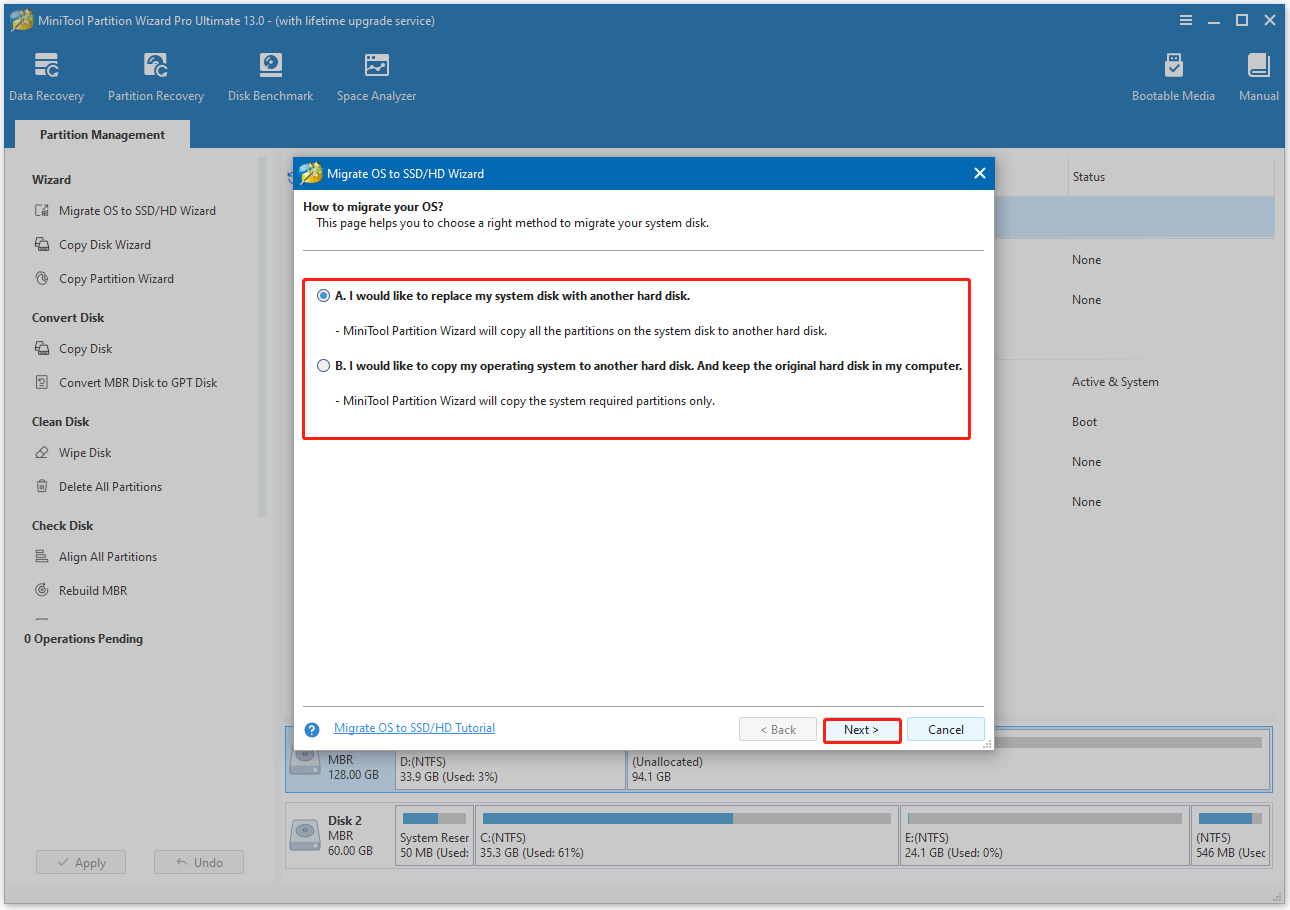
Step 2. Choose the migration method.
Choose a migration method, and then click Next.
- To transfer all the data to the new SSD, choose option A.
- To migrate the operating system only, choose option B.
Step 3: Select the target disk and adjust copy options.
- Select the new SSD as the target disk. You will be warned that all data on the target disk will be erased.
- Review the copy options and disk layout. Keeping the default option is recommended. Then, click Next.

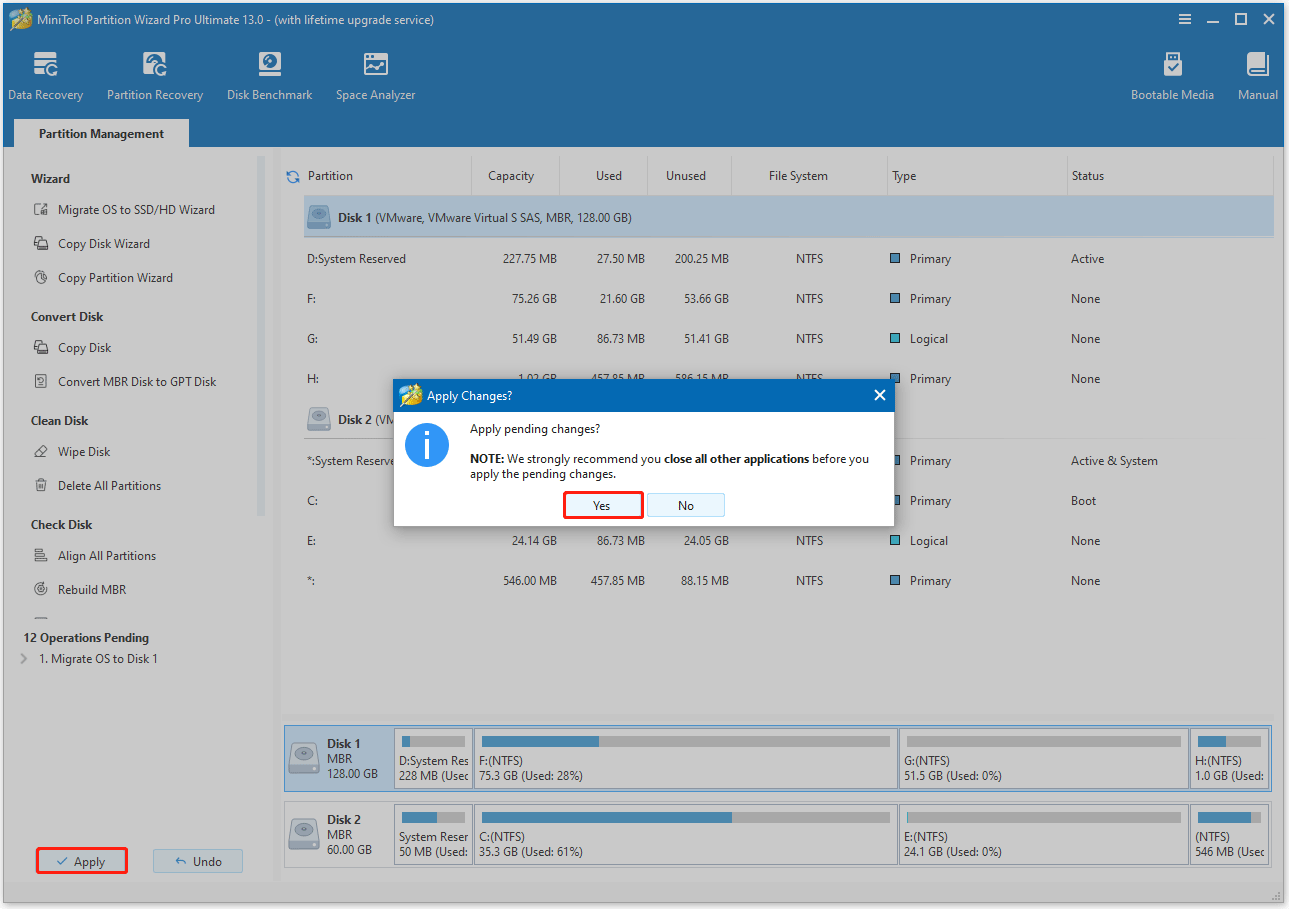
Step 4. Apply the migrating changes.
- Read the NOTE information and click Finish.
- Preview the changes and click Apply to start the cloning process.
- Click Yes to confirm and allow the operation to proceed. The process may take some time to complete, especially for large disks.
Once the process is complete, boot from the new SSD.
- Shut down your computer.
- Physically replace the old hard drive with the new SSD.
- Restart your computer. You need to enter your BIOS/UEFI settings to change the boot order to ensure it boots from the new SSD.
- Verify the new SSD is working correctly and that your OS is properly activated.
Method 2. Add More RAM
Adding more RAM is a great way to speed up Windows 10 computer, especially if you have consistently high memory usage. The process involves identifying the correct type of RAM for your system, purchasing it, and physically installing it.
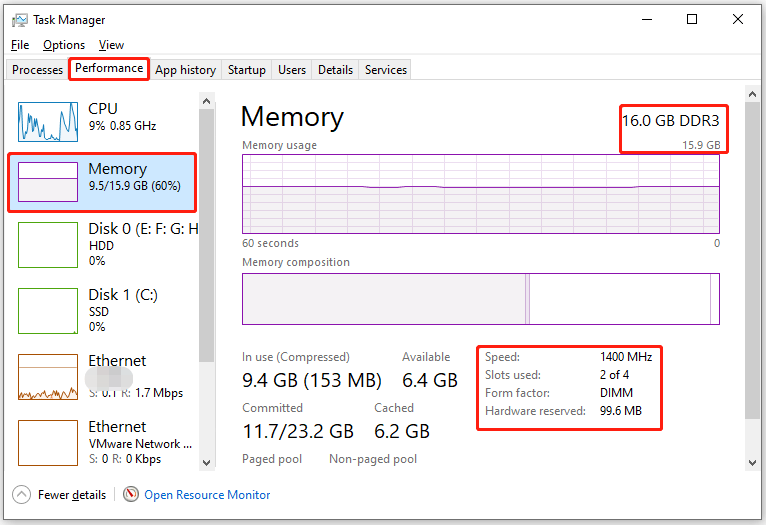
Step 1. Check your current RAM specs to know what type of RAMis compatible with your motherboard. Different computers use different types, speeds, and sizes.
- Open Task Manager.
- Go to the Performance tab and click Memory.
- Note the installed RAM capacity (e.g., 8GB, 16GB), type (e.g., DDR3, DDR4), and speed (e.g., 1400 MHz).
- Note the Form factor. Desktops use longer DIMMs, while laptops use shorter SO-DIMMs.
- Note how many slots are used and how many are available.
Step 2. Check the maximum capacity.
Your motherboard has a maximum amount of RAM it can support. Consult your computer’s or motherboard’s manual to find this limit.
Step 3. Purchase compatible RAM.
If there is only one memory slot, the old RAM should be replaced with a larger one. If there are two memory slots, a RAM of the same model as the old one should be purchased. Otherwise, the old and new memory modules may be incompatible.
Step 4. Install the RAM
- Turn off your computer completely and unplug all cables.
- Remove the side panel of your desktop PC or the access panel on the bottom of your laptop.
- Locate the RAM slots. These are typically near the CPU and are often color-coded.
- Push down on the small retention clips at both ends of an empty slot to open them.
- Align the notch in the RAM stick with the ridge in the slot. Push down firmly and evenly on both ends of the stick simultaneously until the clips snap back up and lock the stick in place with a gentle click.
Step 5. Verify the installation
- Put the case back together, plug everything back in, and start your computer.
- Open Task Manager again, and check if the total amount of memory is increased.
If the new RAM is recognized, you are done and should notice improved performance.
Method 3. Upgrade Your CPU or GPU
Upgrading your CPU (Processor) and GPU (Graphics Card) can improve Windows 10 performance, but they are generally more complex and less impactful for general system speed than an SSD or RAM upgrade.
CPU upgrades primarily benefit demanding applications like video editing, 3D rendering, or heavy multitasking.
GPU upgrades primarily affect gaming, professional graphics work, and certain accelerated applications.
Here is how to speed up Windows 10 computer. You can try these methods one by oneClick to Tweet
Maintenance Tips to Keep Windows 10 Fast
After speeding up your Windows 10 computer, adopt these habits to maintain performance:
- Regular restarts: If you typically put your PC to sleep instead of shutting it down, a simple restart can help clean up memory and improve performance.
- Schedule disk cleanup: Run Disk Cleanup once a week.
- Monitor temperature: Overheating can slow down hardware. Use tools like HWMonitor to check CPU/GPU temperatures. If the temperature exceeds 85°C, clean the dust off the fans.
- Close unused applications: Make it a habit to close unused applications, browser tabs, and background programs.
How to Speed up Windows 10 Computer FAQ
Additionally, adjust visual effects for best performance, set your power plan to High Performance, and ensure your game and Windows settings are configured for gaming, such as lowering resolution, using the highest monitor refresh rate, and disabling the Game Bar.
1. Slow startup
2. Applications lag
3. Frequent crashes
4. Low disk space
5. Overloaded resources
Bottom Line
How to speed up computer Windows 10? Try the software/setting optimization and hardware upgrade mentioned in this post.
By following this guide, you can make your Windows 10 computer faster so that easily handle multitasking, gaming, and office tasks.
If you have any problems or suggestions when using MiniTool Partition Wizard, you can contact us by sending an email to [email protected]. We’ll get back to you as soon as possible.
About The Author

Position: Columnist
Linda has been an editor at MiniTool for seven years. She continuously learns about computers and puts her knowledge into practice. Moreover, she is particularly knowledgeable in disk management, data recovery, system installation, and PDF editing. Her articles typically reference multiple examples or are based on her own experience, providing users with the most suitable solutions.
User Comments :