BSOD 0x0000007e error is one of the most frequently encountered issues. How does this happen? How to fix this error? How to recover the missing data due to this error? MiniTool will show you solutions.
What Triggers the Error 0x0000007e
Windows error 0x0000007e is one of the most common errors that you may encounter, which is related to the inability of the operating system to access the specific system files that are crucial for the execution of specific tasks.
This error doesn’t indicate that your operating system has been damaged. It only indicates that there’s something wrong when your operating system accesses the specific files. You may encounter this error when booting your PC or during the process of accessing hardware.
Here, I list some possible cause of stop: 0x0000007e error and you can take them as your reference.
- Virus or malware infection.
- The system or hardware drivers are outdated.
- The system BIOS is outdated or incorrect.
- The system is not compatible with hardware drivers.
- The space of the hard disk is not enough.
- The hard disk is damaged.
- The driver is faulty.
To solve this error successfully, you can select one method from the following given methods.
8 Ways to Fix BSOD 0x0000007e
- Disable antivirus programs temporarily
- Uninstall unsafe or incompatible third-party drivers
- Check if you have enough disk space
- Utilize Registry Editor with regedit command
- Run CHKDSK utility
- Update BIOS version
- Update or disable device drivers
- Update video adapter
Fix 1: Disable Antivirus Software
Running antivirus software is available only when your computer is bootable. Virus or malware infection is the main cause of many Windows errors including 0x0000007e. Therefore, if this error occurs, you can try disabling your antivirus software temporarily.
Fix 2: Remove Unsafe or Incompatible Third-party Drivers
Third-party drivers can cause the 0x0000007e error very easily. To fix this error, you can uninstall them. This method is available only when it occurs after booting your computer. Microsoft once made a patch program for Windows 7 and Windows Server R2 users, so you can download it to fix the error.
However, it doesn’t always work due to certain reasons. Alternatively, you should check all the drivers that have been installed on your computer are safe. Then uninstall drivers that you are not sure about their security or stability. Finally, reboot your computer and check if the error is solved.
Fix 3: Ensure You Have Enough Disk Space
The limited disk space is a common cause of error 0x0000007e. When this error happens to you, it is suggested that you check your disk space usage. If this is the point, you should take some measures.
You can either delete space-consuming files, uninstall some unnecessary programs, resize partition, extend partition, wipe disk, because all these methods enable you to get more disk space.
MiniTool Partition Wizard boasts all these features, so you can address the limited disk space issue with ease. As your computer is unbootable, you will need a bootable media created by MiniTool Partition Wizard Pro Edition.
Here, I will introduce you how to extend partition with MiniTool Partition Wizard Pro Edition. After you finish installation operation, please launch it to enter its main interface. However, before extending partition, you need to know what exactly it is.
It can help you enlarge your target partition size by taking space from any other partitions or unallocated space on the same disk. When you want to expand a partition to non-contiguous unallocated or free space or there’s no unallocated or free space on the hard disk, extending partition is recommended.
Here’s how to do.
Step 1: Reboot your computer under the help of the bootable media created by MiniTool Partition Wizard Pro Edition, and then enter the BIOS page.
Step 2: Set the bootable media as the first boot order in the Boot tab of the BIOS page. After entering the MiniTool PE Loader page, click on Partition Wizard.
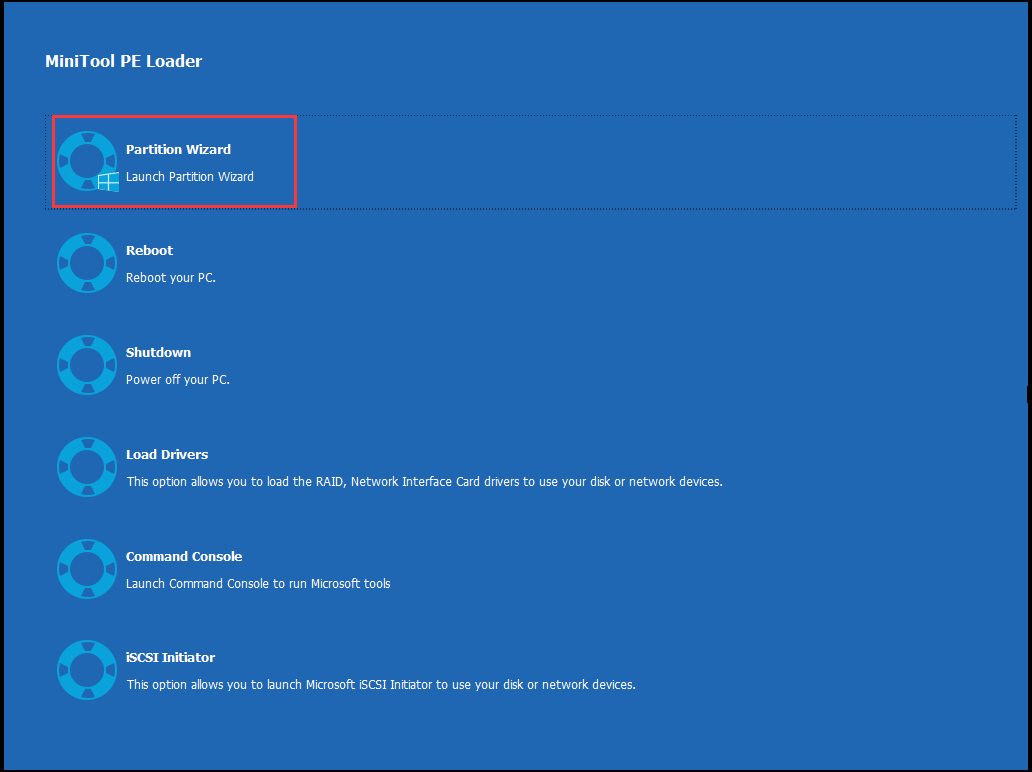
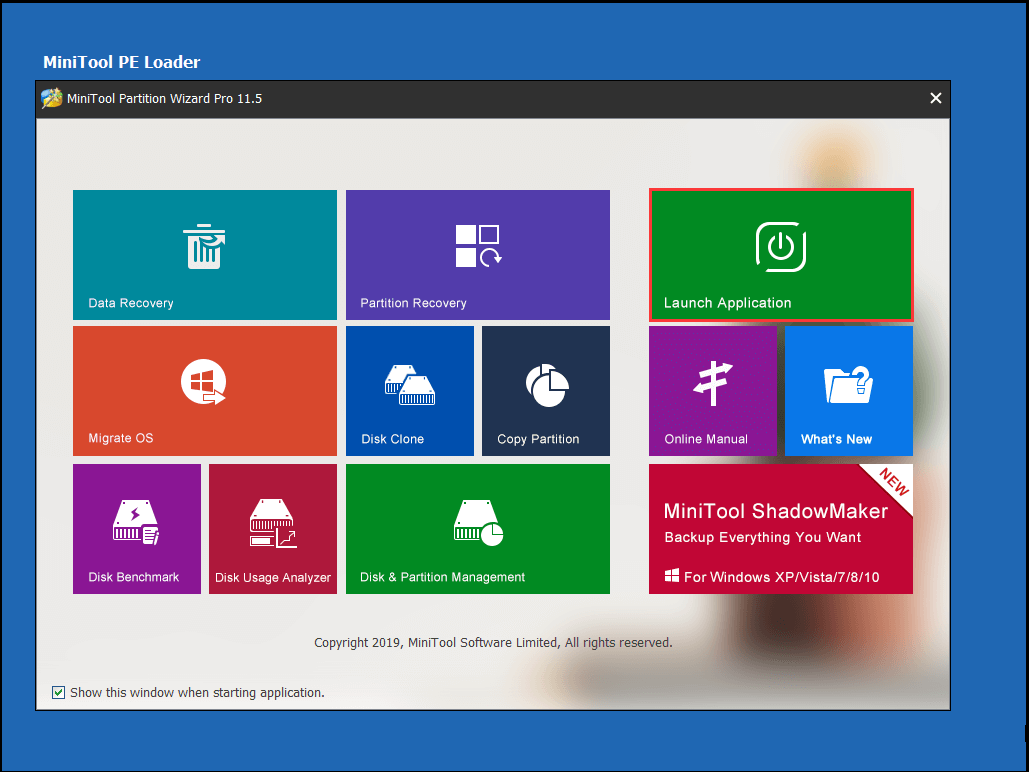
Step 3: Click Launch Application on the pop-up window.
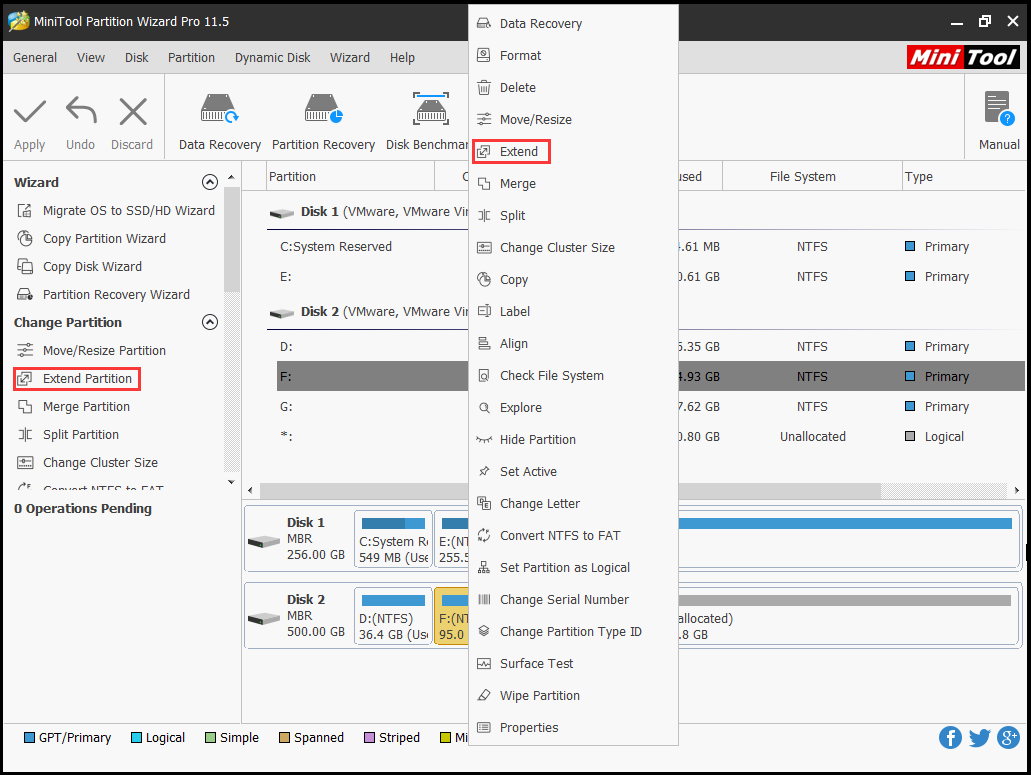
Step 4: As you can see, you have two ways to find the Extend Partition feature on MiniTool Partition Wizard. The option one is to click on the target partition and then select the Extend Partition feature in the left side of the main page. Another option is to choose Extend from the menu beside the partition after right clicking the target partition.
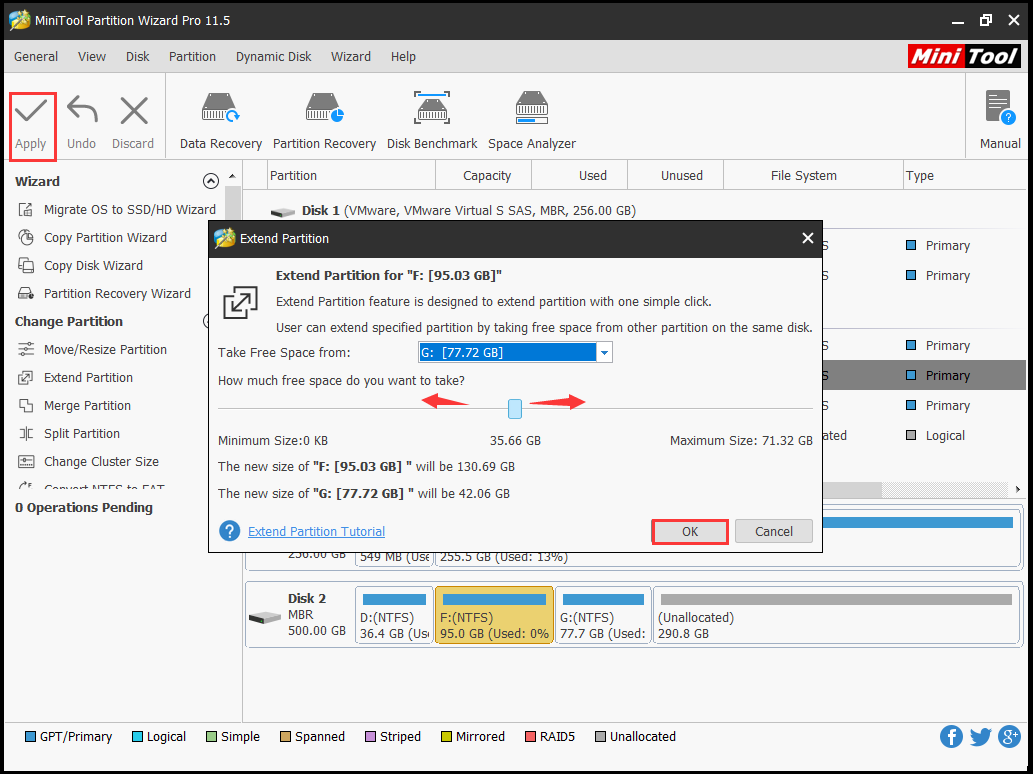
Step 5: In the pop-up window, choose a partition that you want to take free space from, and then determine the amount of free space that you want to take from the selected partition. Then, click on OK. Finally, click Apply to carry out the operation.

Fix 4: Utilize Registry Editor with Regedit Command
Step 1: Open Settings by pressing Win and I keys, and then navigate to Update & Security. Click on Recovery, and then click Restart now.
Step 2: After entering Windows Recovery Environment, follow the path: Troubleshoot > Advanced options > Startup Settings > Restart. Then your computer will restart into the Startup Settings page. You can enter the Safe Mode by pressing either F4, F5 or F6.
Step 3: Then you will boot your system in Safe Mode.
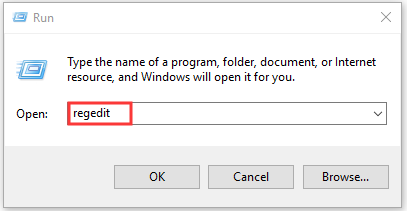
Step 4: Press Win plus R keys to open the Run window, and then type regedit and hit Enter.
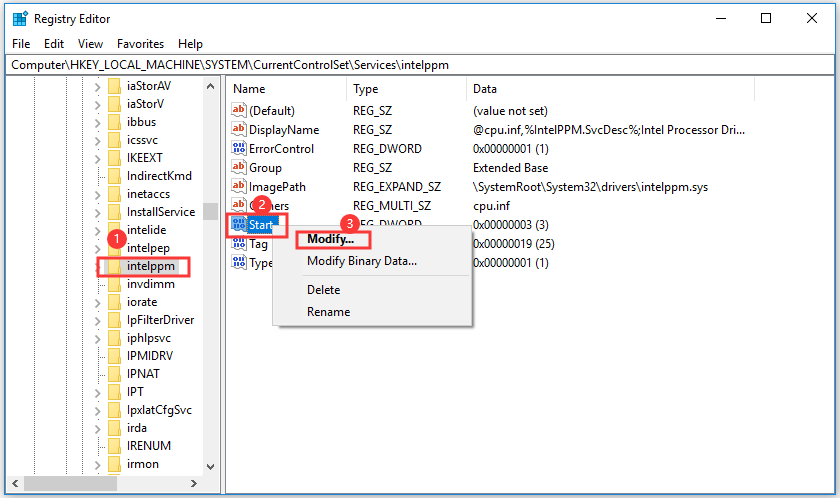
Step 5: In the Registry Editor window, go to the destination by following the path below.
HKEY_LOCAL_MACHINESYSTEMControlSet001ServicesIntelppm
Step 6: After finding the final content, right click the Start in the right side of the window and choose Modify to continue.
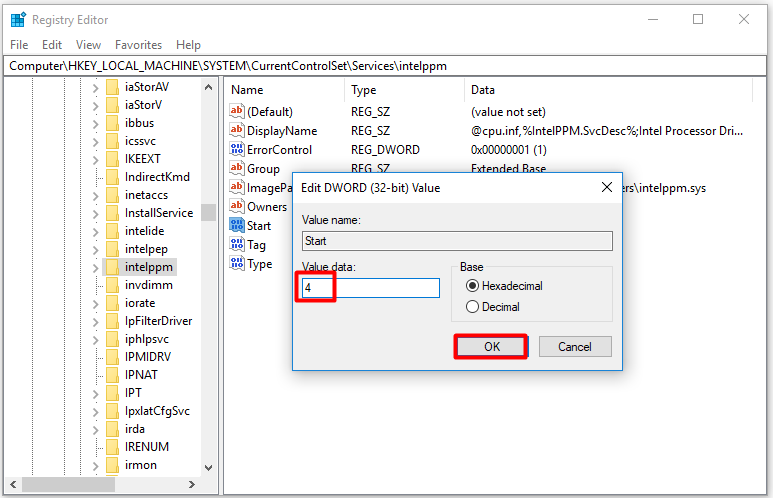
Step 7: In the pop-up window, set the value data as 4 and click on OK to save changes and exit the Registry Editor.
Step 8: Reboot your computer and check whether the error still persists.
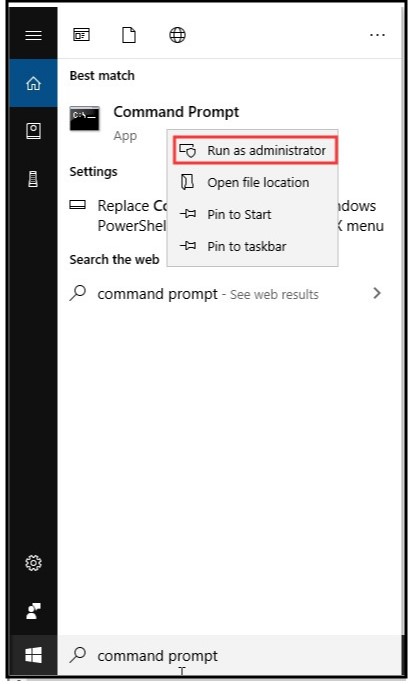
Fix 5: Run CHKDSK via Command Prompt
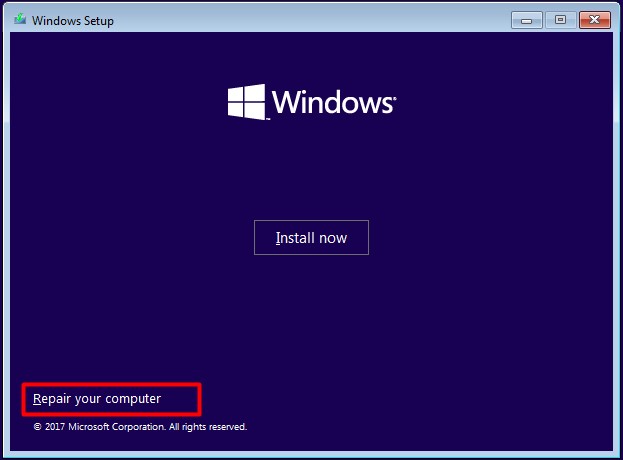
To check if the error 0x0000007e occurs to you due to a faulty disk, it is highly recommended that you run CHKDSK utility. Reboot your computer with the prepared Windows installation media created by Windows 10 Media Creation Tool and set it as the top boot order. After that, follow the steps below.
Step 1: In the pop-up window, click on Next.
Step 2: Click Repair your computer to go on.
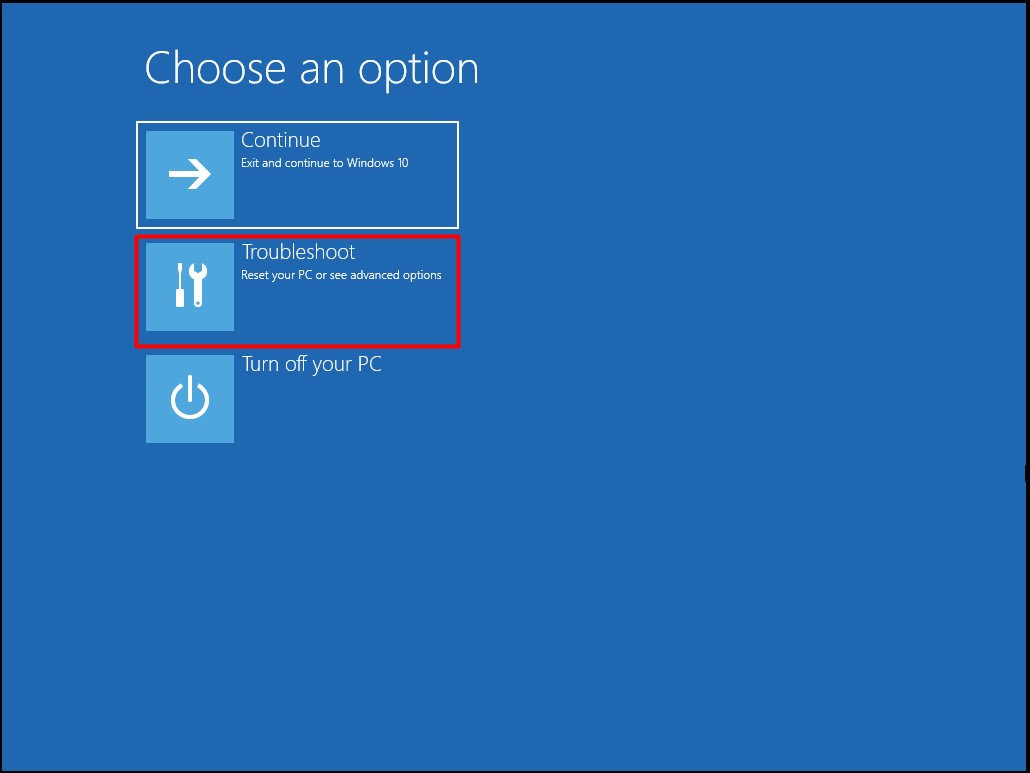
Step 3: Click on Troubleshoot in the Choose an option page.
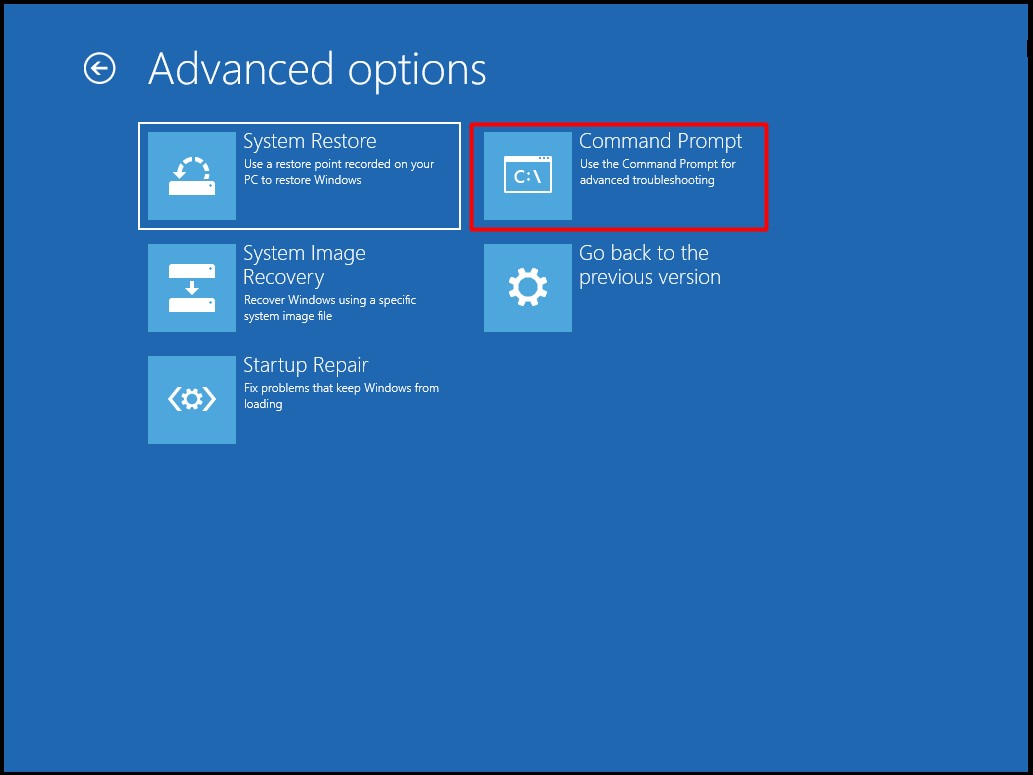
Step 4: Click on Command Prompt.
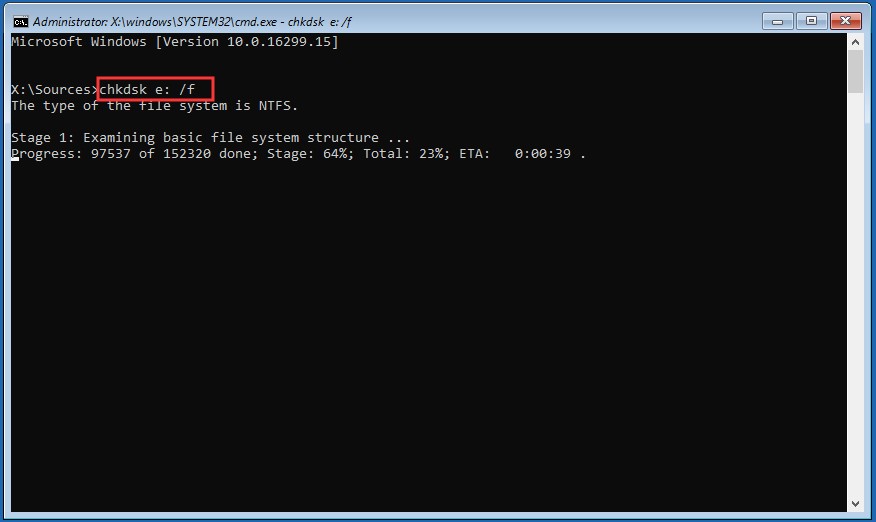
Step 5: In the elevated prompt, type command chkdsk *: /f (* represents the drive that you want to check and repair) and hit the Enter key. Then the program will start scanning your hard disk and fix errors on it.
Fix 6: Update BIOS
BIOS represents Basic Input/Output System, which is embedded on the chip within your computer’s motherboard. Updating BIOS can help you reduce much booting time, eliminate errors, improve performance, improve system practicality and fix any possible errors with your computer like BSOD 0x0000007e.
You should find the latest BIOS version before updating it.
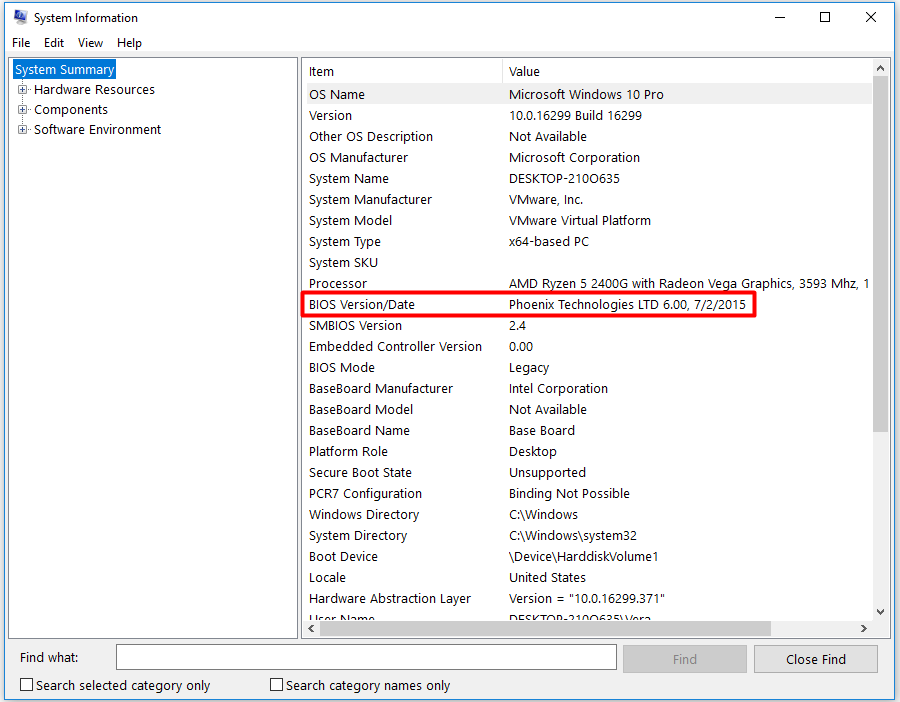
Step 1: Follow the path below to check your present BIOS version.
Press Win and R keys to open the Run window > type msinfo32 and hit Enter > find the current BIOS version on the right side of the page.
Step 2: Check your motherboard type by following this guide.
Step 3: As you have the detailed information of your computer’s manufacturer and model number now, visit the website of the manufacturer and download the latest BIOS.
Step 4: Then you can follow the detailed steps in this post: How to Update BIOS Windows 10 | How to Check BIOS Version
Fix 7: Update or Disable Device Drivers
This method is effective only when your computer can be booted after the error occurs. In this case, you can follow the steps below to update or disable your recently installed device drivers.
Step 1: Repeat Step 1 to Step 4 of Fix 4 to reboot your computer in Safe Mode.
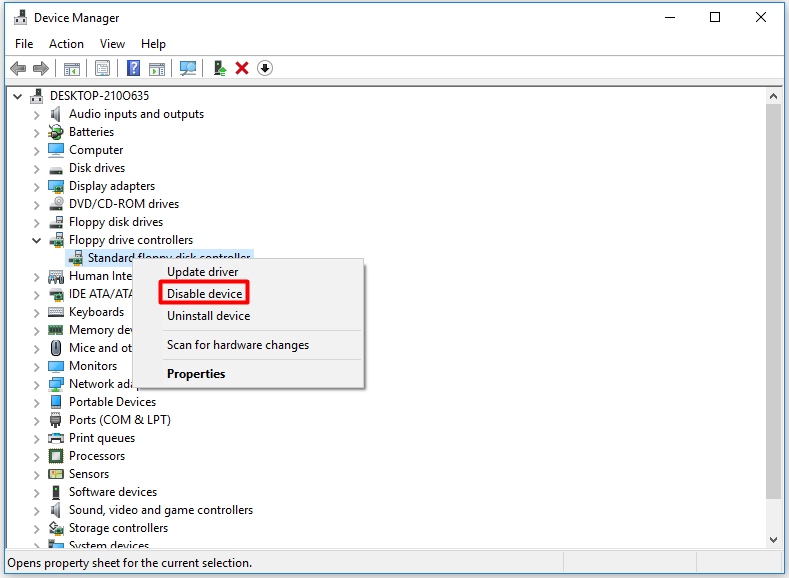
Step 2: Open Device Manager.
Step 3: Double click the device that you installed recently (before the error started to happen).
Step 4: Right click the device and choose the Disable option from the pop-up menu. If you want to update drivers, you need to click on Update driver option instead. Then follow the instructions in the elevated window to finish the whole operation.
Step 5: Exit Windows Device Manager. Reboot your computer and check if the error is fixed.
Fix 8: Update Video Adapter
When your computer is bootable after the error 0x0000007e occurs, you can update video adapter to fix it. This method can fix the incompatibility between the outdated adapter and computer. Here are specific steps.
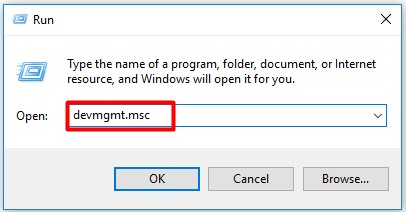
Step 1: Press Win and R keys to open the Run window. Then type devmgmt.msc and press the Enter key.
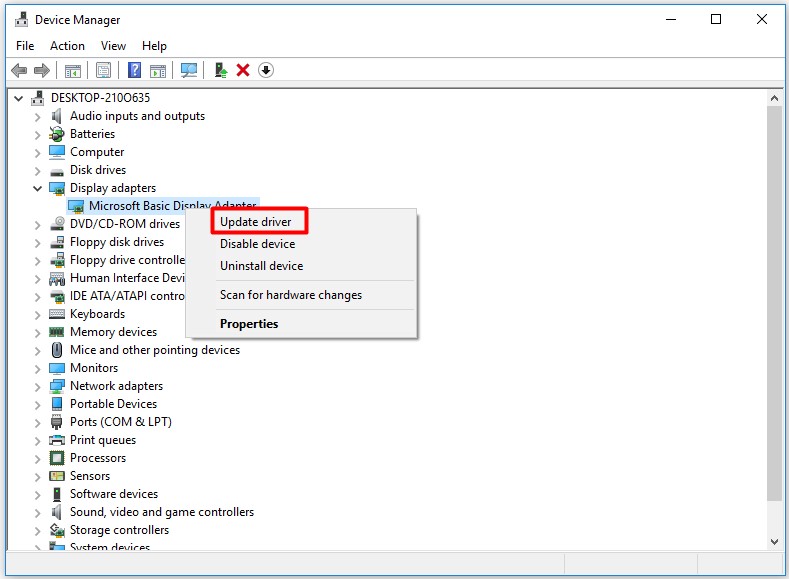
Step 2: Double Display adapters to expand it. Right click the current video adapter and choose Update driver in the sub-menu.
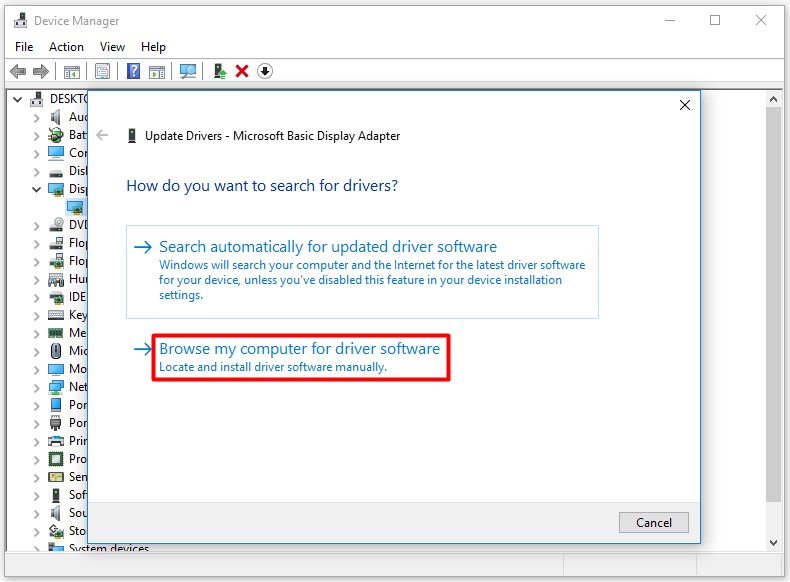
Step 3: In the elevated page, click on browse my computer for driver software.
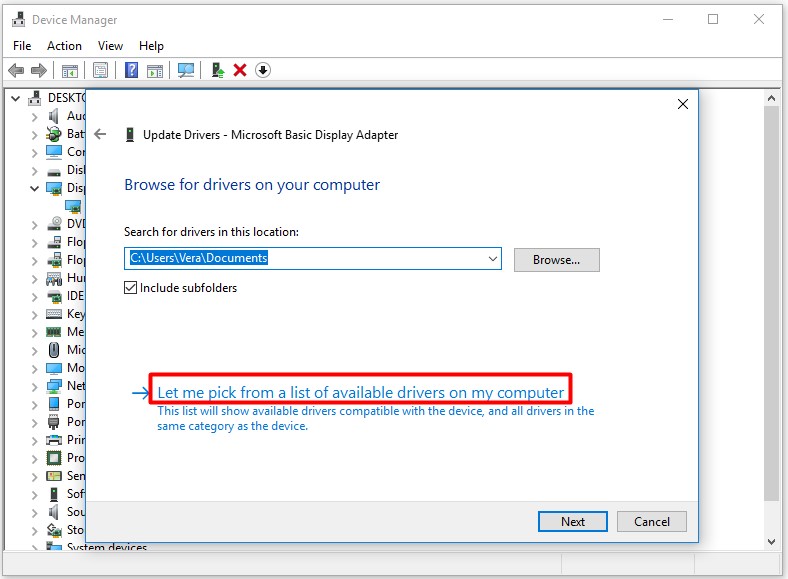
Step 4: Click on Let me pick from a list of device drivers on my computer.
Step 5: Choose the latest video driver that has been downloaded from the website and click on Next.
Step 6: Wait for the new adapter to be installed. Then restart your computer to check if the error is fixed.

Recover the Missing Data Due to BSOD 0x0000007e
You can fix and stop 0x0000007e error by using the method above, but how to find back the missing data due to this error. Don’t worry! MiniTool Partition Wizard can help you recover your lost data. The Data Recovery feature of this excellent software enables you to find your important data back easily.
Don’t hesitate to download it now! You can get it by clicking the button below. You can choose the suitable edition based on your situation.
MiniTool Partition Wizard FreeClick to Download100%Clean & Safe
After that, you are able to recover your data by following this guide: Hard Drive – Recover Lost Data and Restore Lost Partitions
Conclusion
These methods are very effective for fixing 0x0000007e error, so you can choose one according to your demand. The possible cause and solutions to the error are provided for you. If you need to recover your data, you can also find a method in the post.
If you have any new thought about error 0x0000007e, please leave your words in the comment below. If you have any doubt or suggestion about MiniTool software, write an email directly via [email protected].
User Comments :