Tiny10 is a good choice for low-end PCs. If your computer has low RAM and storage space, try using this lightweight Windows 10 system. In this post, MiniTool Partition Wizard tells you how to install Tiny10 from an ISO file.
What Is Tiny10
Tiny10 is a stripped-down version of Windows 10 that is created by NTEDV. So, it is also called lightweight Windows 10. All the bloatware, unnecessary apps, services, and system components have been removed by the developer. Apart from Notepad and Wordpad, default apps like the image viewer, Internet Explorer, Microsoft Store, Windows Security, and media player are removed in Tiny10.
Even so, all the core Windows system tools are kept such as Disk Management, PowerShell, CMD, etc. Given that fact, Tiny10 takes much less space and can work on computers with low RAM and little disk space. If you install Tiny10 on a 32-bit computer, it only takes you 5.2GB of space.
On 64-bit computers, Tiny10 needs 10GB of space at most. While installing a standard Windows 10 requires 22GB of disk space. As for RAM, this light Windows 10 needs 1GB on 32-bit PCs and 2GB on 64-bit computers. If you have a low-end PC, then Tiny10 is very suitable for you. In addition to Tiny10, the following systems can work on low-end computers too.
- Tiny11
- ReactOS
- Chrome OS Flex
- Windows 10 Lite
- Nexus LiteOS 10
- Nexus LiteOS 11
- Ghost Spectre Windows 11 Superlite
- Ghost Spectre Windows 10 Superlite
- Windows 10 China Government Edition
Tiny10 ISO Download
Exclusive 70% OFF McAfee
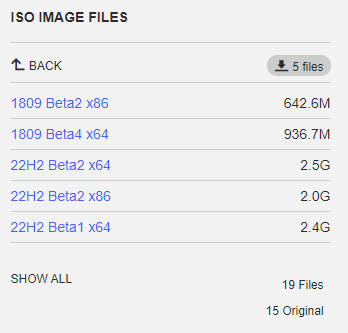
If you want to try this lightweight Windows 10 system, download its ISO file on the Internet. There are several versions of Tiny10 (lightweight Windows 10). According to your situation, choose a proper Tiny10 version.
1. Tiny10 x64 Beta 1 runs Windows 10 Enterprise LTSC (Build 19044.1586, March 2022). It means that you can activate Tiny10 with a Windows license, but it doesn’t support Windows updates.
2. To know the latest information about Tiny10, pay attention to the official Twitter account of NTDEV.
- 1809 Beta2 x86
- 1809 Beta4 x64
- 22H2 Beta2 x64
- 22H2 Beta2 x86
- 22H2 Beta1 x64
Tiny10 Install
After you get Tiny10 ISO downloaded, make a bootable drive and install the system with the given steps.
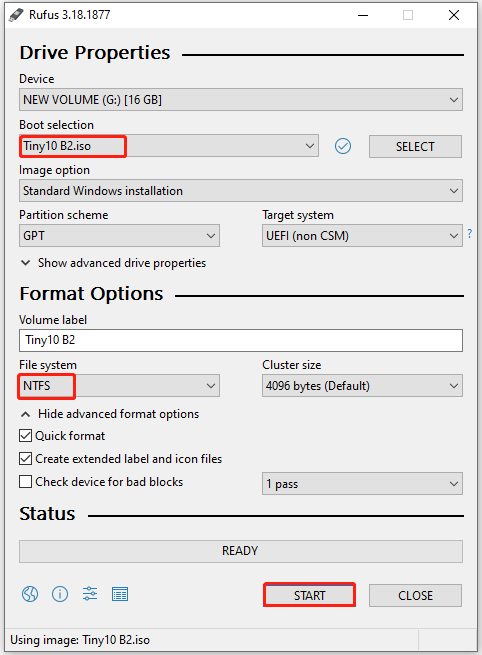
Step 1: Download and install a piece of USB bootable software like Rufus and Windows USB/DVD Download Tool. Here we use Rufus.
Step 2: Plug a USB flash drive into your computer.
Step 3: Run Rufus, choose the downloaded Tiny10 ISO file, pick NTFS file system, and click the START button.
Step 4: After the process ends, the bootable USB drive is ready.
Step 5: Connect the bootable drive to the target computer.
Step 6: Enter the boot menu of that computer by holding a boot key like F12 during the restart process.
The boot key varies according to computer brands and models. You can follow the corresponding guide below to enter the boot menu of your computer.
Step 7: Choose the connected USB drive and press Enter to continue.
Step 8: Then you will access Tiny10’s installation window which is similar to Windows 10’s. Select a drive to install this lightweight Windows 10 and click Next.
Step 9: Follow the on-screen instructions to finish the Tiny10 installation.
Also read: Make a Multi-bootable USB Drive with 4 Multiboot USB Tools
You can get a Tiny10 ISO download, make a bootable USB drive, and then set up light Windows 10 step by step. Alternatively, you are able to directly migrate Tiny10 from another computer to your PC with a system migration tool like MiniTool Partition Wizard. Its Copy Disk and Migrate OS to SSD/HDD features can help you do that in a few clicks. After migrating Tiny10, you can run the system without installing it.
MiniTool Partition Wizard DemoClick to Download100%Clean & Safe
Download this Windows system migration tool now! By using it, you can get a complete Tiny10 system within a few clicks.
Here’s an new update for Tiny10: Tiny10 2303
User Comments :