What Is Rectify11
Rectify11 is a modified version of Windows 11 developed by MikeRosoft6009. Hence, Rectify11 isn’t affiliated with Microsoft in any way. It is built to fix UI inconsistencies in Windows 11. For instance, it includes changes to the setup theme, Microsoft Management Console (MMC), administrative tools, and Start menu.
Even so, Rectify11 is backward-compatible with decade-old UI elements, making the UI completely consistent and cohesive. Actually, the shell has been redesigned from scratch to keep everything in line with the modern fluent design.
The team has redesigned items like the loading ring, some cool new wallpapers, the recovery environment, File Explorer dialogs, system properties, and action boxes on Rectify11. All these UI elements have been updated with new icons, fonts, and WinUI 3 themes.
As Rectify11 has been made bloat-free and more performance-driven, there are no background telemetry and TPM requirements on it that is different from Windows 11. Moreover, Rectify11 comes with a consistent dark mode which is unavailable on Windows 11.
Then, old dialogue boxes like the Run window and pop-up windows will be in dark mode on this redesigned Windows 11. Apps like Control Panel, Device Manager, Disk Management, Registry Editor, Group Policy Editor, Control Panel, Task Manager, and other apps but for Paint App support dark mode too.
You can install security and quality patches on Rectify11. As for cumulative updates, developers don’t recommend installing them. As for Windows 11, Microsoft directly handles the updates on it. The developer removes Microsoft Edge Browser and makes Chromium Browser the default browser of Rectify11.
The following projects are used on Rectify11 too.
- Microsoft Store: download desired apps
- ExplorerPatcher: choose between Windows 11 and Windows 10 Taskbar
- 7-Zip: compress and decompress files
- Resource Hacker: replace resources in files
- MicaForEveryone: apply mica backdrop to apps
- Libmsstyle: render controls from rectify msstyles
If you want to get a light Windows 11, you can consider Windows 11 Lite, Tiny11, Ghost Spectre Windows 11 Superlite, or Nexus LiteOS 11. For lightweight Windows 10, you can try Tiny 10, Ghost Spectre Windows 10 Superlite, Nexus LiteOS 10, etc.
Where to Download Rectify11 ISO
You should know the Rectify11 system requirements before downloading and installing it on your computer. At first, Rectify11 doesn’t support 32-bit machines. Instead, it only supports 64-bit PCs. Besides, you need 4GB RAM at least and 64GB of disk space to install this redesigned Windows 11.
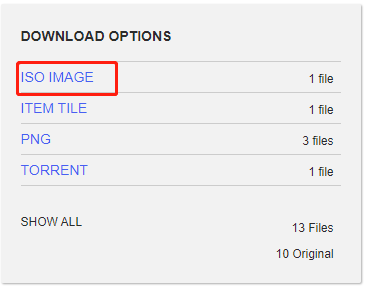
Ensure that your PC meets the Rectify11 system requirements and you have a stable Internet connection. The size of the Rectify11 ISO is about 5.72GB, so it would take you some time to finish the download process. After learning these facts, go to the official website of Rectify11 and download the Rectify11 ISO file.
If the website is under maintenance, you should check that after a period of time. Alternatively, you can also get the Rectify11 ISO from other reliable sources.
You’d better download Rectify11 from its official website.
How to Install Rectify11
After you download the Rectify11 ISO file, you can install this system by using the steps below.
Step 1: Download and install a piece of USB bootable software on the Internet. For instance, you can download Rufus, Windows USB/DVD Download Tool, WinToUSB, etc. In this scenario, we use Rufus.
Step 2: Plug an empty USB into your computer and then launch the downloaded USB bootable software (Rufus).
The USB should have 16GB of space at least.
Step 3: Click SELECT and then find and choose the downloaded Rectify11 ISO file on your computer. If your computer doesn’t come with TPM and Secure Boot, select the “Extend Windows 11 Installation Restriction (no TPM/no Secure Boot)” option. You can perform a standard installation if your PC supports that.
Step 4: Make sure that GPT and UEFI are selected.
Step 5: Type a volume label and click START.
Step 6: After the bootable USB drive is ready, plug it into the target computer and restart the device to enter its boot menu. To do that, keep pressing a boot key like F12, Esc, and F1 when the PC boots up.
Step 7: On the shown boot menu, choose the bootable USB drive as the boot option.
Step 8: Follow the on-screen instructions to finish the installation.
You will see a totally redesigned fluent Windows setup while installing Rectify11. It means that you don’t have to go through an unnecessary setup process. The system boots up after a single restart.
Oofhours Media Tool allows you to download Windows 11/10 ISO file and make a bootable USB drive without using separate USB bootable software. You can get the ISO and make installation media via one tool.
Bonus tip: If you don’t want to install Rectify11 from scratch, directly migrate it from another computer with a system migration tool like MiniTool Partition Wizard. Its Copy Disk and Migrate OS to SSD/HDD features allow you to migrate Rectify11 easily. You can use the system immediately after migration.
MiniTool Partition Wizard FreeClick to Download100%Clean & Safe
Download and install this software, and then start the migration process now!
User Comments :