Many Windows users complain about Lexar 64GB USB 3.0 not working on forums. Have come across the Lexar flash drive not recognized issue? This post of MiniTool provides you with several effective troubleshooting methods.
What Causes Lexar 64GB USB 3.0 Not Working
Lexar USB flash drive attracts a large number of users because of its high performance, affordable price, and security property. Sometimes, however, many users reported their Lexar 64GB USB 3.0 not working on Windows PC.
When inserting a Lexar USB drive into a Windows PC, lots of users receive some error messages like “USB device not recognized”, “Unknown device (descriptor request failed)”, “the last USB device malfunctioned”, etc.
What causes Lexar flash drive not recognized? After analyzing extensive user reports and references, it can be concluded that this issue can occur in the following several cases.
- The Lexar flash drive has no drive letter.
- The USB ports are disabled in BIOS.
- Fault USB port.
- Outdated or problematic USB device driver.
- Unrecognized file system.
Now, let’s start exploring the Lexar jump drive troubleshooting methods.
Solution 1. Run Hardware and Devices Troubleshooter
The first and simplest method is to run Hardware and Devices troubleshooter. This tool will detect any hardware issues on your computer and provide some solutions, which can help you fix Lexar 128GB flash drive not working.
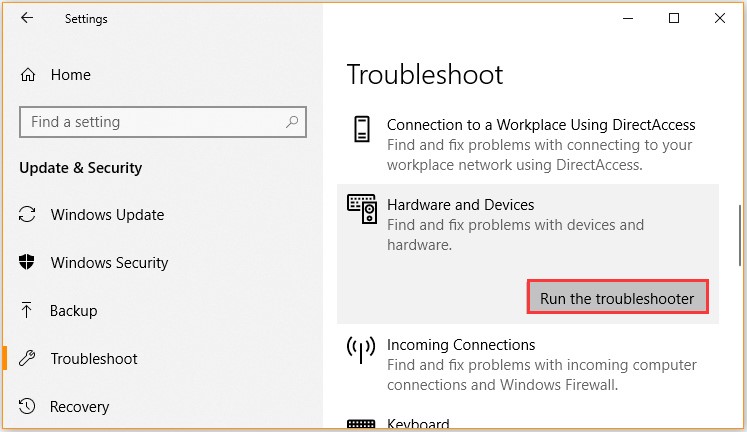
Step 1. Press the Win + I keys to open the Windows Settings app.
Step 2. Click on Updates & Security > Troubleshoot one by one.
Step 3. Double click the Hardware and Devices on the right pane, and click on Run the troubleshooter.
After the process completes, restart your computer and connect your drive again to see if the Lexar flash drive not recognized issue still persists.
Solution 2. Update the USB Device Driver
It is possible that Lexar 64GB USB 3.0 not working can be caused by an outdated or problematic USB device driver. To fix this issue, you can try updating the USB device driver.
Step 1. Right-click the Start button and select the Device Manager from the context menu.
Step 2. Expand the Universal Serial Bus controllers menu, and then right-click the USB driver that comes with the error and select Update driver.
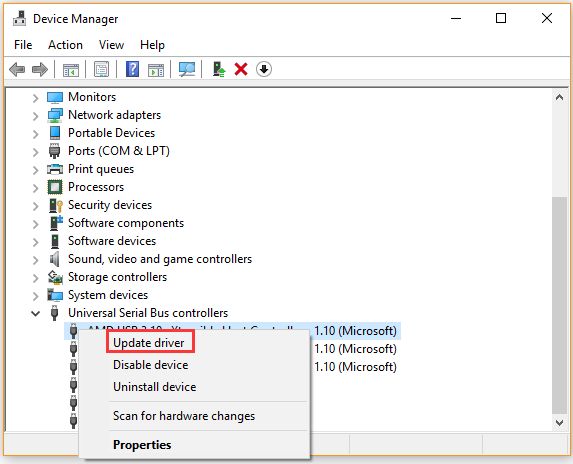
Step 2. Select Search automatically for updated driver software option and then Windows will automatically download and install any available updated USB driver.

Once the process completes, reconnect and see if Lexar 64GB USB 3.0 not working still persists.
Solution 3. Assign a Drive Letter for Lexar USB
The Lexar flash drive won’t show in File Explorer if this USB has no drive letter. In this case, you need to reassign a driver letter to the Lexar USB flash drive. Here is a simple guide:
Step 1. Press Win + R keys to open the Run dialog box, and then type diskmgmt.msc and hit Enter.
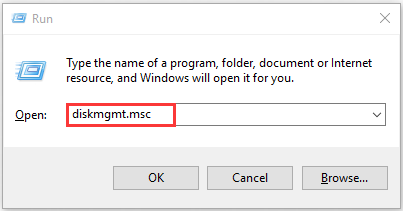
Step 2. Right-click the Lexar USB drive and select Change Drive Letter and Paths in the pop-up window.
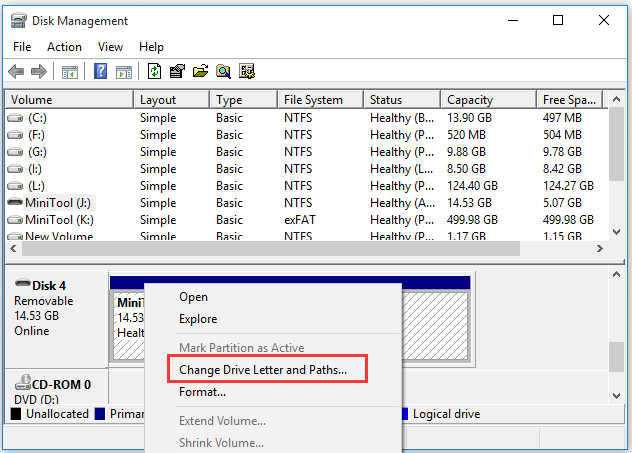
Step 3. Click on the Change button, and then select a drive letter from the drop-down menu and click OK to save changes.
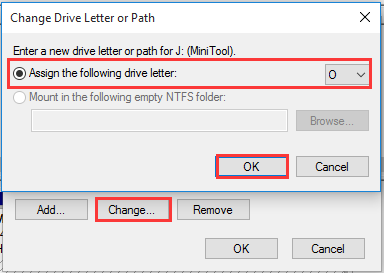
Now, you can reconnect the drive and check if the Lexar flash drive not working has been fixed.
Solution 4. Enable the USB Port in BIOS
Sometimes the Lexar flash drive not recognized issue can occur because it is not enabled in BIOS. Since some certain motherboard manufacturers disable unused ports by default, which causes many second drives not showing in Windows. Now, follow the steps below to enable the USB port in BIOS.
Step 1. Turn off your computer completely and connect your Lexar flash drive and power on.
Step 2. Keep pressing the F8 key to enter the BIOS setup before the computer is booted. You can read this post “How to Enter BIOS Windows 10/8/7” to learn details.
Step 3. In the BIOS window, navigate to Advanced > USB ports by pressing the arrow keys.
Step 4. Select the USB support > Full Initialization and choose the correct OS type.
Step 5. Press the F10 key to save the changes and exit.
Now, you can restart your computer and see if Lexar 64GB USB 3.0 not working error is solved.
Solution 5. Format Lexar USB with a Supported File System
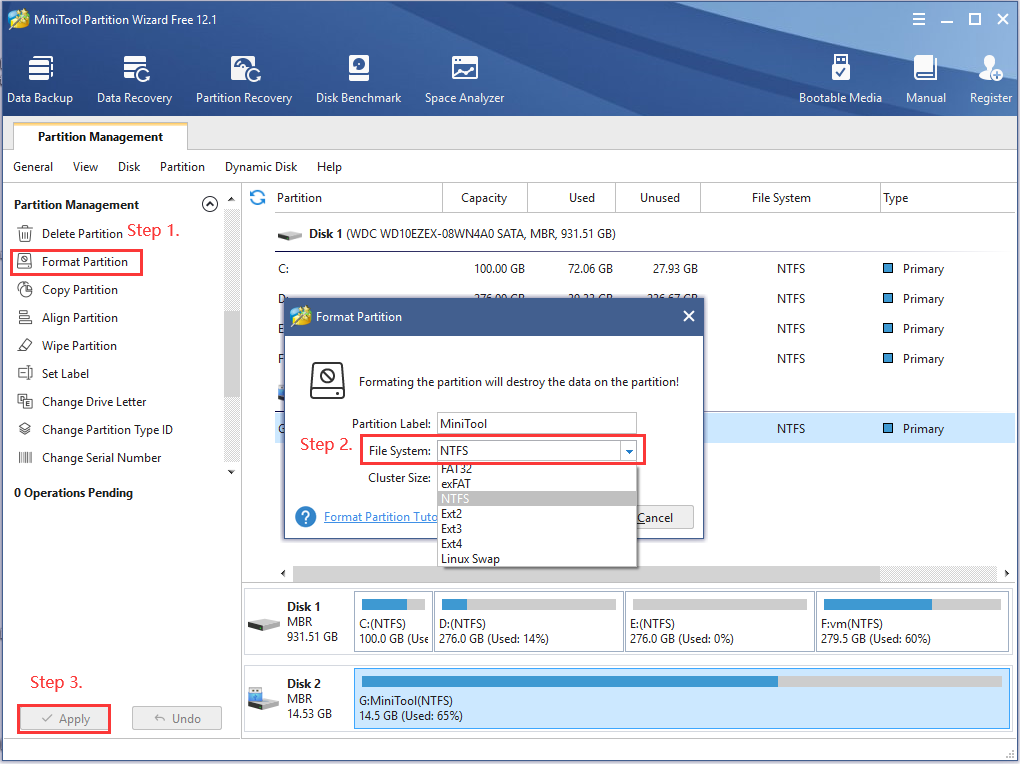
If all the above methods fail to work, then the Lexar flash drive not working issue can be caused by an incorrect file system or unsupported RAM file system. To fix the issue, you need to reformat the Lexar USB drive to NTFS/FAT32/exFAT file system that’s supported by Windows.
It’s highly recommended that you use a free USB formatting utility – MiniTool Partition Wizard. It is a trusted multifunctional partition manager that focuses on data recovery, hard drive optimization, file system conversions, etc. After you format the USB to the right file system, you still can utilize this software to recover lost data.
MiniTool Partition Wizard FreeClick to Download100%Clean & Safe
User Comments :