Mac hard drives usually use APFS (Apple File System) or the HFS+ (Hierarchical File System Plus), while Windows drives utilize NTFS, FAT32, and exFAT. Except for exFAT, the file systems of Mac hard drives are not compatible with that of Windows.
New Apple devices are formatted with APFS, while old Mac hard drives use the HFS file system. By default, Windows can’t read these file systems.
Therefore, Mac most time can’t read Windows drives and vice versa. If you want to read a Mac drive on Windows PC, you need to convert a Mac-formatted drive to a Windows drive or use a piece of third-party software. However, it is not recommended to access a hard drive via a third-party program in the long term.
Given that fact, you’d better convert a Mac hard drive to a Windows drive. To do that, you need to reformat the Mac hard drive. As you might know, formatting a hard drive will remove data from it. So, you should back up the data before you format the drive to avoid data loss.
The process to convert Mac hard drive for Windows is divided into 3 parts. Go through the process by following these parts one by one.
Part 1: Back up the Data on the Mac Hard Drive
If you have a Mac nearby, simply plug the hard drive into the device and back up the data. On the contrary, if you only have Windows-based computers, copy files from the hard drive onto your Windows system drive or other drives on the computer by using HFSExplorer.
HFSExplorer requires you to install Java to use it. You can install Java and then uninstall it after you make the backup.
Alternatively, you can use a backup utility on macOS to perform the backup operation. Disk Drill is such a utility that comes with macOS computers. What you should note is that you need to plug in another storage media if you don’t want to use the OS drive as the backup destination.
Then connect the Mac-formatted hard drive to your computer. Download, install, and run Disk Drill, and then follow the on-screen instructions to finish the backup process.
Part 2: Delete All Partitions on the Mac-Formatted Drive
After you back up the data on the Mac hard drive, you should delete all partitions to wipe the drive. There are two simple and efficient methods to do that. You can select one based on your situation.
Method 1: Use Diskpart
Diskpart is a command-line disk partitioning utility, which enables you to perform operations by running some commands. To wipe the Mac partitions via Diskpart, follow these steps.
Step 1: Connect the Mac-formatted hard drive to your Windows computer.
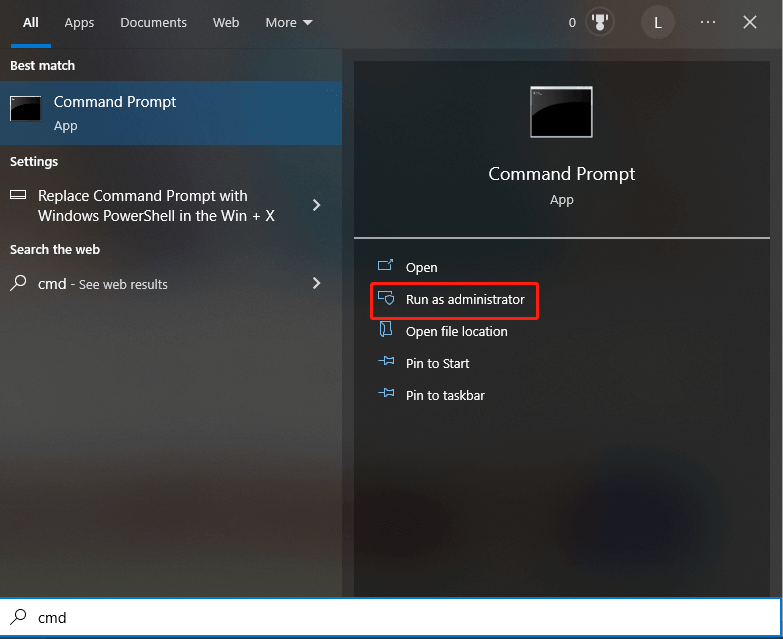
Step 2: Type cmd in the search box, and then click the Run as administrator option in the right panel of the window. Alternatively, right-click Command Prompt under Best match and click Run as administrator after you type cmd.
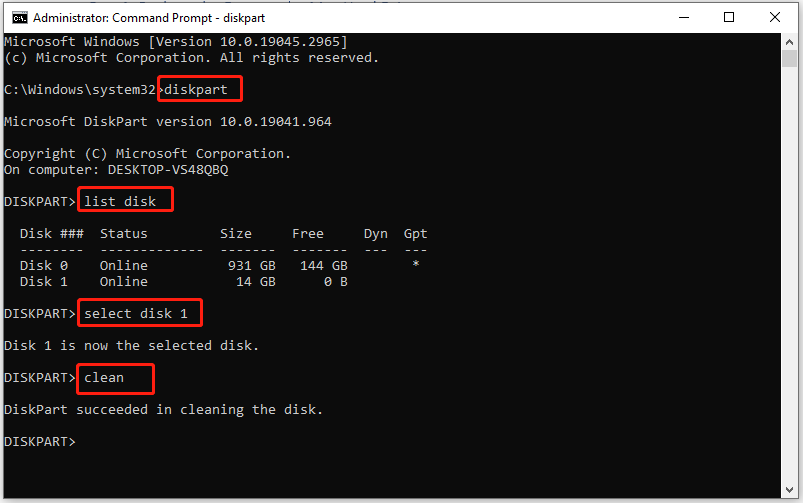
Step 3: In the pop-up Command Prompt window, type the following commands and hit Enter after each. After the process ends, you will see a message stating that Diskpart succeeded in cleaning the disk.
- diskpart
- list disk
- select disk 1 (you can replace 1 with the actual number that represents your Mac-formatted hard drive.)
- clean
Also read: Diskpart Clean vs Clean All: Choose a Way to Wipe Disks
However, you sometimes will encounter issues like Diskpart clean not working, Diskpart has encountered an error, Diskpart there are no fixed disks to show, and other problems while using this utility. If so, you can try another method to delete all partitions on the hard drive.
Keep the Mac hard drive connected to your PC.
Method 2: Use MiniTool Partition Wizard
MiniTool Partition Wizard is a comprehensive Windows partition manager, allowing you to perform various operations related to hard drives and partitions. For instance, you can wipe disks, copy disks, check disk space usage, convert partition tables between MBR and GPT, migrate OS to SSD/HDD, convert file systems between FAT32 and NTFS, create/format/extend/move/shrink/copy/merge/split/delete/copy partitions, etc.
Storage devices such as SSD, HDD, dynamic disk, SSHD, external hard drive, USB flash drive, SD card, and hardware RAID are supported by MiniTool Partition Wizard. It means that you are able to carry out the operations above on these devices. The tutorial below shows you how to remove all partitions on the Mac hard drive via this free partition software.
Step 1: Download and install MiniTool Partition Wizard by clicking the button below and running the setup file.
MiniTool Partition Wizard FreeClick to Download100%Clean & Safe
Step 2: Launch the software to access its main interface.
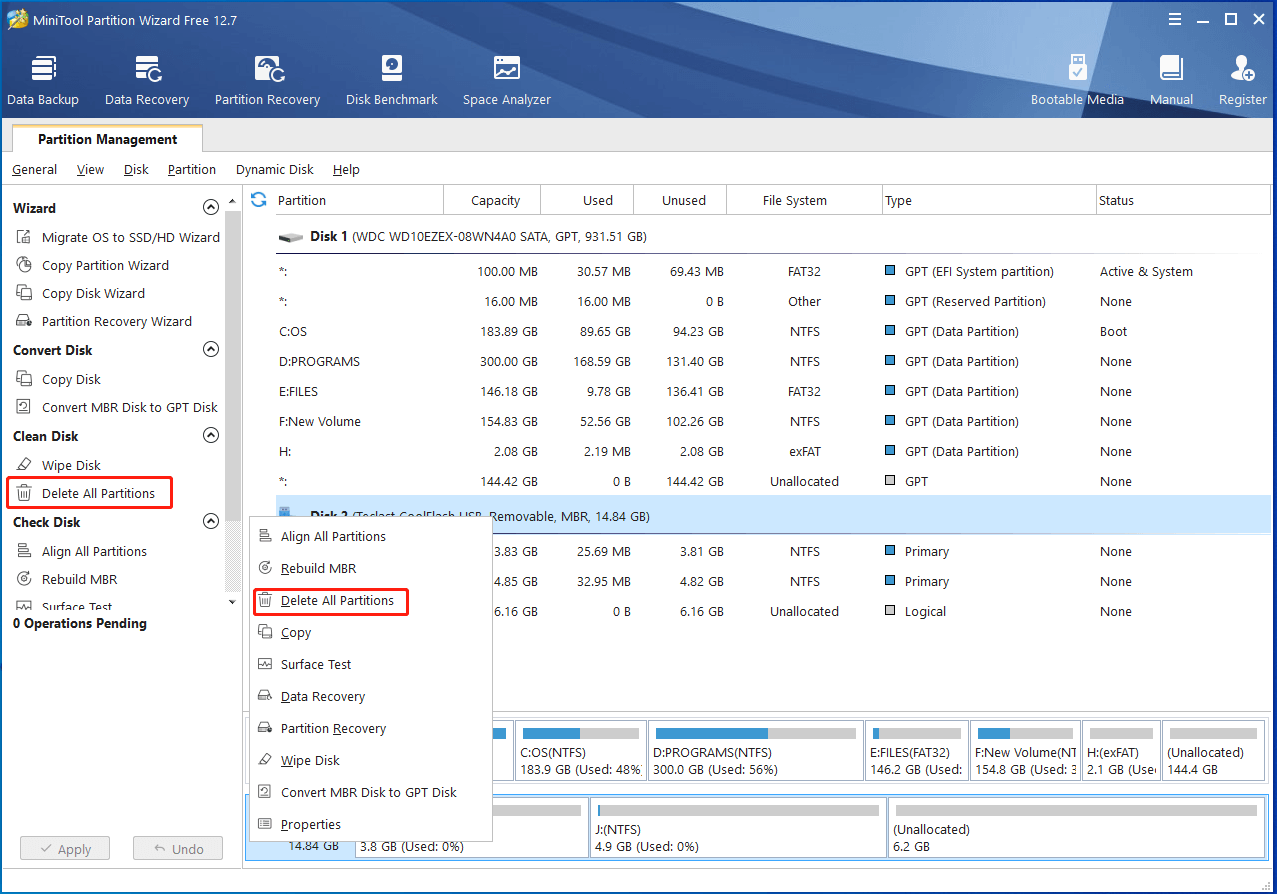
Step 3: Right-click on the connected Mac-formatted hard drive and tap Delete All Partitions in the context menu. Alternatively, highlight the hard drive and click Delete All Partitions in the left panel.
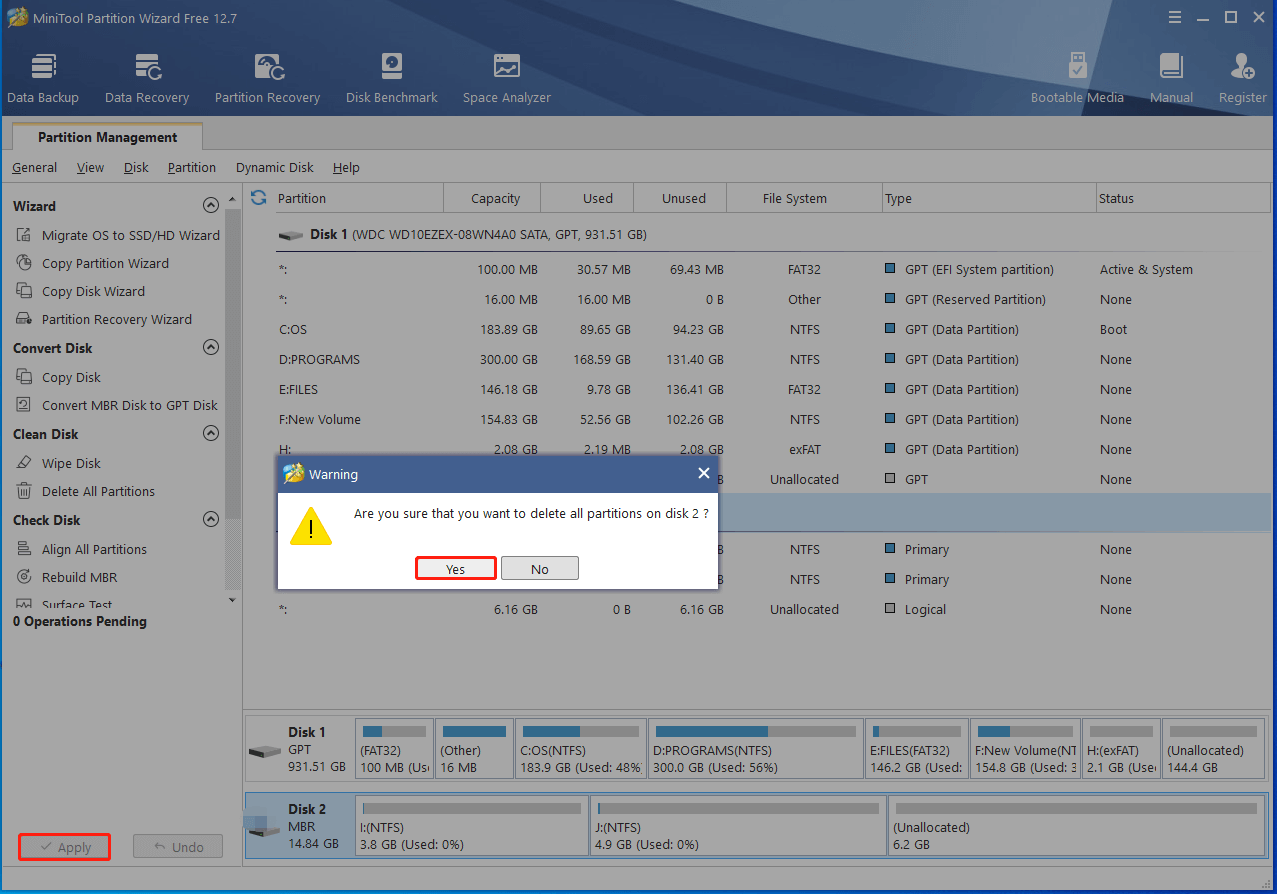
Step 4: In the prompted warning window, click Yes to confirm the operation.
Step 5: Tap Apply to execute the pending operation.
Part 3: Format the Drive to Windows-Supported File System
The hard drive will become unallocated after you delete all partitions on it. Then you need to partition the hard drive, or you can’t make use of it. After that, format the hard drive to file systems that Windows supports. Here comes the need for a partition managing tool.
In this section, we show you how to format Mac hard drive for Windows via a third-party partition manager and the Windows native disk managing utility. Pick a desired program and follow the corresponding steps to complete the operation.
Way 1: Partition and Format Mac Hard Drive for Windows via Third-Party Software
As professional partition software, MiniTool Partition Wizard helps you partition hard drives within a few clicks. You can format the drive during the partition creation process.
Does partitioning a drive erase data? This post reveals the answer and offers you the solution.
Step 1: After running into the main interface of MiniTool Partition Wizard, click on the unallocated space of the Mac hard drive and click Create Partition in the left action panel.
MiniTool Partition Wizard FreeClick to Download100%Clean & Safe
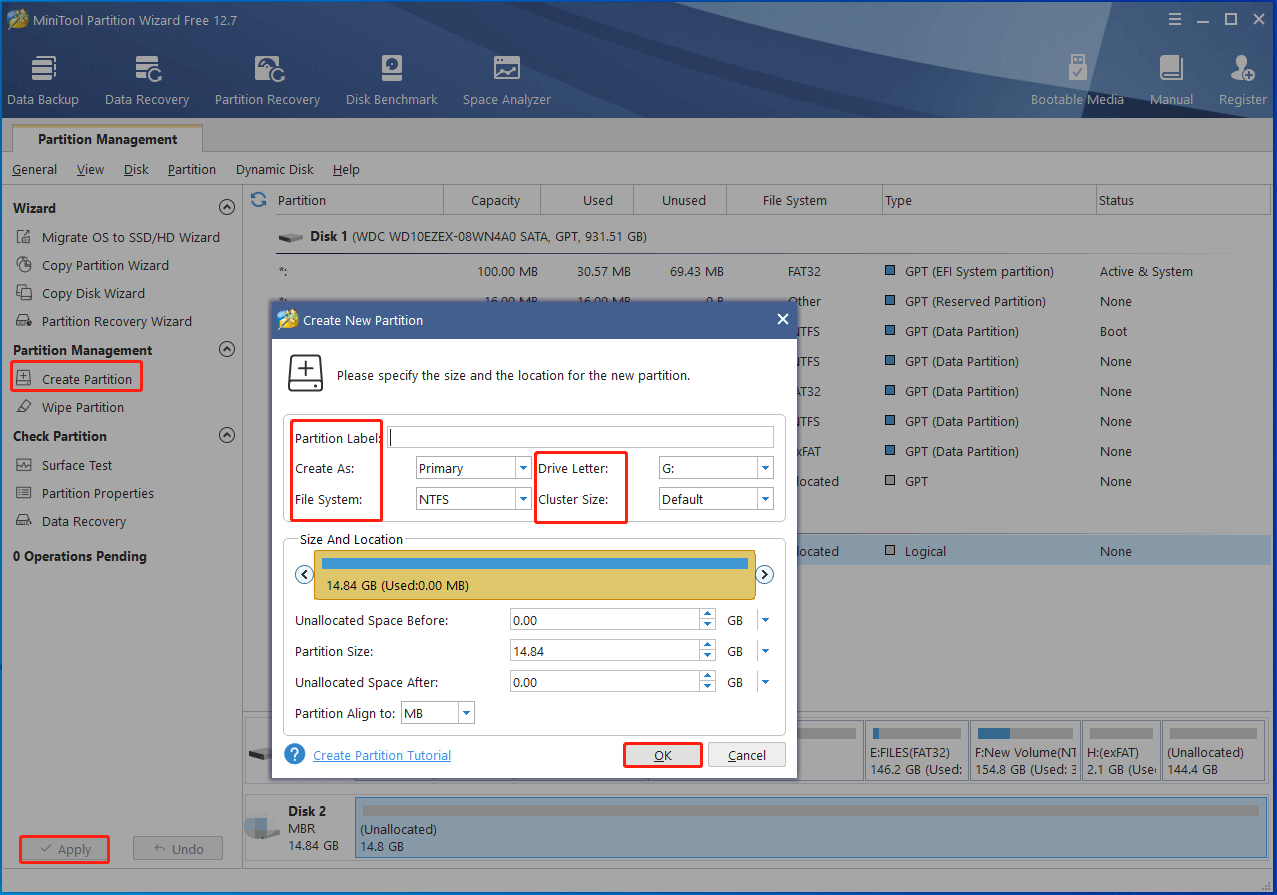
Step 2: In the pop-up window, configure partition parameters based on your needs and click OK to save the changes you’ve made.
- Partition Label: According to the purpose of the partition, add a label for the partition. For instance, if the partition is sued to store files/folders, label the partition as “document”. To know more, please refer to this guide: Should You Always Label Your Removable Media? Check Answers
- Create As: You can decide whether the partition type is Primary or Logical.
- File System: Select a file system from the drop-down menu.
- Drive Letter: Assign a drive letter for the partition. Without a drive letter, the partition won’t appear in File Explorer.
- Cluster Size: Based on your preference, choose a cluster size.
- Partition Size and Location: You can decide that by moving the partition block or typing the exact number in the partition size field.
Step 3: Click Apply to execute the operation.
![Format Floppy Disks: Why and How to Do That [Full Guide]](https://images.minitool.com/partitionwizard.com/images/uploads/2023/05/format-floppy-disk-thumbnail.jpg)
Way 2: Partition and Format Mac Hard Drive for Windows via Disk Management
Disk Management is an embedded disk manager on Windows computers. You don’t have to download and install it. Instead, you just need to open it from the Run window or Start menu. Here are the detailed steps to convert a Mac-formatted drive to a Windows drive through Disk Management.
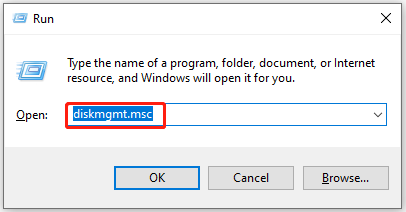
Step 1: Open the Run window by pressing Windows and R keys. Then type diskmgmt.msc and click OK to open Disk Management. You can also right-click on the Windows icon and click Disk Management to open it.
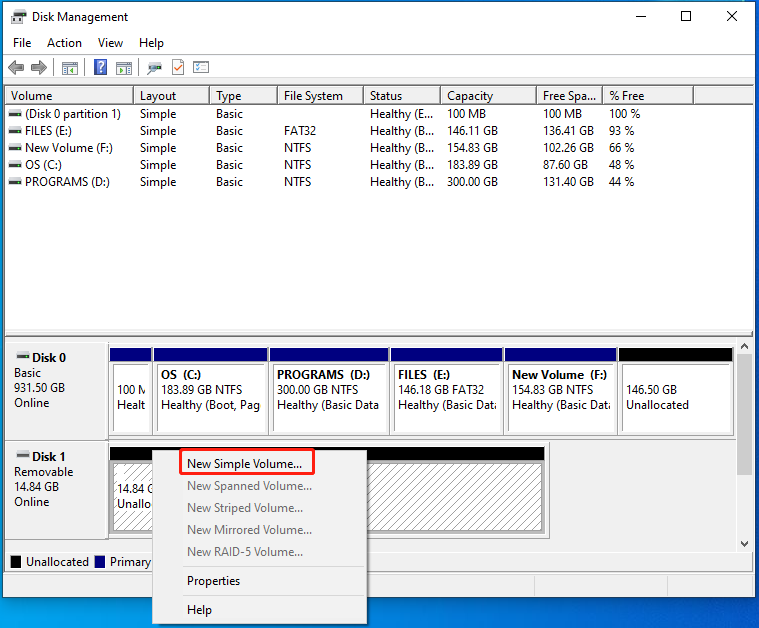
Step 2: Right-click on the unallocated space of your Mac hard drive and click the New Simple Volume option.
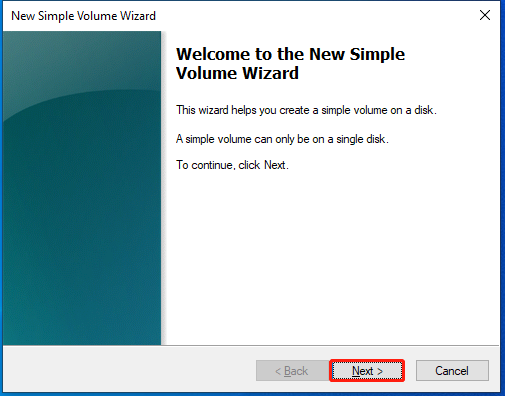
Step 3: In the New Simple Volume Wizard window, click Next to continue.
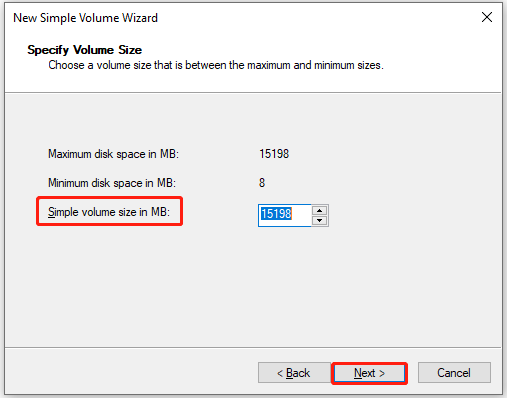
Step 4: Specify volume size in the next window. Then click Next.
The volume size is counted in MB, so you need to calculate manually.
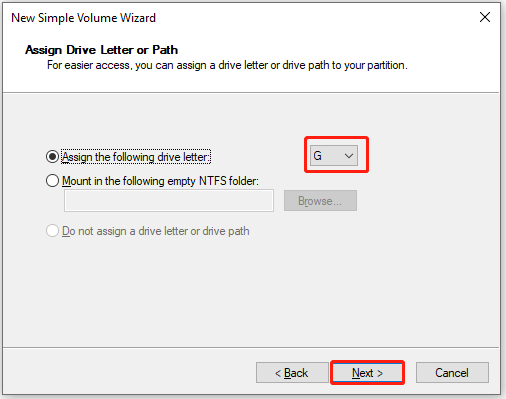
Step 5: Assign a drive letter for the partition and then click Next.
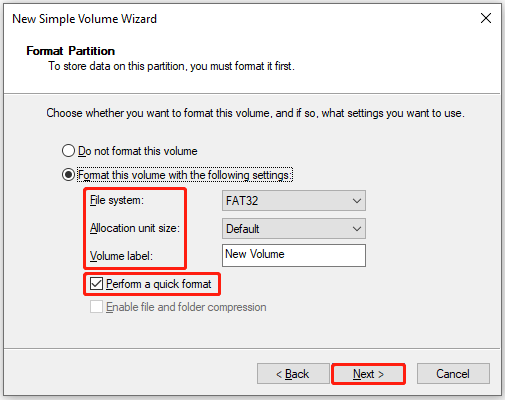
Step 6: After checking the Format this volume with the following settings checkbox, configure format settings like file system, allocation unit size, and volume label based on your situation. Then click Next to move on.
Ensure that the Perform a quick format option is checked, or you will perform a full format. A full format will erase data, making them unrecoverable. This post illustrates the difference between quick format and full format.
Step 7: Click Finish to confirm and execute the operation.
Now, all the steps to convert a Mac hard drive to a Windows drive have been shown to you. If you need to do that, simply follow the given steps in this post to complete the operation.
Also read: Convert USB Flash Drive to Local Disk [Step-by-Step Guide]
Bottom Line
You can’t access hard drives with HFS+ or APFS file systems on Windows computers without third-party software. To access a Mac drive without extra software, you need to convert a Mac hard drive to a Windows drive manually. This post provides you with all details.
If you have any thoughts about this operation, write them down in the following comment area. For any questions related to MiniTool Partition Wizard, contact us by sending an email to [email protected]. We will help you solve them as soon as possible.
User Comments :