Don’t worry when you get stuck in the PS4 error code CE-37857-0. Here, this post from MiniTool Partition Wizard explores what causes the annoying error and how to solve it in detail. Simply refer to the following content to solve the error.
About the PS4 Error Code CE-37857-0
PlayStation 4 (PS4) is a popular home video game console that was developed and announced by Sony Interactive Entertainment on November 29, 2013. This console allows you to access your games and keep desired data (like installed apps, games, screenshots, etc.) with internal and external storage.
However, sometimes when you connect a USB drive for uploading or copying certain game data on your PS4, you may fail with an error code called CE-37857-0. Usually, this error code will come along with a message saying the USB storage device is not connected.
The USB storage device is not connected CE-37857-0 error is a common PS4 error and can occur due to various reasons. Below, we summarize the main causes for you.
- There are temporary glitches or bugs existing in the PS4 system.
- The connection between the USB device and your PS4 is loose or faulty.
- The currently used USB port is damaged.
- The file system of the USB device is incompatible with PS4.
- The PS4 database gets corrupted.
- The PS4 system software is out of date.
- Unexpected issues happen during the installation of PS4 system software updates.
- The USB device is physically damaged.
- …
After finding out the possible reasons for the PS4 CE-37857-0 error, let’s get down to the feasible ways to fix it.
Way 1: Check the USB Connection
After the “PS4 USB storage device not connected” issue happens, you should check the USB connection first. You need to verify if you connect the USB device to your PS4 tightly and properly.
Besides, you can try removing and then reconnecting the USB device for a further check. In case the current USB port stops working normally, you’d better use a different one to connect the USB device. The following steps are about the safe removal and reconnection of the USB device.
Step 1: Press and hold the PS button to open the Quick Menu.
Step 2: Navigate to Sound/Devices > Stop Using Extended Storage.

Step 3: After that, remove the USB device from your PS4. Then go to Power > Turn Off PS4 in the Quick Menu to power off the console.
Step 4: Wait a few minutes. Then turn on your PS4 and re-plug the USB device using a good USB port.
In addition, you can connect the USB device to a computer to see if it works. If not, it may indicate the device is damaged and you should replace it with a good one. If it does, then you need to try other troubleshooting fixes for the PS4 error CE-37857-0.
Way 2: Correct the USB Drive’s File System
An incompatible file system may also result in the “the USB storage device is not connected CE-37857-0” issue. To fix it, you need to reformat the USB device to FAT32 or exFAT. Only the two file systems can be recognized by PS4.
You can easily format the USB drive with the Windows built-in utilities – Disk Management, Diskpart, and File Explorer. However, such formatting will reveal certain problems, like data loss, the 32GB limit on FAT32, etc. To overcome them, we’d like to recommend you make use of MiniTool Partition Wizard.
It’s a comprehensive partition manager that enables you to convert NTFS to FAT and vice versa without data loss and format USB to FAT32 even though it’s larger than 32GB. Moreover, it also allows you to partition/resize/clone hard drive, convert MBR to GPT, recover data from hard drive, and more.
To change the USB drive’s file system with MiniTool Partition Wizard, choose either of the following ways according to your needs.
#1. Convert NTFS to FAT Without Data Loss
This way is applicable when you suffer from the CE-37857-0 PS4 error with an NTFS USB drive containing important data. To perform the NTFS to FAT conversion, follow the steps below.
Step 1: Download and install MiniTool Partition Wizard on your PC.
MiniTool Partition Wizard DemoClick to Download100%Clean & Safe
Step 2: Connect the problematic USB drive to your computer and then launch the USB formatter to enter its main interface.
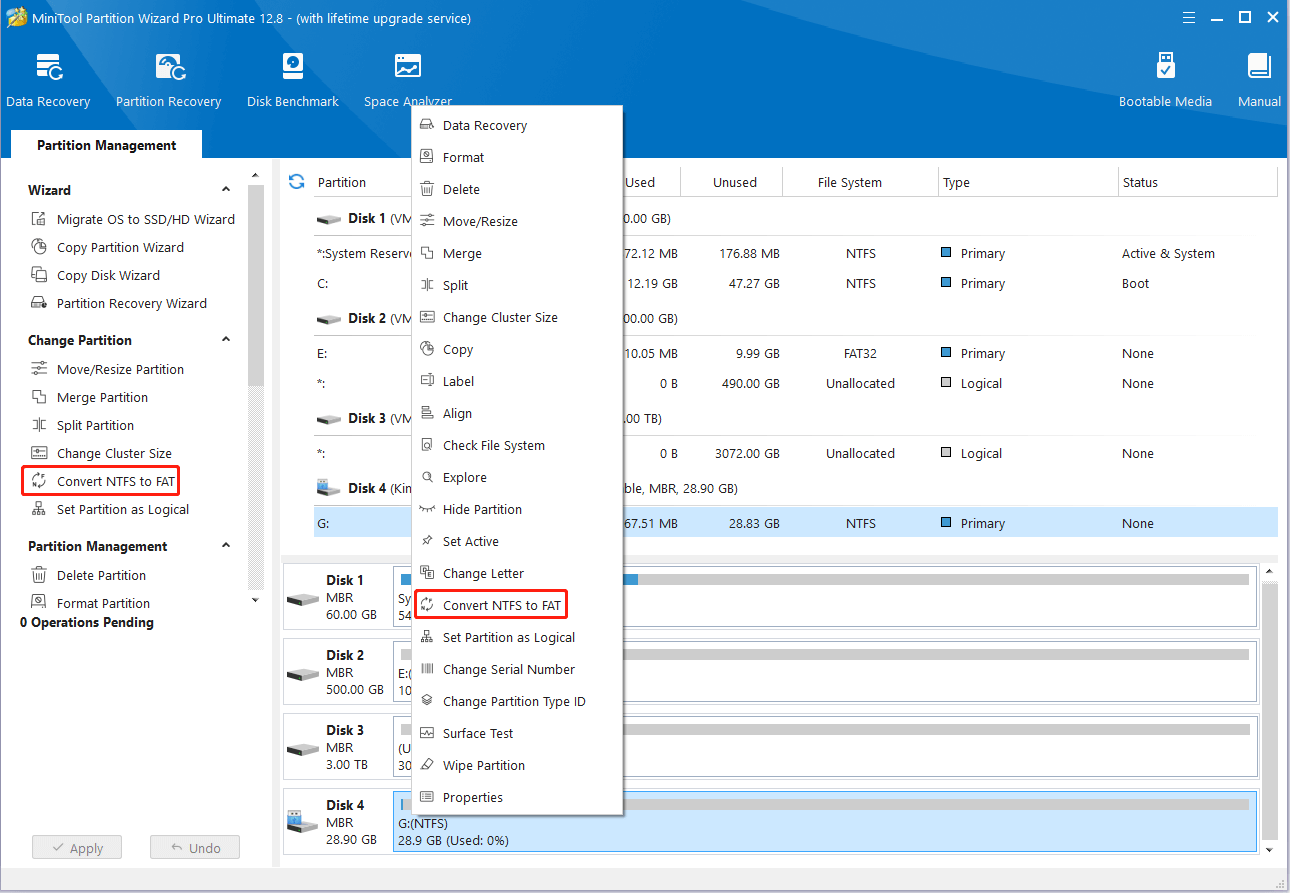
Step 3: Right-click the partition on the target USB device and then select Convert NTFS to FAT to continue. Alternatively, you can highlight the target partition and select Convert NTFS to FAT in the left action panel.
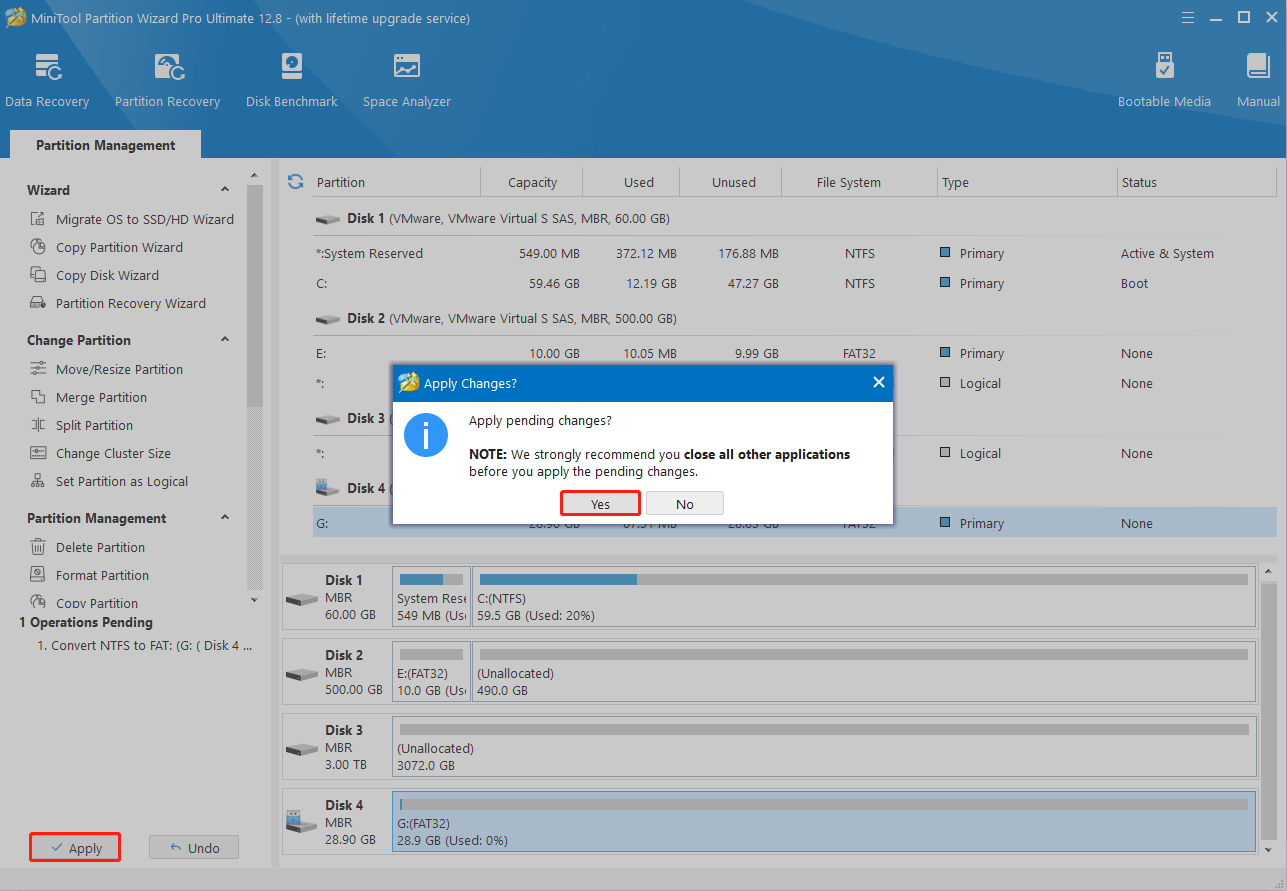
Step 4: Finally, click Apply > Yes to save the pending operation.
#2. Format the USB Drive
MiniTool Partition Wizard can also help format the USB drive for free with a few clicks. If you plan to convert the USB drive from other file systems to FAT32 or exFAT by formatting, you can follow the given steps.
Step 1: Connect the USB drive to your computer. Then download, install, and launch MiniTool Partition Wizard.
MiniTool Partition Wizard FreeClick to Download100%Clean & Safe
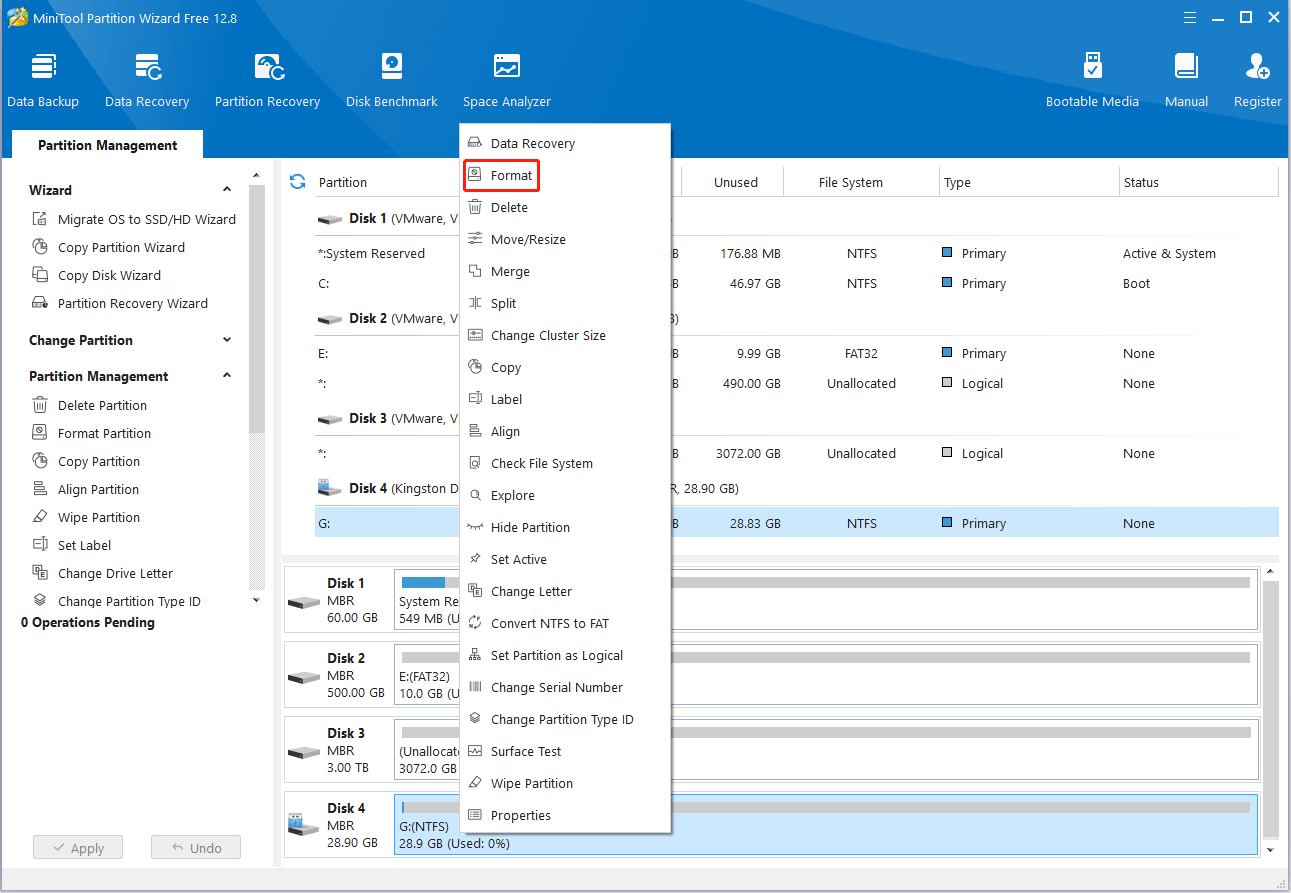
Step 2: Right-click the partition to format and then select Format from the context menu. Also, you can select Format Partition from the left side after highlighting the target partition.
Step 3: Choose FAT32 or exFAT from the File System drop-down menu and then click OK.

Step 4: After that, don’t forget to click Apply to execute the process. When prompted, click Yes for confirmation.
Way 3: Replace CMOS Battery
CMOS (Complementary Metal-oxide Semiconductor) is a small amount of memory that stores the BIOS settings. With CMOS, your PS4 can maintain the correct settings every time it powers up, shortening the time to boot up. If the PS4 CMOS battery fails to work as normal, you may get various errors including CE-37857-0.
How to fix CE 37857 0 in this case? Well, it’s recommended that you replace the PS4 CMOS battery for a try. To execute the operation, it’s better to ask experts for help. If you have enough knowledge about CMOS battery replacement, you can do it by yourself as well.
Way 4: Update the System Software
In some cases, the outdated system software may lead to PS4 error CE-37857-0. If it’s the culprit, you can try updating your PS4 console to the latest version to see if the error can disappear. You can learn how to do this from the simple guide below.
Step 1: Tap the Settings icon from the home screen of your PS4.
Step 2: Scroll down to find and select System Software Update to continue.
Step 3: If there is an update for the latest version of the system software, your system will automatically download it.
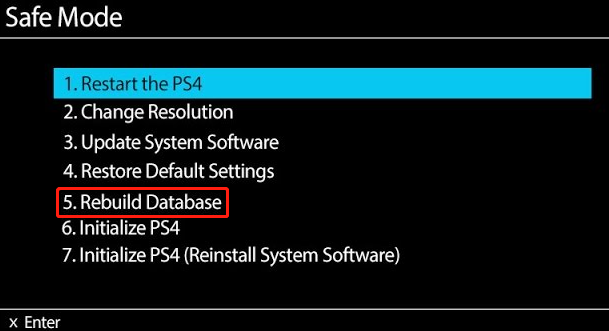
Way 5: Rebuild PS4 Database
It’s also possible for you to solve the “PS4 USB storage device not connected” issue by rebuilding the database. Here’s a step-by-step guide on how to do this.
Step 1: Turn off your PS4 console by holding the Power button for 3 seconds.
Step 2: Once the console is off, press and hold the Power button again. Don’t release it until you hear the second beep.
Step 3: Connect your controller with a USB cable. Then press the PS button on the controller to boot the console into Safe Mode.
Step 4: After that, select the Rebuild Database option. It will take a long time to complete the process. Just wait patiently.
Way 6: Initialize Your PS4
Another way you can try to get rid of the PS4 CE-37857-0 error is to perform an initialization. To do this, you just need to go to Settings > Initialization > Initialize PS4 and then follow the on-screen instructions.
Keep in mind that initializing PS4 will wipe out all the data saved on system storage and restore your system settings to default values. Therefore, to protect your data from missing, you may need to create a PS4 backup in advance. Additionally, don’t turn off your PS4 during the system initialization. Otherwise, this will damage your system.
Way 7: Contact PlayStation Support
If the CE-37857-0 PS4 error persists after you apply the above methods, we highly recommend you reach out to PlayStation Support. In general, you can obtain technological assistance by doing so. The team will provide you with a couple of professional suggestions to troubleshoot the PS4 error.
Bottom Line
Are you bothered by the PS4 CE-37857-0 error? Hope you can effectively fix the frustrating error with the above methods. If you have any problems with the “PS4 USB storage device not connected” issue, leave them in our comment part below.
If you run into any issues while using MiniTool Partition Wizard, please contact us via [email protected]. We’ll make a reply to help you as soon as possible.
User Comments :